Showing posts with label games plus. Show all posts

Friday, June 20, 2014

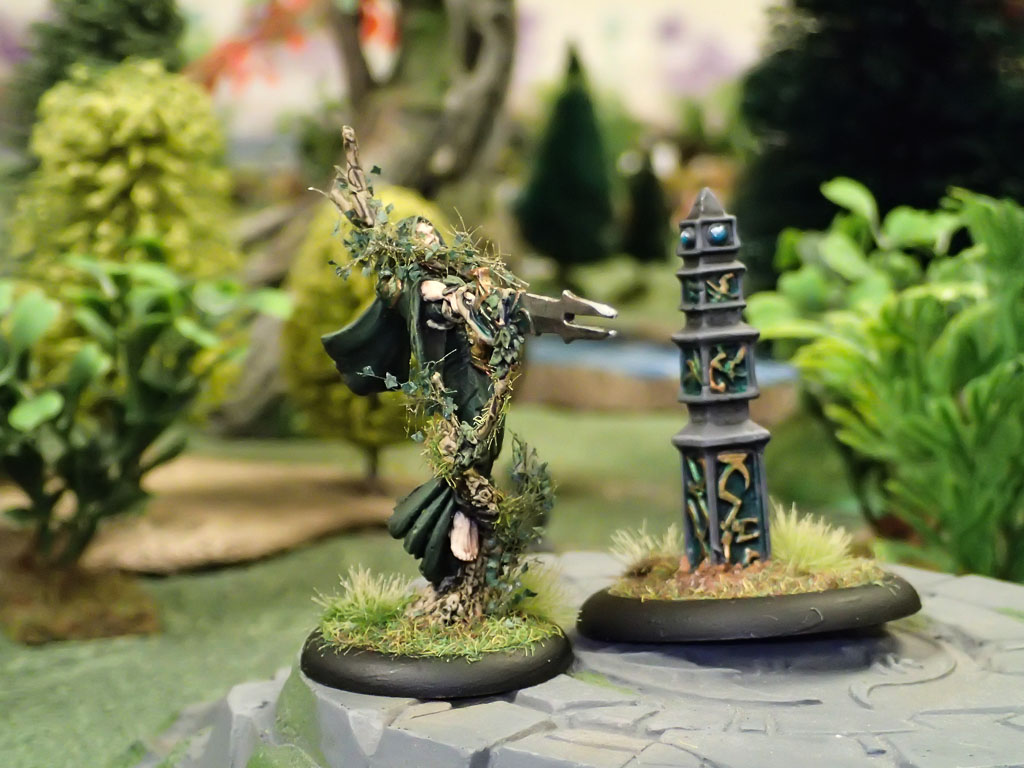
Quake and Mourn Campaign: Raid on the Arboria of Vitu Daru


(Editor's note: We played the first session of our new fantasy campaign this week, with 7 players in attendance at Games Plus. We played at least 8 individual games and will try to produce battle reports on most of them.)

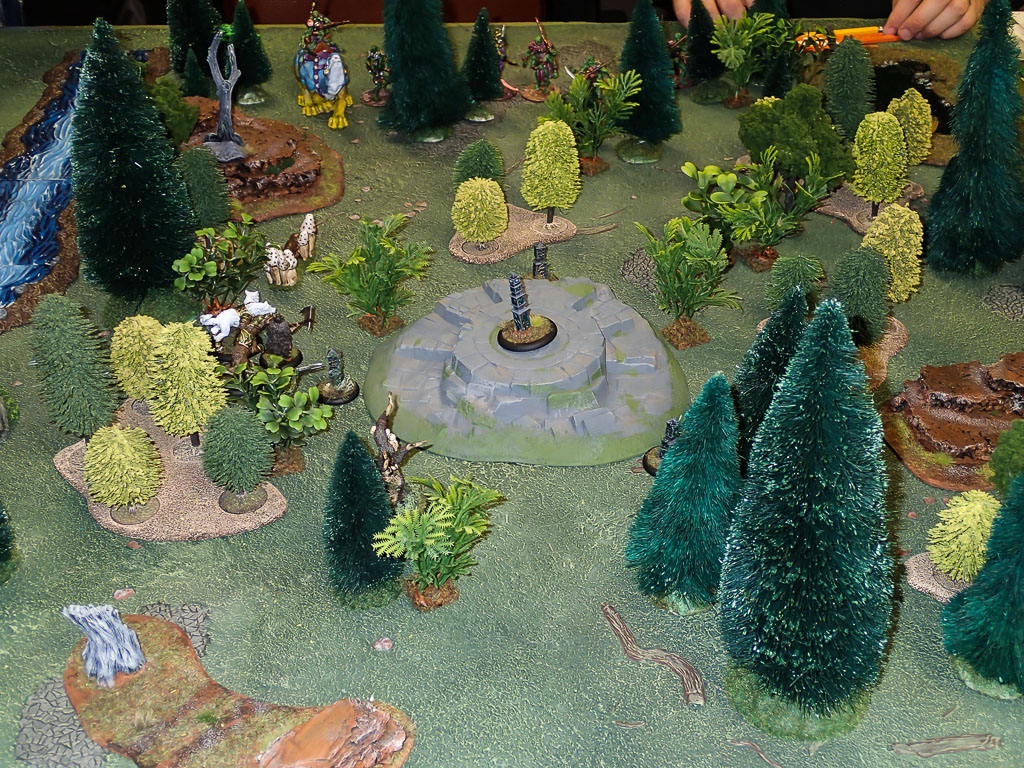
In the first game, my Wild Druids of Vitu Daru were performing a ritual using the Scrying Stones to try and pinpoint the source of the land's blight. The Tharks of the Wyl'st Horde (Tim's warband) mustered to raid the forest and stop the druidic ritual!


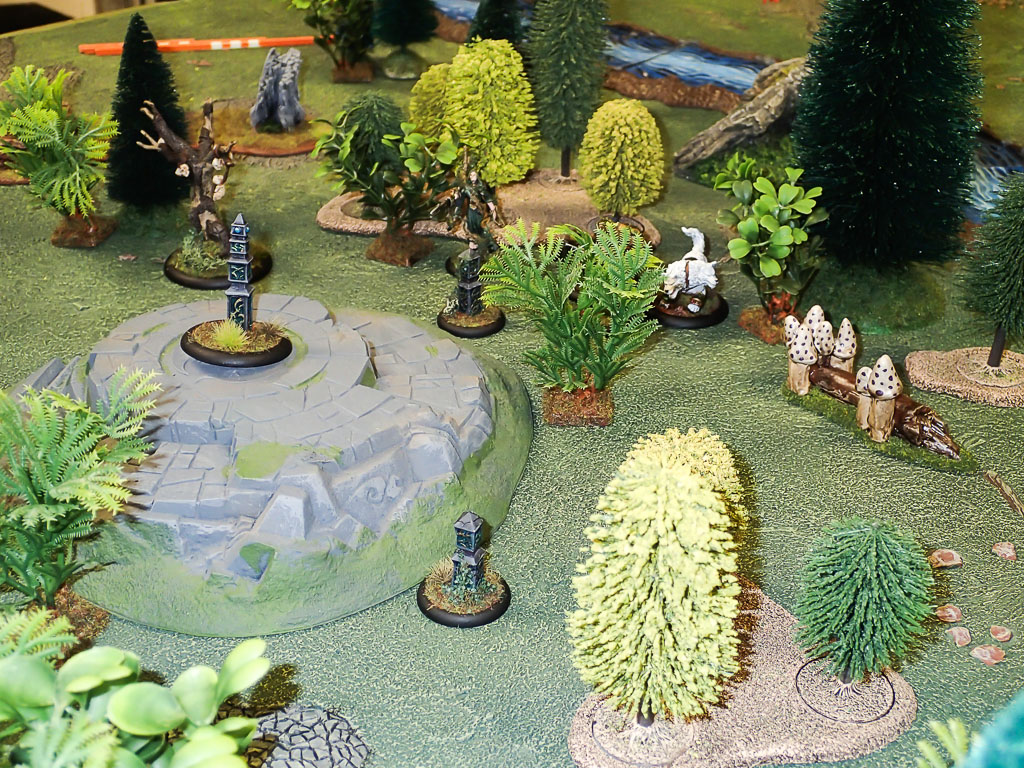
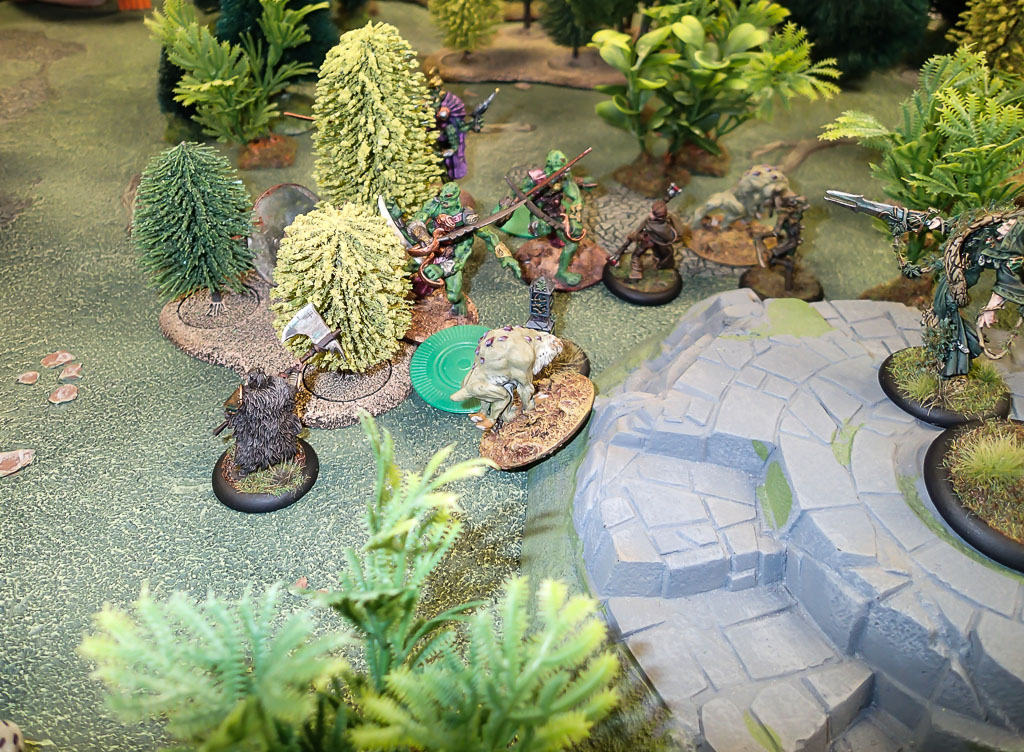
This scenario had a six-turn limit. The druids had to protect the Scrying Stones! At least one of the three human druids on the battlefield had to stay within medium range of the Scrying Stones for the duration of the game in order to complete the ritual.

Due to the effects of the ritual, druid warband members within long range of the Scrying Stones get +1 to their Combat rolls. The druids started in a circle one near the dais in the center of the forest.


Tim's attackers had to kill the heathens or force them far enough back from the scrying stone so that the ritual was interrupted. The Tharks started within long range of any board edge.


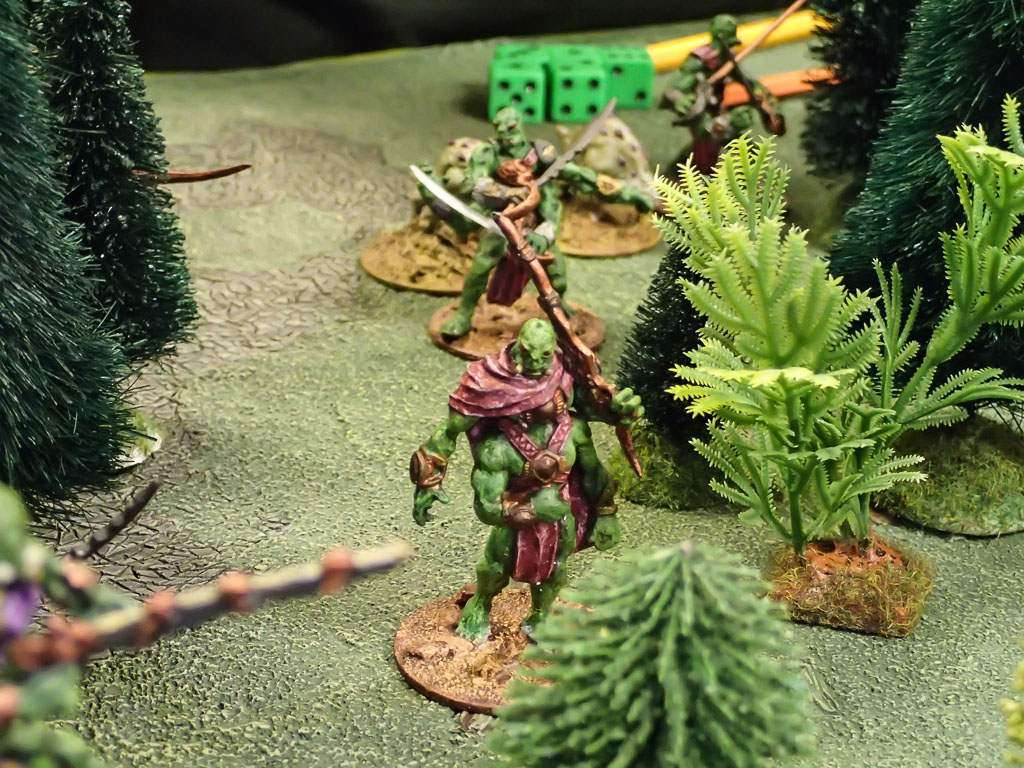
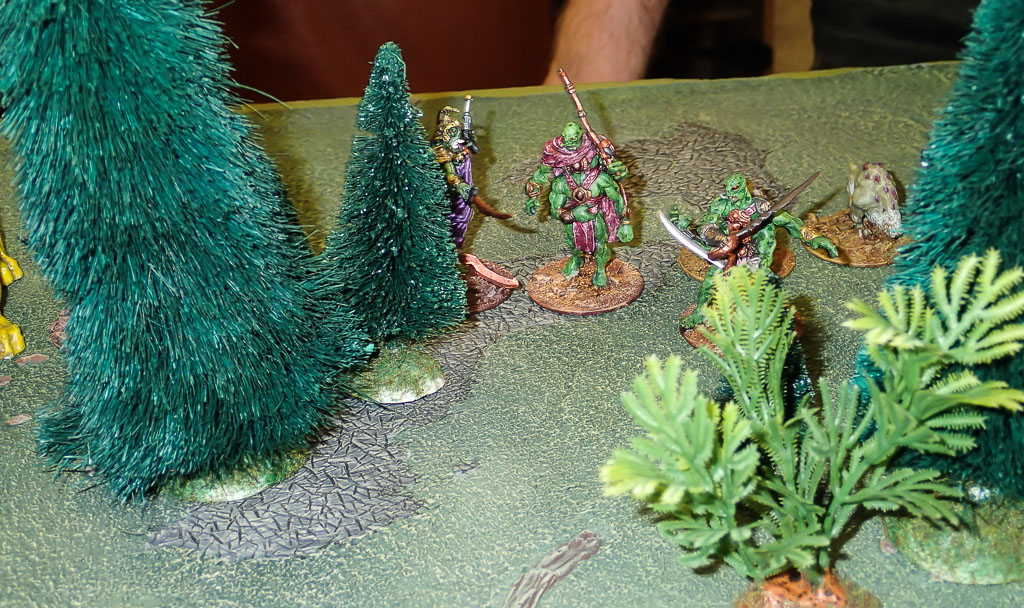
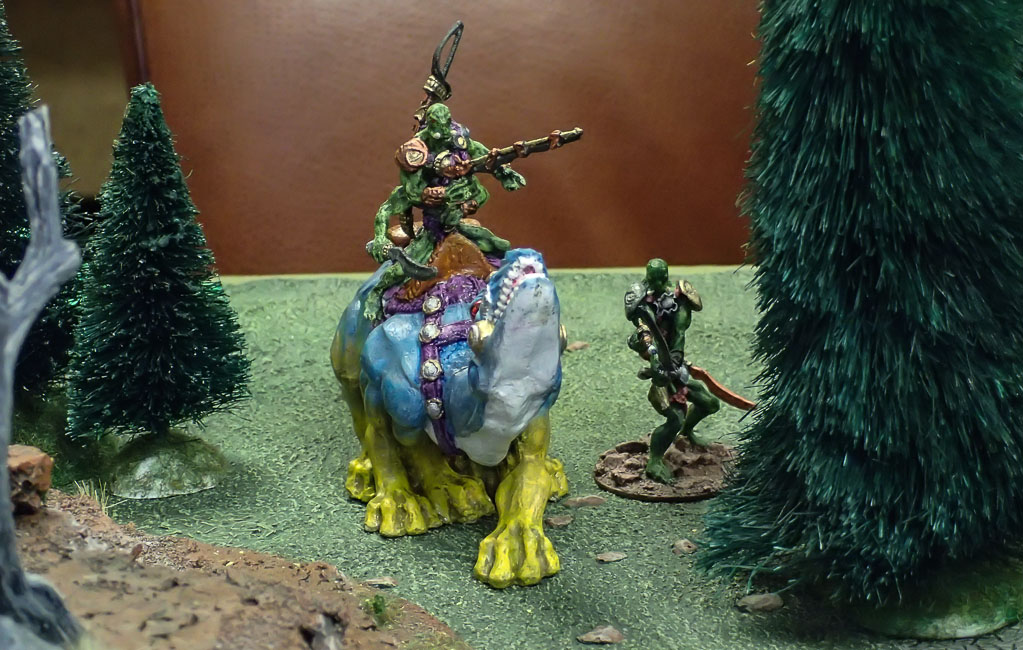
Wes Wyl, one of Tim's more fearsome creations, led the charge astride a HUGE Thoat mount. The rest of the Tharks, lead by J'en Jexxs the Mighty, were not far behind.


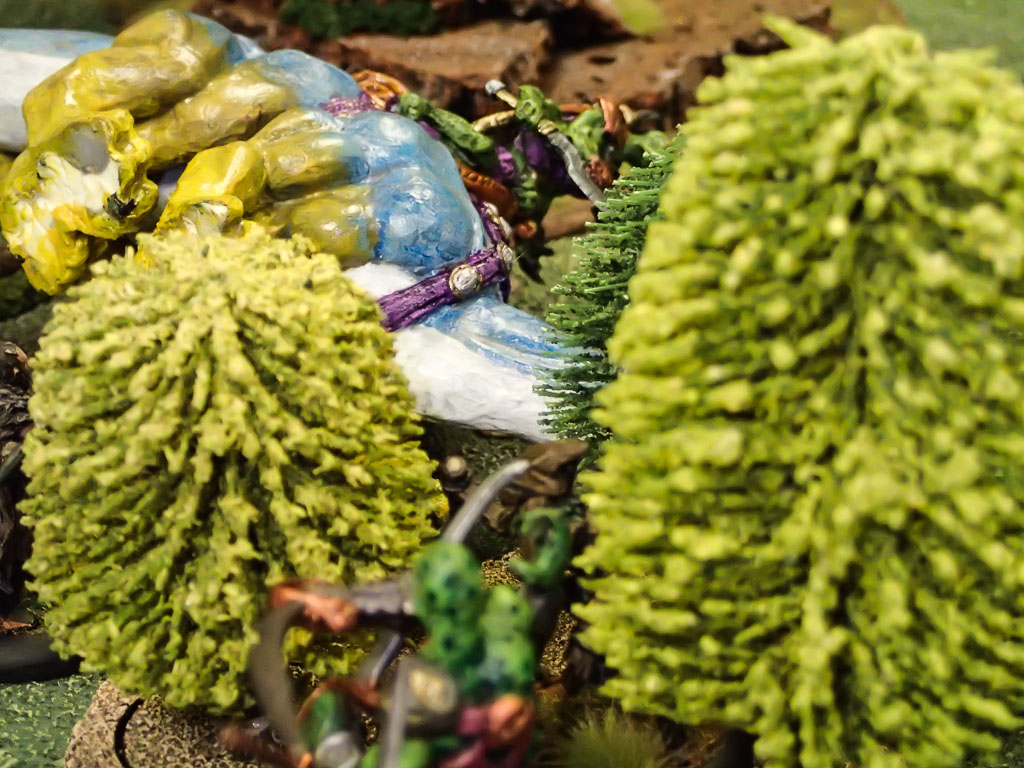
Summer and Winter, the brave two-headed wolves, met the huge beast in combat, but were destroyed.


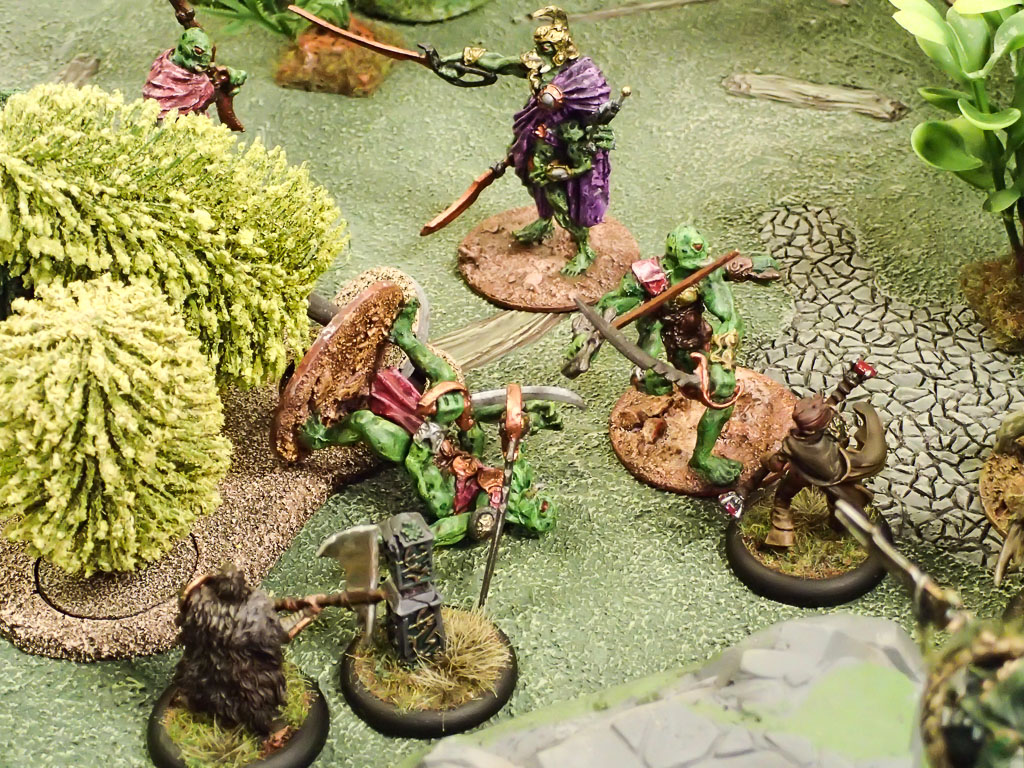
Using their natural powers, the treekin sent their roots burrowing up through the ground to entangle their enemies, while the druids tried to land killing blows.


Finally, summoning a rage from deep within himself, Ursun Fur-Walker felled the great beast.


The battle was furious and chaotic. The Tharks of the Wyl'st almost managed to overrun the Druid's defenses, but even as Tharks and druids slaughtered each other in the forest, Arborius the druid managed to complete the ritual.


A sense of newfound purpose filled the druid's soul. The warband now has a sense of direction. After dispatching the Tharks, they set off on a quest across Qaarra to repair the blight and return natural order to the chaotic lands.

This was a fun scenario, and it provided a great narrative jumping-off point for my  but I think it still needs some tweaking. The +1 to combat should be limited to just the area inside the circle. I also think the attackers should start a little farther away from the dais in the center to give the defenders a little more time to set up a defensive plan.

Stay tuned for more battle reports from our first campaign session!

-- Josh, Chicago Skirmish Wargames club member

Tuesday, October 1, 2013

Games Plus Miniatures Auction Coming Up Oct. 6


This weekend many of us here in Chicago will be making the pilgrimage to Games Plus, an excellent suburban game shop that's hosted many of our game nights. Oct. 6 Is their twice-annual miniatures game auction, and it's a fantastic opportunity to gamers to get their hands on miniatures, terrain, hobby supplies, rulebooks and more for very attractive prices.

I'd hazard a guess that most of the projects and games we've run over the years -- from our Song of Blades & Heroes campaigns to our 28mm Mech Attack convention games -- have been catalyzed by cheap pick-ups from the game auction. It's worth the drive if you're anywhere near northern Illinois on Sunday!

-- Patrick, Chicago Skirmish Wargames club member

Friday, March 15, 2013

Auction Report: We Came, We Saw, We Bid


Last weekend a handful of us ventured out to Games Plus for the twice-yearly games auction. We made a point to attend the miniatures day, when thousands of minis -- boxed and loose, painted and unpainted -- were auctioned off in a marathon bidding session lasting from 10 a.m. to about 8 p.m. These photos are sort of a general look at the chaotic array of loot that was available at the auction.


A little bit of everything, eh?

Here at Chicago Skirmish Wargames, we added a whole bunch of cool new stuff to our coffers. In no particular order, here's what we carried out of the dungeon (er, Games Plus) at the end of the evening:

  • 11-inch vinyl Cthulhu model kit, unassembled
  • Warhammer Storm of Magic templates (extremely cool and useful to represent all manner of tabletop area effects)
  • 2 40k dreadnoughts from the Assault on Black Reach box set -- one of the few ways to get multimelta dread arms!
  • 40k manufactorum terrain kit, new on sprue
  • A batch of 10 desert islands that could be used for Uncharted Seas or naval historical
  • 4x4-foot Zuzzy gaming mat with a desert wasteland texture
  • Undead dracolich and a few smaller undead dragons, poorly painted and ready to be stripped
  • Assorted terrain pieces: jungle trees, seaweed, unpainted Armorcast resin bits, scratchbuilt medieval building, sci-fi bunkers
  • Bunches of old (and new) rulebooks, codexes and army books
  • And countless "grab bags" of random assorted sci-fi and fantasy stuff. Priced at $5 to $10 each, these packs were just so much fun to buy and we ended up handfuls of useful stuff.

Mark your calendars -- the next Games Plus auction will take place in a mere 6 months!

Friday, December 14, 2012

Playtesting "This Is Not A Test"


Last week we had our regular game night at Games Plus, a venerable gaming establishment in suburban Chicago. Tim and I were planning to try out This Is Not A Test, a forthcoming post-apocalyptic ruleset being developed by Joseph McGuire. (Full disclosure: I did a bit of contract editing work for Joey on this product -- mostly grammar and proofreading -- but of course it won't color my impressions one way or another.)

I was somewhat skeptical that This Is Not A Test (hereafter TINAT) would fit with Chicago Skirmish Wargames' club philosophy -- that is, we enjoy fast-play skirmish games that are lite on rules and heavy on imagination. Our TINAT playtest rulebook was a hefty thing, but luckily the core rules are only about 20 pages long and we mastered them after a few turns. The rest of the book is devoted to weapons, armor and equipment, as well as fluff, faction-specific army lists, and a well-developed campaign system.

For the game, Tim and I whipped up two warbands at the game's prescribed point value: 600 points.

Tim fielded his Neo-Soviets using the Peacekeepers' army list (sort of like frontier lawmen, but with K-9 units). Here they are on the edge of our skirmish battlefield.


I fielded my Kolony Ferals using the Tribals army list to reflect their primitive equipment. Here they are, in the ruins opposite Tim's Neo-Soviets.


In the interest of getting down to brass tacks ASAP, we intentionally compressed the battlefield a little bit. The game suggests at 4x6 playing surface (pretty much the standard for most games) but we downsized to a 4x4 table and didn't suffer any ill effects. We both ended up putting about 15 guys on the table for each of our factions.

In TINAT, every figure is an individual -- there are no squads or unit coherency to track. Personally, I like this, as I've always felt squad-based mechanics aren't a good fit for 28mm battlefields. Warbands are composed of models of various power levels, from "green" all the way up to "legendary," though the rulebook notes that it's unusual to see figures from both extremes on the table at the same time.

Each turn, players dice off for activation (TINAT uses d10s) and then take turns trying to activate figures one at a time. If you pass an activation test, that figure gets 2 action points to use immediately, then you continue activating more of your figures. If you fail, you get 1 action point to use, then play passes to your opponent, who then tries to activate some of his guys.


The turn continues like this until everybody's figures have activated. Because activation can pass back and forth several times, it wasn't uncommon for our turns to proceed like this: I activate 3 guys, then Tim activates 5 guys, then I activate 1 guy, then Tim activates 2 guys, then I activate 8 guys, then Tim activates 6 guys. When everyone has been activated, the turn is over and you roll initiative for the next turn.

We sort of seesawed back and forth each turn, activating different groups of figures (or not) which in turn drew our focus to different areas of the battlefield. The fact that I didn't get to activate all of my guys at the same time presented some very nifty tactical situations. Do I press my advantage on the flank where most of Tim's guys have already taken their actions, so they can't hit me back this turn? Or do I try to take the fight to his 'fresh' troopers who haven't yet taken an action, in order to force them to respond quickly to my aggression?


The terrain is all homemade: Tim built the foamcore buildings in the background, a fellow gamer in Kansas built the overgrown ruins, and I did the big ol' pipe sticking out of the ground.

By the middle of the game, we had a good handle on the rules. My tribals were all armed with blunderbusses, which had a range of only 6 inches, so I had to really get in close to do any damage to Tim's Neo-Soviets. His guys had assault rifles, which had range of 24 inches. Luckily I had given the tribals some metal armor, which was a bit heavier than the Neo-Soviets' armor and thus increased their survivability as they crept through the ruins.

The game handles shooting damage by making it mostly simultaneous -- that is, if you hit, you don't roll to wound immediately, but you put a little wound marker next to the victim and continue with your activation. Only when you fail an activation roll (and play passes to your opponent) do you resolve all those outstanding wound tokens. Thus it's possible for a guy to take hits from several enemy figures in a single turn. In our game, Tim shot one of my guys with two assault rifles and a flamethrower, just to be sure. We rolled for damage all at once for all 3 hits -- the guy died for sure. You can't always be certain that a single hit will knock out an enemy, so the game encourages you to really pour the fire onto important targets.

However, there is a downside to the simultaneous damage thing: We found that we needed a variety of colored markers to track the various conditions on the battlefield in a given turn. Check out the in-game photo below. The blue markers indicate a figure that has moved and shot during its activation (this is important because figures that have moved gain a defense bonus). The yellow markers indicate figures that have been hit by a flamethrower, but we haven't yet rolled for damage yet. The green markers note that the figure has made a ranged attack but didn't move. The black marker indicates that the figure has been hit by a blunderbuss but we haven't yet rolled for damage.


Remember, at the end of each turn there is a "cleanup phase" where you can remove all of these tokens. Tim and I didn't have a problem using markers to track these conditions, and they're not expressly mandated in the rules, but not everyone is a fan of lots of little markers on the tabletop.

Melee combat works a little differently because damage is applied immediately (melee being a much more decisive type of combat compared to shooting).

Beyond that, we had a lot of fun with the game. Interesting sidenote: Both Tim and I were accessing the playtest rulebook on electronic devices (him on a Kindle and me on a Samsung Galaxy S3 smart phone) and I've gotta say, this really enhanced our gameplay experience. Just the ability to use the "find term" function on a smartphone or tablet was a godsend and avoided lots of needless rulebook flipping (or finger swiping, since we're using touchscreen devices).

Coupled with the background material, factions and well-developed campaign framework, Tim and I agreed that TINAT seems to be on the right track. It's not a skirmish game, nor is it a combo-rific game like Warmachine, but it's also a tighter, more focused ruleset than something like Necromunda. Check back for more updates as we playtest this game again!

-- Patrick, Chicago Skirmish Wargames club member

Thursday, October 25, 2012

Carnage in New Chicago: Our 2nd Annual Halloween Zombie Game


This week we hosted the second installment in our annual Halloween zombies game. For our initial effort last year, Tim (our zombie gamemaster) set the bar pretty high, with a walk-right-up-and-play urban horror game featuring desperate survivors and mindless zombies. This year, we turned the dial up to 11 with more terrain, more players -- and of course, more zombies. Here's the zombie pool that Tim used to populate our map.


For last year's game, we used All Things Zombie with a few modifications. This year, we used Blasters & Bulkheads, which did an excellent job simulating a small group of heavily armed heroes blasting their way through hordes of walking dead. B&B has a "henchmen" mechanic that was well-suited to running the zombies -- keeping them dangerous in big groups but also giving survivors a chance to escape.

We set up a tabletop with all sorts of urban terrain, including office buildings, abandoned military checkpoints and an industrial area with fences and warehouses. Here are a couple of the little vignettes that helped tell the story of the last days of New Chicago.

What's this? An abandoned medical supply depot? Who knows what's in those barrels...


And over here, it looks like the military fortified this office building against the oncoming horde. But where are they now...?


Prior to the start of the game, each player selected two armed survivor figures from a big pool of maybe 30 figures. Then Tim randomly generated each character's stats. They were assumed to be armed with exactly what the miniature was carrying -- little wonder, then, that the shotgun-wielding figures got selected first!

The players started their figures in a couple different board edges. Here a small group of survivors creeps onto the battlefield. By the end of the game, we had developed a persona for the guy in the tan coat -- his name was Jimmy Jaworsky, a tough-as-nails South Sider wearing a Bears jersey underneath his jacket. Yes, I put on my very best Chicago accent when it was Jimmy's turn to activate.


Across the board, Tom's two survivors found themselves in an abandoned industrial area. A warehouse loomed up ahead, so Tom sent Professor Paulsen -- an aging, tenured scholar from the University of New Chicago who nonetheless knows how to handle a shotgun -- to explore.


Tim came armed with plenty of random charts to aid in our looting efforts. In this case, Professor Paulsen stumbled across a handful of zombies -- and two survivors cowering behind a stack of crates! After Tom's two survivor characters dispatched the zombies, the two newcomers agreed to join the survivors, giving Tom two more figures to control for the remainder of the game.

To the north, a multi-story garage loomed against the darkened skyline. That's where Karl sent his two survivors, who were both clad in bright yellow biohazard suits. Perhaps they were scientists before the outbreak?


Inside the garage was a garbage truck, a formidable mode of transportation with the potential to squish dozens and dozens of zombies -- if only Karl could get the vehicle started! His attempts created a lot of noise, which brought even more moaning, groaning zombies to the scene.

As with last year's scenario, noise played an important role as the game unfolded. Fighting in melee, starting cars, shooting firearms -- all of these things generated noise, which in turn could attract zombies. Sometimes a gunshot or scuffle wouldn't result in any undue attention from the undead, but other times a half dozen zombies might show up, hungering for flesh.


Anyway, back to the game. Across the map, Jimmy Jaworsky was getting himself into a bit of trouble. He spotted a high-end sports car peeking out of a shipping container, and Jimmy decided that this was the ride that was going to get him out of New Chicago once and for all. But as he closed in on the vehicle, two small groups of walking dead stumbled after him...

Meanwhile Mike's two characters -- a grizzled military veteran and a plucky girl sidekick -- commandeered an old pickup truck, got it running, and began zooming across the map, splatting zombies left and right. 


They sideswiped a big mob of zombies that were harassing Jimmy, then skidded around a corner and headed off into the industrial sector to help out Karl's survivors.


And speaking of Karl's survivors -- they finally got the garbage truck up and running, but about a dozen zombies were thronging around the garage, pursuing two different groups of survivors.


By this point Karl's survivors had mobilized the garbage truck, and Mike's survivors were careening around the map in their pickup truck.


Poor Jimmy Jaworsky had gone to the big Polish sausage stand in the sky, though -- he was ripped apart and devoured by eight zombies as he attempted to hotwire an abandoned car. Professor Paulsen, too, went on permanent sabbatical, as he was dismembered by zombies in the industrial sector. Luckily Tom's other survivors proved particularly adept at self-preservation, and they emerged onto the streets to meet the garbage truck saviors.

We called the game there, as Games Plus was about to close. Everyone had plenty of praise for the scenario and for Tim's gamemastering. The game was fun, bloody, exciting and grim, just like any zombie apocalypse game should be! Here's the final photo, showing the garbage truck plowing into a mob of zeds.


Doubtless we'll run a zombie game next Halloween. Until then!


-- Patrick, Chicago Skirmish Wargames club member

Wednesday, May 30, 2012

Naval Thunder report: Battle of the Denmark Strait


A few months ago four of us made the long trek out to Games Plus in Mt. Prospect to play our club's first naval game. With only a few people attending, it made sense to play a battle with a small number of ships. The one I picked happened to also be one of the classic battles of WWII.

In late May, 1941, the German battleship Bismarck tried to break out into the North Atlantic. Accompanied by a heavy cruiser, the Prinz Eugen, the two German ships set a course for the Denmark Strait. They were met by the Royal Navy's newest battleship and the pride of the fleet, HMS Hood. HMS Prince of Wales was so new that she hadn't even gone through her trials yet and still had civilian dockworkers on board. Hood was a ship built at the end of WWI and was considered at the time to be the most powerful in the world, at least by the British.

The miniatures we used were all 1/3000-scale ships from a variety of manufacturers. That scale is getting quite rare in the US and can really only be found in England. All the miniatures except Hood were made by Skytrex. Hood was brought from a fellow named Mick Yarrow, who makes these ships in his basement. He makes some odd ships like German carriers, and I have dealt with him many times.


The rules we used for this skirmish are called Naval Thunder: Battleship Row and the expansion, Bitterest Rivals. It is a very well-polished rule system that I have used many times for naval games. It covers time periods from the Spanish-American War of 1898 to WWII.

There were a handful of specific rules for this scenario, mostly to accurately reflect the conditions of the ships during this particular battle — and they all affected the British. Prince of Wales had to roll each turret separately and any ones rolled would negate that turret's fire, reflecting the poor state of affairs aboard that new ship.

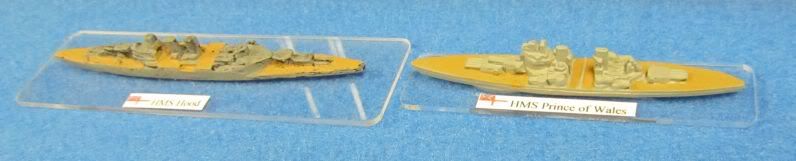
In addition, the British would have to roll a command check if either ship was sunk. I had Hood, Tim had Prince of Wales, Karl had the powerful Bismarck, and Kevin was stuck with Prinz Eugen, a ship which was totally outclassed in the battle. Here are the British ships:


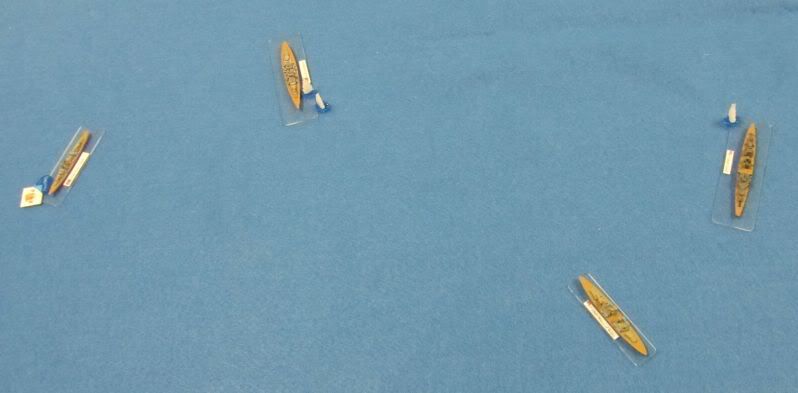
After a short explanation of the rules, we were off. Turn one had Hood and Prince of Wales, turning to starboard (right). The Germans moved toward their exit point, still unsure about the rules. Hood fired at Prinz Eugen and missed. Bismarck hit Prince of Wales, as did Prinz Eugen. However, the smaller guns on Prinz Eugen did no damage at all.

Turn 2 had the British continuing their turn to cut off the Germans and uncover all their guns. Bismarck and Prinz Eugen continued on course, as the British shooting hadn't done much the previous turn. Hood fired on Prinz Eugen again and hit, penetrating the weak armor and causing the cruiser to begin flooding. Bismarck and Prince of Wales exchanged fire, both hitting but not causing major damage. Prinz Eugen failed to fix her flooding and took more damage.


In Turn 3, the Germans changed tactics. Realizing that they were being overwhelmed, Bismarck turned to port (left) to unmask all her guns. Prinz Eugen continued on course while the British continued on their previous course to keep the Germans from their objective. Bismarck fired on Hood for a change and hit, but didn't penetrate Hood's moderate armor. Prince of Wales hit Bismarck and did some hull damage, but not a lot. Hood smashed Prinz Eugen's engine room, reducing the cruiser's speed while Prinz Eugen managed to hit Hood and do some damage, but nothing critical.

On Turn 4 Bismarck continued to turn while all the other ships remained on their previous course. Hood switched fire to Bismarck and did some damage. Bismarck replied and did some damage to Hood, while Prince of Wales caused a fire to start on the beleaguered Prinz Eugen. But Prinz Eugen hit Hood again and damaged the large ship's engines.

During Turn 5 Bismarck reversed course now headed to starboard while the British continued on their course. Hood blew up after a devastating barrage from Bismarck, while Prince of Wales smashed one of Bismarck's main battery turrets. Prinz Eugen sank as a result of fires and flooding.


Turn 6 started with only half the remaining ships in the fight. The loss of Hood had not scared the British, and they continued to fight. Both ships moved in close, blasting away with everything they had. While Bismarck did some damage to Prince of Wales, she took a lot of damage in return. Her bridge was smashed and she was on fire.

 On Turn 7 it was all over. Prince of Wales crossed the T of Bismarck and raked her with a well-aimed round of fire, causing the Bismarck to slip under the waves and vanish into the pages of history.


Everyone had a lot of fun playing and all agreed to try it again in the future. Our results differed greatly from those of history, and yet some things remained the same. In reality, Bismarck and Prinz Eugen briefly exchanged fire with the British before Hood blew up and Prince of Wales turned around and sailed away, having accomplished nothing in the battle. Bismarck sailed on and was damaged a few days later, making her attempt to return to Brest in occupied France for repairs. She was attacked and sunk by the Royal Navy on her way there.

— Mike, Chicago Skirmish Wargames club member

Tuesday, March 6, 2012

Where you'll find us this weekend

This coming weekend is the Games Plus spring auction, an annual event that draws gamers to suburban Chicago for 10 straight hours of auction fun. It's a great place to find deals on rare, OOP or just plain weird miniatures and gaming paraphernalia.

The event runs for four days, capping off the excitement with the miniatures auction on Sunday. It'll start at 10 a.m. this year and will probably wrap up around 8 p.m. A contingent of folks from Chicago Skirmish Wargames — including your intrepid blog editor — will be at Games Plus for most if not all of the Sunday auction.

Are you planning to come out? It's well worth the drive for folks in Indiana, Michigan and Wisconsin. Post a comment here and we'll be sure to say "hi!"