
In late May, 1941, the German battleship Bismarck tried to break out into the North Atlantic. Accompanied by a heavy cruiser, the Prinz Eugen, the two German ships set a course for the Denmark Strait. They were met by the Royal Navy's newest battleship and the pride of the fleet, HMS Hood. HMS Prince of Wales was so new that she hadn't even gone through her trials yet and still had civilian dockworkers on board. Hood was a ship built at the end of WWI and was considered at the time to be the most powerful in the world, at least by the British.
The miniatures we used were all 1/3000-scale ships from a variety of manufacturers. That scale is getting quite rare in the US and can really only be found in England. All the miniatures except Hood were made by Skytrex. Hood was brought from a fellow named Mick Yarrow, who makes these ships in his basement. He makes some odd ships like German carriers, and I have dealt with him many times.
The rules we used for this skirmish are called Naval Thunder: Battleship Row and the expansion, Bitterest Rivals. It is a very well-polished rule system that I have used many times for naval games. It covers time periods from the Spanish-American War of 1898 to WWII.
There were a handful of specific rules for this scenario, mostly to accurately reflect the conditions of the ships during this particular battle — and they all affected the British. Prince of Wales had to roll each turret separately and any ones rolled would negate that turret's fire, reflecting the poor state of affairs aboard that new ship.
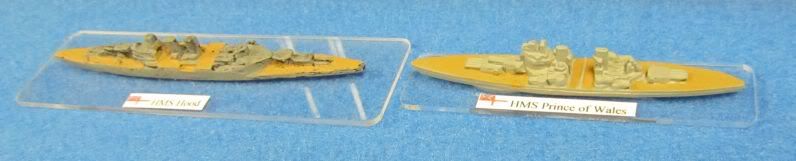
In addition, the British would have to roll a command check if either ship was sunk. I had Hood, Tim had Prince of Wales, Karl had the powerful Bismarck, and Kevin was stuck with Prinz Eugen, a ship which was totally outclassed in the battle. Here are the British ships:

After a short explanation of the rules, we were off. Turn one had Hood and Prince of Wales, turning to starboard (right). The Germans moved toward their exit point, still unsure about the rules. Hood fired at Prinz Eugen and missed. Bismarck hit Prince of Wales, as did Prinz Eugen. However, the smaller guns on Prinz Eugen did no damage at all.
Turn 2 had the British continuing their turn to cut off the Germans and uncover all their guns. Bismarck and Prinz Eugen continued on course, as the British shooting hadn't done much the previous turn. Hood fired on Prinz Eugen again and hit, penetrating the weak armor and causing the cruiser to begin flooding. Bismarck and Prince of Wales exchanged fire, both hitting but not causing major damage. Prinz Eugen failed to fix her flooding and took more damage.

In Turn 3, the Germans changed tactics. Realizing that they were being overwhelmed, Bismarck turned to port (left) to unmask all her guns. Prinz Eugen continued on course while the British continued on their previous course to keep the Germans from their objective. Bismarck fired on Hood for a change and hit, but didn't penetrate Hood's moderate armor. Prince of Wales hit Bismarck and did some hull damage, but not a lot. Hood smashed Prinz Eugen's engine room, reducing the cruiser's speed while Prinz Eugen managed to hit Hood and do some damage, but nothing critical.
On Turn 4 Bismarck continued to turn while all the other ships remained on their previous course. Hood switched fire to Bismarck and did some damage. Bismarck replied and did some damage to Hood, while Prince of Wales caused a fire to start on the beleaguered Prinz Eugen. But Prinz Eugen hit Hood again and damaged the large ship's engines.
During Turn 5 Bismarck reversed course now headed to starboard while the British continued on their course. Hood blew up after a devastating barrage from Bismarck, while Prince of Wales smashed one of Bismarck's main battery turrets. Prinz Eugen sank as a result of fires and flooding.
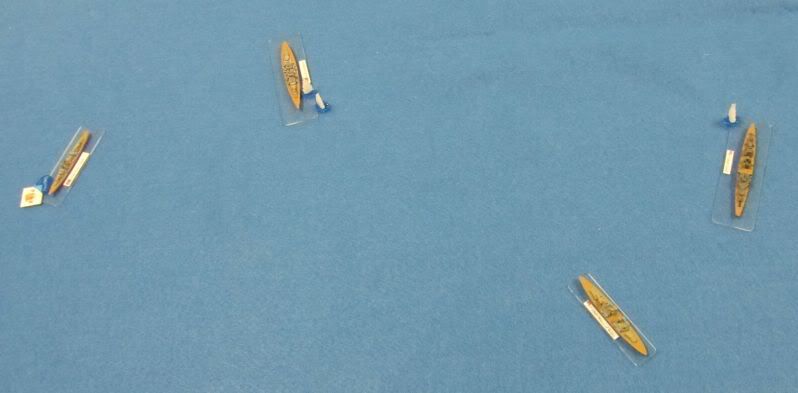
Turn 6 started with only half the remaining ships in the fight. The loss of Hood had not scared the British, and they continued to fight. Both ships moved in close, blasting away with everything they had. While Bismarck did some damage to Prince of Wales, she took a lot of damage in return. Her bridge was smashed and she was on fire.


Everyone had a lot of fun playing and all agreed to try it again in the future. Our results differed greatly from those of history, and yet some things remained the same. In reality, Bismarck and Prinz Eugen briefly exchanged fire with the British before Hood blew up and Prince of Wales turned around and sailed away, having accomplished nothing in the battle. Bismarck sailed on and was damaged a few days later, making her attempt to return to Brest in occupied France for repairs. She was attacked and sunk by the Royal Navy on her way there.
— Mike, Chicago Skirmish Wargames club member

2 comments:
Lovely report, but isn't it "Prince of Wales"? :)
Oops, corrected! Now, if we were playing Weird War II, it might very well be the Prince of Whales...a gigantic orca with 18-inch guns strapped to its back, maybe?
Post a Comment
Note: Only a member of this blog may post a comment.