Showing posts with label wargaming. Show all posts

Friday, February 21, 2014

Tomorrow's War: Operation Snakepit


Once again, Josh and I had the day off, and so with snow in the forecast, we decided to sneak in a quick game of Tomorrow's War. We used our previous scenario as the jumping-off point for this battle.

Operation Snakepit
Colony World: Fornacis III 
Area: New Tupelov 

Following their decisive victory in New Tupelov’s urban core, the Subathi empire has begun redeploying its heavy weapons in preparation for a long-expected seige of the city by Terran armored divisions. Sensing an opportunity, the Thunderbolts mercenary army, operating under its own agenda, has prepared an ambush along one of these resupply corridors, hoping to catch the Subathi off-balance and inflict a devastating defeat. A setback here would give the Terrans an opening for their massed assault -- and it would serve the Thunderbolts’ own strategic purposes.

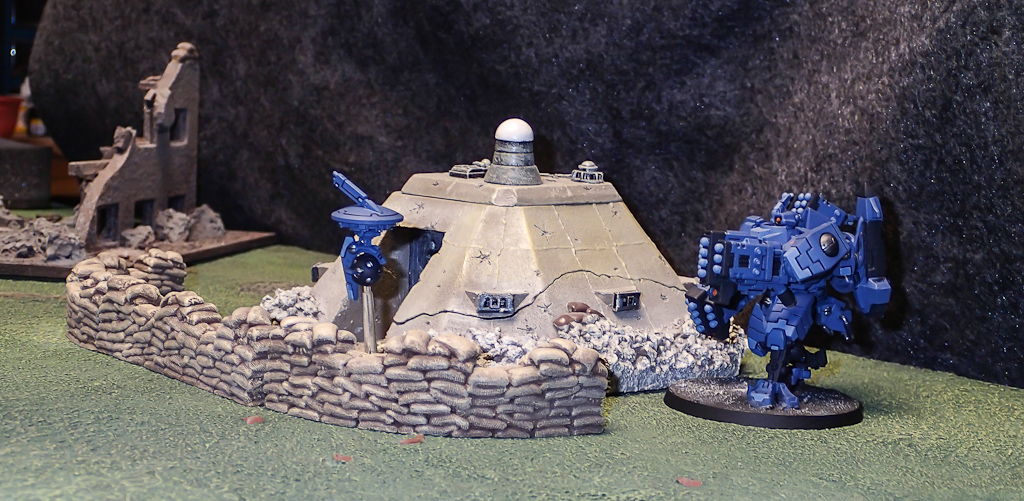
In game terms, the Subathi empire (represented by Josh's shiny Tau figures) had to escort a deactivated heavy weapon battle suit across a long table into a designated resupply zone on the other end of the table. My mercenary army, Colonel Markham's Thunderbolts, would attempt to ambush the escort and destroy the heavy weapon suit. Here's the battlefield (the bunker on the far end of the table represents Josh's destination):
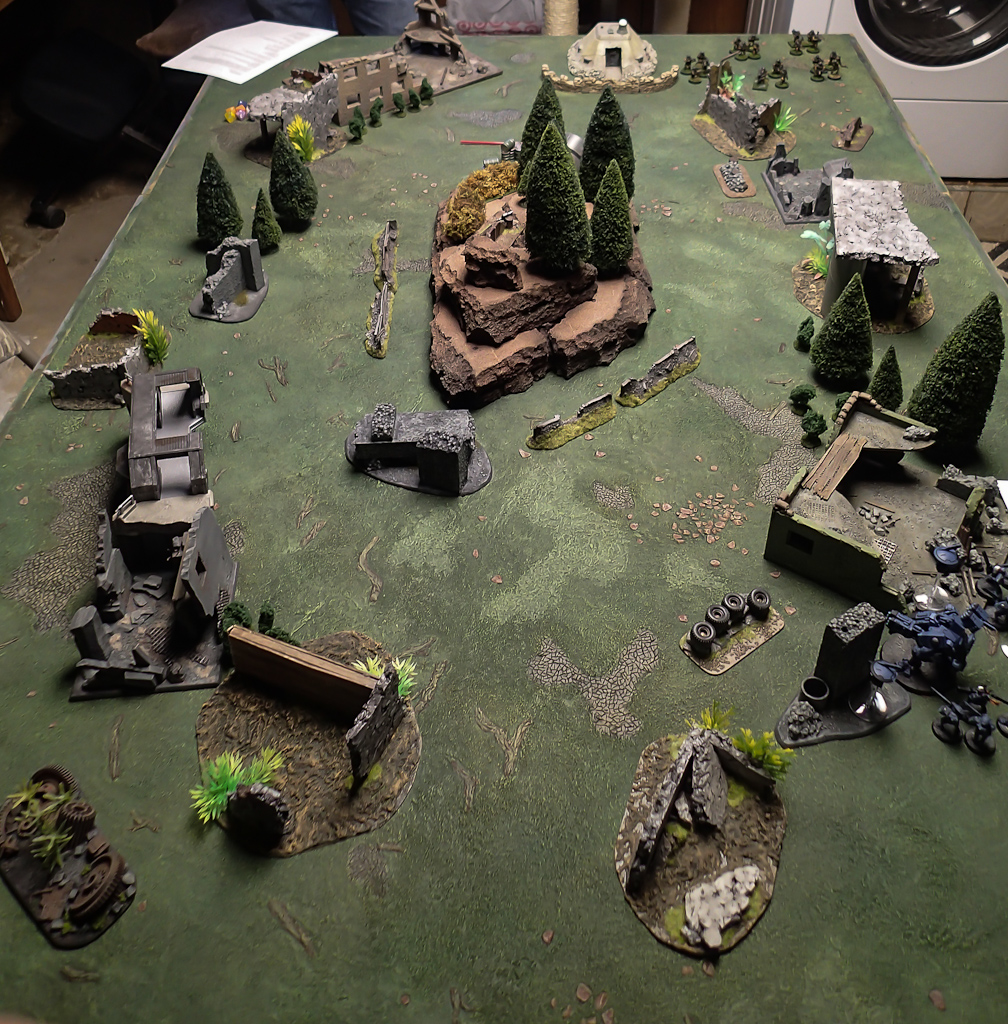

The big rocky bluff in the center of the table proved to be an interesting terrain piece. It was large enough that it completely blocked line of sight across the table, effectively turning the battlefield into two smaller avenues and forcing Josh to choose a route through the broken ruins of New Tupelov.

(The awesome latex mat is from Zuzzy and I just finished painting it for Josh. Hopefully we'll see it again soon in games to come!)

We added a few new tweaks to this game. Josh kept the initiative the entire game, which meant that my Thunderbolts could only react to his actions as per the Tomorrow's War rules. Also, his Subathi had shield drones that generated a forcefield around his heavy weapon suit. I could target and destroy the shield drones, but that proved difficult and costly as the game wore on.
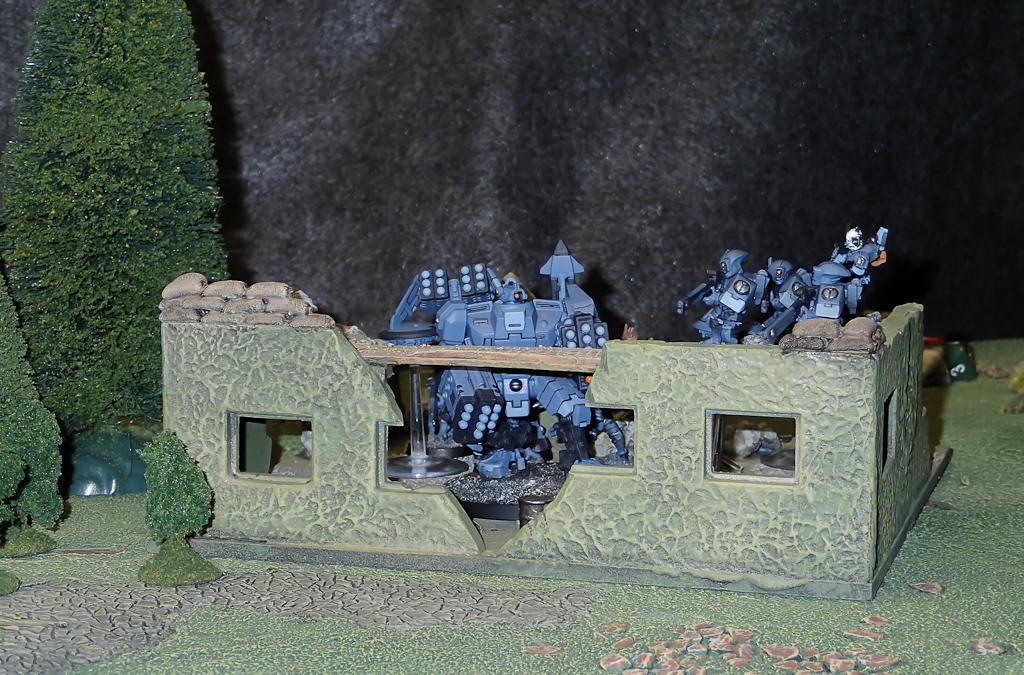

Josh's opening moves sent his guys around the right flank, seizing some ruins and laying down covering fire with some of his Subathi warriors. These initial maneuvers proved very effective, as it hampered my ability to move across the battlefield and respond to his flanking move. Here are two photos of a typical engagement from the opening turns of the game: my guys moving from cover and getting caught out in the open!
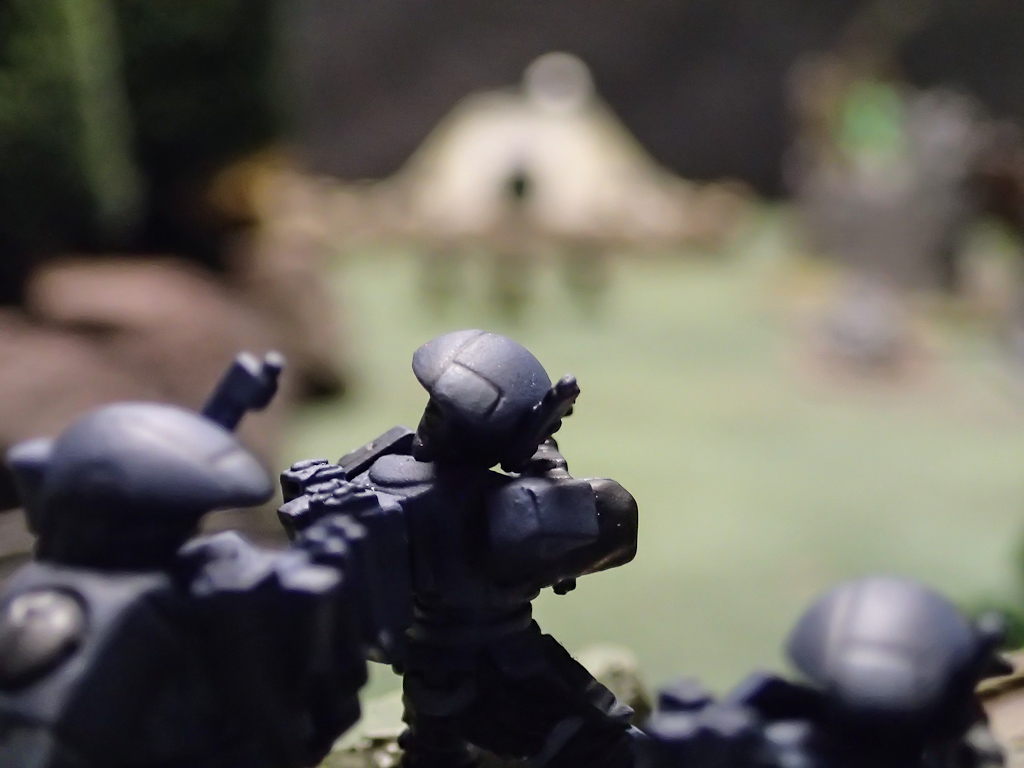


Oh crap! Run guys!

Eventually I slogged my way through Josh's firepower and deployed a couple fireteams on the rocky bluff in the center of the table. These guys spent the rest of the game lurking in the wooded hills, firing on Josh's shield drones as they tried to move across the table with their heavy weapon suit.


Josh's reinforcements arrived on turn 2, and he sent them up the left flank, which I had been busily evacuating so I could focus on the right flank. Oops! I had a couple fire teams on the left side of the board, so I put them into cover in the ruins of New Tupelov and prepared to return fire.


These figures are from Pig Iron's Heavy Infantry range and they're absolutely fantastic -- chunky, mid-tech near future warriors with appropriately sized weapons and a lot of character.
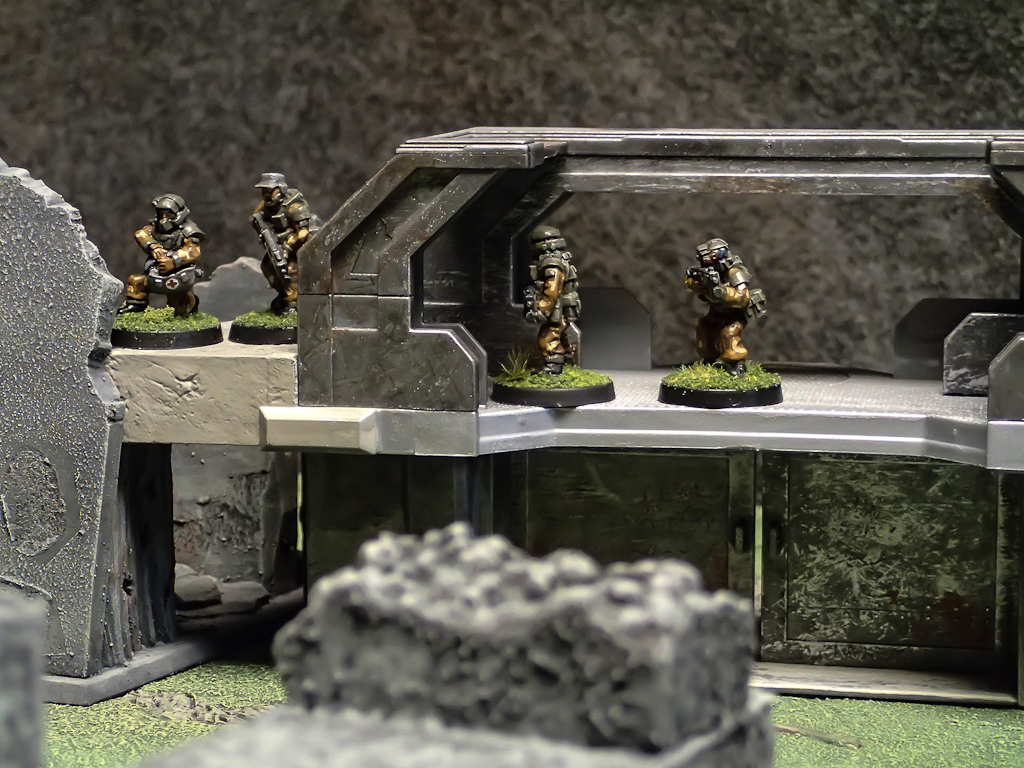

Shortly after I took this photo, a squad of Subathi warriors shot this fireteam to pieces, leaving only wounded, moaning troops lying in the dust. While the battle raged on the other side of the table, Josh sent a squad to capture my wounded mercenaries -- no doubt to give us a reason for a follow-up game! Here's the capture:
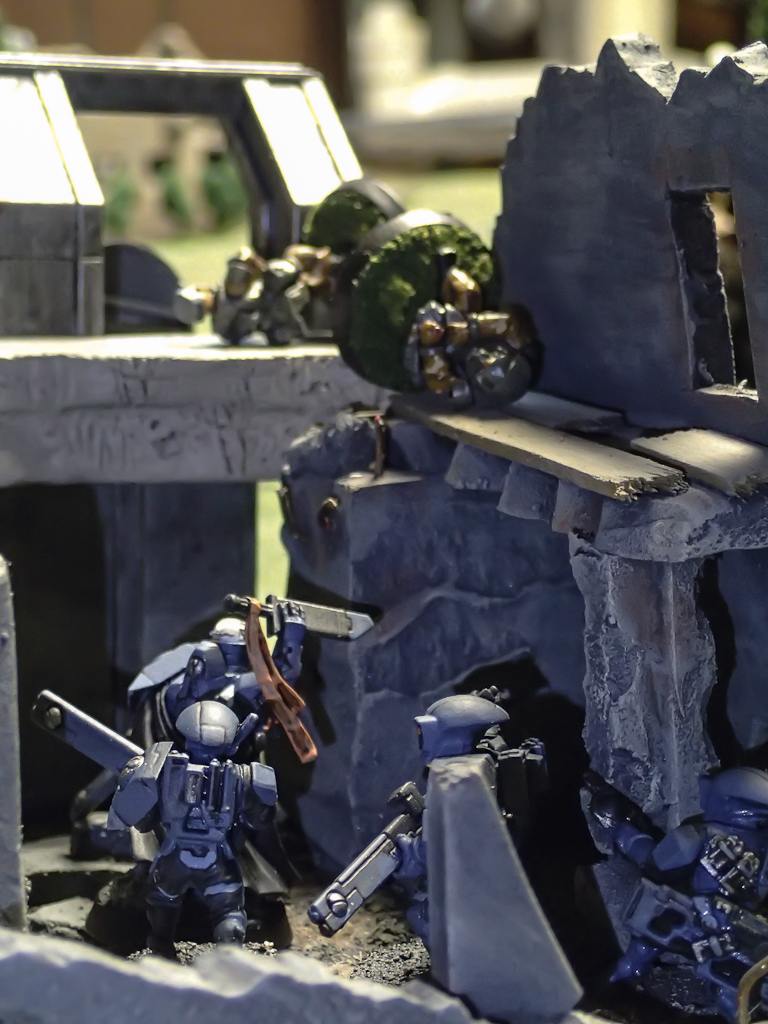


Across the table, I was doing a pretty good job of throwing roadblocks into Josh's path. In one notable engagement, he sent a squad of Subathi warriors charging into a mercenary squad that was already weakened by casualties. In a miraculous turn of events, the mercenaries rallied, fought off the Subathi, and proceeded to annihilate the opposing squad to a man.
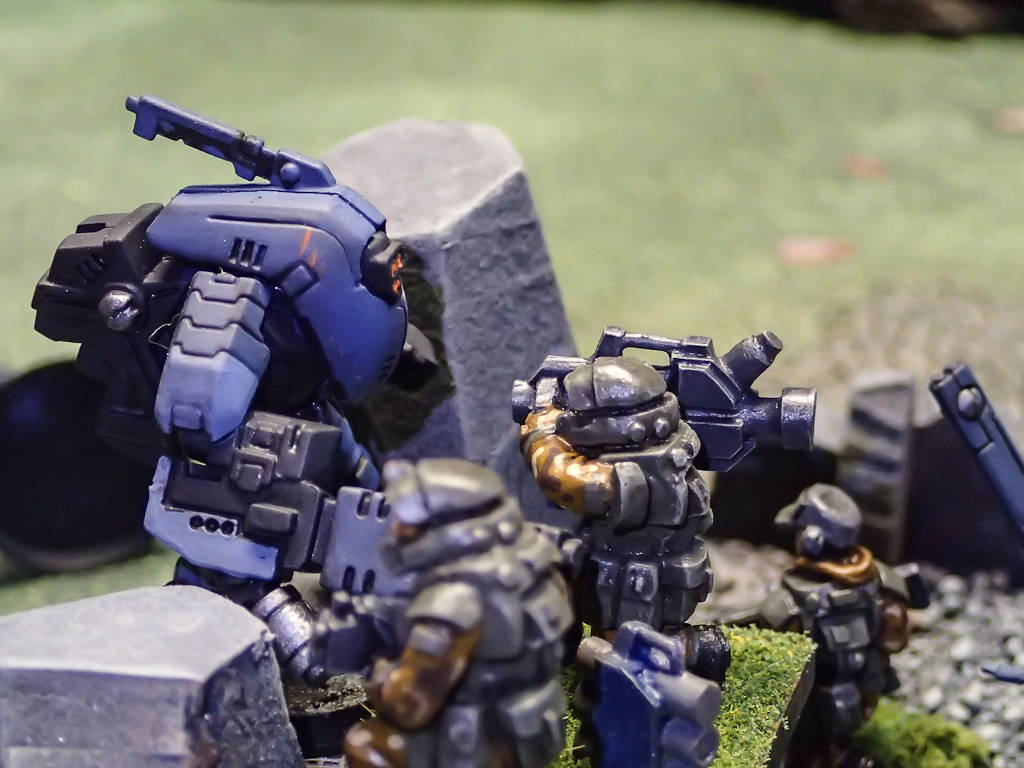

As the game entered its final turns, I was finally able to shoot down a few of those pesky shield drones, thus exposing Josh's heavy weapon suit.
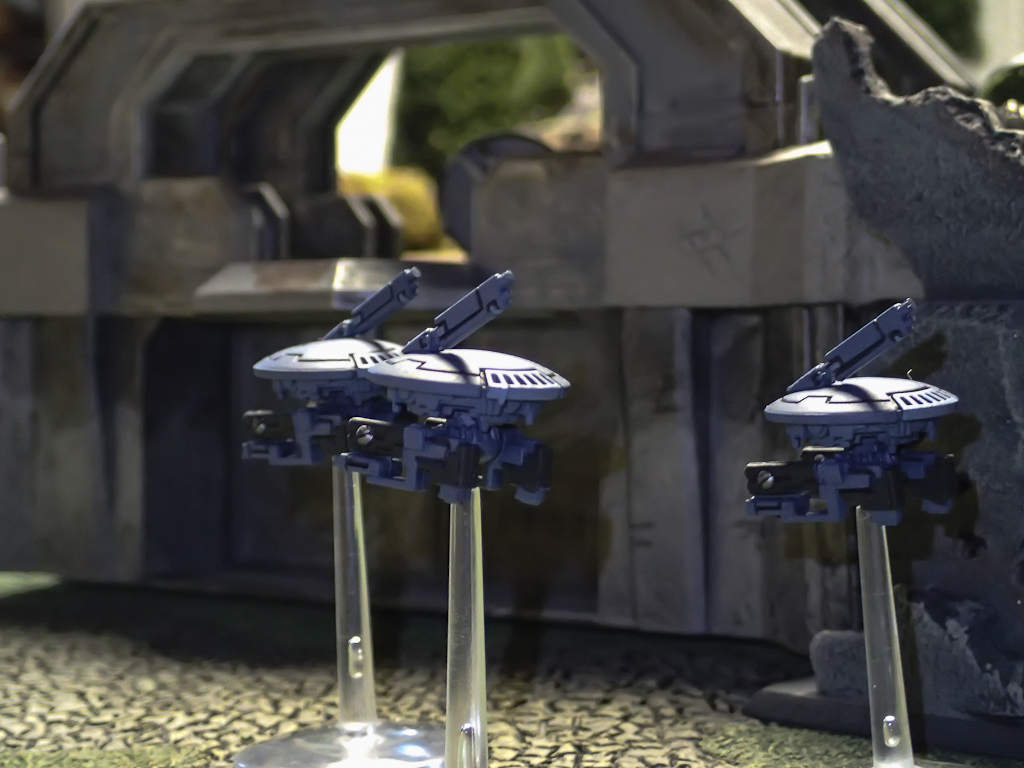

But my fireteams were out of position and I was only able to get off a few rounds of fire before we reached out turn limit. We actually played 1 turn beyond our limit because it was clear that Josh was on the verge of victory. And indeed, with his Subathi warriors providing covering fire, the heavy weapon suit marched into the resupply zone and secured the win.
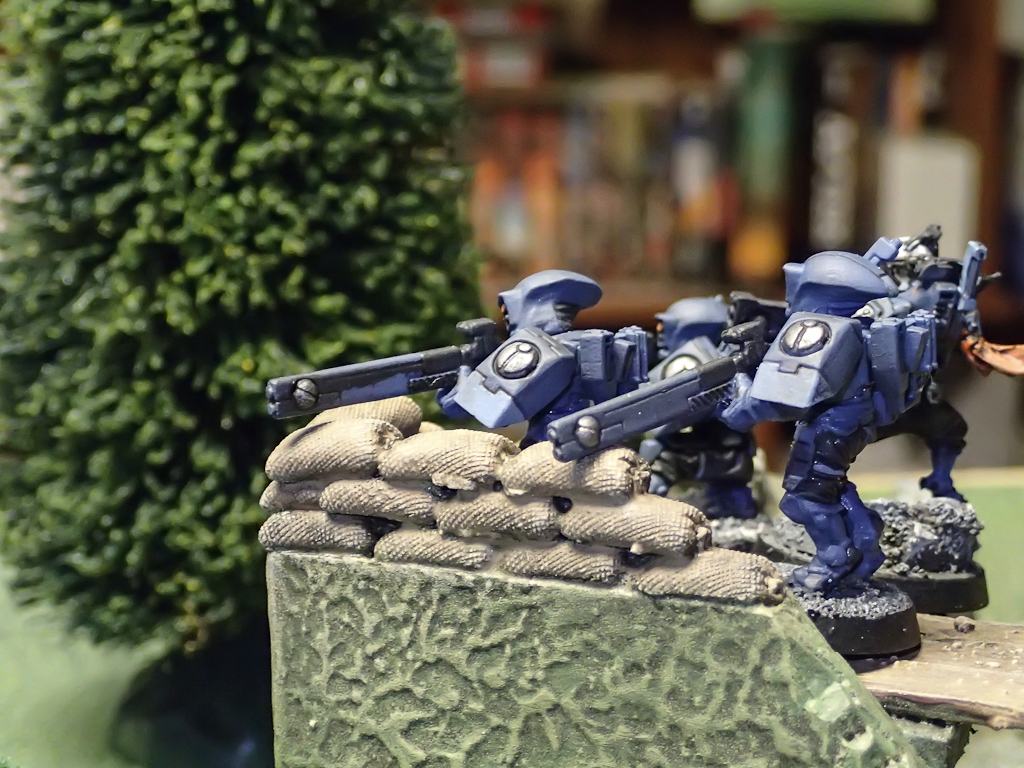

Look, here's weapon suit. He's the one with missiles for hands. He's dancin'!

Once again we had a very enjoyable game of Tomorrow's War. With both players now pretty experienced, our games have begun to hum along quite smoothly. Josh and I agreed that the next game would be an all-out assault to free the captive mercs, so stay tuned for that one in the near future!

-- Patrick, Chicago Skirmish Wargames club member, with photos by Josh

Monday, August 5, 2013

Kings of War Battle Report and Game Review


It was inevitable -- after Karl and I split a huge box of random miniatures that we purchased at Little Wars earlier this year, we found ourselves awash in really cool fantasy miniatures. As we pawed through piles of old-school chaos warriors, Bob Olley dwarves and Ral Partha skeletons, we began sketching out ideas for playing some large-scale fantasy games. After considering a number of rulesets, we settled on Kings of War, which seemed to offer a fast-playing game that still allowed for pretty big, epic battles. The rulebook and army lists are available as free PDFs, but both Karl and I splurged for the nice hardcover rulebook.

We played our first game last week at Games Plus, our occasional game venue in suburban Chicago. The game might have taken place sooner, but Karl and I found that we needed a few extra weeks to paint and base our armies. As it was, we were able to muster armies of about 1,300 points -- basically medium-sized forces that were still below the 2,000-point threshold that Kings of War suggests for typical games.

We laid out a desert tabletop with a couple hills, a couple areas of scrub-brush and a small clump of barrels and crates near the center of the table. Kings of War is a mass battle game in 28mm, so it needs a big battlefield with less terrain that we typically use.


Karl arrayed his chaos forces along one table edge. A few of his guys are still shiny from the dip -- they were dry, but he hadn't sprayed them with matte sealer to take the shine off. Those are Confrontation werewolves in the foreground, from the prepainted plastic miniatures line by Rackham. They proved to be 1) very affordable and easy to get on the battlefield and 2) dead hard in the actual game! I fielded a block of 'em in my army, too.


I deployed my undead legions opposite him, trying to go for a tactical arrangement despite not really knowing how things would play out. I'm using custom movement trays from Litko, sized for the 25mm round circles that almost all of my undead guys use. In the background you can see my skeletal dragon. The rat swarm in front of the skeleton regiment is an actual unit upgrade in Kings of War!

We rolled for a scenario and got "Kill and Pillage," which is one of three very generic scenarios provided in the Kings of War rulebook. Basically we are both tasked with securing supplies (represented on the battlefield by oak barrels) and killing each other, with a six-turn time limit.

And then we were off! Karl's forces were much faster than my undead guys, so he surged forward and managed to get into combat in the second turn, when I was barely out of my deployment zone! Here his werewolves (the all-star unit for both of us in this game, as it turned out) and chaos lord crashed into my cavalry, which was attempting a sneaky flank move.


Shortly after this photo was taken, the cavalry took a big hit and then failed their Rout test and were removed from the table. Kings of War doesn't use individual figure removal to indicate damage to a unit -- rather, you just use a dice to track overall damage, and if the unit ever fails its Rout test, you just remove the entire block of troops from the table. This took some getting used too, since it was rather heartbreaking to remove 20 beautiful, handpainted skeletons from the table after a particularly brutal charge. But the game played fast, due in no small part to these rules!


After my cavalry evaporated into a fine red spray at the hands of Karl's werewolves, I knew I needed to get serious. I sent a block of skeleton archers charging into the flank of Karl's dragon, which suffered a bit of damage and then turned to face these bony aggressors.

Then I mobilized my own werewolves and charged them into Karl's main line of troops, eviscerating a block of chaos foot soldiers and threatening the chaos leader and standard bearer. My dragon brought up the rear in this assault.


Now, most of my photos show only the best, most decisive clashes in the game. But I left out the parts that showed how my flanks just collapsed under the combined weight of the werewolves, dragon and chaos cavalry that hit me from both sides. In both cases (again, not pictured due mostly to embarrassment) I had a 20-strong block of skeleton warriors that just fell to pieces after one or two rounds of combat. Oh look, turns out I did have a pic showing my skeletons getting turned into oversized toothpicks.


Yep, they're getting it from both ends in that photo. Victory was clearly Karl's in this game. However, it would have been interesting to play out a few more turns. I strongly suspect that our game would have devolved into "werewolves vs. werewolves," with both units (mostly unhurt) meeting in the middle of the battlefield to pound the crap out of each other. The werewolves were so potent on the battlefield (for both of us!) that before the game was even over we were already contemplating house rules or house limits on their use.

OK, now it's time for some closing thoughts from Karl and me.

Karl's Conclusion
So Kings Of War is exactly what I'd hoped it would be. The game was fast and didn't take much longer than a Song of Blades and Heroes game. The rules are really straightforward and there was comparatively little rulebook checking for a first-try of a new game.

Pat and I agreed that the game will probably balance and play much better at 2000 points. At our 1300-point limit, we didn't field quite enough units to really bring out the strategy of denying your opponent certain movements and supporting your own units through maneuvering.

My closing thoughts wouldn't be complete, however, without mentioning the mayhem that regiments of werewolves (equivalent in power to a "Horde" of most other units) can have in a game where almost all the other units are "Troop" level. My recommendation for games under 1500 points would be to limit the size of units to 20 for infantry, 3 for large infantry and 5 for cavalry. That would probably keep big units from smashing little ones too quickly as well as give each player enough units to really utilize strategy. All in all, a game I hope to play many more times. I'm painting more units for it now!

Pat's Conclusion
I had expected maneuvering to play a bigger role in Kings of War, since the unit footprints are really quite big and it's unrealistic to expect such big groups of figures to turn on a dime to face a flank threat. However, since each unit can rotate 90 degrees as part of its movement, and many units were able to rotate as many times as needed due to special rules, it never really felt like maneuvering was quite as important as it should have been.

Also, it was a big shock to play a game with such long move distances. Karl's cavalry and werewolves were charging from 18 inches away, which allowed him to reliably get into close combat on turn 2. That's a big increase from Song of Blades & Heroes, our go-to skirmish game, in which only a handful of figures can cover that much distance in a single turn.

I've concluded that I need more core foot troops like skeletons or zombies. Simply taking up space on the battlefield does not equate to combat prowess! My 20-man blocks of skeletons were dealt with easily by Karl's forces. Now, if I had another 20 or 40 skeletons waiting around to counter-charge....

Anyway, the games were fun and I think they'll be even more enjoyable once we can muster 2,000 points per player. Tim is already interested in basing up some of his miniatures for Kings of War, so look for more battle reports in the future.

 -- Patrick, Chicago Skirmish Wargames club member

Thursday, July 18, 2013

Third Time's a Charm for CSW's 40k Gaming


Mike and I met at the local Games Workshop store south of Chicago for a small (yet epic) clash in the world of Warhammer 40,000. Mike's Imperial Guard force met my Dark Angels army in a 530-point skirmish game.


Dark Angels Forces 
  • Company Master Balthazar 
  • 10-man tactical squad with plasma gun and plasma cannon 
  • Dreadnought with assault cannon and missile launcher 
  • Ravenwing Darkshroud with assault cannon


Imperial Guard Forces 
  • Tons of mans with lasguns and grenade launchers! 
  • 2 HQ squads with medics 
  • 1 heavy weapons squad with autocannon 

Since we were just playing a small game, and were limited to a table with one gigantic piece of terrain, we decided to start on the corners and have an all-out battle. Here's how things looked at the outset of the battle.


Turn 1 
The Imperial Guard split their forces, sending one group around each side of main building in a flanking attempt. This turned out to be a very good move! The Dark Angels advanced, though they were less concerned with getting into cover, since the Darkshroud vehicle confers a cover save to all squads within 6 inches.


Turn 2 
The Imperial Guard started shooting through the building at the Dark Angel forces, taking down one space marine. The flanking group moved further around the building even as the Dark Angels returned fire. The dreadnought's frag missile blast templates took out a handful of guardsmen.


Turn 3 
The Imperial Guard main force moved up into the building for cover, while the flanking force maneuvered to opend fire on the advancing marines. The Dark Angels turned to face the flanking heavy weapons team.


The Guardsmen managed to destroy the Darkshroud with a single penetrating hit, blowing it up and taking out a number of nearby marines. Enraged, the Dark Angels returned fire, destroying the heavy weapons team and slaughtering handfuls of guardsmen.


Turn 4
The remaining guardsmen sneaked around behind the dreadnought and destroyed it with their grenade launchers!


The four remaining space marines and their fearless leader continued to butcher the seemingly endless hordes of guardsmen.

Endgame 
At this point, we ran out of time. From a victory points perspective, we were tied, and we decided to call it a draw. I am fairly certain that given another turn or two, the Dark Angels would have fallen to the guardsmens' numbers. I think my list choice was fun, but maybe not the most effective army. The points I spent on the Darkshroud might have been better spent on another tactical squad. I probably also should have tried to move into close combat, where I would have both dominated and been protected from further shooting.

Mike's thoughts: I got a better idea of what my force can and can't do. I know I need a few more weapons that penetrate better, but I can rely on lasguns to put some pain on standard marines. I think a few more autocannons and plasma guns might have helped more, especially if I could have gotten the plasma guns into the fight earlier. But the big winner for me were the grenade launchers. Expect to see a bunch of them in the future! I don't know if the medics did a lot to help, but I think standards would have been a good idea, along with some commissars. It was a fast (surprisingly) and fun game of 40k!

-- Josh, Chicago Skirmish Wargames club member

Friday, May 31, 2013

Back in the Saddle with Song of Blades & Heroes


A few guys from the club got together in my basement recently for an off-week game night. Our goal was to showcase some newly painted fantasy figures and terrain that we've been slowly accumulating ahead of the summer fantasy campaign. We were all collectively itching to play some more Song of Blades & Heroes, a fantastic ruleset that has served us well since the club's inception in 2010. (Spoiler: for readers who enjoyed last summer's Iron Isle campaign, get ready for a treat. We're going back to that wondrous world with this new campaign! More details to come...)


For this game night, we tried a slightly different table configuration for my small basement game area. It turned out really well -- everyone was basically sitting by everyone else, so we could chat and talk trash and sort of watch all the other games unfold. We played 6 separate 1-on-1 games of Song of Blades & Heroes, switching seats between each game so people could play against different opponents on different boards.


As you can see from the photos, we set up three distinct 3x3-foot skirmish boards: a medieval village, a wooded glade and a grim canyon dominated by a fortified watchtower.


Rather than attempt to reconstruct the chaos and fury of last night's games, I'll just present the photos and try to examine the little vignettes that played out on the tabletop.

In the first game, Karl's chaos knights (the Night Herons of the Black Crown) faced off against Jon's orc raiders. The two sides came to blows quickly, and both factions were kitted out for close combat. Karl's knights started the game by lurking near the crumbling walls of the fortified watchtower.


Here are a couple typical brawls from that game.


And here is Jon's orc warchief, mere moments before he was slain in a cascade of bad rolls that ultimately spelled defeat for Jon and victory for Karl.


Across the way, I sent my undead skeletons creeping into a sparse forest in search of Tyler's dwarven adventurers. The dwarves, for their part, advanced in a stout, bearded line of armor and axes, backed up by the considerable threat provided by a large bear named Rolf (pictured below).


Alas, I overextended with my cool, newly painted skeletal dragon and was punished for it. The dragon was cut down by the stunty dwarves as he smashed into their armored line. In game terms, I forgot that the dwarves had the fearless special ability, which rendered my dragon's terror ability irrelevant!


This would prove to be a theme for the night: send my dragon in to attack, and watch it die horribly. Oh well.

Across the table on the village board, Tim's monster-demon-dudes squared off against Josh's newly painted warband of adventurers. Here's Josh's team -- in true old-school fashion, he has a little bit of everything in here: dog, mouse warrior, elf archer, etc.


Here are Tim's guys in action. The scenario (Tim was defending a pumping station and Josh's guys were crippled by thirst) meant that Josh was on his back almost from the start. Their game was definitely among the first to end.


It didn't help that Josh's adventurers had to face off against THIS THING while scurrying through the streets of the village. (Tim often brings cthuloid monstrosities to the table as part of his SBH warbands, and this evening was no exception.)


After those games concluded, we chatted a bit and swapped seats for a new set of games. Of course, my notes got even sketchier at this point in the evening, so bear with me (Rolf pun).

In the medieval village, Tyler mustered his dwarves to assault Karl's chaos knights. That game ended up lasting for the rest of the evening, and they were still playing it out as we were packing up our models at the end of the night.


Here's a closeup of the fight that was developing in the center of town. It took the dwarves a while to get their (because they move a little slower than their human counterparts) but they arrived in force, and only bear-ly won (another Rolf pun)!


(I didn't get a single photo of Jon and Tim's game in the wooded glade. I think it was over rather soon.)

On the fortress table, Josh and I set up a scenario whereby my undead had captured a border outpost owned by his adventurers, so he was tasked with taking it back by force. I began the game by assembling my skeletons in a shieldwall near the gates of the fort's main yard.


Another team of skeletons ventured out into the burnt-out ruins to try and flank Josh's team. His archers did a good job of keeping them at bay, though, and that darn dog proved to be a capable combatant.


Here's the scene as some more skeletons hasten to join the battle that has been joined just outside the supply depot. Despite my overwhelming numbers (skeletons are cheap, but ineffective in combat) Josh managed to get Roland, his mouse warrior, into contact with one of the creates.


I was ready for this move, though, and my wraith swooped in with his gigantic sickle and lopped off poor Roland's head, thus snatching victory from the jaws of defeat.


We were all very pleased to get back to our roots with some Song of Blades & Heroes. This was also a great chance to take stock of our fantasty terrain and tabletop accessories and see if we need to fill any holes before the campaign starts. I think we discussed making some Mordheim-esque ladders and walkways for our village table so we can add some more tactical options to our games. I've also got some Lemax Christmas Village accessories (walls, fences, etc.) that need to be repainted.

-- Patrick, Chicago Skirmish Wargames club member