Showing posts with label scenery. Show all posts

Friday, September 11, 2015

Bridges and Scuttles from O-Scale Train Cars


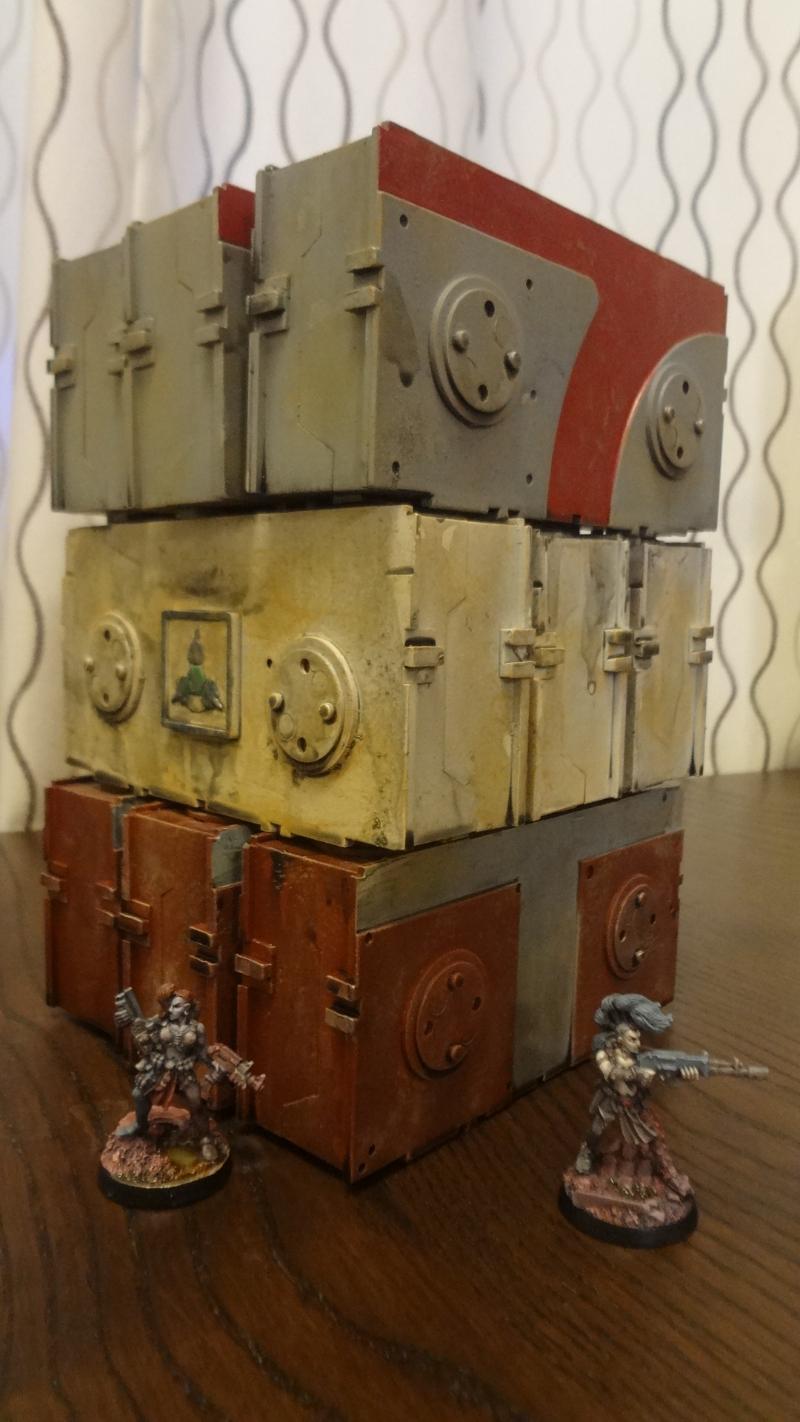
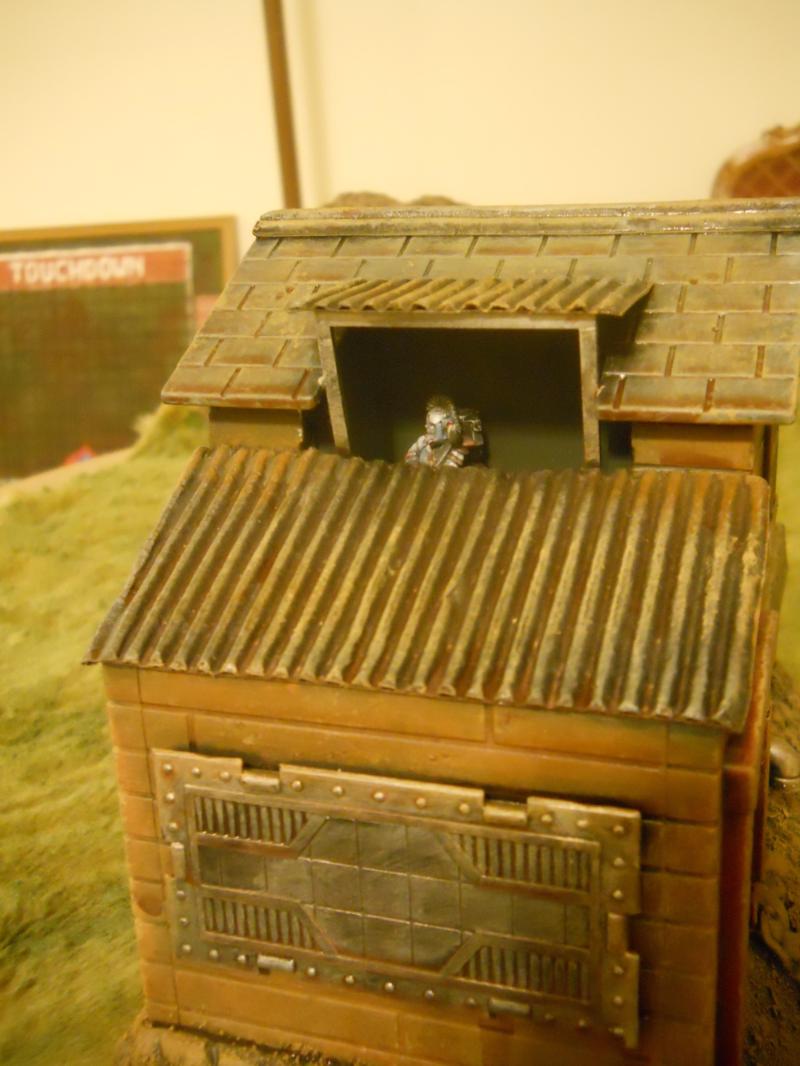
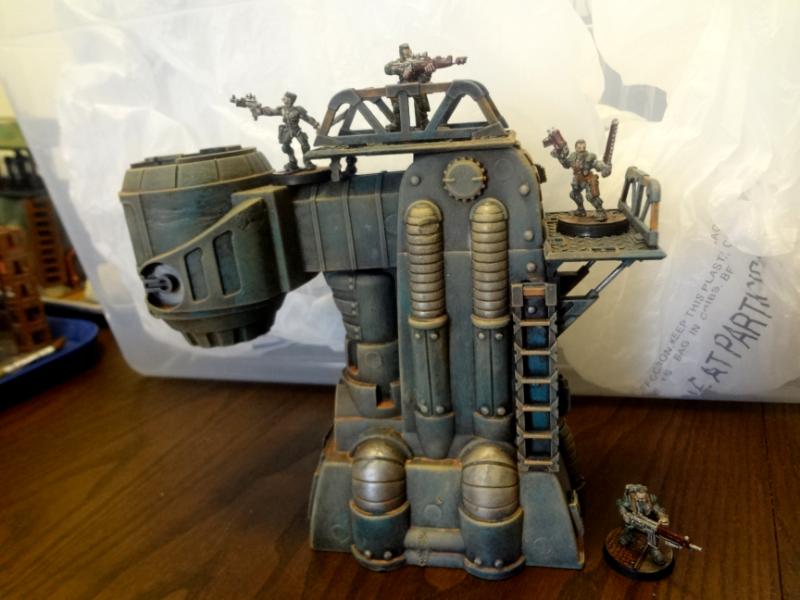
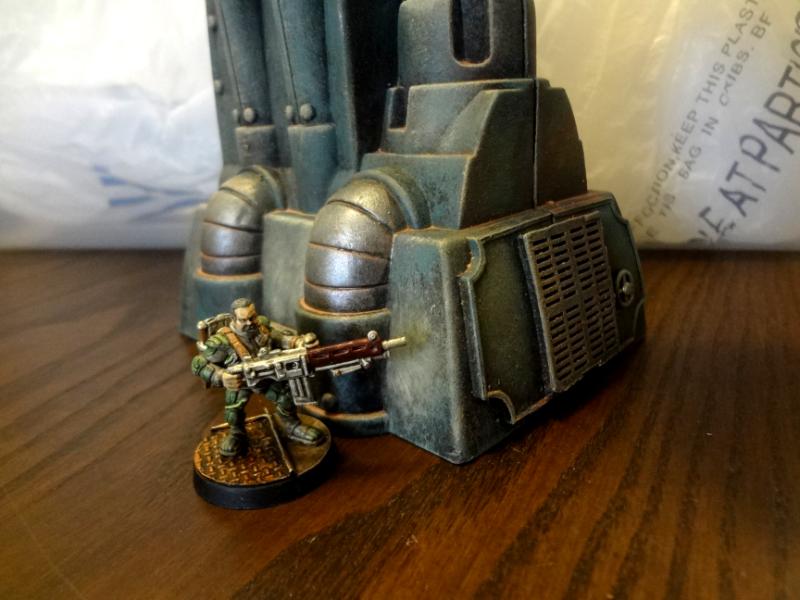
Over the past few years I've picked up a number of broken O-scale train cars, and I've finally put them to good use. Most of these damaged in some way, usually lacking wheels and trucks, but that didn't bother me since I didn't need them anyway. Aside from price, the main benefit to using model train cars is the great detail, which makes drybrushing a breeze. Check out those great rivets and ladders!


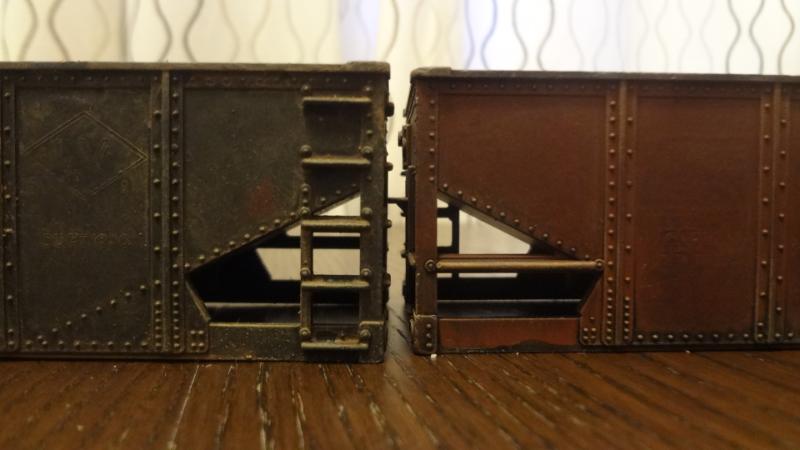
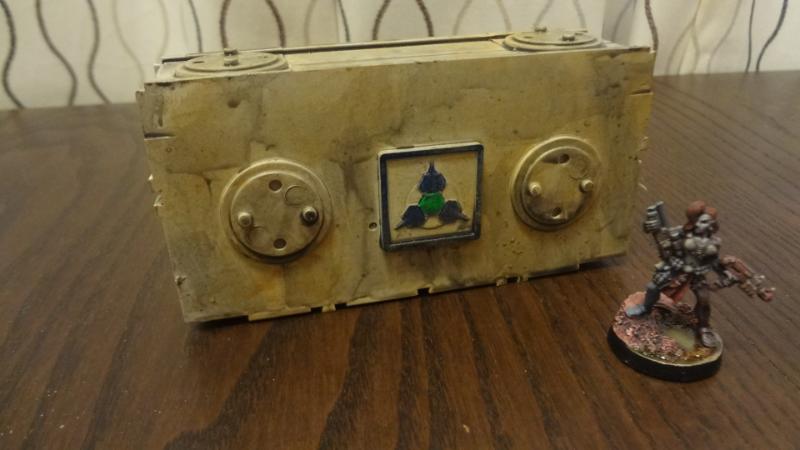
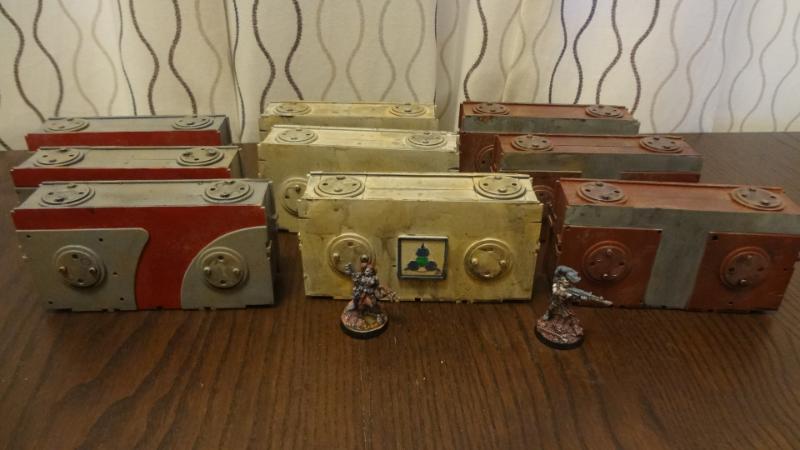
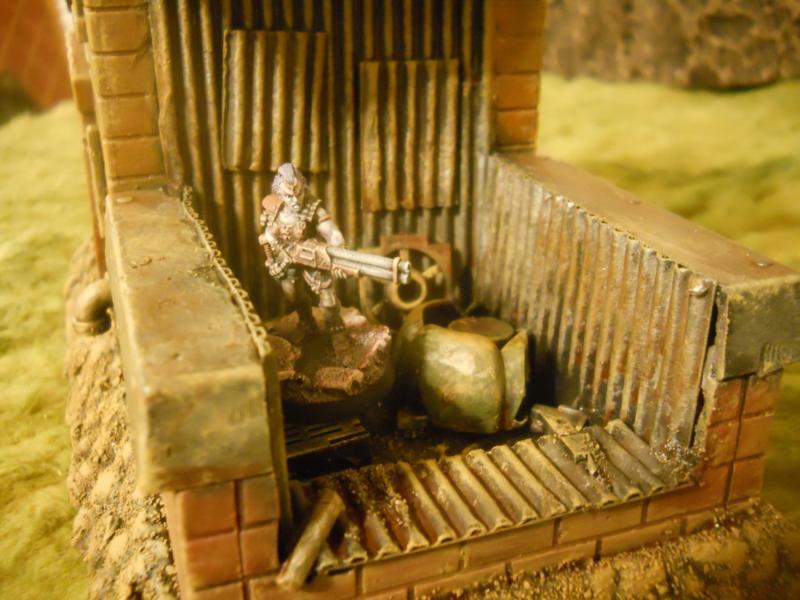
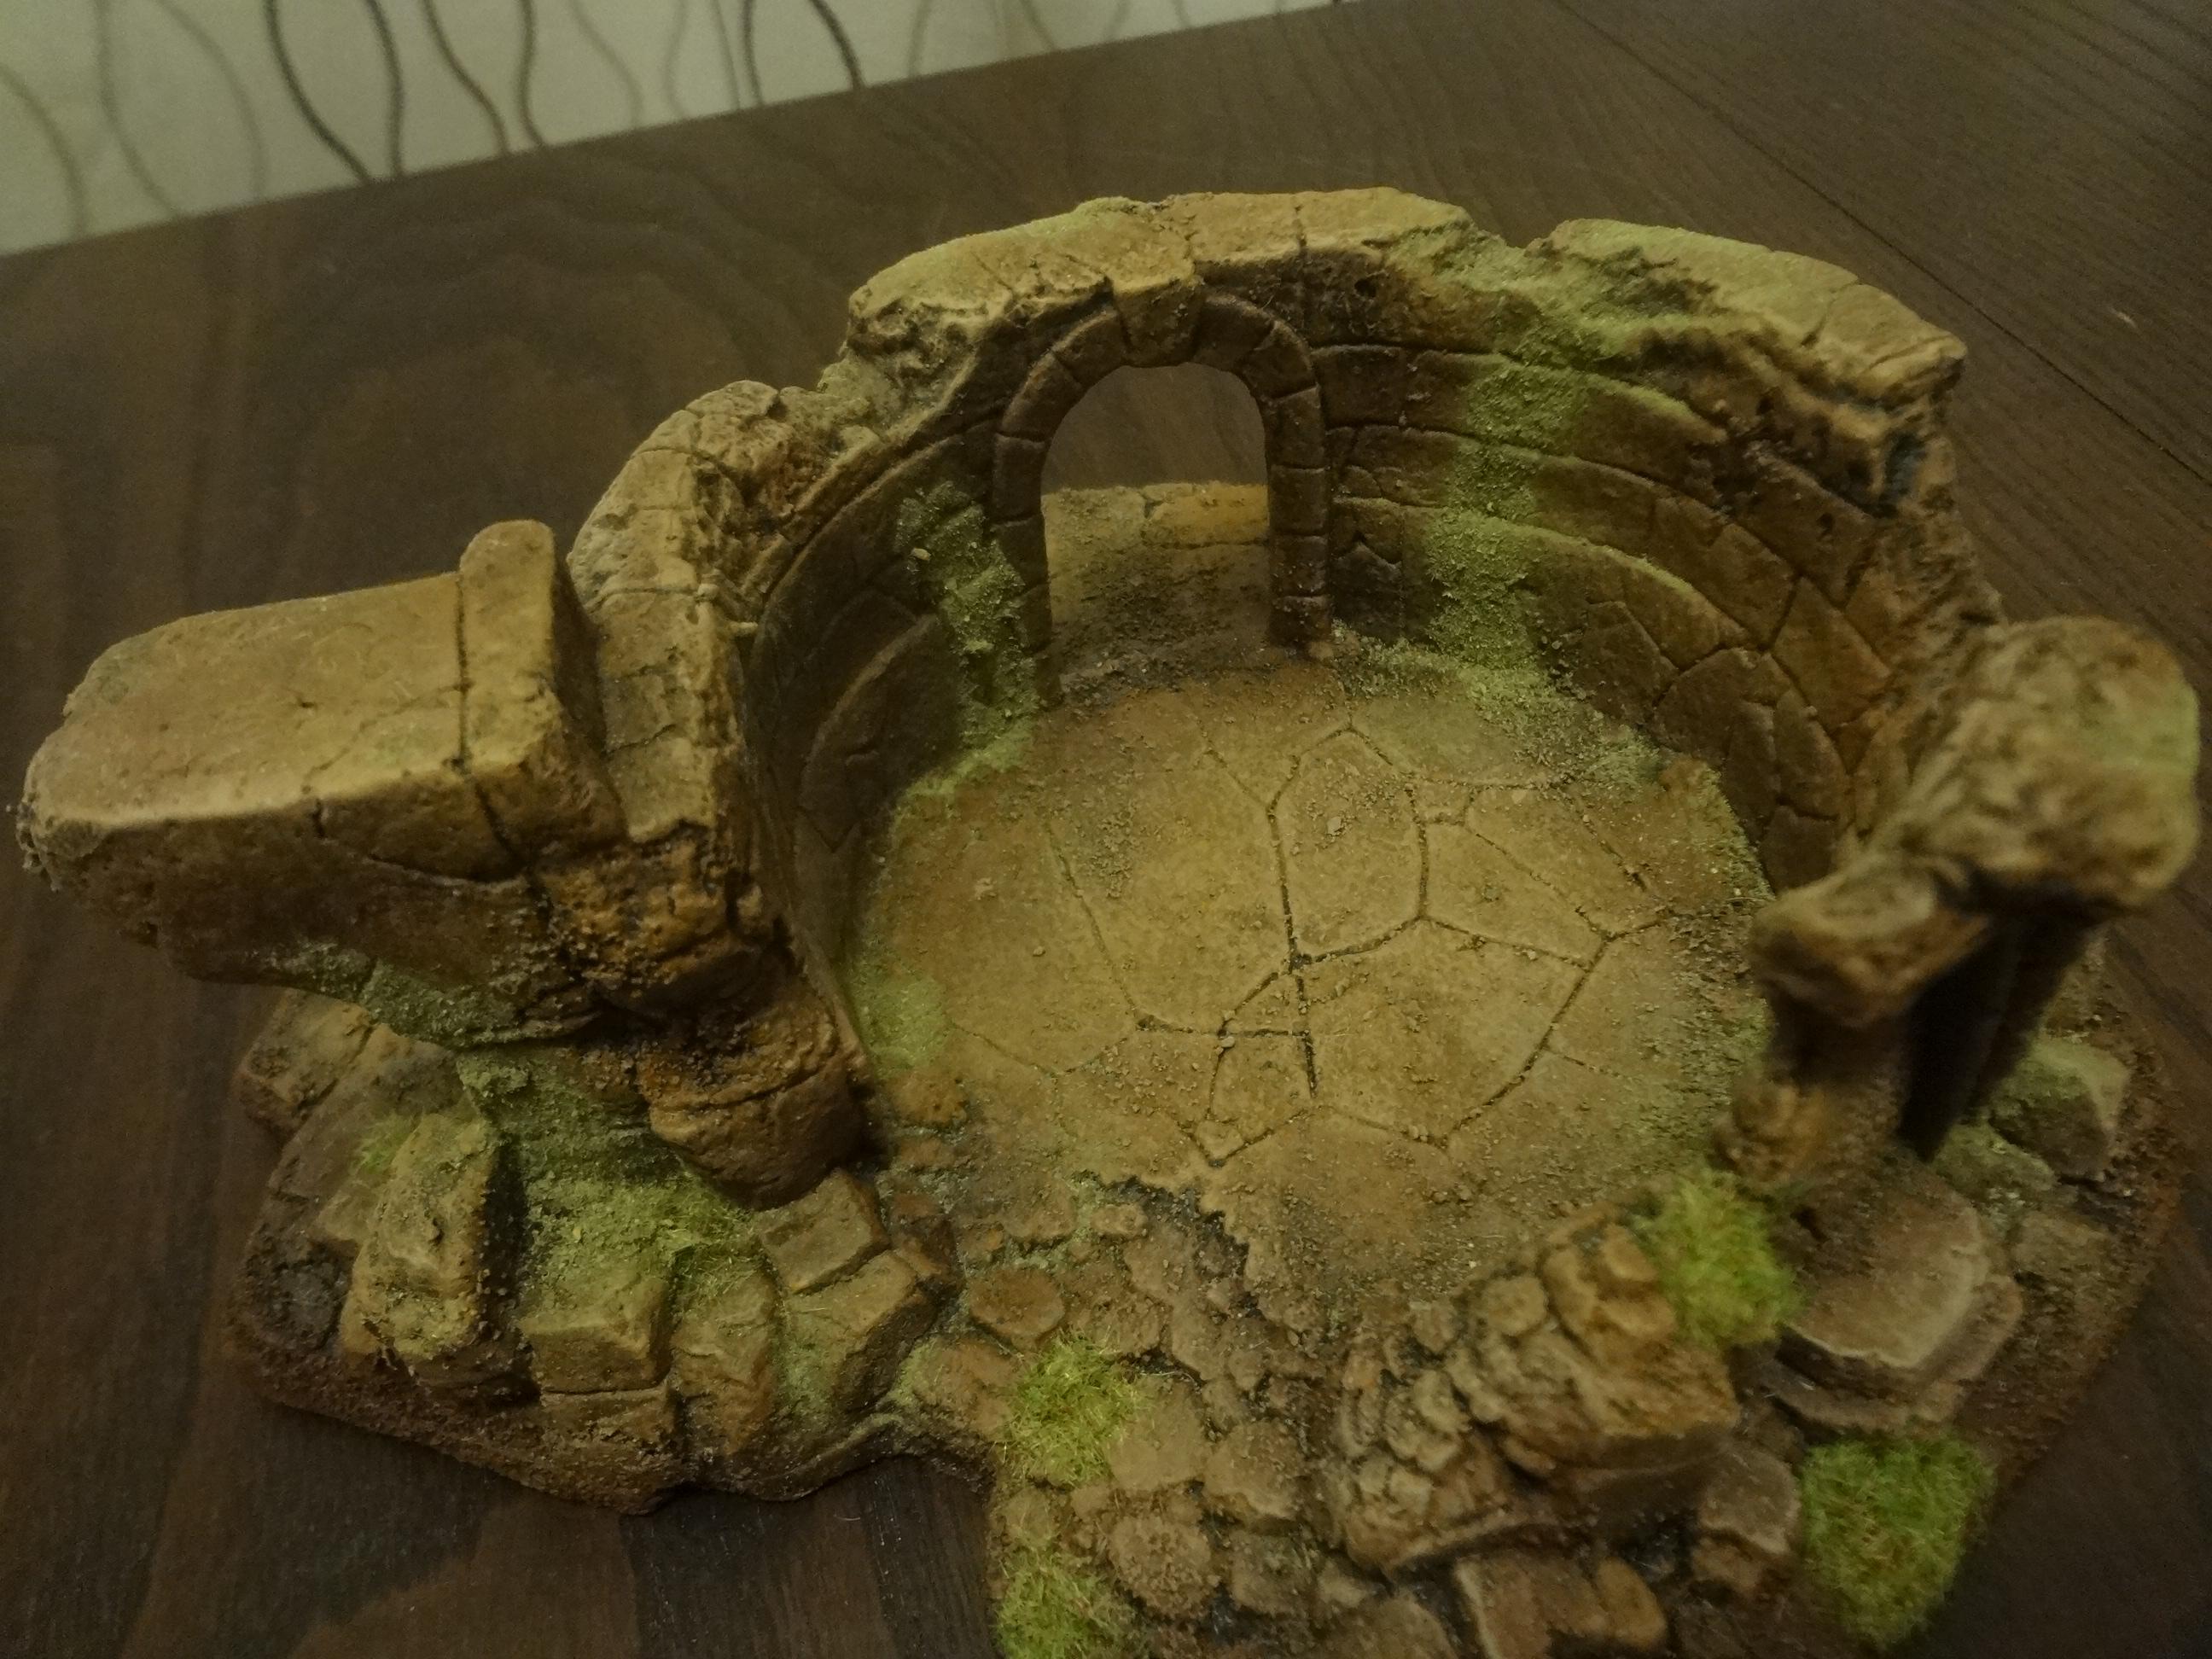
Here are coal and sand scuttles made from open-topped hopper cars. I used my Dremel 543 blade to cut off the bottom of the cars and smooth them out.


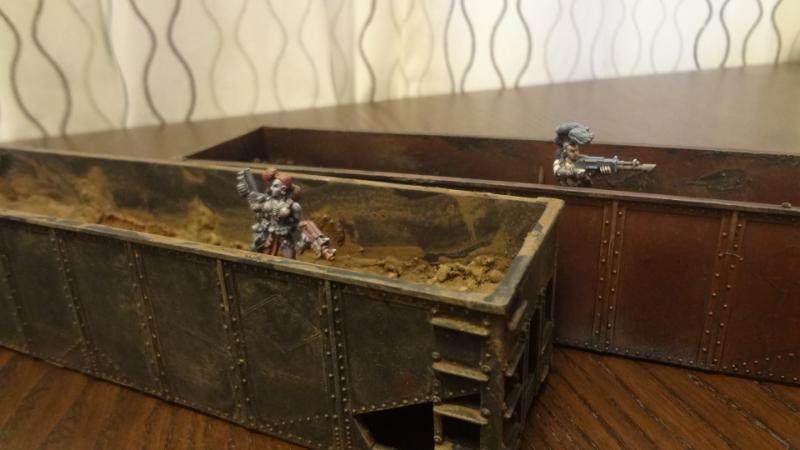
Then I glued in a cardboard bottom and added ballast. The coal is gravel painted black, drybrushed and then given a bit of magic wash for a coal-like sheen.


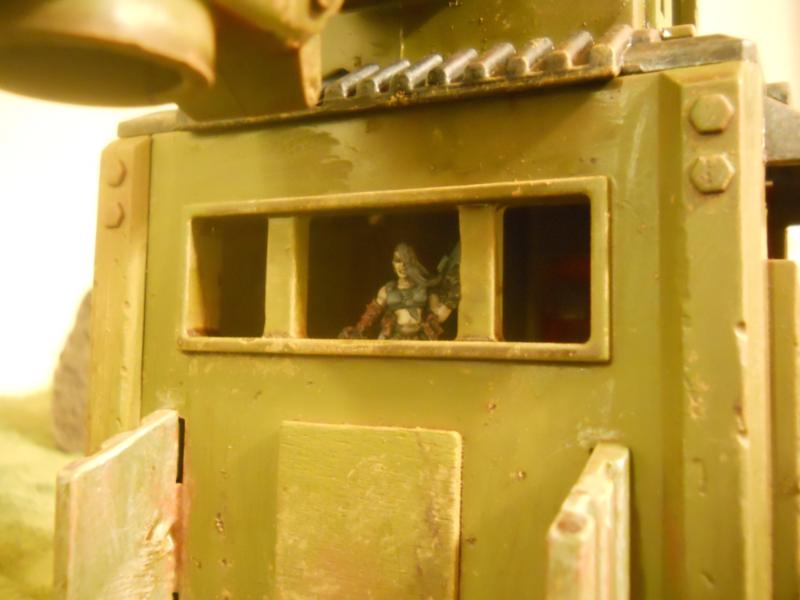
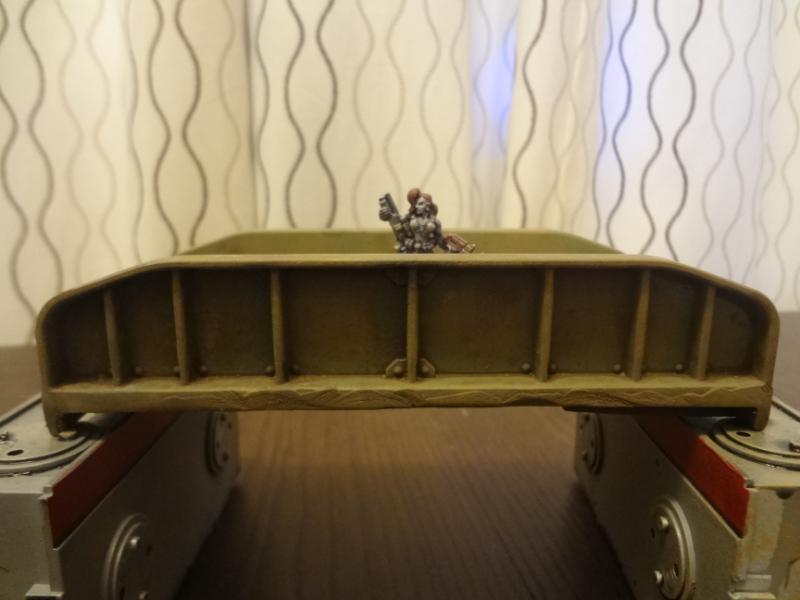
Done correctly, the ballast will bring the floor level up just enough to allow 28mm figures to take cover but still see over the edges.


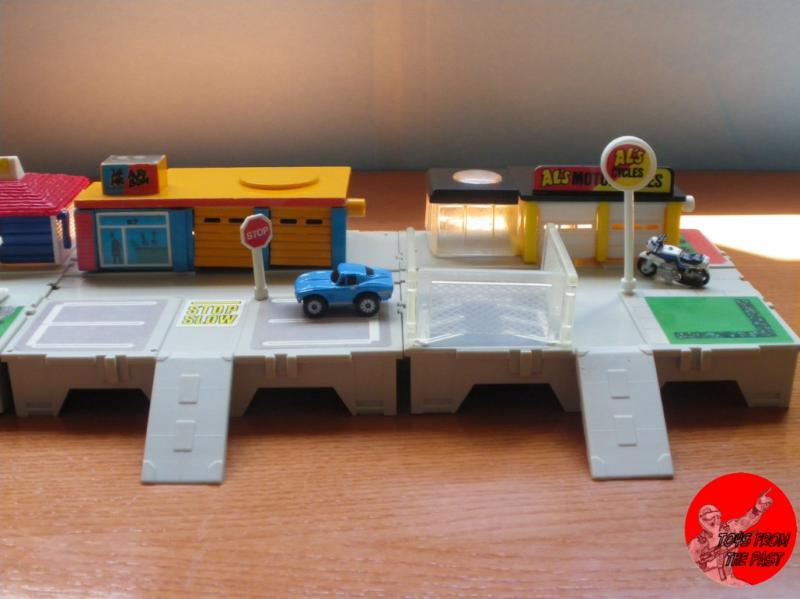
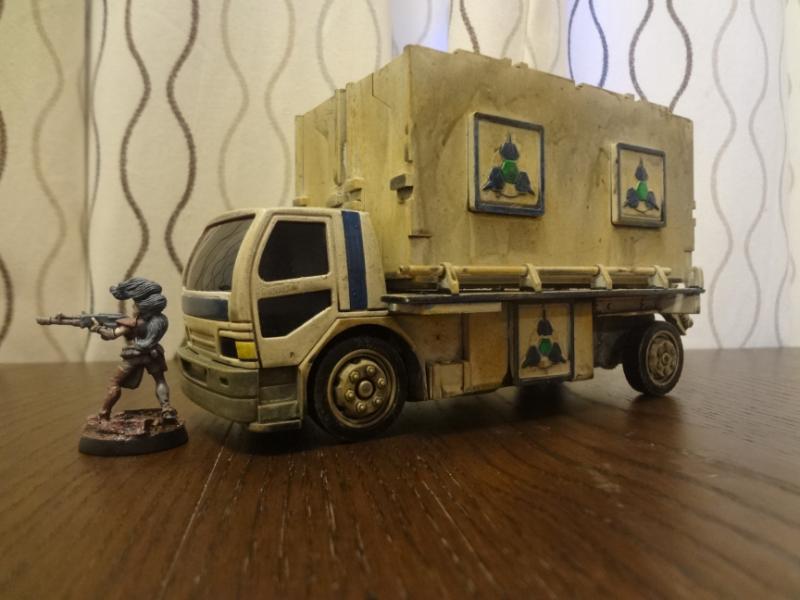
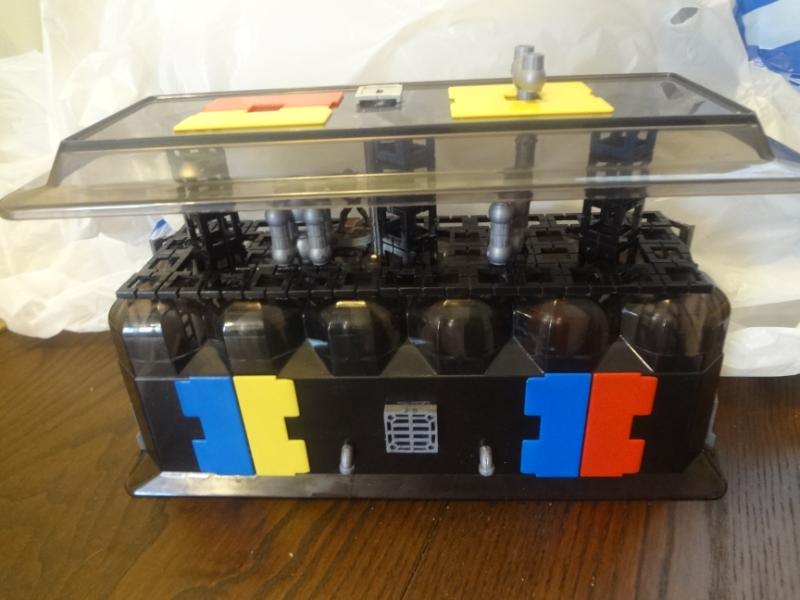
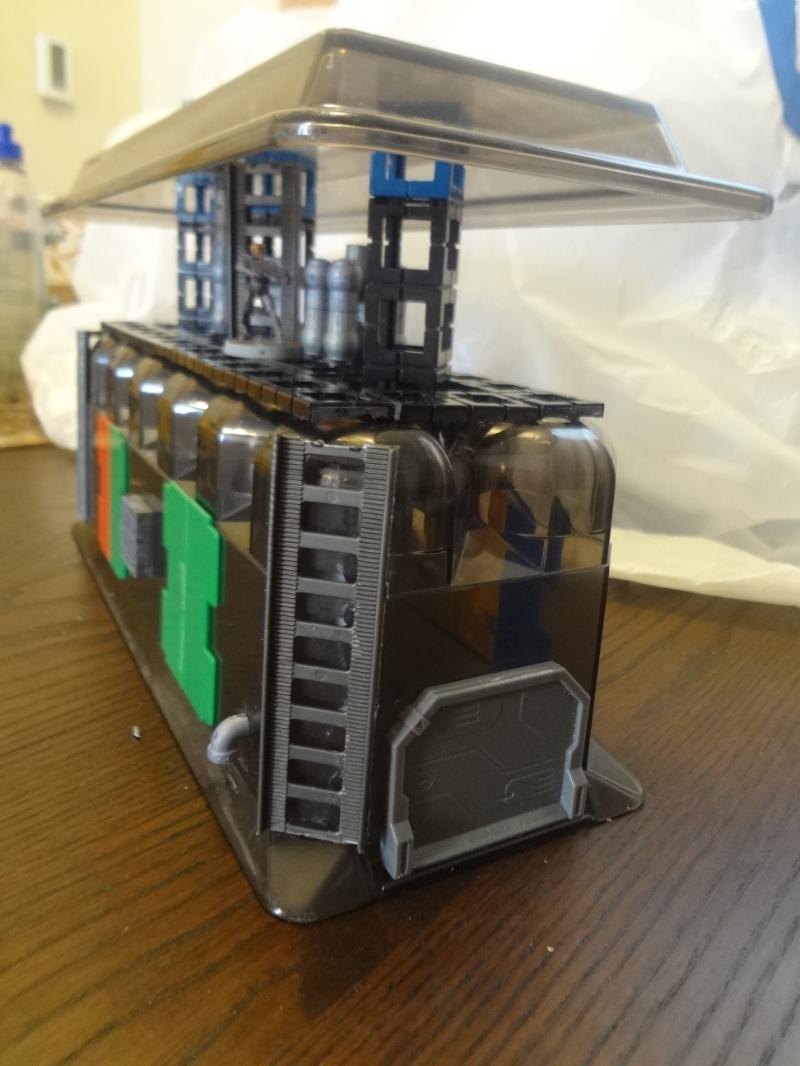
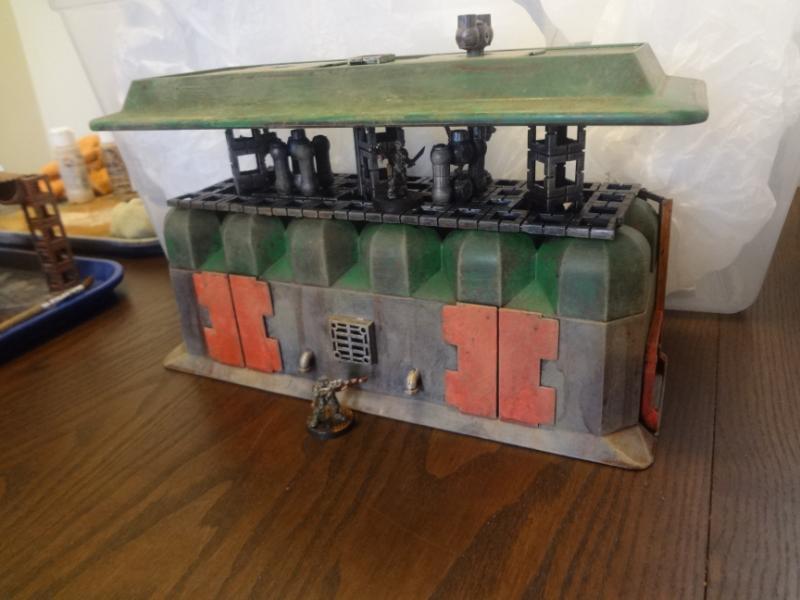
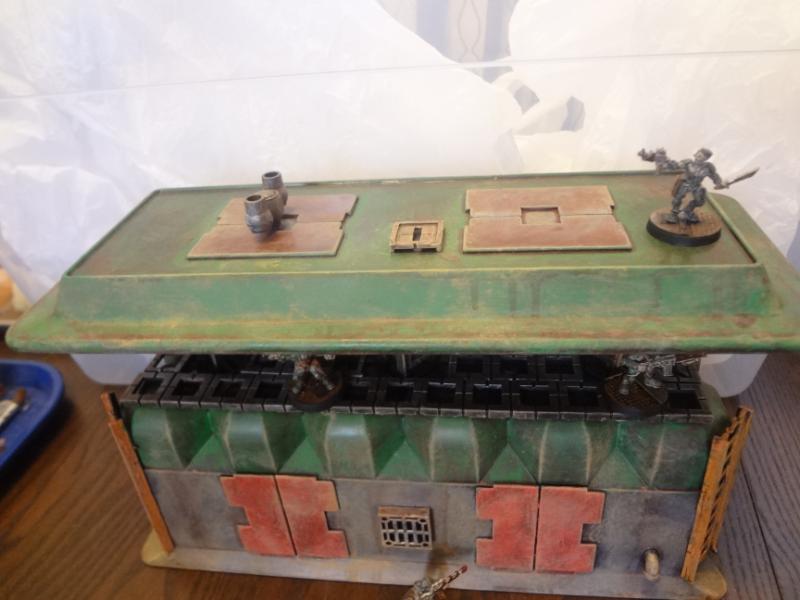
I did similar work on two gondolas and a Fisher Price Geotrax bridge. I filled the molded-in tracks on the Fisher Price bridge with cement and gravel, though I probably should have cemented over the whole area. The odd melted section of the middle bridge one came that way, which is probably why it was so cheap. Looks pretty cool to me.


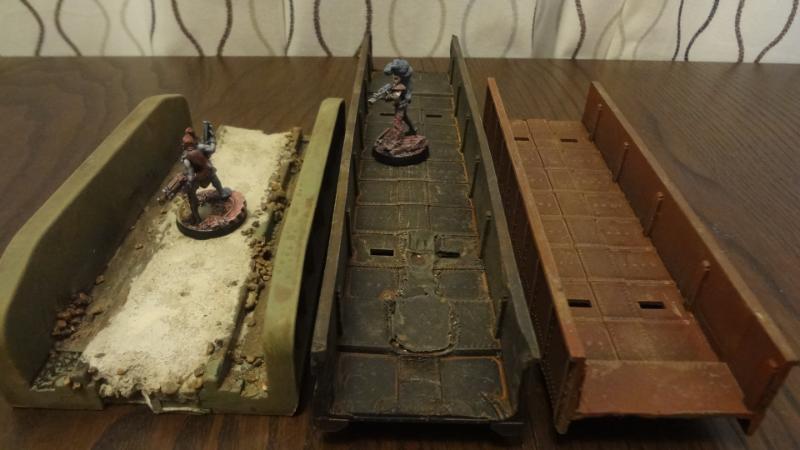
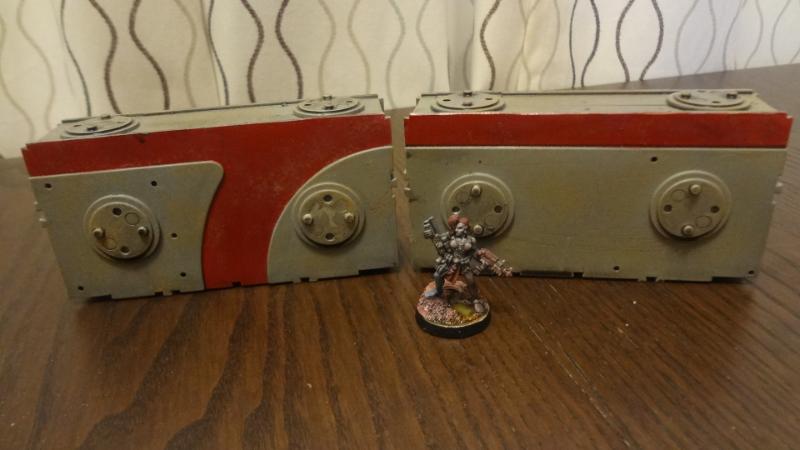
The black bridge simply had the ends cut off.


The red bridge was also shortened.


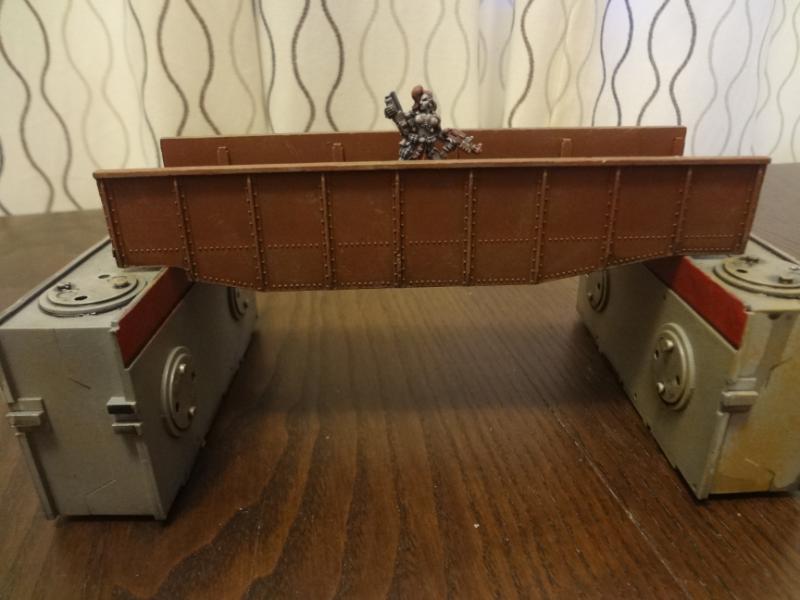
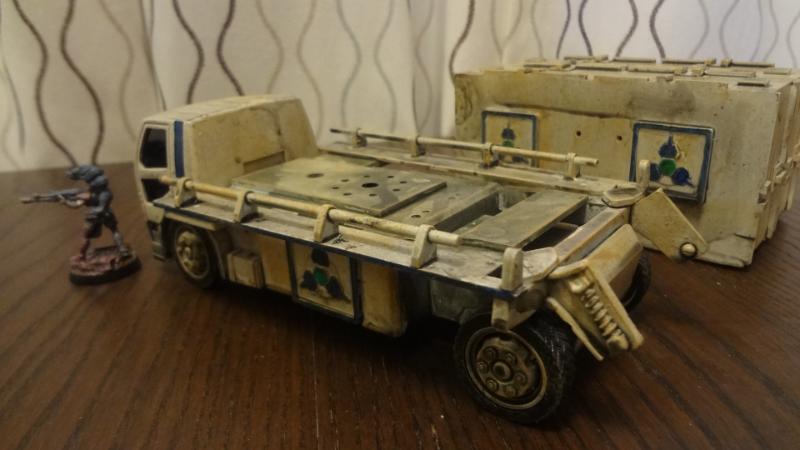
The Fisher Price bridge was actually meant to be used flat on the ground and had big chunks of ground detail molded on the sides. I cut all that off!


All three were simply spray painted, then washed and drybrushed with tan. The end result is a set of extremely useful terrain pieces for very little money. I've got a number of industrial terrain pieces that have buckets or spouts that will spill nicely into the scuttles. Likewise, sturdy bridges and gangways are an essential part of any Necromunda layout. If your local train store doesn't have a bargain bin, a quick search of eBay will show various lots of broken or outdated train cars that can be had for a fair bargain.

-- Karl, Chicago Skirmish Wargames club member

Tuesday, September 8, 2015

Shipping Containers from Micro Machines Playsets


A while back I came across a bag of old Micro Machine playsets at a resale shop. They were largely incomplete, but the bag contained 11 of them and the price was great, so I picked them up as a basis for sci-fi shipping containers. In their original form they would have looked something like this.


(Picture via Toys from the Past)

After cleaning off any stickers, I clipped off the hinges and glued them shut. They're a very nice size, being tall enough to completely conceal a 28mm miniature or even a small vehicle, but thin enough to not take up too much space on the tabletop.


The round details are status markers from the Sedition Wars game that are meant to stack under the bases of the miniatures.


The logo details are mutation markers from the same game.


I used a heavy coat of "Magic Wash" (Future Floor Polish and paint) to weather these. I'm not entirely pleased with the results, as it's almost too dirty and drippy. If I use Magic Wash in the future, I'll probably use ink rather than paint. Still, the results are quite serviceable. I have three each of three different types, each type painted in a different manner.


They are pretty stable and can be stacked to make a rather impressive tower.


I also kitbashed a flatbed transport truck from various toy parts and a removable double container.


Again I'm not entirely pleased with the Magic Wash, but it looks fine on the tabletop.


These are a welcome addition to my sci-fi scatter terrain collection. They've already seen use in Necromunda and Mech Attack and I'm sure that's just the beginning.

-- Karl, Chicago Skirmish Wargames club member

Thursday, July 23, 2015

Terrain for Mattias, Part 1: The Negotiation


There's a lot of painting talent in our club. One member in particular has a very unique style that I like a lot. Mattias's approach has a palette and look that is quite unlike most other painters. You can see it on his less-than-accurately titled Amateur Hour blog.

When it came time for Necromunda, I really wanted him to paint my Eschers for me. I simply don't have the skill to paint these amazing miniatures in a satisfactory way. However, knowing his schedule, and my inability to pay him what his skill would deserve, I knew I would have to make a big offer.

I convinced him to accept two Macross models, a mess of custom terrain and use of the Eschers in the our Necromunda campaign in exchange for him painting up a 14-member Escher gang. In a few weeks we should be able to see the entire gang (his starting warband is already finished, and some are in this post), but today I will present my half of the bargain.

The rocks are seat cushion foam, torn by hand and then painted black with drybrushes of brown and bamboo.


A few of them have tunnels running under them. The piece near the middle with the monster on it was cut from the piece in the upper right with an electric carving knife. It perfectly matches and can be used separately or together to make a taller piece.


I hadn't though much about it, but Mattias showed me how they can be combined for some cool looking formations.

The buildings below are made with my typical methods of Dremeling away any sections I don't want, then covering the resulting openings and details I don't like with corrugated cardboard and sci-fi bits, plus lots of additional greebling. These first two in particular have lots of nice junky bits in the receptacles. Feel free to ask any construction-related questions in the comments section.

The first two buildings are similar in style, both based on Thomas and Friends railway buildings. I've painted them similarly and made them into a sort of recycling center.


I'm particularly proud of the spot on the back where minis can be placed in a lookout.


This second piece is more like two buildings on the same base.


I've cut away the chute that once connected them and put a dumpster in between them. A few bits on the other side implies a covered trash compactor.


This third building is a stock model from Dust Tactics Airfield Quonset Hut Accessory Pack with an added smokestack.


I really think that 28mm wargamers owes it to themselves to buy a box of these. About $20 will get you 4 incredibly useful buildings that can fit into any setting from 1941 through the far future. They even have opening doors! I've also found them useful as roofs on top of Dust Tactics Warzone Tenement buildings.

The final building is a converted Fisher Price toy.


I removed a window to allow access to the upper story and added a bit of machinery inside.


I also removed a variety of other parts and bracing from the boom and bucket to make the area accessible to miniatures.


An added shelf makes the upper first story window a nice lookout.


I was so happy with this one that I didn't want to let it go, so imagine my joy at finding another one at the resale shop a few weeks ago! I'm eagerly awaiting the completed Escher gang, though I will have to wait until the end of the campaign to take possession. When they're ready, I'll post them up and you all can judge if I made a good bargain.

-- Karl, Chicago Skirmish Wargames club member

Tuesday, June 30, 2015

Fantasy Terrain Bits and More Waterfront

Here are a couple more fantasy terrain pieces that I recently finished up. This first bit came in a bag of HO-scale items I found at a resale shop. It is a base to a plastic model building, but the building wasn't included. My original intention was just to make a piece of ground that I could put my individually-based trees on to denote an area of a forest. But that would be too simple...


So, I added some of Tim's Hirst Arts pieces to suggest very old ruins and glued down a thick layer of the "sand mix" concrete product that so nicely replicates slightly rocky soil.


A quick paintjob and a bit of greenery and it's done.

And here is a pier and boat set that I picked up at the bi-annual Games Plus auction. I'm not sure of the make -- perhaps Anisty or Ral Partha?


The casting is less-than-ideal, with quite a few air bubbles, and unfortunately some of these are on notable areas such as EVERYWHERE!


Luckily, termite-infested wood doesn't seem at all out of place on a medieval waterfront, so I just left them as-is and made almost no effort to clean them up.


Nothing fancy about their paint jobs, but the detail on these is very robust, so they are a cinch to paint with fast wet and dry brushes.


These items should be a nice addition to my slowly growing collection of waterfront terrain.


-- Karl, Chicago Skirmish Wargames club member

Thursday, June 18, 2015

Dragons Don't Share, But Mike Does!


After three posts about my latest sci-fi terrain, I've got a change of pace today with some fantasy terrain. This batch of ruins is from Reaper's Dragons Don't Share diorama set, which includes these ruins, a very large dragon and six adventurers.

Fellow club member Mike wanted the figures but gave me the ruins, so I wanted to honor his gift by getting this project done right away before it had a chance to fall into the bottomless bin of "upcoming projects." It's a pretty impressive terrain piece -- quite flexible, though that's not always a good thing. The physical material (Reaper's "Bones" PVC plastic) was warped, even it was hard to correct the warp even after soaking it in boiling water and adjusting the shape (the common solution for bent Bones). So I glued it to some hardboard.

Each piece of this kit meets up with the others like a puzzle, so I kept the bases the same size as the terrain sections.


I wanted to add a bit more grit to the surfaces, so after covering it in black gesso, I sprinkled a bit of sand while it was still wet. I flicked some on the sides of some of the walls too. For fast paint jobs that rely on drybrushing, I think more texture is better. You can see some of that here on the largest of the two stair pieces.


Here are the large and small stairs together.


After that, I started with a basecoat of ruddy dark brown, followed by a wet overbrush with Terra Cotta, a drybrush of Trail Tan and a very light drybrush of Bamboo. Except for the mystery red brick color, these were all Delta Ceramcoat craft paints.


I finished it off with patches of ground cover from a static grass mix and some moss from sawdust-based flock. I'm not totally happy with the greenery.


It looks OK, but there are some shaded spots (notably under the large stair section) where I should have left the ground cover off. It may be time to invest in one of those tools that makes the static grass stand up properly.

Of note: the tower section is actually two parts. The interior of the bottom section is nicely detailed even where it meets the top. As a bonus, the top of the tower looks pretty good placed separately on the ground.


All in all, I think Reaper has a fantastic terrain set here. Even those who are critical of the Bones material for smaller minis tend to agree that it's a good material for larger pieces. That is not to say it's perfect, but gluing it to a base helps a lot, and a bit of sand adds some of the grit that PVC terrain may lack.

I really hope they make this kit available in separate pieces. The current package is $75, which is a bit steep for someone who just wants the terrain. Though I will mostly use it for fantasy (Weathertop, perhaps?) it's very versatile. It could easily see use in steampunk settings, virtually any historical European conflict and -- despite its lack of skulls -- this kit wouldn't even be out-of place in the 41st millenium.

-- Karl, Chicago Skirmish Wargames club member

Tuesday, June 16, 2015

More Toybashing: Creepy Crawlers and an Egg Box


I'm back with two more pieces of sci-fi terrain made from old toys and cast-off junk. These started life as a "Creepy Crawlers" molding station and a vintage refrigerator egg box that Josh gave me.
 
For the egg box, I flipped it over and used the lid as the roof. I used a bunch of Rokenbok pieces both as supports and as flat sections for the floors.


I added some plastic slabs on the sides and roof, plus a few bits from the Pegasus Chemical Plant kit. This kit has become hard to find in the USA and I highly recommend buying it if you can find it. I use pieces from the kit on almost every terrain piece I make.


The end pieces are plastic doors are upgrade pieces from the Sedition Wars game. The ladders are cut from pieces of toy Power City train track.

Here's a look at the original Creepy Crawlers kit. I don't have any in-progress pics of the Creepy Crawlers piece, but here's what it was made from.


I separated the toy from its base to shrink the footprint a bit, then rebuilt it into a sort of forge.


I covered up many of the screw holes with either plaster or round bits of plastic punched from blister pack plastic with a standard paper hole punch.


Except for a small grate and a few other pieces, almost all the added bits are from Mantic Battlezone accessory sprues. This thing just screams Necromunda to me. Though it's finished, I feel that I need to build some kind of gondola or reservoir to hold whatever it dumps out of its bucket.

The egg box building doesn't have quite the same Necromunda look, but it's a nice piece that is perhaps a bit more futuristic. It looks to me like some sort of chemical storage facility.


The simple orange, green and gray scheme has some nice contrasts.


I really like these Sedition Wars doorway bits, though I wish I'd chosen a color other than aluminum, which looks an awful lot like the grey walls after a couple washes and a dusty tan drybrush.


The bit in the middle is a hatch that lines up with a ladder from the 2nd level. The roof looks good enough, but perhaps I should have done something to split up the one-piece look of the lid.

Overall, the egg box building has a very unique look that sets it apart from the rest of my collection. I particularly like the way miniatures can be on a second level elevation and still have overhead cover. Now that I'm occasionally playing Necromunda, I'm thinking a lot more about multilevel terrain and cover. Both of these pieces are well in that vein.

-- Karl, Chicago Skirmish Wargames club member