Showing posts with label necromunda. Show all posts
Friday, September 11, 2015
Bridges and Scuttles from O-Scale Train Cars
Over the past few years I've picked up a number of broken O-scale train cars, and I've finally put them to good use. Most of these damaged in some way, usually lacking wheels and trucks, but that didn't bother me since I didn't need them anyway. Aside from price, the main benefit to using model train cars is the great detail, which makes drybrushing a breeze. Check out those great rivets and ladders!
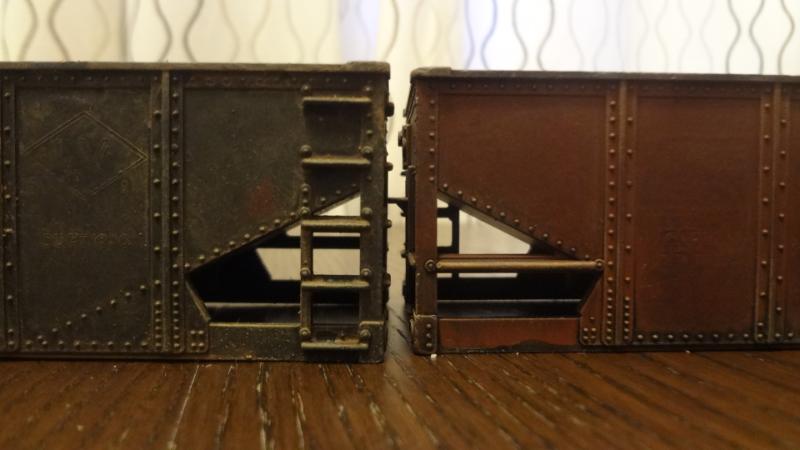
Here are coal and sand scuttles made from open-topped hopper cars. I used my Dremel 543 blade to cut off the bottom of the cars and smooth them out.
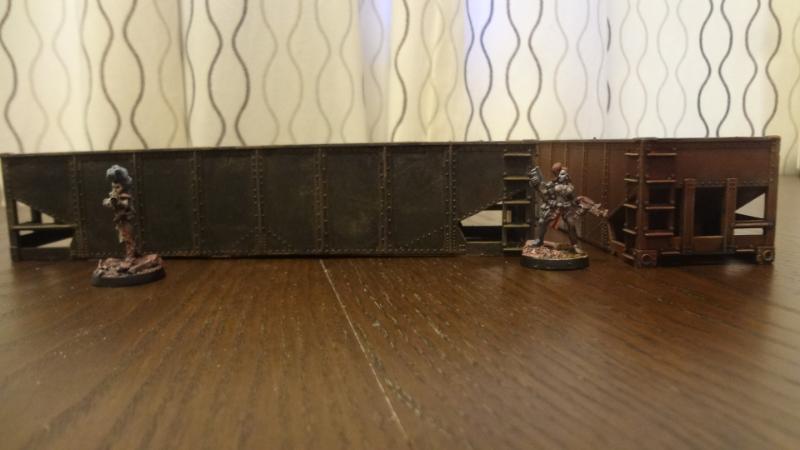
Then I glued in a cardboard bottom and added ballast. The coal is gravel painted black, drybrushed and then given a bit of magic wash for a coal-like sheen.
Done correctly, the ballast will bring the floor level up just enough to allow 28mm figures to take cover but still see over the edges.
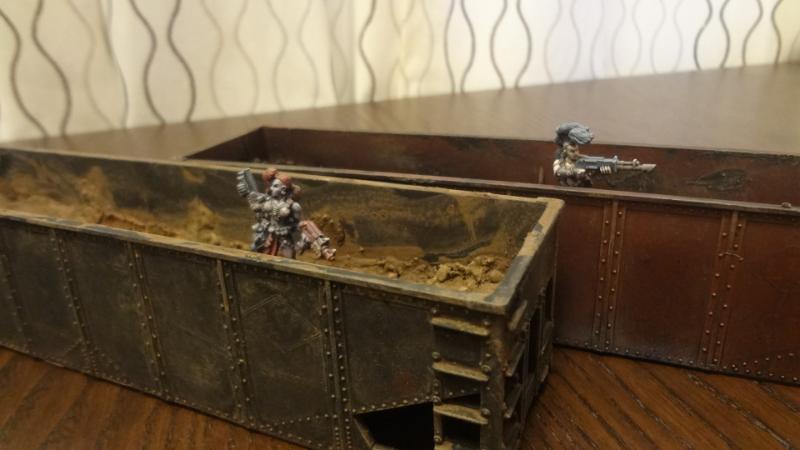
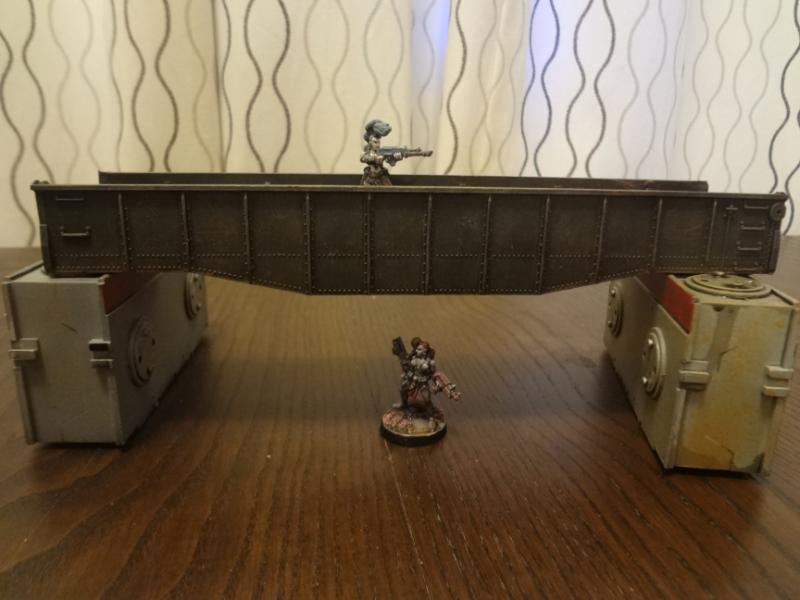
I did similar work on two gondolas and a Fisher Price Geotrax bridge. I filled the molded-in tracks on the Fisher Price bridge with cement and gravel, though I probably should have cemented over the whole area. The odd melted section of the middle bridge one came that way, which is probably why it was so cheap. Looks pretty cool to me.
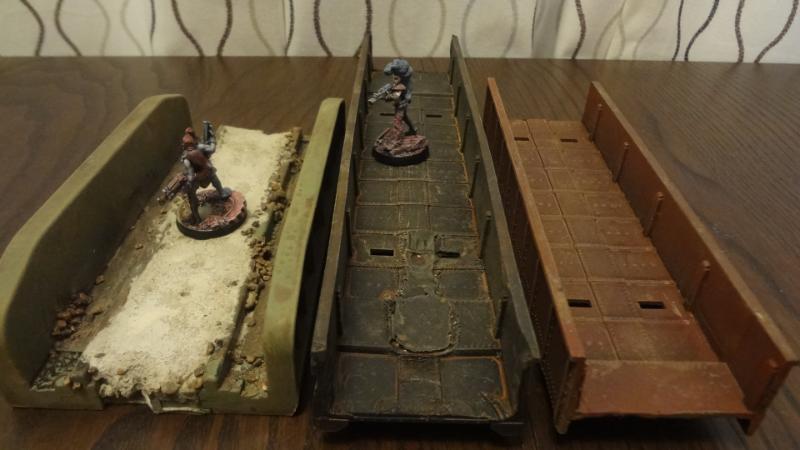
The black bridge simply had the ends cut off.
The red bridge was also shortened.
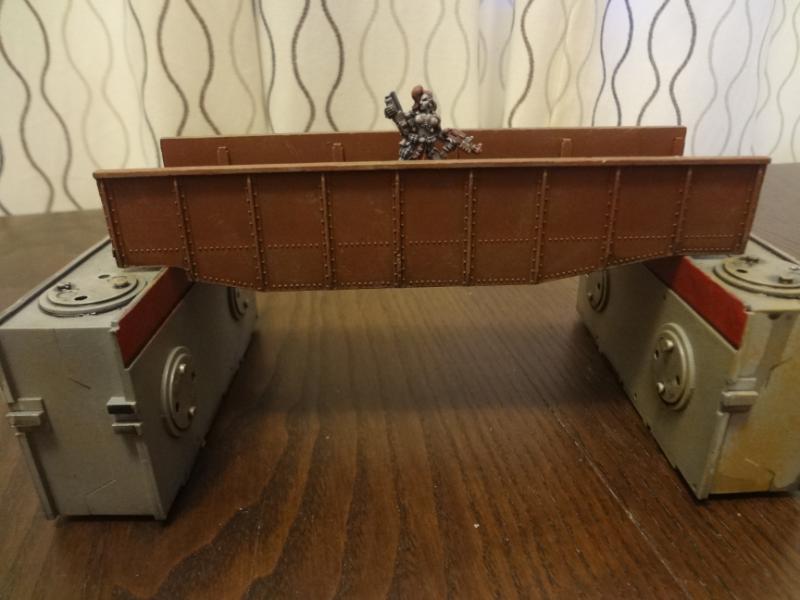
The Fisher Price bridge was actually meant to be used flat on the ground and had big chunks of ground detail molded on the sides. I cut all that off!
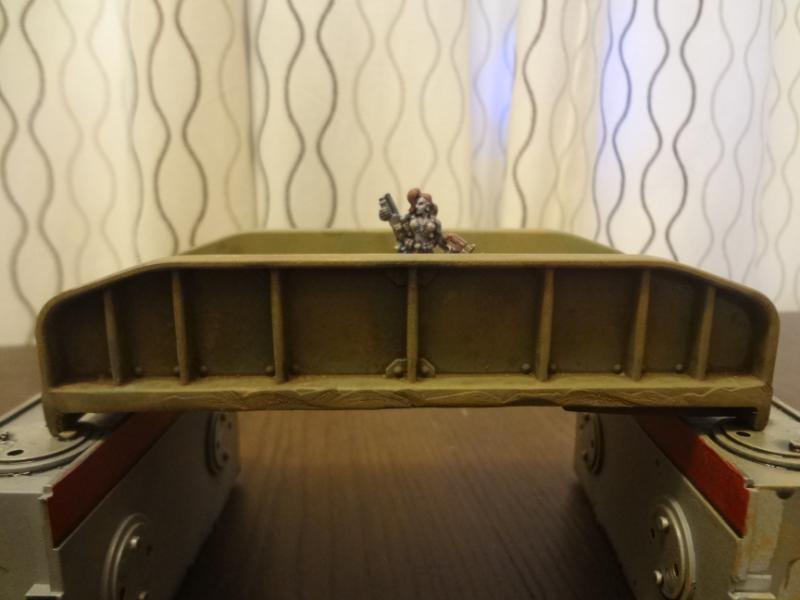
All three were simply spray painted, then washed and drybrushed with tan. The end result is a set of extremely useful terrain pieces for very little money. I've got a number of industrial terrain pieces that have buckets or spouts that will spill nicely into the scuttles. Likewise, sturdy bridges and gangways are an essential part of any Necromunda layout. If your local train store doesn't have a bargain bin, a quick search of eBay will show various lots of broken or outdated train cars that can be had for a fair bargain.
-- Karl, Chicago Skirmish Wargames club member
Friday, September 4, 2015
The Exchange with Mattias, Part 2: Escher Gang
Before his departure to Hawaii, Mattias and I arranged a trade of terrain and miniatures. Earlier I showed off the buildings and cliffs that I built for him. Today I've got 15 Necromunda figures that he painted for me. All but one of these are unmodified Games Workshop Escher figures, based on Inkwell Industries resin bases.
The smaller size pics don't do these justice so I've uploaded large versions of each. If you really want to see them close up, go ahead and "open in new tab" any of these images to see the figs in their full glory.
Juves
The lowly cannon fodder of the gang. I had asked for a variety of skin tones. In Mattias' unique grayscale-based painting style, this results in a range from an elfin pale to a shadowed grey.
Ranged Weapon Gangers
At first I was a bit confused by the somewhat monochrome bases, but now I think it's really a nice unifying effect.
More Gangers and Heavies
Note the great sludgy wet effects. Most of the figures have a bit of it on their bases, but it's particularly notable here. Also, I'm really glad to have the plasma gun figure. The weapon is a nice in-between size that could easily be work as a plasma or heavy plasma gun.
Close Combat and Leader Figures
Very glad to have the iconic (and now ridiculously expensive) "Mad Donna Ulanti" figure as seen on the right. Also, the figure on the far left is not Games Workshop and has a rather interesting history. The original sculpt was a "Mutant Dominatrix" in the Shockforce game. Mega Minis (now Johnnyborg) acquired the rights and re-released her in a slightly resculpted form without her mutant characteristics (gills, tail, etc) and this was the example I acquired.
Unfortunately, the arms and hands were just terrible, so I chopped them off just below the elbows and attached the arms from a Heroclix Elektra figure, with a Necromunda autogun attached. She also has a Rogue Trader-era bolt pistol holster on her right leg. I think she fits in pretty well, and for those interested, she is still available here.
As a bonus, here's a neat figure I picked up from Mattias when he was selling off a few of his painted figures. Lots of potential uses for him (cultist, mage, mutant, you name it) in a variety of genres, but I particularly thought that in Necromunda he could be a Wyrd, which is a sort of independent magic user. He scales pretty well with an average ganger. Not sure of the manufacturer, but I'm pretty sure he's a vintage sculpt of some sort.
Lastly, my pictures have made the paint jobs slightly more muted than they appear in real life. Here's a shot with flash that washes out the figs a bit, but still shows off a bit more of the contrasts and certain details and reveals the wet effects on the bases.
And there you have it! Fifteen excellently painted Escher figs with enough variety to cover most any gang arrangements. I'm very happy to have these, as the Escher have long been favorites of mine, but I never felt that my dip-based painting style would have been appropriate for these sculpts.
-- Karl, Chicago Skirmish Wargames club member
Tuesday, August 25, 2015
Necromunda Campaign: Lower Wacker Hive, Session #3
Last month, while Josh and Pat and were playing The Dogs & The Dust, Ian and I put together a Necromunda game. Ian's Delaque "Spectres" faced off against my Van Saar "Fjord's Folly."
On the right flank, Fjord led half his gang across a viaduct.
On the opposite side, the Spectres advanced through some ruined habs.
The Delaque didn't stay in the habs for long, and with the support of their heavy stubber, they quickly seized the center of the board.
Unfortunately for them, the center of the board was also prime pickings for Gunborg and his hunting rifle.
Back on the right flank, the Spectres and the Folly battled back and forth. Eventually the Folly pushed the Spectres back.
Though the Folly were successful, it was a somewhat hollow victory. Injured juve "Ove" was captured by the Spectres and promptly sold to slavers. Despite Fjord's Folly's ongoing string of bad luck, I'm continuing to enjoy this campaign. The rules, opponents, figures, terrain and scenarios have all been great! What more could a gamer want?
-- Karl, Chicago Skirmish Wargames club member
On the right flank, Fjord led half his gang across a viaduct.
On the opposite side, the Spectres advanced through some ruined habs.
The Delaque didn't stay in the habs for long, and with the support of their heavy stubber, they quickly seized the center of the board.
Unfortunately for them, the center of the board was also prime pickings for Gunborg and his hunting rifle.
Back on the right flank, the Spectres and the Folly battled back and forth. Eventually the Folly pushed the Spectres back.
Though the Folly were successful, it was a somewhat hollow victory. Injured juve "Ove" was captured by the Spectres and promptly sold to slavers. Despite Fjord's Folly's ongoing string of bad luck, I'm continuing to enjoy this campaign. The rules, opponents, figures, terrain and scenarios have all been great! What more could a gamer want?
-- Karl, Chicago Skirmish Wargames club member
Monday, July 6, 2015
Necromunda Campaign: Lower Wacker Hive, Session #2
The second round of our Necromunda campaign took place a couple weeks ago. Here's the account of the two encounters between the Panther Moderns and Fjord's Folly.
Van Saar leader Fjord is not known for his success or his common sense, so it was no surprise that when his gang Fjord's Folly encountered the Delaque-affiliated Panther Moderns, they immediately instigated a showdown (we played the Shoot-Out Scenario). The Panther Moderns were outnumbered and drew first.
If Fjord's men thought the quick draw was a sign of weakness, they were in for a rude awakening, as the Moderns quickly outgunned them and took Van Saar ganger Iver captive.
This was, of course, cause for the Folly to attempt a rescue mission scenario as our second game of the night.
Things went smoothly at first. Fjord's Folly carefully advanced on the Moderns hideout where Iver was being displayed on a second story balcony.
However, the Folly were too quick to reveal themselves and began taking fire almost immediately.
Fjord himself went down, but quickly recovered. Soon thereafter, the Panther reinforcements began arriving.
Concentrated fire drove off the first reinforcements, but it wasn't long before jammed weapons and casualties blunted Fjord's advance. Panther Antonio with his heavy stubber was particularly fearsome perched on atop the gang headquarters.
When the balcony guard was taken down and a weapons malfunction took Antonio's big gun out of commission, the Folly made one more attempt to take the balcony -- only to find another ganger holding the line with his shotgun and steely gaze.
Thus beaten back, the Folly bottled out.
After the battles, the Panthers took pity on their captive Van Saar gangers and sold them back the Folly. However, Fjord's relief was short-lived, as ganger Erikki died that night from wounds sustained in the battle.
The campaign is going well so far. The Panther Moderns are the clear frontrunners, but no gang seems to have sustained massive losses, and all continue to accrue experience and advances. I'm especially impressed with the scenarios. The original authors clearly put a lot of thought into them, and the author/editors of the Necromunda Community Edition seem to have made some nice subtle tweaks to balance them a bit.
Despite a 1-2 record with my gang Fjord's Folly, I'm having a ton of fun and am looking forward to the next round of Necromunda.
Here are a few shots of the layout and game that was going on next door to us. Mattias' "Madame Two Swords' Gang of Horrors" Eschers await the arrival of Jon's "Red Scare" Redemptionists at an abandoned transit node.
You can see Jon expressing disbelief at the surprising ineffectiveness of his Redemptionist's many flame weapons.
Until next time!
Tuesday, June 16, 2015
More Toybashing: Creepy Crawlers and an Egg Box
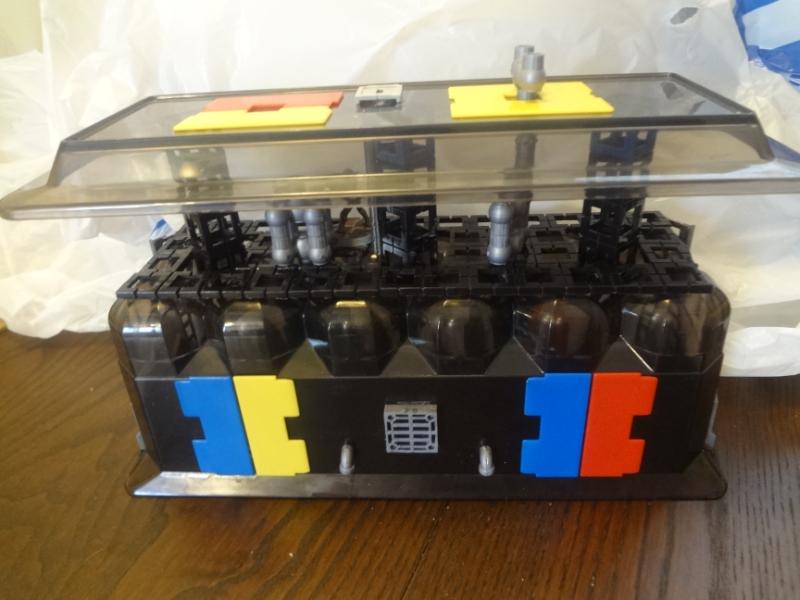
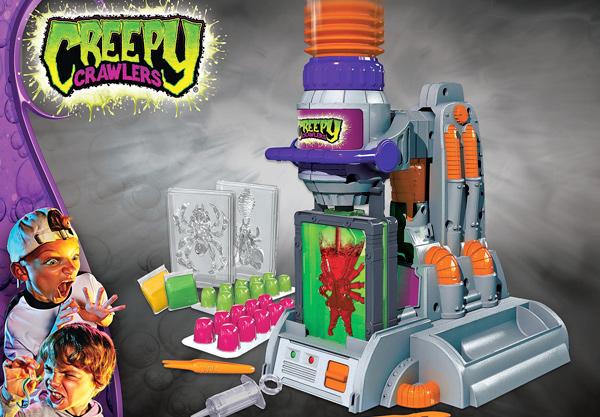
I'm back with two more pieces of sci-fi terrain made from old toys and cast-off junk. These started life as a "Creepy Crawlers" molding station and a vintage refrigerator egg box that Josh gave me.
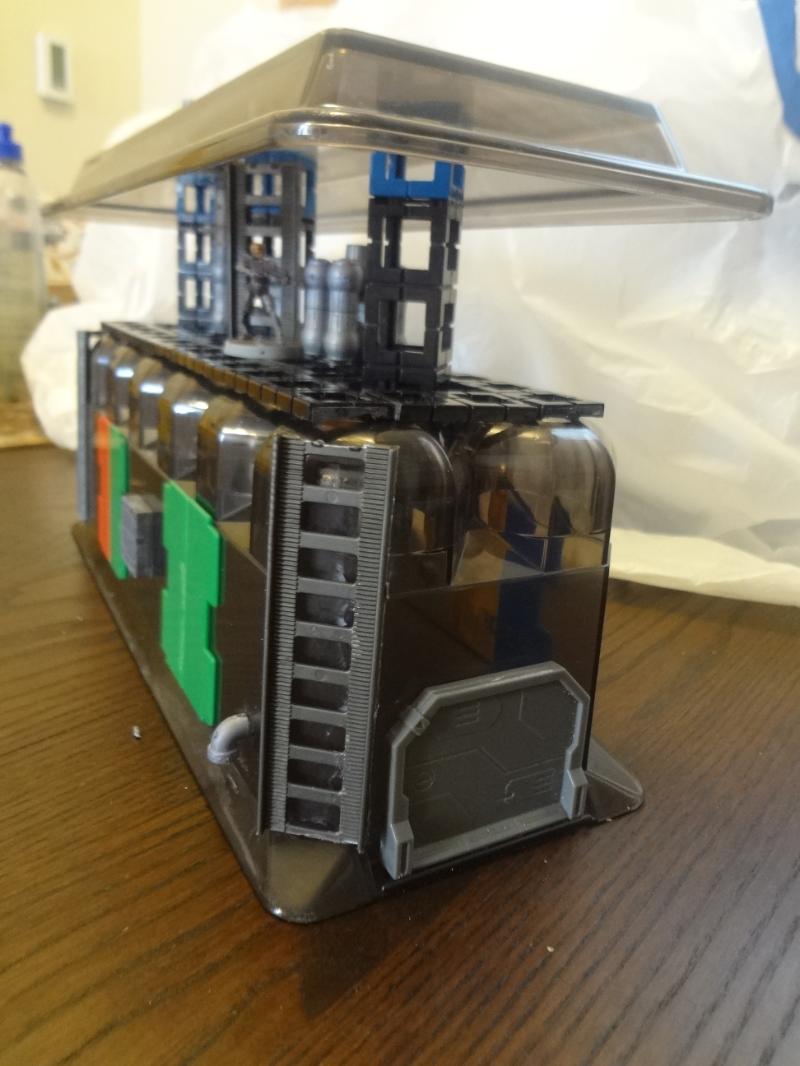
For the egg box, I flipped it over and used the lid as the roof. I used a bunch of Rokenbok pieces both as supports and as flat sections for the floors.
I added some plastic slabs on the sides and roof, plus a few bits from the Pegasus Chemical Plant kit. This kit has become hard to find in the USA and I highly recommend buying it if you can find it. I use pieces from the kit on almost every terrain piece I make.
The end pieces are plastic doors are upgrade pieces from the Sedition Wars game. The ladders are cut from pieces of toy Power City train track.
Here's a look at the original Creepy Crawlers kit. I don't have any in-progress pics of the Creepy Crawlers piece, but here's what it was made from.
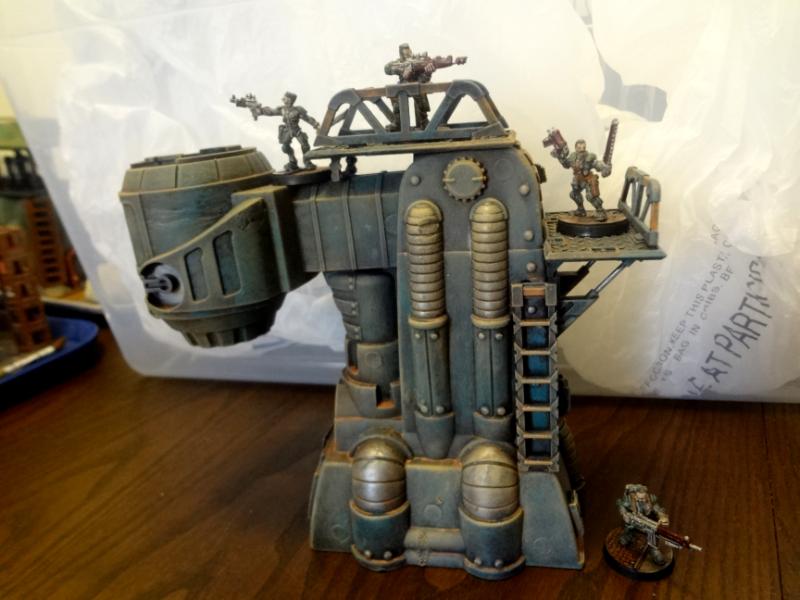
I separated the toy from its base to shrink the footprint a bit, then rebuilt it into a sort of forge.
I covered up many of the screw holes with either plaster or round bits of plastic punched from blister pack plastic with a standard paper hole punch.
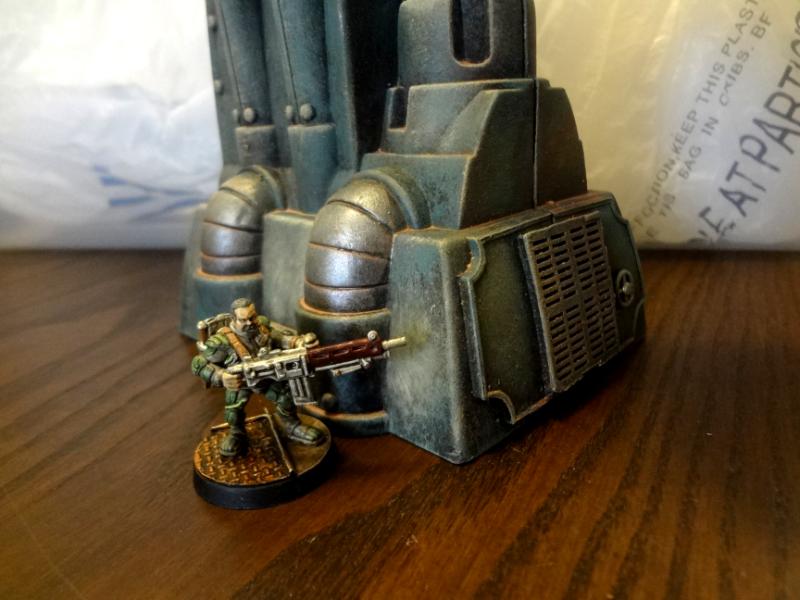
Except for a small grate and a few other pieces, almost all the added bits are from Mantic Battlezone accessory sprues. This thing just screams Necromunda to me. Though it's finished, I feel that I need to build some kind of gondola or reservoir to hold whatever it dumps out of its bucket.
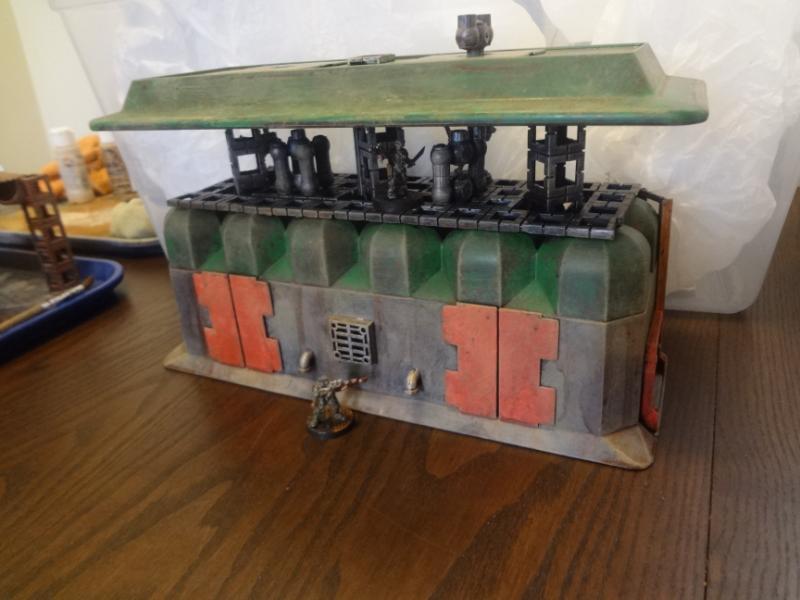
The egg box building doesn't have quite the same Necromunda look, but it's a nice piece that is perhaps a bit more futuristic. It looks to me like some sort of chemical storage facility.
The simple orange, green and gray scheme has some nice contrasts.
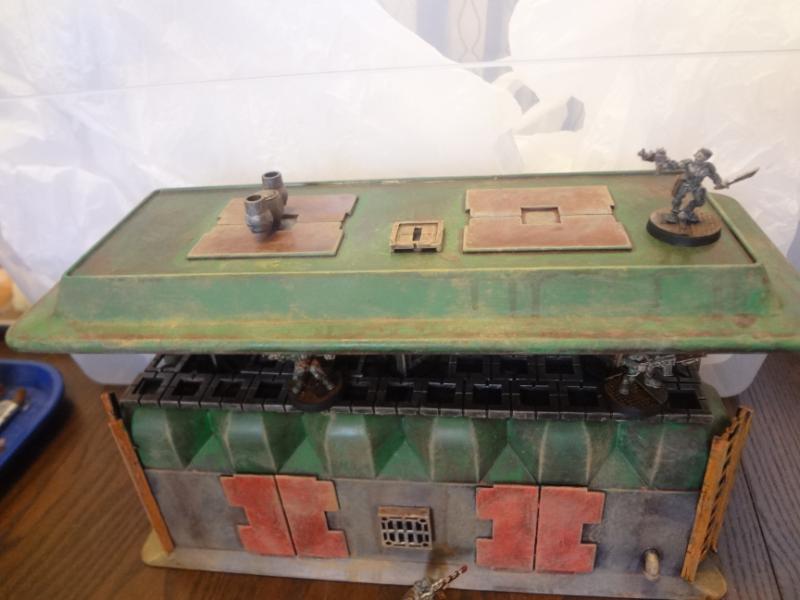
I really like these Sedition Wars doorway bits, though I wish I'd chosen a color other than aluminum, which looks an awful lot like the grey walls after a couple washes and a dusty tan drybrush.
The bit in the middle is a hatch that lines up with a ladder from the 2nd level. The roof looks good enough, but perhaps I should have done something to split up the one-piece look of the lid.
Overall, the egg box building has a very unique look that sets it apart from the rest of my collection. I particularly like the way miniatures can be on a second level elevation and still have overhead cover. Now that I'm occasionally playing Necromunda, I'm thinking a lot more about multilevel terrain and cover. Both of these pieces are well in that vein.
-- Karl, Chicago Skirmish Wargames club member
Wednesday, June 10, 2015
Rokenbok Terrain Bonanza
A week ago I was at my local resale shop when I came across a Rokenbok Monorail Start Set.
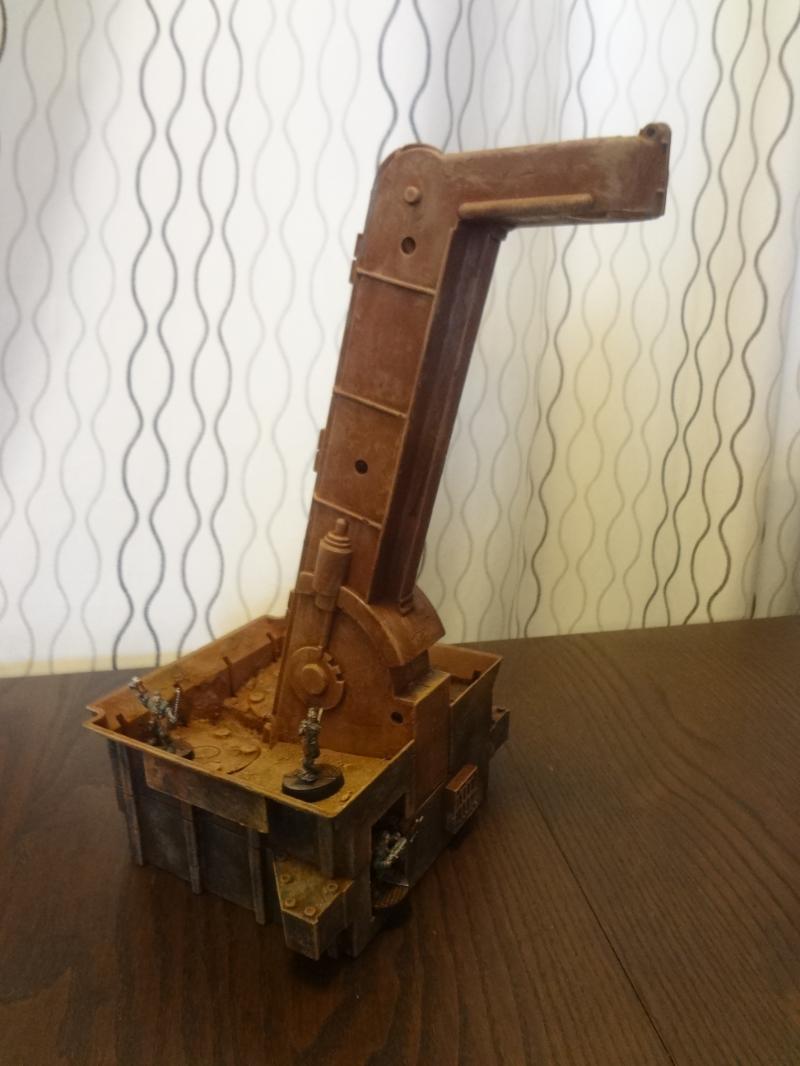
It lacked the train and many of the other small elements, but the other large elements -- a ball elevator and storage tank -- that intrigued me most.
For those who don't know, Rokenbok is a building system based around mostly cubed construction elements and radio controlled items such as trucks, monorails and other motorized features. Despite having other projects in the pipeline, as soon as I got home I broke out my tools and glue and started building.
First off the assembly line was this Storage Tank.
It is mostly stock pieces, except for the addition of a grating on top cut from circular cross stitch mesh (which is an excellent way to add industrial-looking floors to any round item). I also added some corrugated floors over the downspouts (not pictured).
The second item is the Ball Elevator, originally intended to lift plastic balls up into the storage tank. After cutting away the power cords, I removed the rubber conveyor belt and glued in some lift sections. A bit of cutting enlarged the top spout enough to fit miniatures up there.
A couple of small bits from the Pegasus Chemical Plant kit were added. The cavity in the back for the power cord is perfectly sized for 28mm figures.
Both terrain pieces were undercoated with ruddy brown Kryon spray primer. Then I added a wet overbrushed color layer, followed by a brown wash and a light tan drybrush to dust everything up.
The inner areas of the elevator also got some heavy ballast using the concrete topper mix that I've been trying out. It's concrete mixed with a nice variety of gravel and sand. The concrete portion isn't as gritty as plain sand (which takes a drybrush extremely well), but it looks like soil when painted, and the mix of gravel sizes is great.
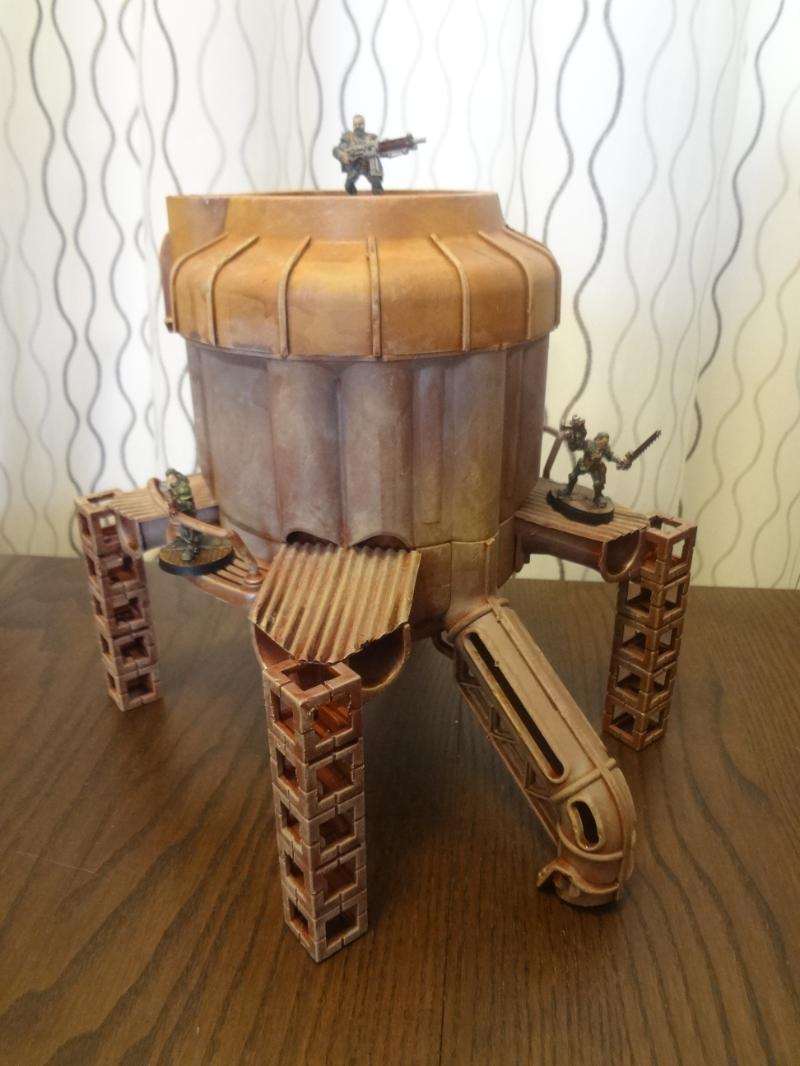
Here's what they look like with paint. Adding pieces of corrugated cardboard turns the downspouts into useable area and makes the entire second story of the tank much more useable. If you don't have any corrugated cardboard on hand, just grab a few Starbucks drink sleeves.
Looks like I forgot to include a ladder up to the top though...
The elevator makes both a very fortified position and a means to access higher sections of a multilayer terrain layout. This bad boy is tall!
Though it looks plain blue in the picture, the paint is actually a really nice blue-green color.
The bucket sections are close enough to avoid disrupting movement in most gaming rulesets.
These were on the table for last weeks game, and they looked great. I'm especially keen to see them as part of a Necromunda layout. The square supports that make up most of the Rokenobok system run the risk of looking a bit similar if used to much, but they have a nice futuristic look, and I'll be using these parts in future constructions.
Lastly Rokenbok toys are a bit too expensive to buy at retail just for terrain purposes (this set cost almost $200 in stores!), but I'll definitely be keeping an eye out for them at the resale shop.
-- Karl, Chicago Skirmish Wargames club member
It lacked the train and many of the other small elements, but the other large elements -- a ball elevator and storage tank -- that intrigued me most.
For those who don't know, Rokenbok is a building system based around mostly cubed construction elements and radio controlled items such as trucks, monorails and other motorized features. Despite having other projects in the pipeline, as soon as I got home I broke out my tools and glue and started building.
First off the assembly line was this Storage Tank.
It is mostly stock pieces, except for the addition of a grating on top cut from circular cross stitch mesh (which is an excellent way to add industrial-looking floors to any round item). I also added some corrugated floors over the downspouts (not pictured).
The second item is the Ball Elevator, originally intended to lift plastic balls up into the storage tank. After cutting away the power cords, I removed the rubber conveyor belt and glued in some lift sections. A bit of cutting enlarged the top spout enough to fit miniatures up there.
A couple of small bits from the Pegasus Chemical Plant kit were added. The cavity in the back for the power cord is perfectly sized for 28mm figures.
Both terrain pieces were undercoated with ruddy brown Kryon spray primer. Then I added a wet overbrushed color layer, followed by a brown wash and a light tan drybrush to dust everything up.
The inner areas of the elevator also got some heavy ballast using the concrete topper mix that I've been trying out. It's concrete mixed with a nice variety of gravel and sand. The concrete portion isn't as gritty as plain sand (which takes a drybrush extremely well), but it looks like soil when painted, and the mix of gravel sizes is great.
Here's what they look like with paint. Adding pieces of corrugated cardboard turns the downspouts into useable area and makes the entire second story of the tank much more useable. If you don't have any corrugated cardboard on hand, just grab a few Starbucks drink sleeves.
Looks like I forgot to include a ladder up to the top though...
The elevator makes both a very fortified position and a means to access higher sections of a multilayer terrain layout. This bad boy is tall!
Though it looks plain blue in the picture, the paint is actually a really nice blue-green color.
The bucket sections are close enough to avoid disrupting movement in most gaming rulesets.
These were on the table for last weeks game, and they looked great. I'm especially keen to see them as part of a Necromunda layout. The square supports that make up most of the Rokenobok system run the risk of looking a bit similar if used to much, but they have a nice futuristic look, and I'll be using these parts in future constructions.
Lastly Rokenbok toys are a bit too expensive to buy at retail just for terrain purposes (this set cost almost $200 in stores!), but I'll definitely be keeping an eye out for them at the resale shop.
-- Karl, Chicago Skirmish Wargames club member