Showing posts with label scenarios. Show all posts

Tuesday, September 29, 2015

Cleared to Engage: The Mystery of the Atom


Last week Josh and I got together to try out Cleared to Engage, a fun, fast-playing ruleset written by P. Todoroff and hosted over at his blog Stalker7. As you might surmise, the intent of the ruleset is to provide a basic framework of rules for running sci-fi, post-apocalyptic and/or cyberpunk skirmish games.

These are Todoroff's homebrew rules used for most of the games featured on his blog. CTE lacks a points system or premade character profiles, but that was no problem for us, as we relish the challenge of crafting scenarios. We were eager to try the rules out! I set the scenario in the Derzhensko Exclusion Zone, which is one of several homebrew settings we've used for our sci-fi and post-apoc games. Here's the scenario outline:

The Lure of the Atom
Location: Derzhensko Exclusion Zone
Area: Unsecured Perimeter K-18

The Zone’s porous perimeter has been compromised by a group of ex-military scavengers, trespassers and adventurers. The goal of the expedition is a single unexploded atomic bomb -- a relic from a past era, when such weapons rained down from the skies. Could it hold the secret to the Zone’s existence? The explorers must first get past the defenders of a small settlement nearby. These hardy folk have spent years rebuilding some semblance of a society in the ruins of the Zone, and they are unwilling to watch their hard work get destroyed by invaders.


The game pitted a group of veteran stalkers, mercenaries and ex-military types (backed up by some rather frightful mutants straight out of the lab) against a ragtag band of dug-in settlers armed with mostly improvised weapons. The stalkers' objective was to reach the atomic bomb and explore its mysteries. Their secondary objective was to reach the water tank outside the greenhouse and restock their dwindling supplies.


The settlers' objective was to annihilate the mercs -- and as we saw in our game, a combination of poor terrain placement and the sheer lethality of "Cleared to Engage" helped the settlers achieve their goal quite nicely.


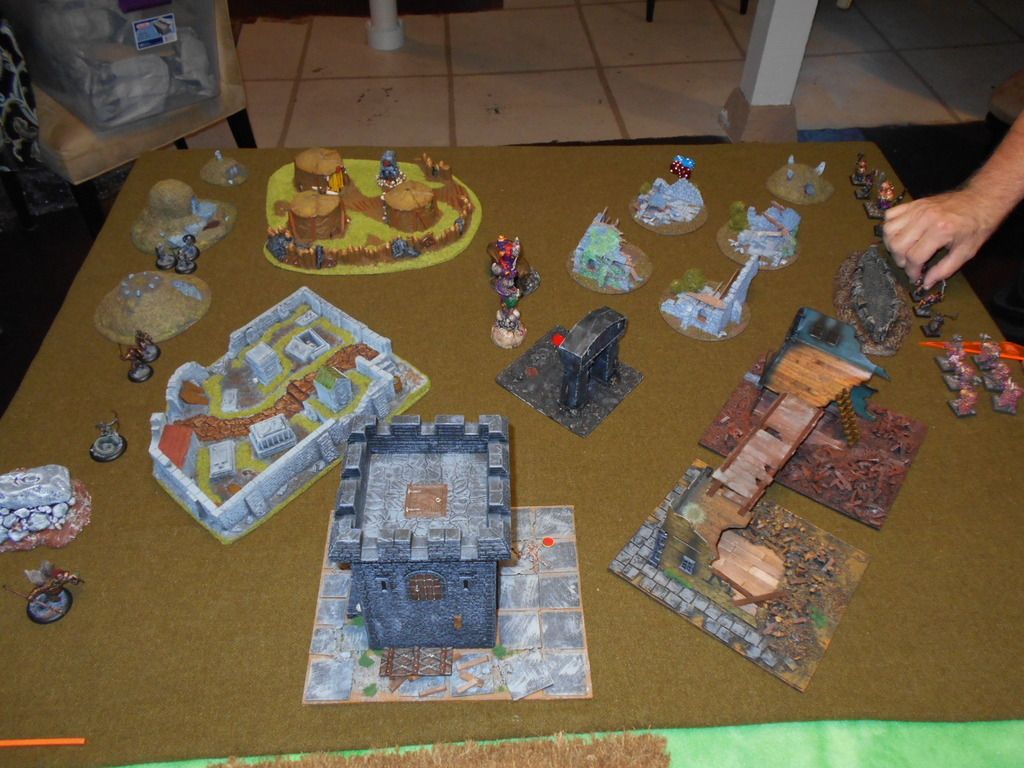
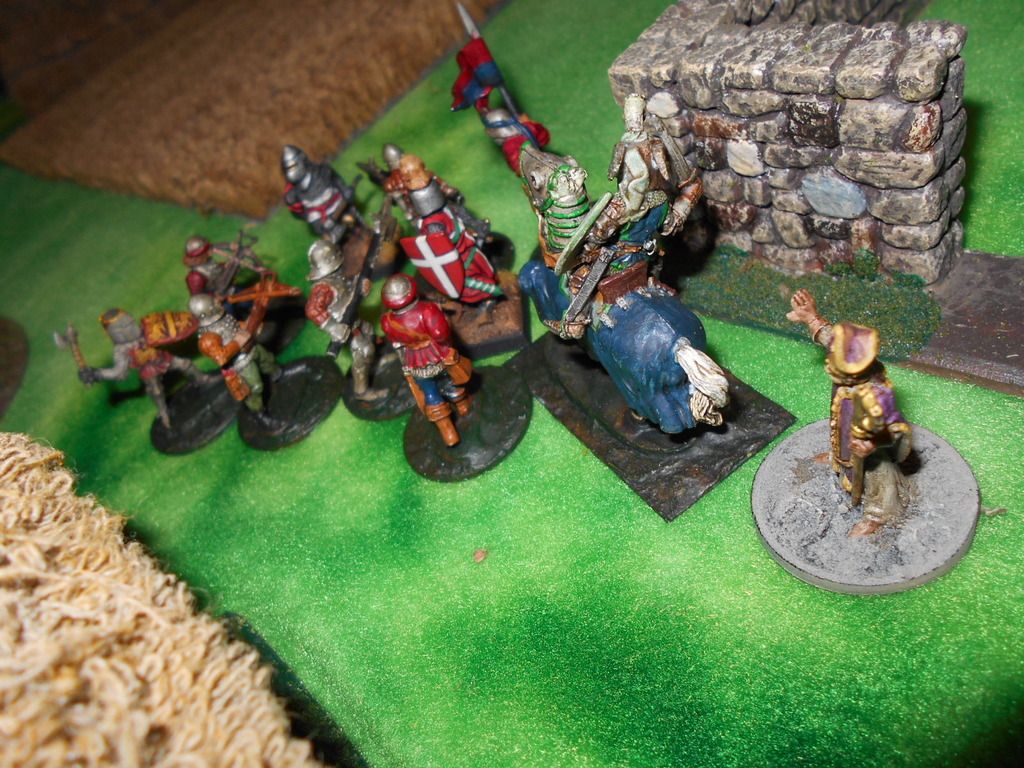
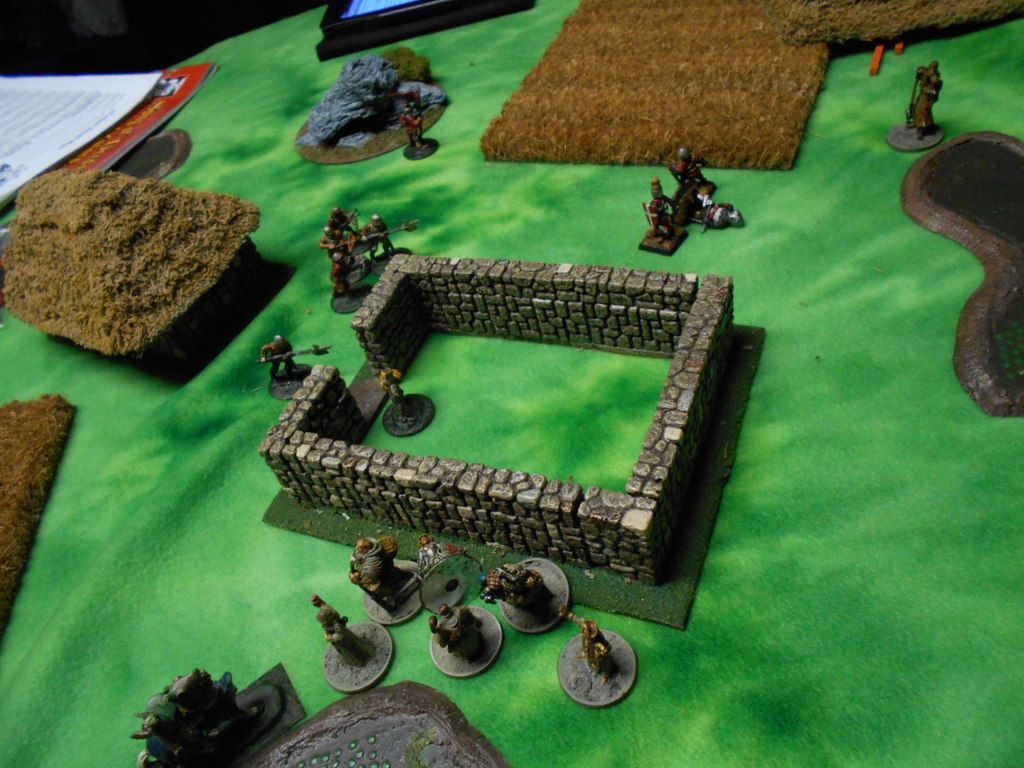
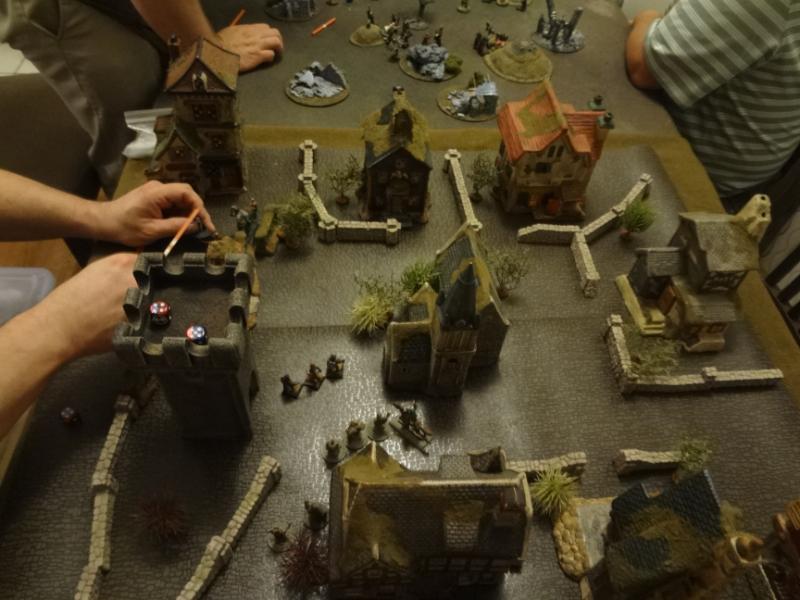
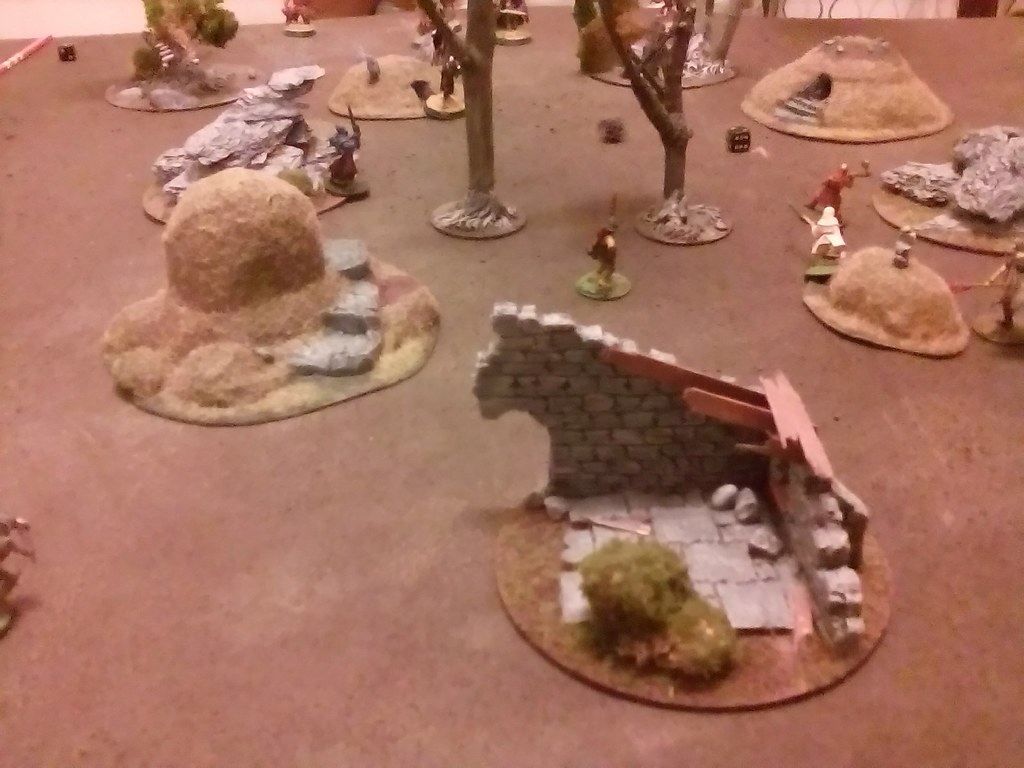
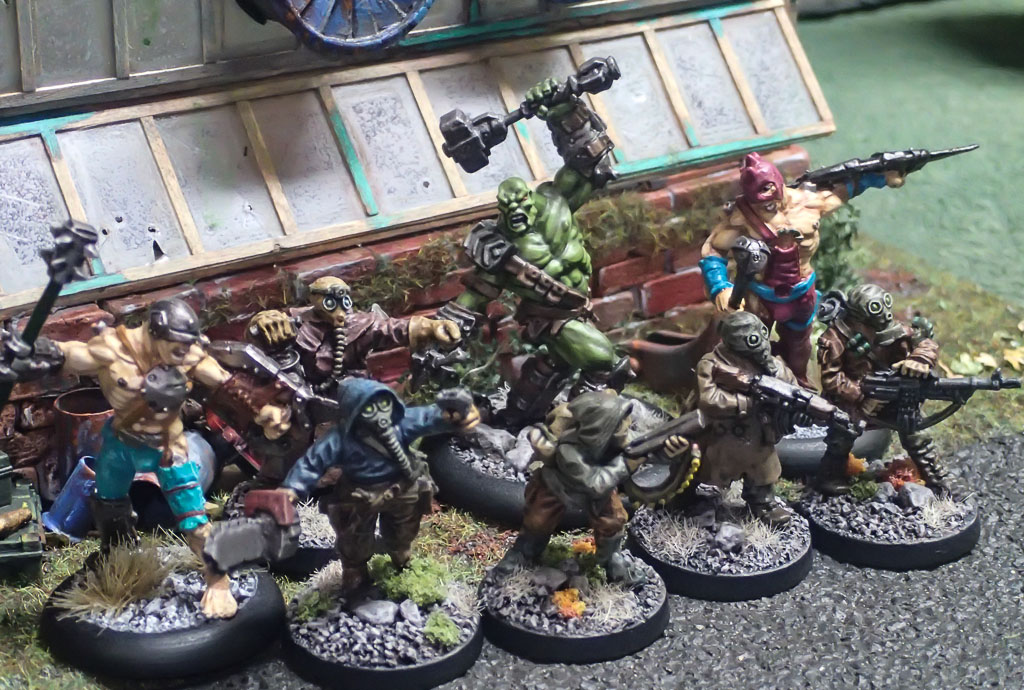
I deployed my mercs in the wooded perimeter outside the settlement, intending to use the "Snipers in the Woods" scenario rule to lay down withering cover fire while my guys advanced. I knew my weapons and equipment were better than the settlers' pitiful rakes and garden hoes. (That's sarcasm, of course. As you can see in the pics, Josh's guys were lovingly converted to hold all manner of nifty weapons, from a leaf trimmer to a stop sign to a pneumatic air gun!)


I advanced through the woods, sending two groups of guys toward the two objectives. In this pic, Floyd the Mega Mutant and Yadonovsky the stalker close in on the water tank, which is attached to the side of the greenhouse -- and critically, within range of the settlers' firearms!


A turn later, they arrived, taking cover behind the greenhouse before sprinting to the water tank.


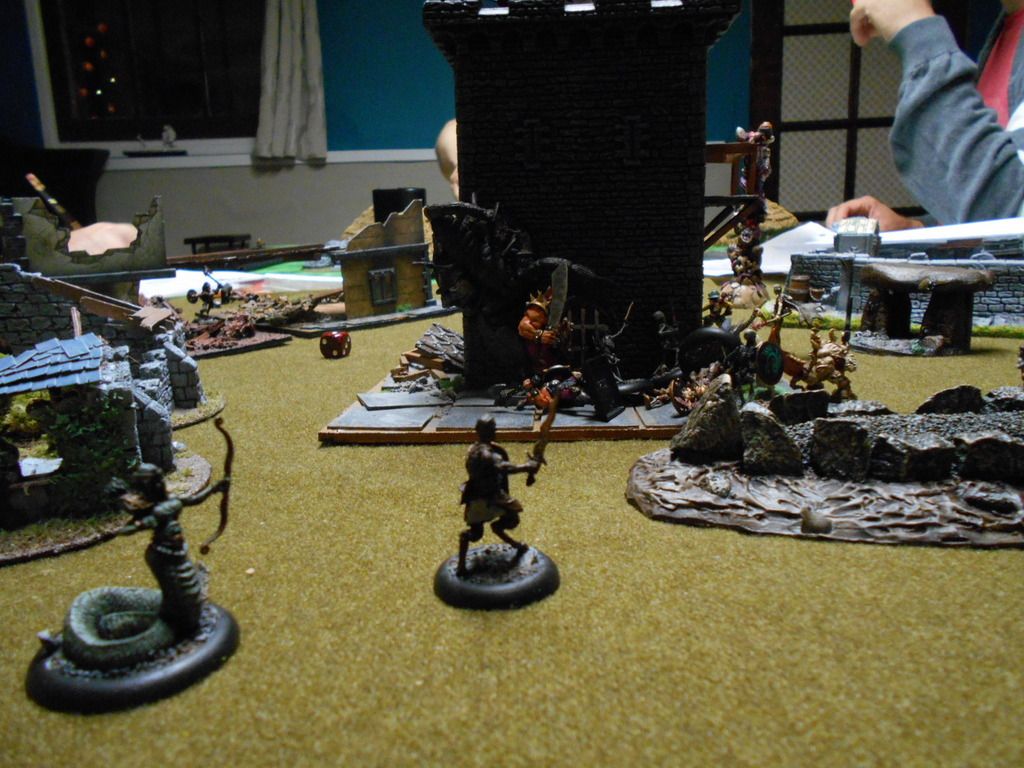
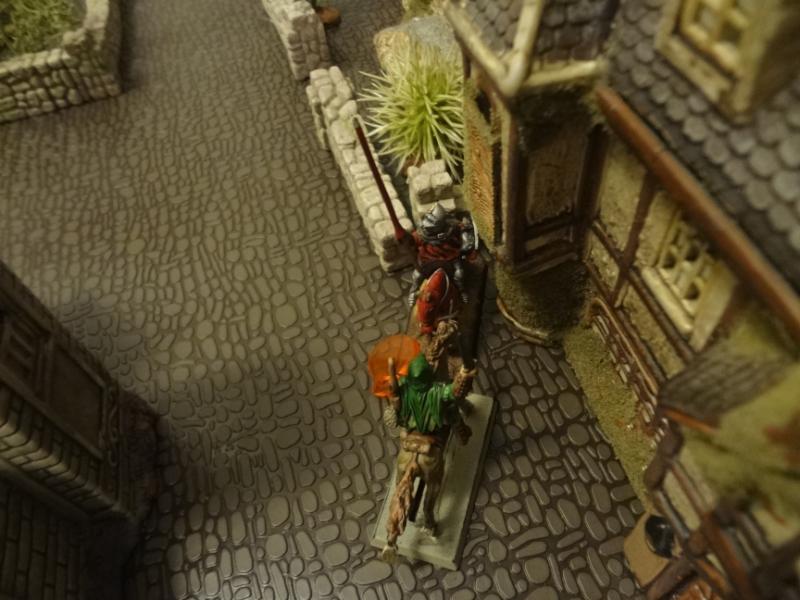
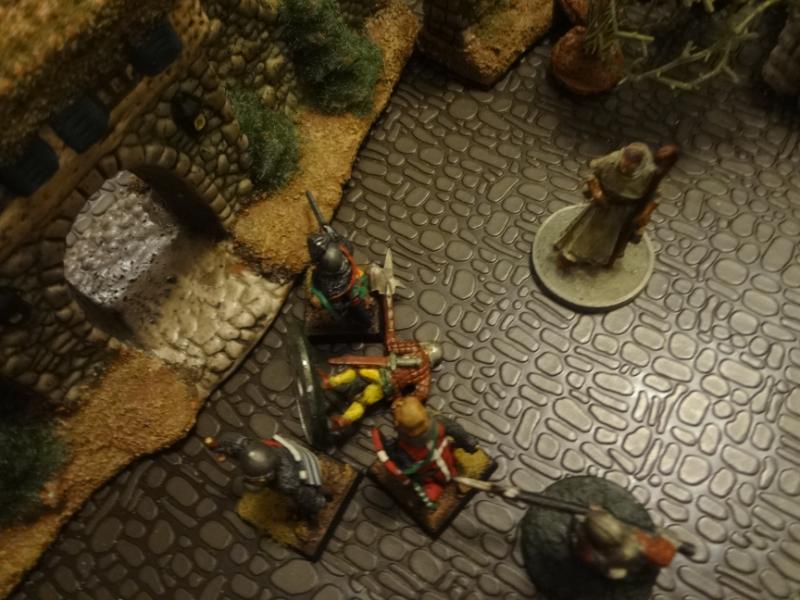
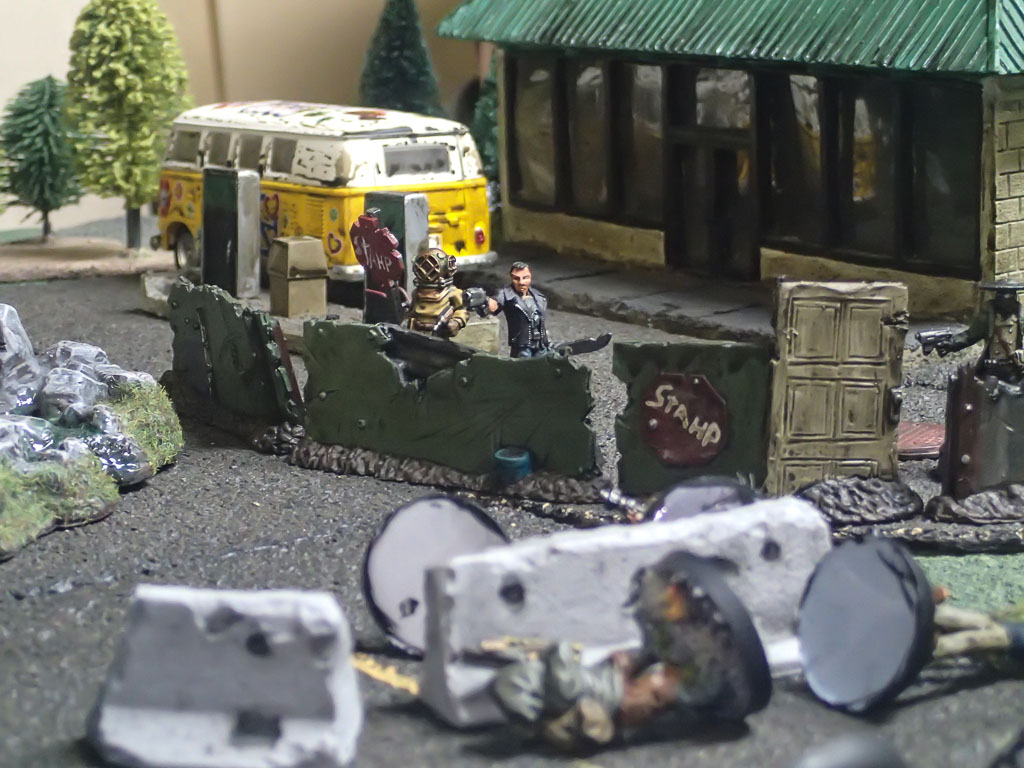
Over by atomic bomb, another pair of mercs was advancing cautiously, using broken barricades as cover. Alas, they were ambushed by Josh's recon element, which had been forward deployed near some shipping containers.


Actually it looks like the recon settler killed the mutant berzerker and was then slain herself. Here's the pic -- you be the judge.


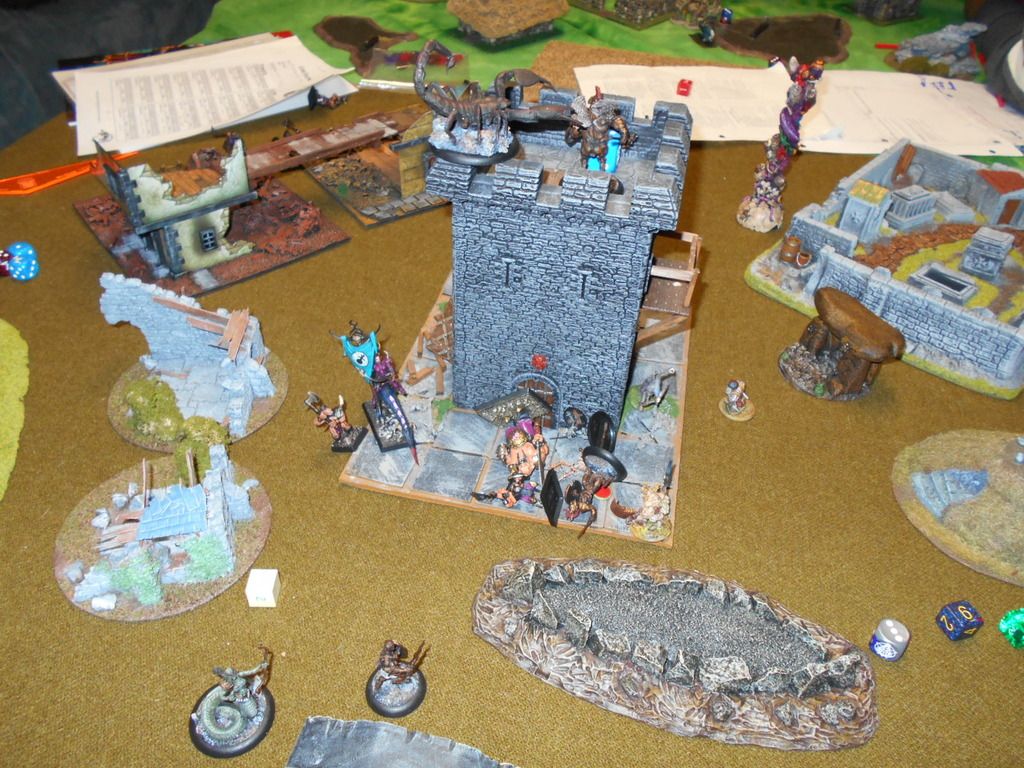
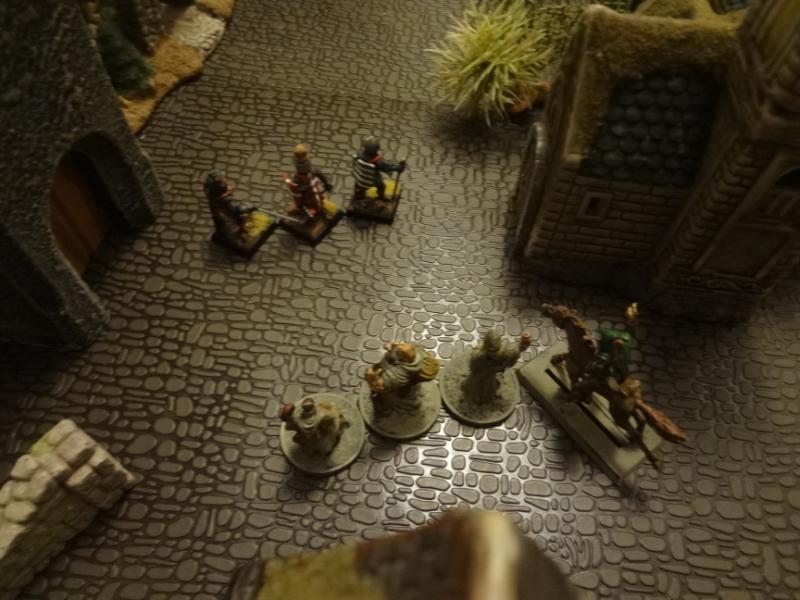
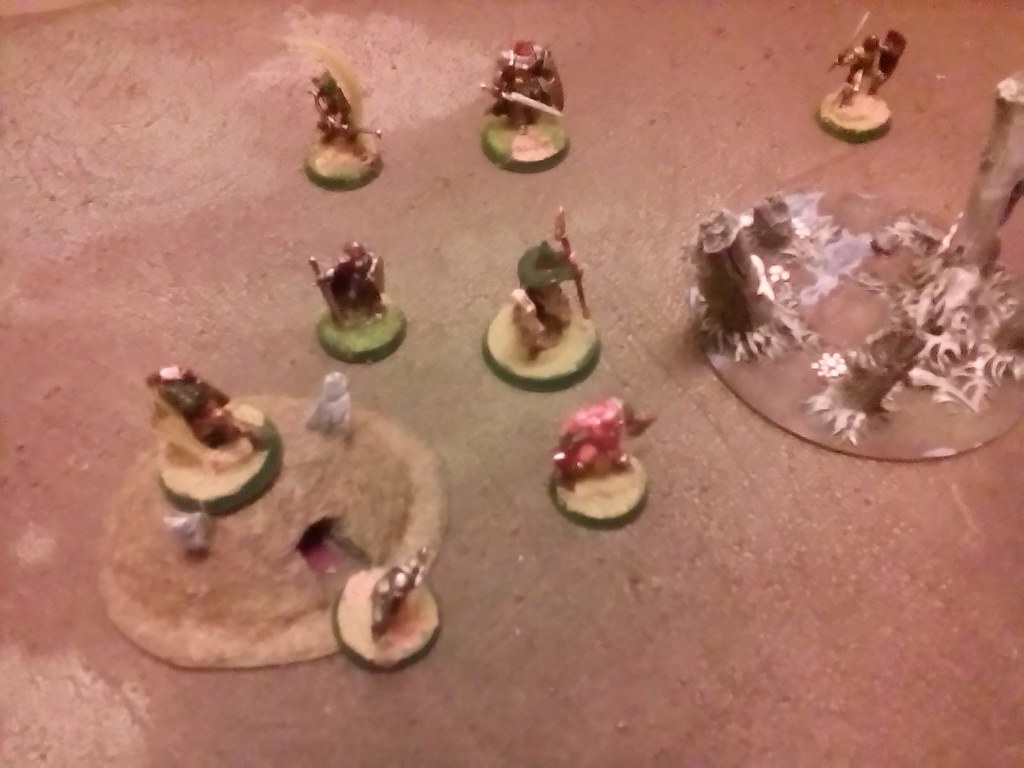
Alone and unsupported, Morsov (with the shotgun) darted across the street to link up with the stalkers by the greenhouse. He made it halfway before encountering some defenders. After a brief, fierce close combat, both figures killed each other.


In fact, that happened a lot. Every single one of our close combats resulted in both figures dying in the first round. I'm not sure if that was due to CTE's deadly close combat system, or some misunderstanding on our part. The result was a veritable killing field near the greenhouse! Here's an example of the carnage after three or four turns.


The results were similar over by the greenhouse. Ranged combat thinned the ranks, and close combat took care of the rest. Josh and I both slaughtered each other's figures with reckless abandon! Josh had a medic, which meant that he was able to revive a couple figures -- only to see them butchered a turn later by my guys.


When the dust cleared, I hadn't managed to secure even one of the two objectives, and Josh had decimated my fighting force. His settlers wouldn't be doing much settling anymore, though, as they had left more than half their number strewn about the streets as casualties. We agreed that Josh won the scenario.

CTE proved to be quite deadly, almost to a fault. We couldn't stop our guys from dying! Even the settlers, with relatively poor stats, were able to score hits when rolling buckets of dice with their machine pistols. Some of this came from terrain placement -- the wide open street was an absolute killzone -- but even figures in cover, such as my snipers in the woods, didn't last long once they started to draw fire.

We agreed to try out more multi-wound figures in our next game, as well as lower benchmark combat values across the board. The great part about this ruleset is that it is very easy to modify and tinker with. After the game, we were just brimming with ideas for possible tweaks and enhancements to better suit our play style and figure/terrain collections.

Hats off to Mr. Todoroff for crafting a fun ruleset that has energized our players. Doubtless we'll try this one again soon!

-- Patrick, Chicago Skirmish Wargames club member

Wednesday, September 9, 2015

The Grimy Jewel Campaign: Session 5 Report


"There are strange things done 'neath the midnight sun by the men who moil for gold…"
- Robert W. Service


The wretched Harba watched from the shadows as the his tales spun from straw... tales of gold and vast wealth filtered down through tellings and retellings down to the mercenaries, villains and adventurers who now searched the ruins in the valley below looking for plunder and treasure... but just as likely to unearth moldering artifacts and glittering gewgahs of fearsome uncanny disposition... better left in their grimy cairns and dungeons... laid to uneasy rest eons, and eons ago...

On a dark and... well… not so stormy night, five Chicago Skirmish Wargames members met in a... well… not dark and dingy basement… and split into two games of Song of Blades and Heroes. Michael brought forth his custom converted and based Mordheim-esque terrain buildings, and Tim set forth a farm with stone cottages.


On the first table side, three warbands blundered and crept through the ruins searching for rumored treasure.  The three competing teams were Michael’s warband ("The Debauched Ones" led by Samira the Salacious), Joe’s Men at Arms, and Jon’s "Calibans Cursed."

The scenario rolled was a treasure hunt, the goal being to find and spirit the treasure off of the table. All three warbands focused on the treasure hunt, rolling to score a 10 or higher (rather than a 12) for each terrain piece encountered. Given the focus, minimal combat occurred with only a few casualties on the board. Jon’s Medusae effectively removed Michaels mounted character from the round. Within four turns, the treasure had been located and removed from the battlefield. Samira the Salacious took the win, finding an extensive amount of money, a magic item, and several gems ...in suspiciously archaic settings of gold.

We quickly reassembled for another three player game. The scenario was a King of the Hill, with victory going to player with the most points of models on the hill at the conclusion of the scenario. We configured a tower as the ‘hill’ and a massive melee ensued outside one of the doors to the tower. Jon flew Oinkos, his flying warthog warrior, over to the tower to enter from the top, his scorpion and skeletons moved towards the base of the tower. Michael likewise moved his ogre and warriors to advance towards the same side that Jon was approaching. Tim moved in from both sides, and some of his models easily avoided the massive melee developing other side of the table. Jon moved a skeleton inside, and then melee began in earnest as each player attempted to delay the others from entering the tower.


Fluffy the scorpion climbed the tower wall using, his clinging and poison traits to attack very effectively from above his opponents. Tim moved a smaller portion of his force, including the assassin, toward the large melee, and further slowed Jon’s forces from entering the tower. Jon’s skeletons and Oinkos added their prowess to the melee, and with Medusa shooting into combat with nary a care for her own, they were able to slay several of Michael’s warriors, including the ogre.


While the melee ensued, Tim had subtly moved three models into the building. The final game turn was a rush to enter the tower. Jon successfully moved another skeleton and Oinkos into the tower. The scorpion, having dispatched his last opponent, scaled the outside of the tower but couldn't quite make it to the top. Michael was able to get a single character into the tower. Final counts saw Tim and Jon both with three models inside the structure. Once the dust had cleared, Tim’s force secured the victory.


That same evening, Tim and Karl played the Surprise Attack scenario with Tim as the defender. Most of his guys were spread across the board, but the monk and cavemen were reinforcements that would come in later. Karl was the attacker.

Karl quickly surrounded and overwhelmed Tim's piecemeal defenders. Tim’s autumn priest then used his wall of fear spell to break up Karl's warband and provide some cover while his remaining members regrouped.  This wall of fear had the desired effect, and slowed down Karl's attack enough for Tim’s monk to come in and help. With his leader surrounded, Karl chose to withdraw rather than risk his life. So, despite being very beat up, Tim's warband pulled victory from the slavering jaws of defeat. In the campaign resolution, Tim’s tourist died of his wounds, and his warband caught an illness after a botched role on the exploration table.  Karl warband came upon a cursed glade in their own encounter, but emerged away unscathed.


The second battle saw Bishop Stuka’s crusaders facing off against Joe’s Men at Arms. Joe was able to successfully sequester his leader within a stone cottage, while keeping his warband in range to be take advantage of his leadership and defend him from attack. This strategy allowed Joe to win through against the crusaders. As a part of the exploration, Karl’s crusaders sacked an Evil temple and escaped with a portion of the temple’s gold for their trouble before heading again down secret paths, with "secret tales, that would make your blood run cold." (Robert W. Service)

…Old Harba... he knows...

-- Jon, Chicago Skirmish Wargames club member

The Grimy Jewel Campaign: Session 4 Report

Here's the action from a recent session of our Song of Blades & Heroes campaign, written in glorious narrative fashion by new club member Joe!


In retaliation for last harvest season's peasant uprising instigated by Bishop Stuka's outlaws none less than Burggraf Wallenstein of Vildeburg himself dispatched Ritter Ludvig VonDraken to bring the holy man and misguided followers to heel. Ritter VonDraken's lads pursued the fleeing cleric to a questionable tavern on the edge of town.


"How many peasant hovels did we torch during the rebellion?" the knight asked the other armored horseman. Custrel Berndt Schnitzel only smiled grimly and nodded in response. "War without arson...is like sausage without mustard!" bellowed VonDraken. "Fetch your tinderbox, boy, we'll make up firebrands!"

The page-boy, Willi, rapidly set about the task, and soon every knight had a burning torch in hand. Confidently they marched directly towards the inn, except for Custrel Schnitzel. He galloped his horse on a wide left flank, flaming brand casting twisted shadows on the derelict houses.


Just as VonDraken and his three halberdiers passed under an arch, the Bishop sprung his trap!


Three outlaw knights rushed from the shadows and hacked VonDraken from his horse, and the rest of the Bishop's men poured from the inn like rats from a sewer. Some of the leaderless soldiers began to edge away...but not Berndt Schnitzel. The Custrel was no coward! He would show those bastards how to burn a building down! Just as Schnitzel rounded the corner, torch in hand, he noticed a glowing halo about the priest's head as the old fool kept babbling some prayer... The mounted knight's jaw went slack and as his eyes began to roll Ridley Boughdodger rode up and knocked the Custrel from his horse and into unconsciousness.


One of VonDraken's crossbowmen managed to send a quarrel whistling through Brother Roberto's robe, knocking him down. But when the henchmen saw both armored horsemen go down, things began to unravel. One of the crossbowmen, a weakling from Vildeburg no doubt, soiled himself and ran off crying. Willi fell back with the standard trying to rally the faltering warband upon him.


The Bishop's three knights, Sires Chopenblok, Dogget and Hakkenslosh, pressed VonDraken's halberdiers, knocking one to the ground. Being tough mountaineers from the Valkenrath Palisades, they refused to yield. "Spank me with your distaff again, granny," the fallen man jeered. "I seen yer mum's arse," shouted another. Junker Monika Frohlich, now in command, had seen enough. "Retreat, run like hell!" came the cry.

-- Joe, Chicago Skirmish Wargames club member

Thursday, September 3, 2015

The Grimy Jewel Campaign: Session 3 Report

Kevin and I met up last week to play the "Swordfight" scenario from Hour 11's book of Song of Blades and Heroes scenarios as part of our ongoing campaign.


Our warbands met while exploring some long-forgotten ruins and barrows now overgrown by forest.  The photos here are from early in the game, as our warriors race to explore six burial mounds.

Each warband suffered a few turnovers early in the game, but later got to encounter the mounds -- and each other. Over the course of the game, about 25 spirits of this fallen chaotic community were awoken, attacking the explorers and generally detaining them with grasping claws.


Eventually, my elven priest of autumn was able to avoid the dead things to get away with a magical artifact.


Rolling on Mattias's Arcane and Deadly Objects table, I found my artifact to be a Twisted Circlet -- a chaotic crown that may inspire or ruin one member of my warband. After the escaping the undead, Kevin's warband found a keg of ale mysteriously preserved in the ruins. My warband then encountered another spirit, this one of a hero who fought against the disturbed chaotic entities when they were all alive. As an atonement for enraging the otherwise contained chaos, my warband pledged to take on a mission on behalf of the fallen hero.

-- Tim, Chicago Skirmish Wargames club member


Tuesday, August 25, 2015

Necromunda Campaign: Lower Wacker Hive, Session #3

Last month, while Josh and Pat and were playing The Dogs & The Dust, Ian and I put together a Necromunda game. Ian's Delaque "Spectres" faced off against my Van Saar "Fjord's Folly."

On the right flank, Fjord led half his gang across a viaduct.


On the opposite side, the Spectres advanced through some ruined habs.


The Delaque didn't stay in the habs for long, and with the support of their heavy stubber, they quickly seized the center of the board.


Unfortunately for them, the center of the board was also prime pickings for Gunborg and his hunting rifle.


Back on the right flank, the Spectres and the Folly battled back and forth. Eventually the Folly pushed the Spectres back.


Though the Folly were successful, it was a somewhat hollow victory. Injured juve "Ove" was captured by the Spectres and promptly sold to slavers. Despite Fjord's Folly's ongoing string of bad luck, I'm continuing to enjoy this campaign. The rules, opponents, figures, terrain and scenarios have all been great! What more could a gamer want?

-- Karl, Chicago Skirmish Wargames club member

Tuesday, August 18, 2015

Frostgrave: Battle in the Ruins


Last week I found time to try out Frostgrave, the new skirmish game from Osprey that's currently burning up my internets. I mean c'mon -- the game recently got its own sub-forum on Lead Adventure Forum, and you know they don't just give those out like peanuts.

The game itself has a fairly narrow focus. It's all about wizards leading bands of soldiers, mercenaries and treasure hunters into the ruins of a once-great city in search of priceless loot. The official flavor of the game envisions the city as snow-encrusted and crawling with all manner of frigid beasties, but I'm already committed to my own ruined fantasy terrain set, which is not snowy but works just fine in a pinch.


In fact, I was very pleased to see how well our terrain meshes with my new cobblestone battle mat. It's a printed fabric product from Cigar Box Battle Mats, featuring scattered turf poking up through a field of cobblestones. The turf happens to match my own standard flock pretty well, as you can see in the pics.

We set up a basic three-player scenario. Karl brought his liturgical warband, with Bishop Stuka playing the role of soothsayer wizard and leading a band of pitchfork-wielding peasants. Josh fielded a pair of wild druids (witches, in the game) backed up by mercenaries and thieves. I went with a necromancer leading a group of thugs and men-at-arms.

(Side note: Frostgrave assumes fairly human-centric warband composition, with typical soldier profiles such as "thug" and "tracker," but it wouldn't be too much of a stretch to add a little more flavor to this baseline treatment. You know: a band of elves escorting a mage into the ruins of the ancient library, or a wight sorcerer leading some skeletons on a smash-and-grab at the old mausoleum.)

We deployed 9 treasure tokens (3 for each player) per the game rules. We played on a 4x4 foot table, a bit larger than the recommended 3x3 tabletop, but I thought it wouldn't matter since we were playing a three-player game.

The game began with each warband filtering into the ruined city and angling for the closest treasure tokens (represented by barrels and chests in these pics).


My own warband got a little bottled up at the outset, which took a turn or two to get sorted out.


My treasure hunter ended up scaling an overgrown tower to secure some treasure on the ramparts. A nifty aspect of Frostgrave is that, unless otherwise specified, all terrain is assumed to be scalable. That really helped reinforce the "treasure hunters!" part of the game, as any figure can climb a wall or tree or ruined tower in search of loot.

As he was scrambling up the sheer wall, Karl's bishop cast wizard eye, a spell which allows the wizard to place a token somewhere on the board, which can then be used to draw line of sight for spells -- effectively giving the wizard a secondary perspective on the battlefield.

Here is the wizard eye, hoving atop the ramparts while my treasure hunter investigates the barrel. I kept waiting for Karl to shoot lightning bolts out of the eye, but he didn't have any shooty spells, just buffs and debuffs.


Elsewhere, Josh's druid and apprentice split up to advance on two separate treasure tokens. This proved to be a good strategy, as Josh was able to seize both without much resistance.


Frostgrave uses d20s for combat and task resolution. While some have criticized the system as being too 'swingy,' I found it somewhat refreshing. The potential for a total blowout was real (especially when using the optional critical hit rule) but that's OK -- no one wants to spend hours and hours playing a skirmish game with 10 figures per side.

Eventually Karl and I met in the center of the table near some treasure tokens. He got there before me, though, so I had to send my warhound and apprentice racing ahead of the rest of my team to try and stop him.


My guys kept his foot troops at bay, but eventually he prised away the barrel and began dragging it off the board. Nearby, his guys tumbled over a shattered pillar to seize an other treasure token.


But shortly afterward, as they were celebrating an early victory, Josh's druid swooped in and eviscerated them piece by piece.


That knight on the left side of the picture was really hoofing it, moving as fast as he could (carrying treasure cuts your move in half) but he was no match for the swift druid spellcaster.

My attempts to stymie Josh's advance were starting to bear fruit -- I raced my man-at-arms up to a treasure token while my wizard perched atop a ruined wall, ready to fling spells if needed. They were opposed only by Josh's warhound ....


But he proved more than capable in taking down the armored soldier. (I think a natural '20' was involved...) That left my wizard alone and exposed. Before he could retreat, Josh sent in a mercenary, and a few lucky dice rolls later, my wizard was toast.


Shortly afterward, we reached our time limit. Everyone had secured at least one treasure token (and Josh made off with THREE!). Even though this wasn't a campaign game, we decided to go through the post-game stuff to see whether or not our casualties survived and to figure out what treasure we had dredged forth from the ruins. As you can expect, this involved lots of rolling on random tables to determine exactly what we got. It was great fun!

This is definitely the strength of Frostgrave -- the old-school nature of the rules, which seems to offer a game experience that is by turns zany and unpredictable, often at the same time! I mean, this game literally has wandering monsters -- yes, please! We also liked that you only need to track experience for your wizard ... everyone else is expendable, for better or worse.

As others have pointed out, Frostgrave's rules engine and campaign system seems easy enough to exploit, but we don't play that way at Chicago Skirmish Wargames. Our games are flavorful and narrative experiences first and foremost. There is plenty of room to hang your own house rules onto the basic framework of the game to correct any mismatched expectations.

Doubtless we'll play this one again soon!

-- Patrick, Chicago Skirmish Wargames club member