Wednesday, March 6, 2013

History Games Con in Elk Grove Village


CSW gamer Michael is one of the organizers behind the third annual History Games Con, set for noon to 7 p.m. Saturday, April 6 at Al Hattendorf Center, 225 E. Elk Grove Blvd., Elk Grove Village, in suburban Chicago. Head on out and take a look if you've got the afternoon free! The event promises to be a fun, family-friendly time.

History Games Con is dedicated to board games and miniatures games with a historical theme. Expected games on the roster will be Catan Trails to Rails, Age of Discovery, Anasazi, Bison, Go West, Puerto Rico, San Juan, Carcassonne, Dominion, Havana and Priests of Ra.

Miniature games will include a 1/1200 scale Napoleonics naval game, as well as Desperado, a wild  west-themed miniatures game. Prizes will be awarded to the top three game winners. Additionally, anyone who brings a game to run will be entered into a raffle for a prize. The Military Miniature Society of Illinois will be on hand with a cool model display and information about the club's activities. Light refreshments will be available. Admission is $3 in advance and $5 at the door. Call 847-439-3994 for information.

(That neat photo at the top is from shamelessly borrowed from Tim's Tanks blog. Great pic!)

Monday, March 4, 2013

40k Redux: Deathwing Faces Off Against Sisters of Battle


Once more into the breach! Jon and I delved into the grimdark world of Warhammer 40,000 with a game last week. My Dark Angels Deathwing faced his Sisters of Battle in a 2,050-point, skull-filled encounter. As the two forces came to blows, a pair of encrypted communiques from the two warring factions relayed details of the conflict to their superiors.

Unconfirmed rumors of a device called as "Caliban’s Bane," an artifact of great import to the Ecclesiarch, missing for millennia, had brought the Sisters of Battle to the abandoned fortress on Exellus Secundus. As they approached, a haze obscured visibility on the battlefield, and suddenly the Sisters' units came under fire as armored figures appeared in their midst...
-- Ecclesiarchy Dictatus, Cipher Level Cerulean


The report mentioned the fugitive known to a select few as "Caliban’s Bane" was below on the planet protected by an unknown military force. An individual to be dealt with carefully and captured at all costs. The Deathwing planned and launch their assault, immediately engaging the enemy as they appeared through the haze…
-- Dark Angels after-action communique


Deathwing
  • Belial - Master of the Deathwing 
  • Interrogator Chaplain in terminator armor 
  • Deathwing Command Squad 
    • Apothecary 
    • Deathwing Standard Bearer 
    • Champion Assault Cannon 
  • Deathwing Knights 
  • 3 Deathwing Terminator squads 
    • 1 Assault Cannon 
    • 1 Plasma Cannon 
    • 1 Cyclone Missile Launcher 
  • Nephilim Jetfighter with twin-linked lascannon 
  • Land Raider Crusader 


Sisters of Battle
  • Canoness Persephone of Order of the Cobalt Torch
  • Sisters Command Squad 
    • Celestians 
    • Sister Dialogus 
    • Hospitaler 
  • 1 Celestian Squad in Rhino Transport 
    • 2 Meltagun 
  • 2 Battle Sister Squads (1 in Rhino Transport) 
    • 1 Storm Bolter 
    • 1 Multi-melta 
  • 1 Dominion Squad in Rhino Transport 
    • 2 Flamer 
    • 2 Meltagun 
  • Confessor Maximillian Krator 
  • Battle Conclave 
  • Crusaders 
    • Arco Flagellants 
    • Death Cult Assassain 
    • 2 Repentia Units 
  • 1 Retributor Squad in Immolator 
    • 4 Heavy bolter 

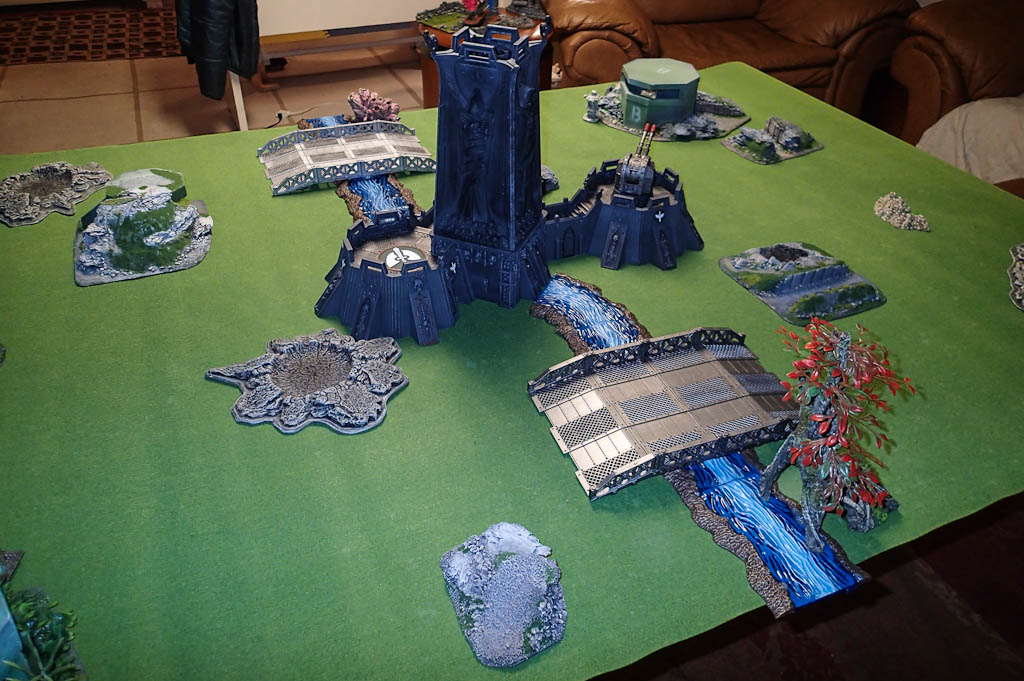
We played on a green planet that had been torn asunder by previous battles. There were abandoned bunkers, craters, and a large fortress spanning a river. For our game purposes, the fortress was just a large building with non-functional weaponry. Two bridges spanned the river on either side of the table.


Jon deployed first. The Sisters spread out across the deployment zone, mostly in tanks.


The Deathwing Land Raider was the only thing on the table. Inside were the Deathwing Knights, Belial, and the Interrogator-Chaplain. All other Terminator squads were in reserve for a second-turn Deathwing assault. The Nephilim jetfighter started in reserves as required.


The Deathwing failed to seize the initiative, so the Sisters of Battle started the turn.

Turn 1A - The Sisters moved their Rhinos forward. The Exorcist missile launcher shot at the Land Raider, and got a lucky shot, glancing 1 hull point from the tank.

Turn 1B - The Land Raider moved 6 inches forward, putting its multimelta in 12-inch range of the forward Rhino. A penetrating hit resulted in an explosion. Four of the squad inside were killed as a result, and one more trooper was taken out with bolter fire, but the squad remained on the table hoping to get their vengeance in return.

Turn 2A - The Sisters maneuvered their vehicles and took another shot at the Land Raider. This time they hit, failed to damage the hulking armored behemoth.


Turn 2B - Things really started happening! The Nephilim jetfighter rocketed onto the board from reserves, spewing destruction across the battlefield. On the green fields below, the Deathwing arrived. The command squad and one tactical squad landed within 6 inches of Belial's teleport homer. The other two squads landed right in the backfield, but luckily they didn't scatter too far away. Taking advantage of "Vengeful Strike" (twin-linked weapons for the rest of the turn after deep-striking) and the Deathwing squad's ability to split their fire against two targets, these newly arrived squads did some damage. The Terminator armored with the plasma cannon destroyed the weapon on one of the Exorcist tanks, and the Nephilim's lascannon took out the other. A number of Sisters fell to storm bolter and assault cannon fire.


Turn 3A - Five Terminators from two different squads perished under a hail of meltagun fire from Celestions and Dominions, and two more died during the ensuing assault. The Terminators took some of the Sisters with them to the grave, but the Sisters still held fast.


Turn 3B - The Nephilim took out the remainder of a Repentia squad. The Land Raider advanced, opened its doors and disgorged Belial, the Interrogator-Chaplain, five Deathwing Knights, and a Watcher in the Dark. They did some damage with guns, then charged for the assault. The Sisters' overwatch only succeeded in removing a single Knight, due to the Toughness 5 granted to them by the "Wall Of Shields" rule. Since they were within 6 inches of the Deathwing standard bearer, they got an extra attack in close combat. The Dark Angels managed to score a devastating number of wounds, but the Sisters managed to make most of their armor saves, holding the bridgehead to block the advance for yet another turn! Melee combat ensued elsewhere on the battlefield, with the Sisters' command squad (and Canoness) perishing in close combat.


Unfortunately, at this point it was very late, and we had to call it a tie. Atmospheric conditions that had been scrambling vox frequencies cleared, and suddenly it became clear who the combatants were. Obviously, there must have been a misunderstanding, and Belial and the Ecclesiarcy Confessor went out for tea and cookies (burnt gingerbread psykers, of course) after they realized their mistake. Not that the new mistrust between them wouldn’t likely set them at odds again in the future. After all, there was no sign of that which each force sought to find on the planet below.

Josh's post game notes 
This was one of the most exciting games I have played. It was full of epic events and lucky rolls. This was the first time I played a game exclusively using my own terrain, and the table looked great! There were a few things that we goofed up on rules-wise, including one botched assault that might have made a difference in the tide of the battle, but we didn't realize it until after the fact, and decided to move forward.

It's too bad that we had to call it after turn 3... The game was still really up in the air at that point. It could have gone either way. I really enjoyed playing the all-Deathwing list, but I'm not sure that it's the best tactical option. If I hadn't been lucky with the dice, I could have run out of units very quickly due to the comparatively few models I had on the table. In addition, the choice to deep-strike the entire army was questionable, especially on this table. My strategy really depended on getting the Land Raider into enemy territory to use Belial's teleport homer to eliminate scatter.

Jon's initiative, coupled with the bridges, really caused a choke point. I couldn't move the way I wanted, and had to risk scatter instead. I got lucky here, but it could have been bad. It was also VERY risky to start the game with only 1 unit on the board. If the Exorcist had destroyed it and caused an explosion, the resulting wounds could have ended the game right there! The Nephilim jetfighter worked out very well for me. It was able to take out some key units early on and saved me a ton of pain. It was still a little expensive, but it is just too fun and cool to leave at home. All in all, it was a TON of fun, and I can't wait for the rematch!

Jon’s post game notes
It was definitely a very fun game, and the great layout added a lot to the enjoyment of the scenario as the armies raging across the tabletop looked very dynamic. The most difficult part about playing against an all-Deathwing Army (aside from the 2+ saves and the fact that my esteemed opponent forgot how to roll 1s this particular game) was not knowing where on the table the actual battle was going to take place. I could guess all I want during deployment, but was essentially guaranteed to have at least some of my units out of place when the deep strike occurred, and the time came for actual battle.

In hindsight, aside from adding some minor mobility, the transports were mostly useless. Though they did provide some cover, I'd cut a few of them out of the list in the future, and replace them with either Seraphim or another Exorcist.

My initial strategy was primarily to test how well certain units did in this edition of the game. I found the Battle Conclave and the Repentia to be very effective, although the need to work in concert with each other or other close combat squads was clear, as only half of them actually made it into assault. One unit less of them and they would have been far less effective.

 I was disappointed with the Arco-Flagellents -- they did a lot of flailing with very little result, though that may be as much because I couldn’t make my Faith rolls to save my life this game. Not a single one succeeded. I think I may remove the Crusaders, and take only Death Cult Assassins (who proved very effective due to high initiative) and Arco-Flagellents next time. If I can make some Faith points, the results may be different. Finally, I will seriously have to consider some Skyfire allies next time (maybe a Hydra), as the Nephilim jetfighter was all too effective at removing my Exorcist from the equation, and killing the only entire unit that I lost. The rematch should be very interesting indeed!

-- Josh and Jon, Chicago Skirmish Wargames club members, with photos by Josh

Sunday, February 24, 2013

New plastic buildings from Proxie Models


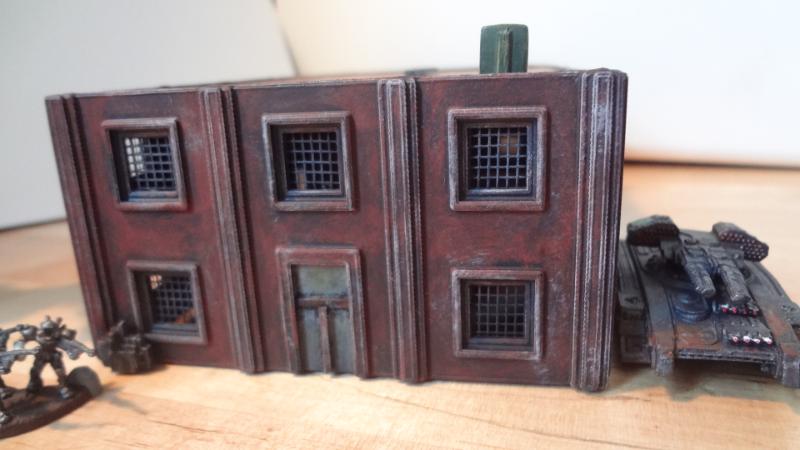
Continuing my habit of working on projects with no bearing on the club's current games, I recently acquired and assembled a couple of the new plastic buildings produced by Proxie Models. Though originally designed for 15mm scale miniatures, I will be using them for our 10mm scale sci-fi battles and have made a few modifications to that end. All the models in the review are 10mm (aka N scale or 1/144 scale).

Proxie Models is an impressive one-man operation that -- from a garage workshop -- designs, masters and casts an extremely affordable range of injection molded bases, buildings and vehicles. You can see the entire range here, and in our earlier review of some of their miniature bases.

Gothic Walls
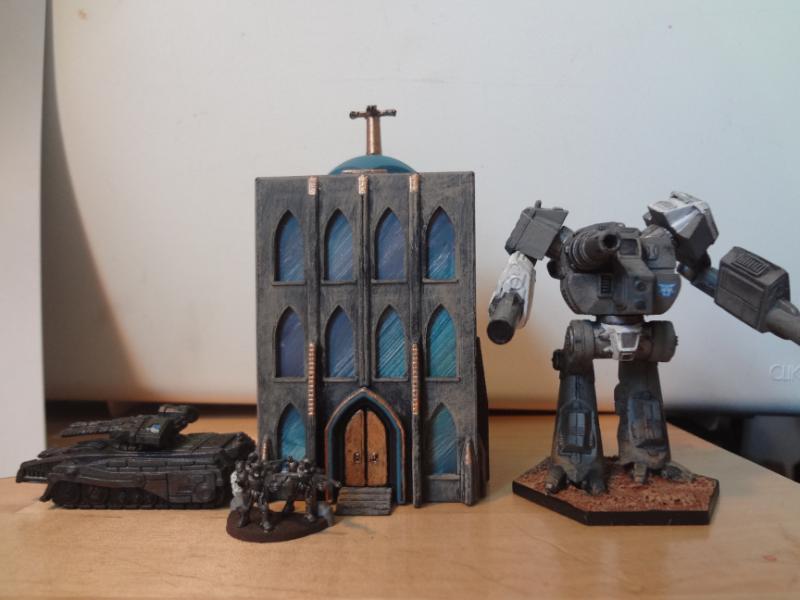
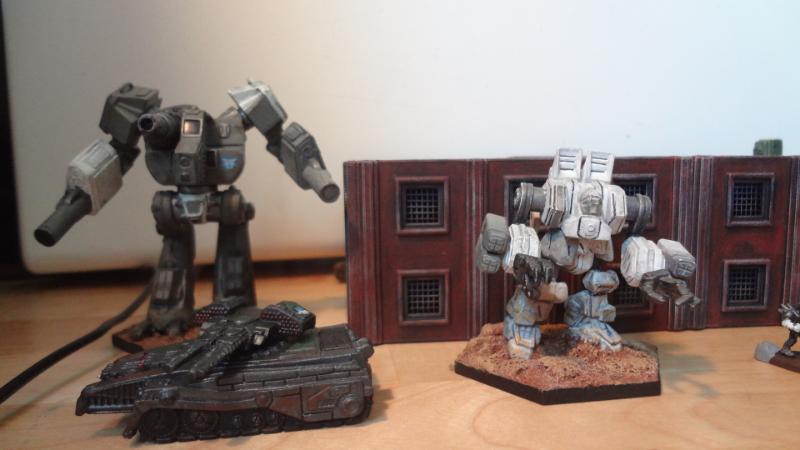
This kit contains four walls and two sets of front stairs that combine to build a 3-story building. Each wall comes with tabs to make it easy to install a floor at each level. I trimmed these away and glued a bit of painted card behind the windows instead. Here's how it scales with a 10mm mech, tank and troopers. I was pleased to see how good the doors scale with 10mm figures. The colors are based loosely on a Greek Orthodox cathedral. 


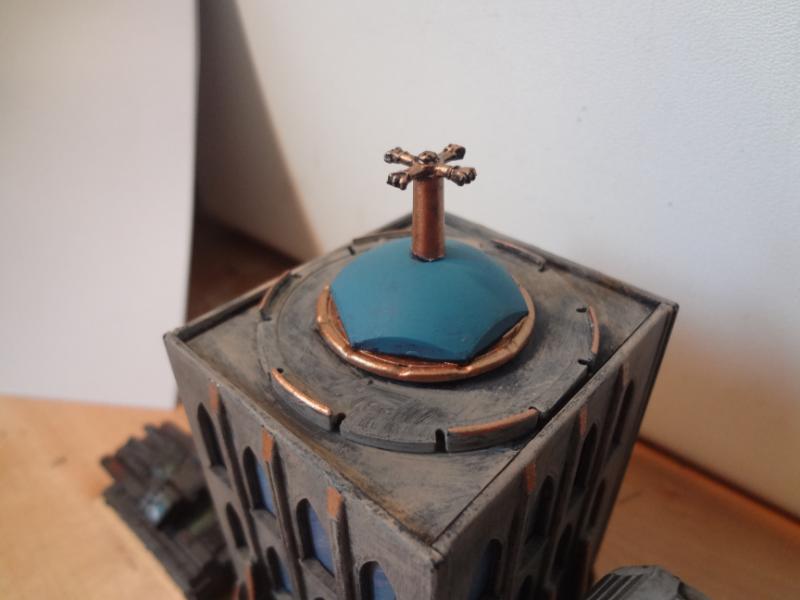
For the roof, I wanted something that would complete the Orthodox look. The roof is made from the following items (bottom to top):
  • A piece of plastic card
  • The bottom section of a Mechwarrior clix mech base with alternating tabs trimmed
  • The inside section of a standard clix base
  • A slightly shortened EM4 flight base
  • A small cross bit from the depths of my bits box


Factory or Office Walls
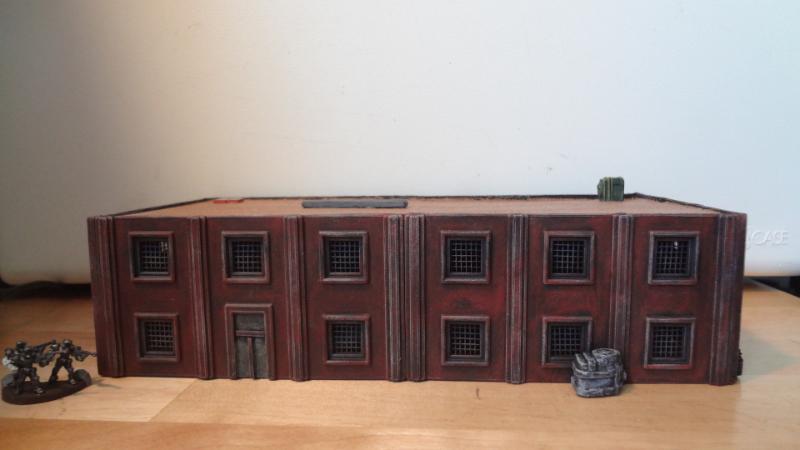
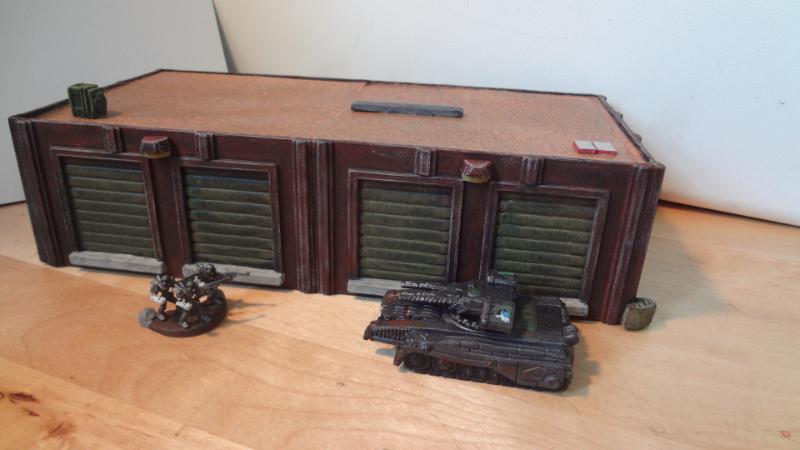
This kit is a set of 6 walls. Two have windows, wwo have windows and doors, and two have a pair of garage doors.


Unlike the Gothic kit, the windows and doors needed a bit of work to make them more suitable for 10mm. I shaved off the door handles and used a bit of scrap plastic to divide the doors into double doors.


To make the windows look a smaller in scale I put some window screening behind each.


The details such as loading dock lights, dumpster and AC unit are mostly parts from cut-up Mechwarrior vehicles. The roof is just plastic card that's been sprayed with sandstone textured spraypaint.


Like the Gothic building it scales well with 10mm, but I did end up wishing I'd also bought the second story kit sold by Proxie. At $9 for both kits (they're $4.50 each) it's a pretty reasonable price for a large 4-story building, which would provide full concealment for even large 10mm scale mechs.


I'm very pleased with these buildings. There aren't many cheap N-scale buildings out there, and these are nicely, if simply done. The addition of roofs would have been welcome, but if it keeps the cost down then I'm certainly willing to make my own. Though not complete building kits, I can confidently recommend these to the gamer who doesn't mind just a bit of DIY.

-- Karl, Chicago Skirmish Wargames club member

Sunday, February 17, 2013

From the workbench: Converted plastic mechs

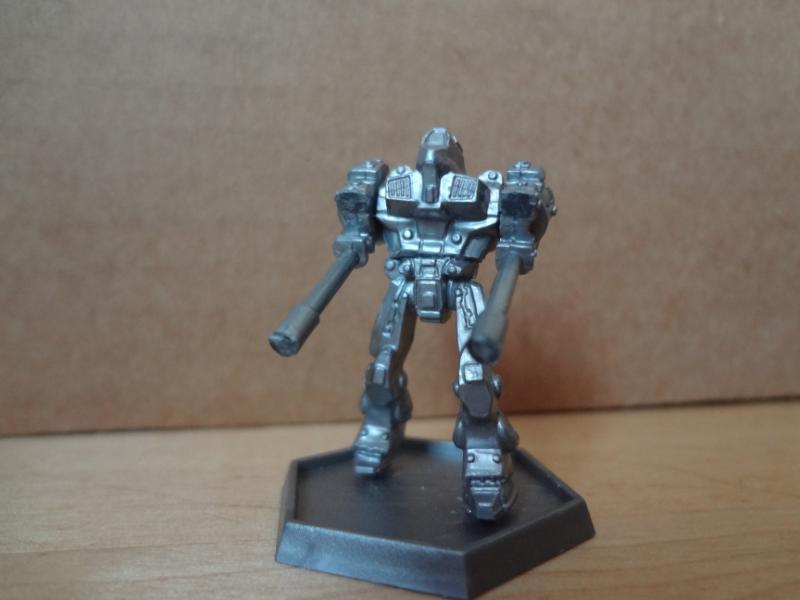
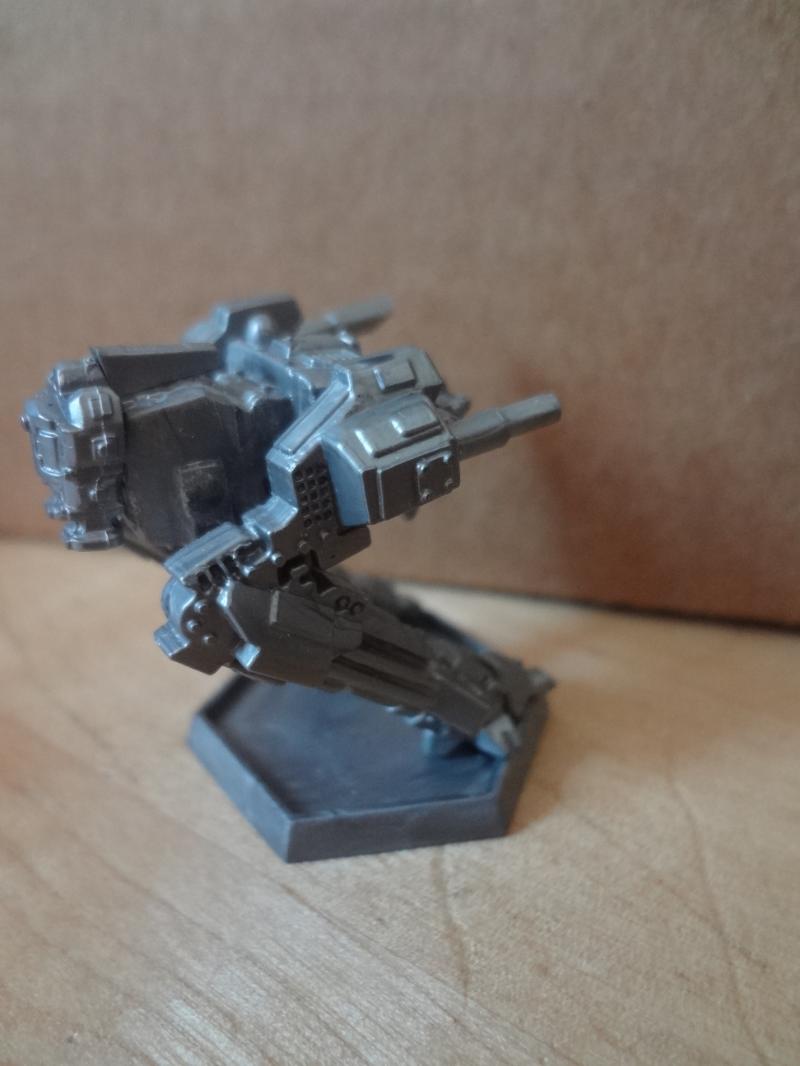
A number of months ago I sat down one evening and hacked out a bunch of conversions of the inexpensive plastic mechs sold by EM-4 Miniatures, and this week I finally got around to photographing them. These are by no means finished, but I thought I'd share some of the possibilities hidden in these 20-year-old miniatures.


Formerly packaged and marketed as "Steel Warriors" and distributed by several other companies, these remain some of the most affordable figures that are near the the Battletech scale (1/300 or 1/285). The 5-figure box sells for about $4 on the EM-4 website.

For a review of them, check out this article from Reviewing Wargames, from which I've borrowed a couple of photos. Each box contains sprues with parts to build 5 mechs using 3 basic chassis (small, large, and chicken walker) and a variety of arms. Bases are also included.


Though there are many options for assembly, here's what they might look like when built "stock."


Nice enough, but there's even more potential there. Here's what I came up with and how I got there.


Small Body Mech 1
  • Fins removed from both shoulders 
  • Gun removed from hand/wrist of right hand 
  • Gun elongated on the left hand 


Small Body Mech 2
  • Shaved cockpit canopy off; upper torso rotated 180 degrees. 
  • Upper barrel removed from each arm (formerly double barrel arms) 


Large Body Mech 1
  • Shortened the barrel of each cannon arm to look more like a cannon and less like a laser.


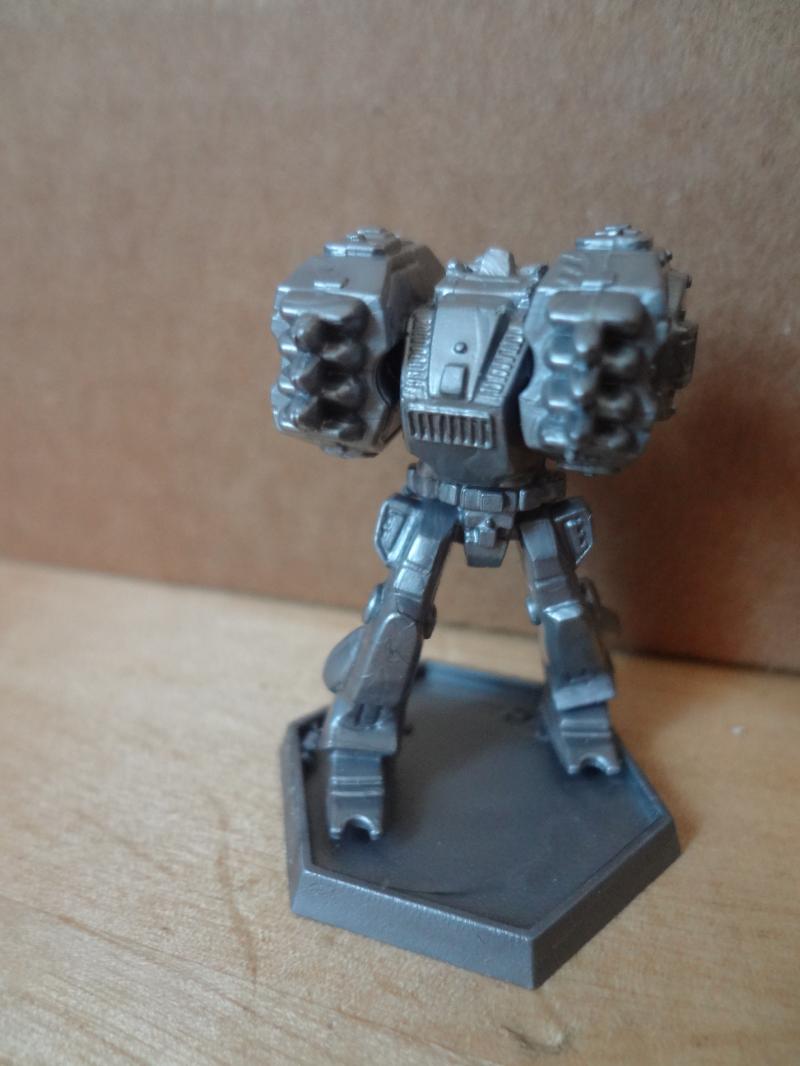
Large Body Mech 2 
  • File away cockpit 
  • Cut body at waist and rotate 180 degrees
  • Instead of mounting missiles on regular pegs, I moved them back a bit


Here's a shot of the "back" of the mech showing where I filed the cockpit away. I'll probably find some little greeble to glue on there, though it's not terribly bad looking.


Large Body Mech 3 

I'm particularly fond of this one, as it is very reminicent of the classic Rifleman mech design from old school BattleTech.
  • File away cockpit, cut at waist and rotate 180 degrees


Large Chicken Walker 1 
This mech's torso is interesting because either end looks like it could be the cockpit.
  • Cut off cockpit 
  • Reverse body section so rear faces forward 
  • Shorten cannon arm a bit for variety 


Large Chicken Walker 2 
  • Cut off rear protruding section (the part used as a cockpit in the mech above) 
  • Glue two random bits on that area (in this case the shoulder part of a double cannon arm)
  • Saw off the rear pegs where the legs are usually attached 
  • Attach legs to forward pegs where arms are usually attached 
  • Attach two barrels to flat front of leg shoulder area 


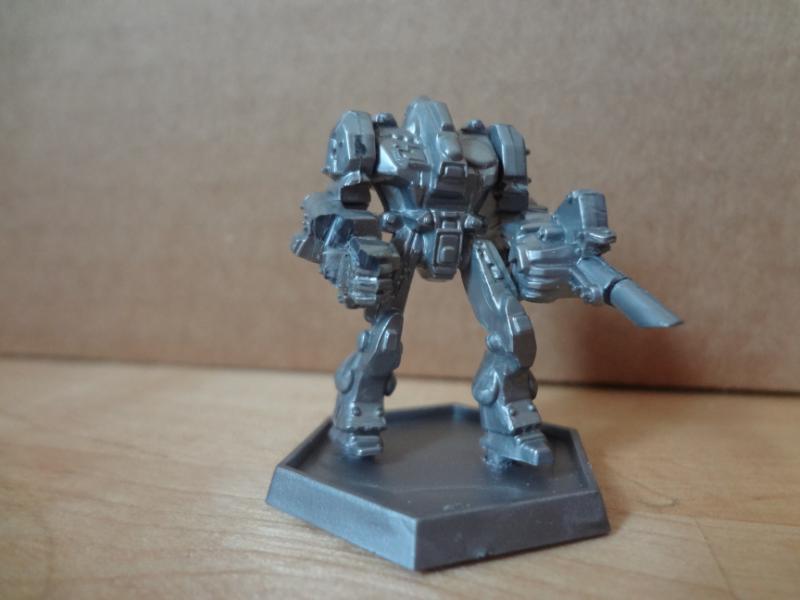
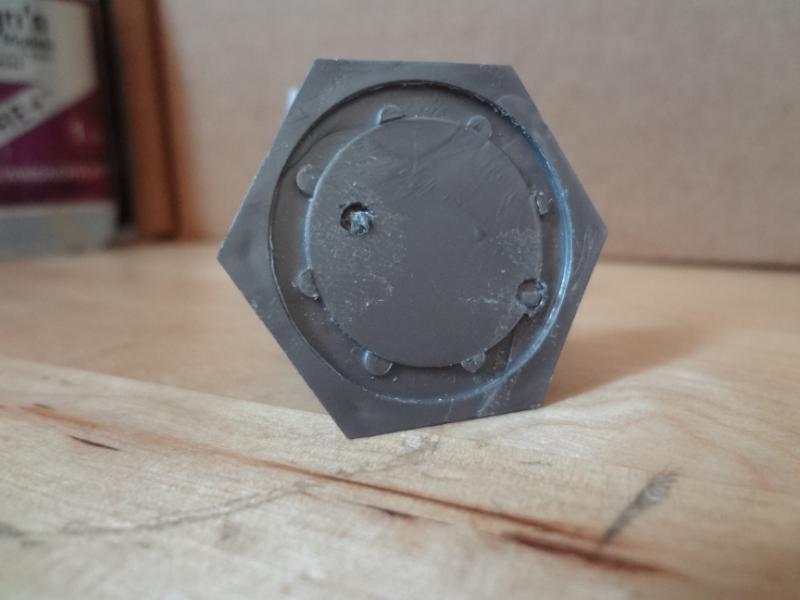
Though the mechs come with either 25mm round or hex bases, I prefer the look of the battletech-style lipped 30mm hex bases. These are also available from EM-4 for the ridiculously low price of £1 GBP for 10 bases. The larger size is nice, and the lipped edge makes your basing/ballast/flock look very tidy. The mechs have little pegs in their feet, and it's easy to carve or drill an appropriately sized hole in the base. Just keep the feet elevated a bit so they will rest nicely on your basing material. Here's a view seen from the bottom of the base.


These miniatures were easy to cut, file and assemble. The plastic is a bit harder than regular polystyrene, but it glues just fine with superglue or my favorite plastic cement (Plastruct Plastic Weld). Even though I don't play BattleTech, I had such a good time with these, that I'll probably come back and convert another batch. Maybe someday they'll even be painted!

-- Karl, Chicago Skirmish Wargames club member

Tuesday, February 12, 2013

Days Gone By: Post-Apocalyptic Campaign Kicks Off


Chicago Skirmish Wargames' post-apocalyptic campaign, tentatively titled "Days Gone By," kicked off last week with our first session at Games Plus. We set up three games, though I only managed to gather photos from a couple. For the rules, we're using This Is Not A Test (TNT), a ruleset under development right now and hopefully coming to a game store shelf near you sometime later this year.

In the first game, Terrence and I set up a scenario set at Installation JX-7, an abandoned military outpost on the edge of the wastelands. My bloodthirsty raiders had captured Captain Mal, the leader of Terrence's warband (a clique of big damn heroes modeled in no small part on a certain starship's plucky crew). He was tasked with infiltrating the raiders' base (centered around this fantastic bunker that Josh acquired on ebay) and springing his gang's leader from captivity before my gang made him into stew.


I set up my raiders (mostly converted Necromunda figures, though that big butcher at the top of this post is from Reaper's Chronoscope line) within 12 inches of the bunker, as per the scenario deployment rules. Terrence's heroes (a custom force designed by picking and choosing figure profiles from several different force lists in the TNT rulebook) moved onto the opposite board edge. Here they are, looking remarkably under-equipped compared to my raiders and their oversized guns.


The scenario rules meant that my raiders couldn't easily spot the heroes as they made their approach. I basically had visual range equal to 1d10 inches per turn...sometimes I'd roll well and be able to spot several targets, but other times I'd roll poorly and my big ol' machinegun-wielding raider in the bunker would just sort of stare at his feet for a turn or two.

Anyway, Terrence sent his more heavily armed heroes on a flanking mission through some ruins. Jayne, Zoe and Kaylee (sound familiar?) were met by a raider with a shotgun. The surprise encounter resulted in a brief firefight, then the raider realized he was in over his head and decided to wait for support.


Luckily there was another raider nearby, along with a mongrel. In TNT, mongrels are clearly meant to be feral dogs kept chained up and unleashed right before battle. As I didn't have any dog miniatures, my mongrel was ... a wild boar! Alas, I don't have a clear photo of him, but you can see him in the background of this photo. Close up, he looks like he belongs on the cover of a heavy metal album.


Anyway, the two warbands exchanged fire a few turns, with casualties mounting among the big damn heroes. Suddenly, the door to the bunker flew open and out sprang Captain Mal, prisoner no more!


Actually, the scenario rules said that Captain Mal could free himself at any point in the battle. He was sort of the x-factor to the game...I kept a close guard on that bunker for several turns, waiting for Terrence to have Mal break out, but in the end he got loose anyway. Alas, Captain Mal got within a few short inches of rejoining his crew when he was felled by a close-range shotgun blast. Several other members of his crew were casualties, too, and the raiders emerged victorious after 6 turns.


Afterward we spent about 15 minutes going through the post-game campaign bookkeeping. TNT has a well developed campaign system with individual steps that will be familiar to many gamers. First you roll to see what happens to your casualties, then you roll for income, then you pay your warband upkeep (based on how experienced they are), then you draw a card from the exploration deck. This last step is completely optional and can result in fantastic riches, lost tech, or your dudes getting eaten by rad muties. It was so much fun -- Terrence rolled quite well and ended up with a nice income haul. And even better -- none of his team (those big damn heroes) were permanently taken out of action. In fact, Captain Mal rolled so well on the casualty table that he actually received extra experience points to boot.

Across the table, Mike and Josh were playing through another scenario. Mike's mercenaries were tasked with escorting a prisoner through the Pestilent Expanse, a windswept wasteland of rock and scrub brush punctuated by the burnt-out shells of blackened buildings. Josh's Preservers were trying to intercept the prisoner, or kill him if necessary. Josh snapped two photos of his warband and Mike's, at the start of the game. Unfortunately that's all we ended up with. Too much time spent gaming!
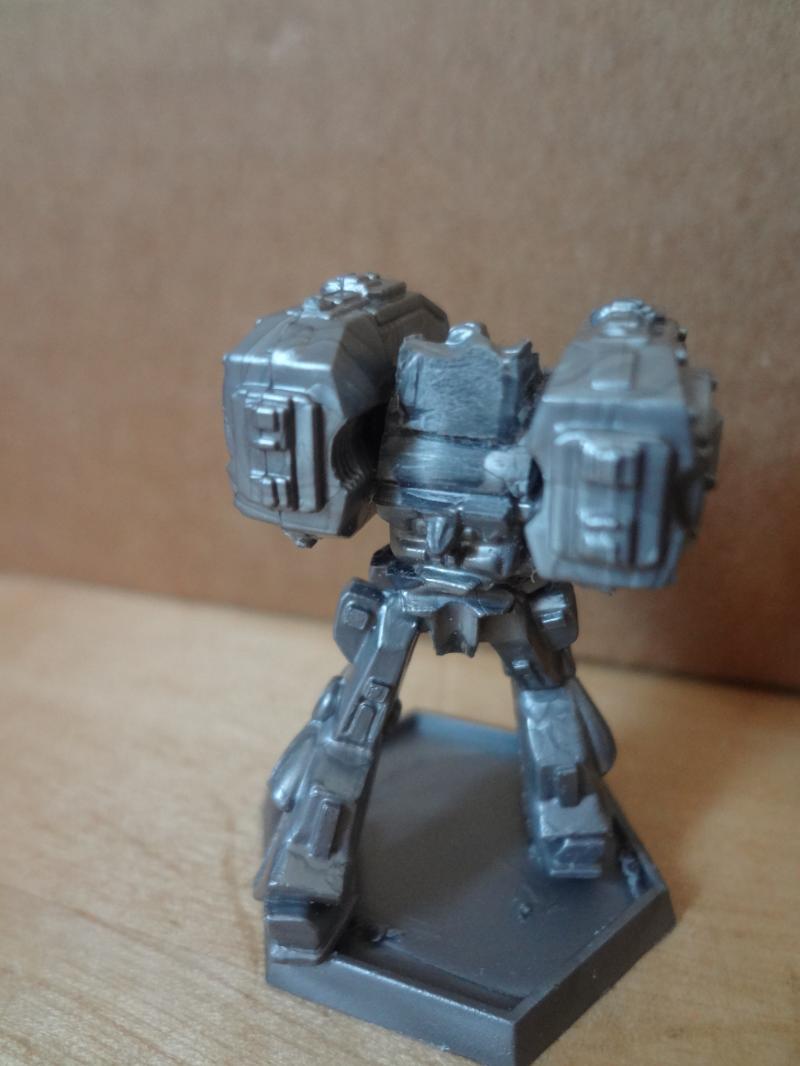
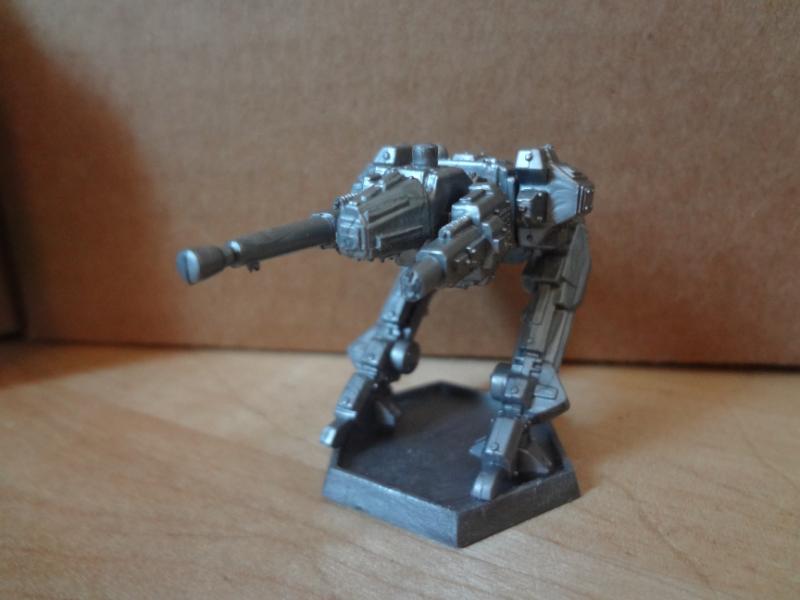


And then, as these two games were taking place, something was happening on the third game table, where Tim and Karl were squaring off for their game. What was going on? Had some new threat emerged to menace the wastelands? Preliminary intel indicated a mutant incursion! Karl's forces were able to transmit one grainy scanner photo of the unknown threat before contact was lost....


Stay tuned -- we'll have more reliable info in future games!

-- Patrick, Chicago Skirmish Wargames club member, with additional photos by Josh