I like metal bases. I don't like paying for them, however, and I don't like washers as bases. It's probably a result of being raised on Games Workshop, but I want my bases to have nice crisp sides. It's also nice for a base to have a depression, especially for miniatures that have cast-on bases.
I don't know of any round metal bases with a depression, which is why a bag of these arrived at my house earlier this month.
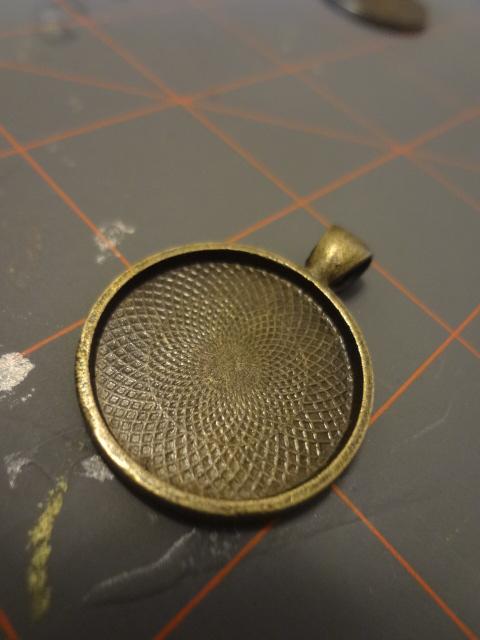
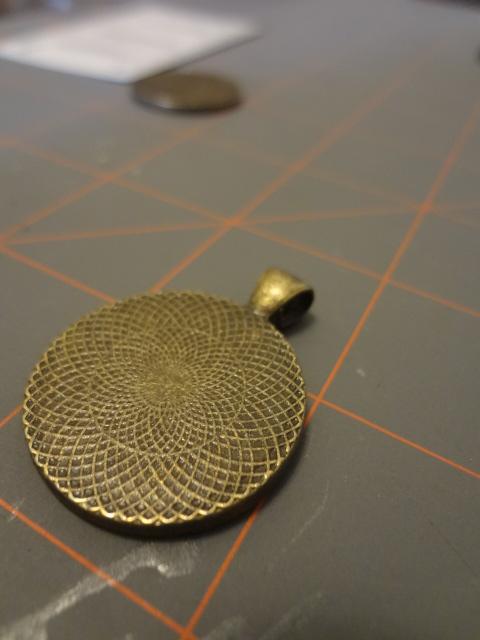
They are readily available on eBay. If you are searching for them, they are called Pendant Tray Bases, 25mm. I did some searching and scored a pack of 30 for $6 shipped! They have a "lace" pattern inside and on the back.
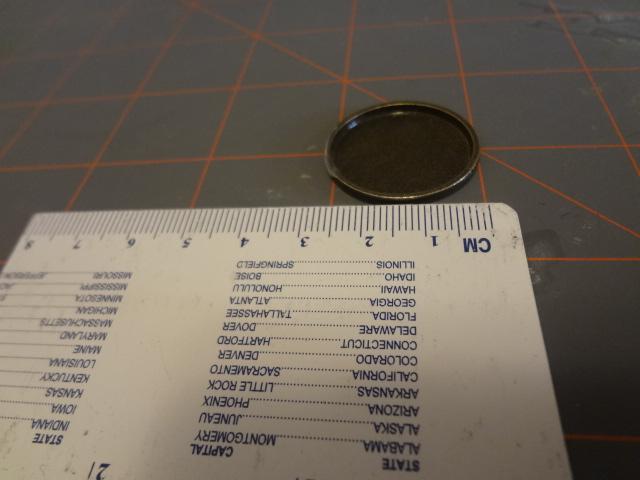
Apparently they are made to have a jewel or some sort of decorative glass bit put into them. They are about 27mm across, with an interior exactly 25mm.
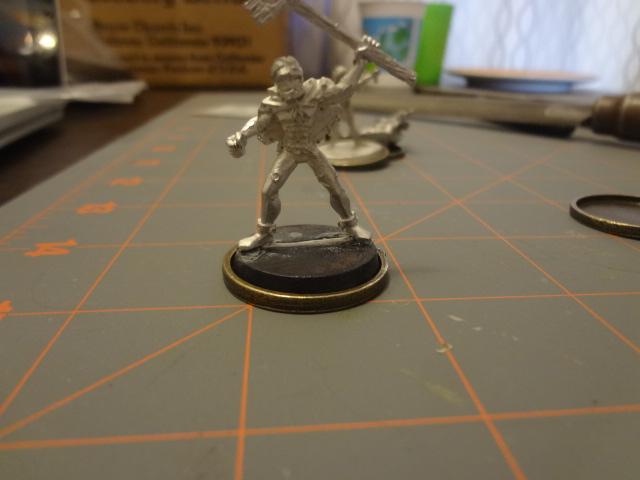
With a good pair of snips, a rough file and a finishing file, it's not much work at all to remove the tabs. What you're left with is a 27mm base that is 2mm high, one mm shorter than a standard slotta-base (which coincidentally will fit right into the middle depression).
You could also glue a figure to the flat "bottom" side. I might do this and use the lace pattern as the basing for some figures. However, where these will really shine is for minis with cast-on bases.
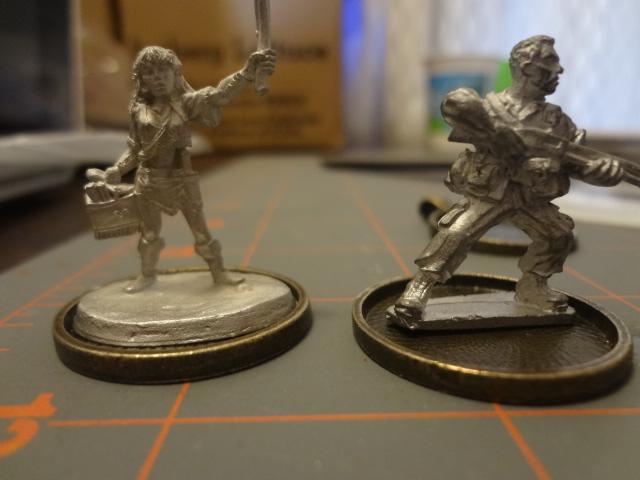
It hides most of the figure on the left, a Shadowrun Native American. It is exactly flush with the base of the figure on the right.
On a whim, I tossed one into paint stripper and it came out two days later looking almost exactly the same. Apparently the bronze coat over the silver colored metal is bonded very well.
To sum up, this is a base with some real advantages. We're always on the hunt for fun, cheap and/or nifty bases for 28mm models. It's got more basing room (25mm) in the interior than both the top of a 25mm slotted base or the inside of a 30mm Privateer Press style base (both have 23mm of basing areas). It can also be used flat side up for a full 27mm of basing area which is almost the same space as the top of Games Workshop 30mm bevel-sided base.
The only disadvantage is that so much of my foam storage is setup for 25mm bases, but I can make accommodation for bases this size as well!
-- Karl, Chicago Skirmish Wargames club member
Showing posts with label basing. Show all posts
Thursday, December 11, 2014
Tuesday, September 23, 2014
Wreck-Age Staker Warband
With more post-apocalyptic gaming coming up this week, I put the finishing touches on another Wreck-Age faction: the Stakers. My goal for these guys was to keep them looking like people more comfortable with farming than fighting.
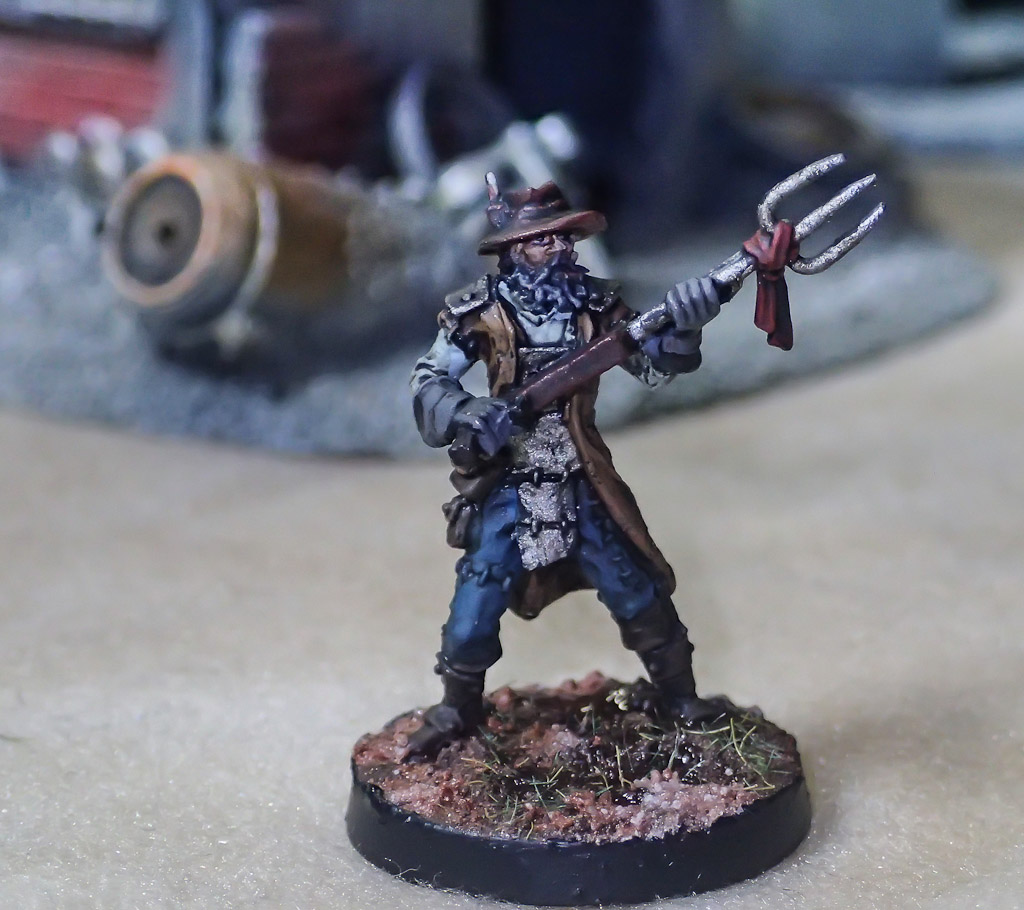
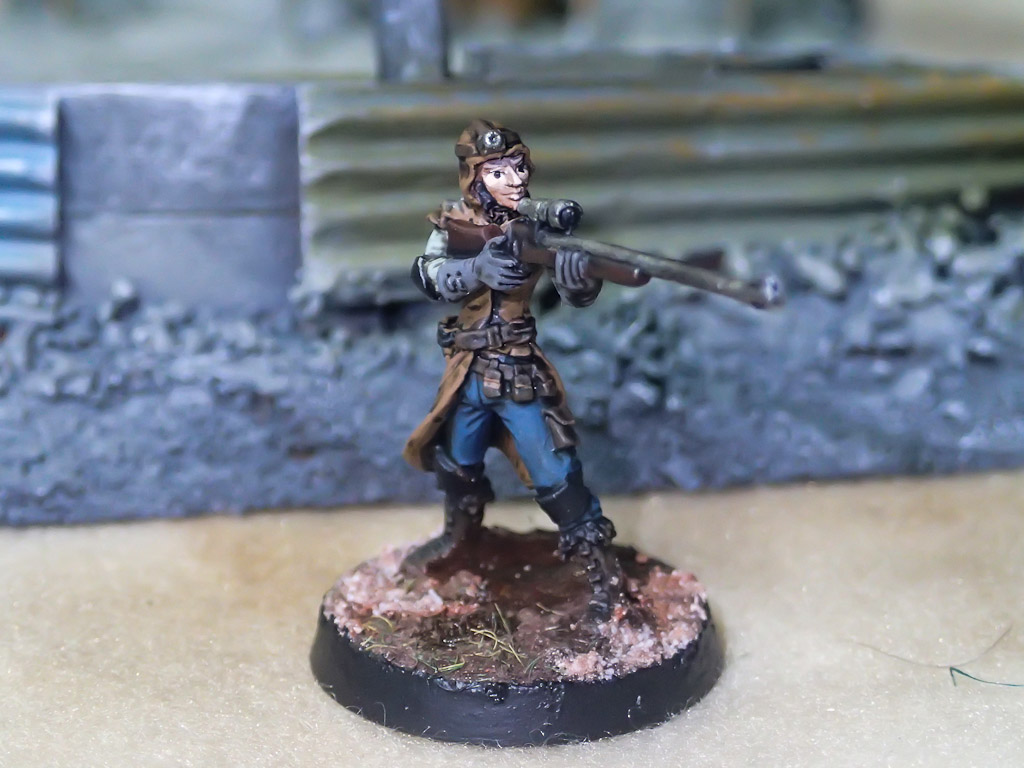
Their leader is a greybeard with tired eyes. Ammo is scarce the wasteland, so he tends to use his weapon more frequently as a pitchfork than a gun.
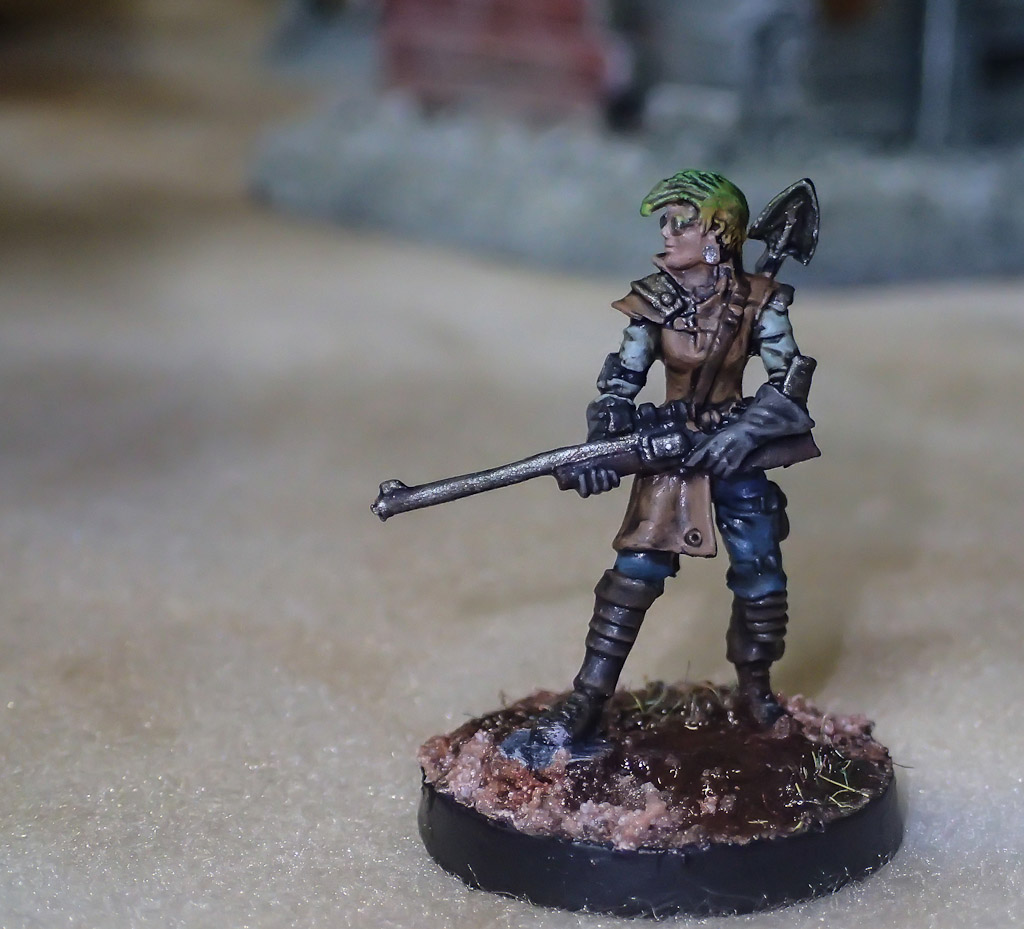
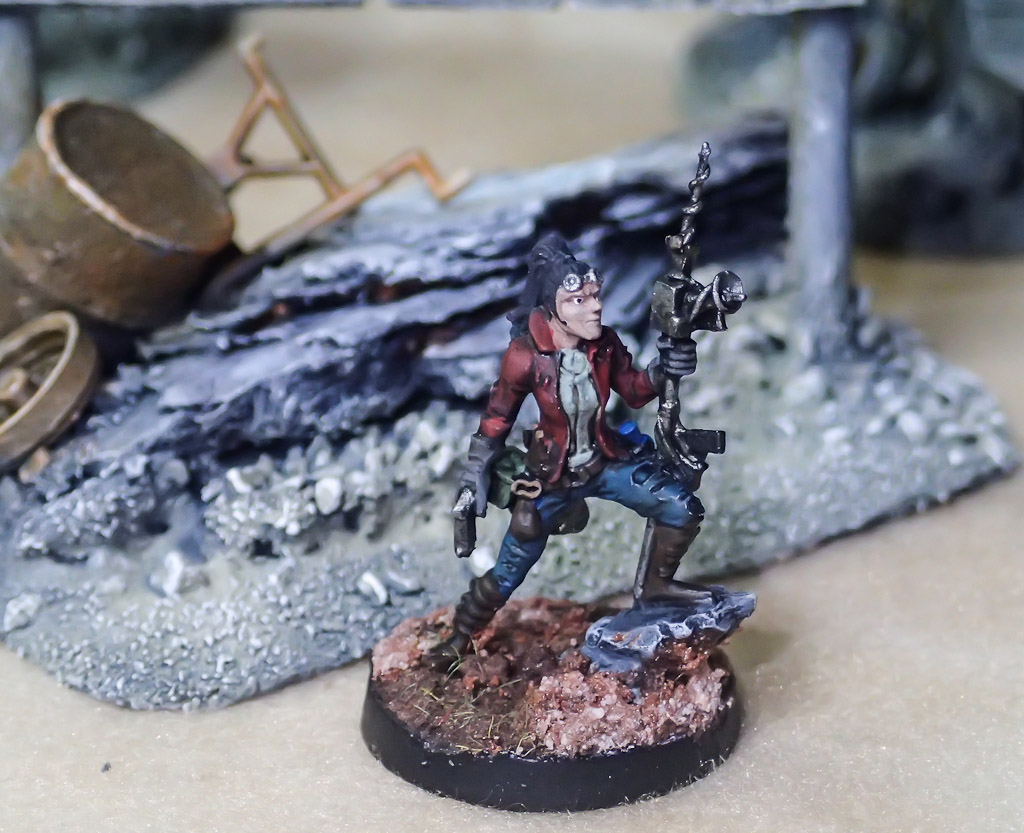
This outrider has a green mohawk and a personality to match.
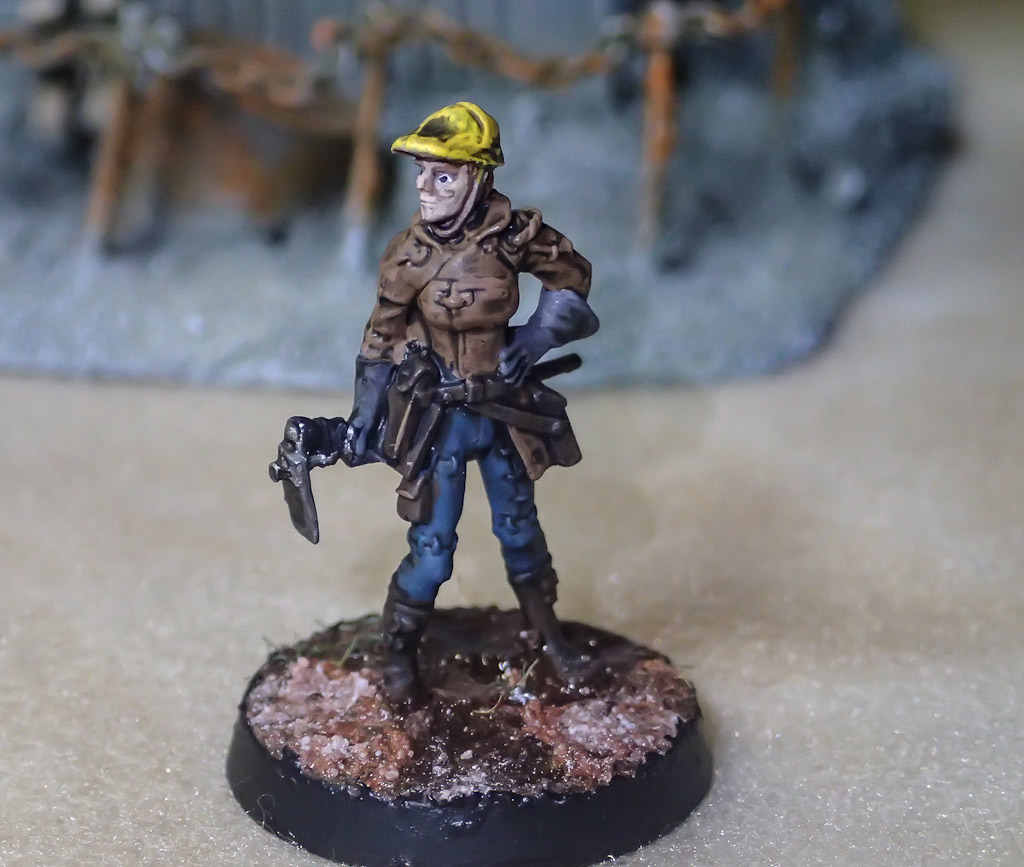
This miner has a dirty face from spending time underground.
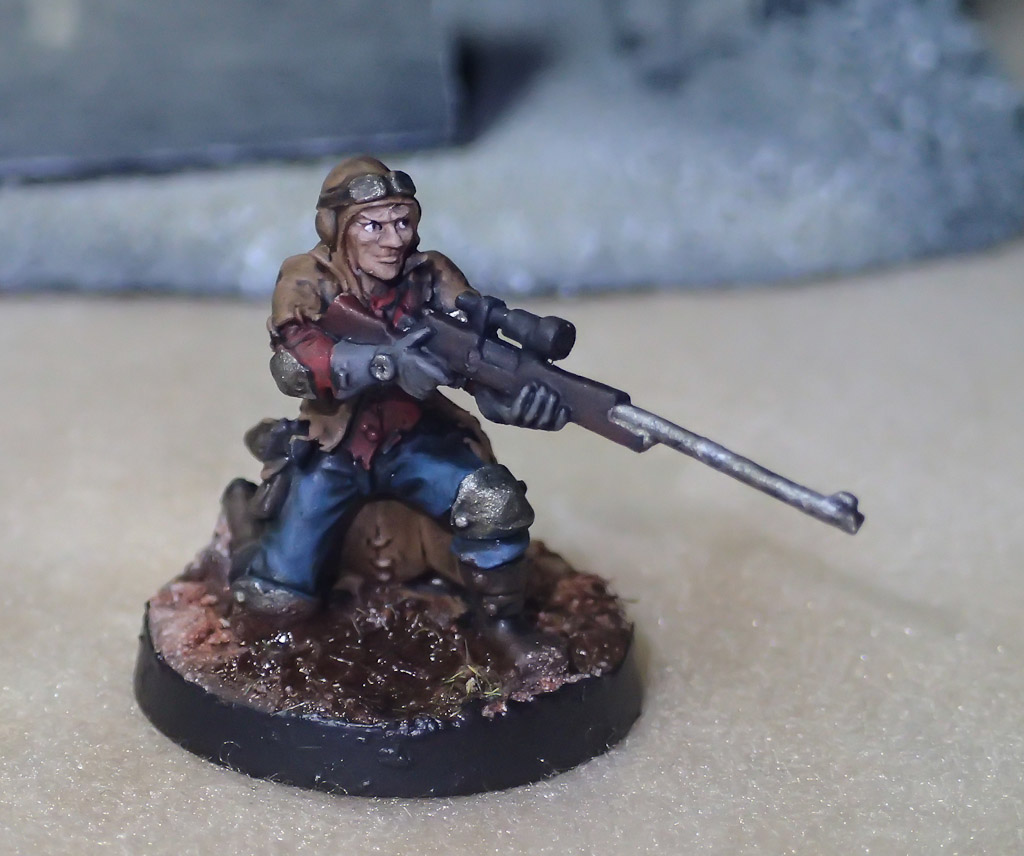
This outrider has a sneaky glint in his eye. This might be the best face I have ever done.
This young lady has a dirty face except around her eyes where her goggles sat.
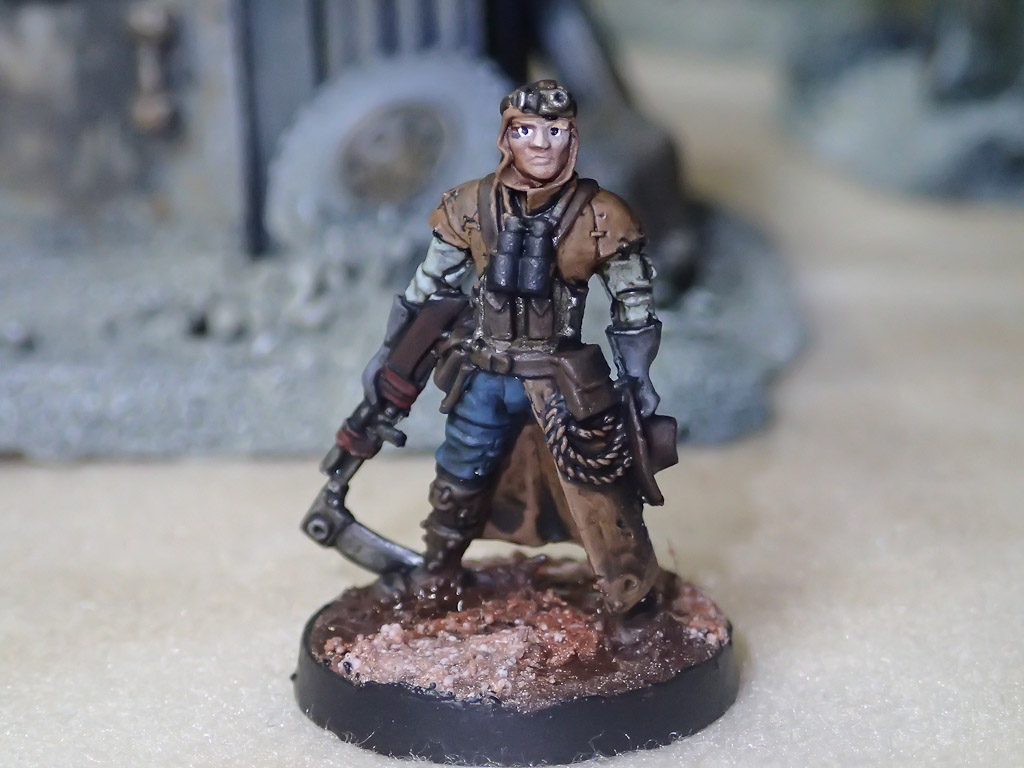
The fieldhand has a scythe attached to his shotgun, and he is determined to defend his homestead.
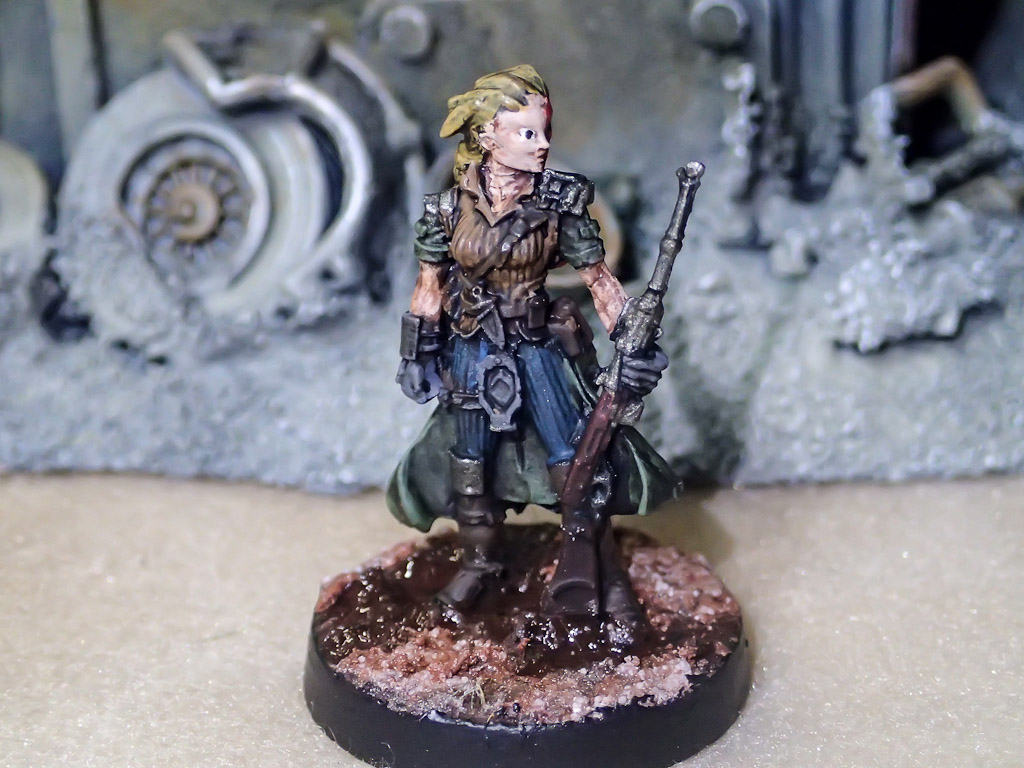
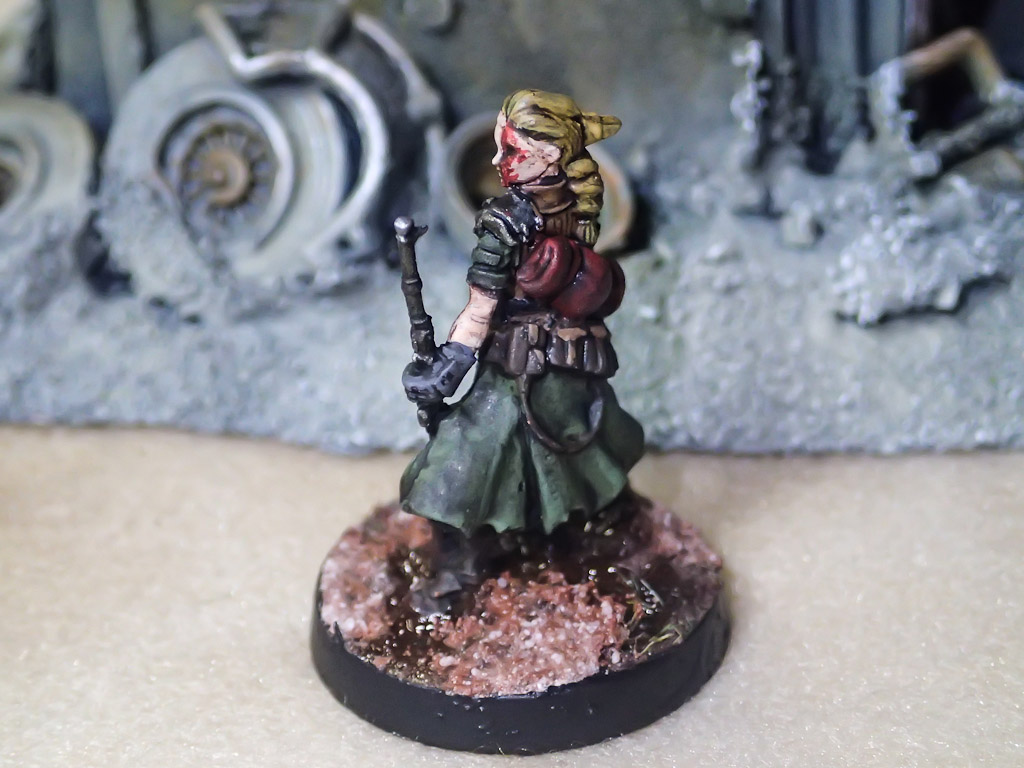
This capybara herder (cabybara coming soon) had some mold issues. Her face and arm had some weird slippage, so I decided to paint her with battle damage. I tried to make the arm holding her gun look scarred from a fire.
From the other side, you can see the gory hole where her eye used to be.
This manly woman keeps the settlement's meager electronics and communications gear in repair.
I tried something a little bit different for the bases. I wanted it to appear as if the figures were standing in muddy fields after a heavy rain. I added a bit of trampled grass, and you can see that the hot sun has begun to dry all but the deepest mud holes.
This effect was done by mixing plaster, pigment powder, and clear resin. There was a dark brown layer, followed by drops of clear resin to represent the wettest mud. 2 more layers of lighter mud with some very fine sand mixed in was added to show it drying and cracking in the sun.
Check back next week for photos of these guys in action!
-- Josh, Chicago Skirmish Wargames club member
Wednesday, September 19, 2012
Two reviews: Inkwell Industries and Mega Minis' Salvage Crew
Today we'll review two groups of miniatures: resin bases, barrels and wheels by Inkwell Industries, and the Salvage Crew from Mega Miniatures.
Inkwell Industries: Bases, Barrels and Wheels
Inkwell Industries is a one-man side project that has some good quality resin products at remarkable prices. This review will showcase their bases, barrels and tires, all of which I purchased a few months ago.
At present the only way to buy Inkwell Industries products is through the Post-Apoc Wargames forum's Traders Shack, which is where I found them.
The 25mm round bases come in 9 designs and are sold in batches of 20 for $5. In the past I've tended to view cast resin bases as a bit of an extravagance. With most bases costing nearly the price of what I try to spend for miniatures ($1 to $2) I didn't see the point. At 25 cents each, however, I couldn't resist trying them, especially when I have a slew of post-apocalyptic figures that would look good on them.
The bases look like the pictures below, though they now all come in white.
The bases all seem well cast. Some of them are a touch uneven on the bottom, but nothing you can't fix with a bit of sandpaper.. A few of them had what might be very minor flaws in the casting detail on top, but since these are all modeled after broken ground, scrap and salvage, I wouldn't have noticed if I hadn't had two of each base to compare to each other, and I doubt anyone else would notice.
Most importantly, the sides all seemed nice and smooth, with no bubbles. The heights of terrain modeled on the bases do vary a bit. Inky informs me that he originally made the bases for himself to balance out the height of the various figures he was using for his own post-apocalyptic games. Differing heights don't bother me, but it's interesting to hear this perspective
My final observation is that while a wide variety of bases are great for post-apocalyptic figures, players seeking a more uniform look might not appreciate all the variation. I would love to see the selection expanded so there were 4 to 5 different sculpts for each "theme" that appears in the mix (gears, rocky terrain, wreckage, etc).
Be sure to read through the miniatures review below to see photos of these bases black-washed and attached to miniatures.
Inkwell also has a 40mm round base cast in a metal plate pattern. It's a nice design, and while the plates aren't perfectly level (I'm not sure if this is intentional or not), they're a steal at 50 cents each and would be a nice choice for basing Space Marine Terminators. I'll probably use the one I have to base up the Ape-X figure from the Reaper Bones Kickstarter.
Hint to Inkwell...If this metal-plate design was available in 25mm or 40mm, I'd buy a batch tomorrow!
I also purchased a pack of oil barrels. They are very simple, with basic rim detailing and a valve on top. The bottoms are a bit uneven on some, but that's to be expected on barrels cast from a one-piece mold, and it's easy to fix. They are entirely adequate, and at 10 for $3 they are quite a bargain.
Lastly, I bought some resin wheels. These are purchasable individually at 15 cents each, and I got 16 of them.
They are 16mm in diameter and size up well with the wheels on the bargain 1/43 Bburago cars I reviewed earlier. These cars were nicely made, but they had some really cheap-looking wheels.
While the diameter and detail of the wheels are all the same, the thickness of the wheels varies quite a bit. There seem to be 3 or so different thicknesses. For folks using these for terrain detailing, this is not a problem, but for those intending to put these on vehicles, it might be worthwhile to specifically request wheels of the same thickness.
I had no problem making a few sets of wheels out of the batch I purchased, though a few will need to be sanded down a bit. The resin is easy to cut and modify, so I have no doubt it will be easy to drill out holes to fit these onto the wheel posts of the Bburagao cars.
Overall, I'm quite pleased with the products received from Inkwell. They don't have quite the polish of some higher-priced resin products, but at a third of the cost or less they are more than adequate for my uses. I highly recommend them, and it's very likely that I will be purchasing more of the bases in the near future.
Salvage Crew Miniatures on Inkwell Bases
Last year I briefly reviewed the Salvage Crew miniatures from Mega Miniatures. They were originally produced by Alpha Forge for their Star Mogul game, and Mega Minis acquired the line last year (which includes many other great figures) and released the game as a free download on their website.
The purchase of the post-apocalyptic bases from Inkwell Industries seemed like a perfect excuse to assemble these figures and base them up. I've mounted them on the Inkwell bases and given them a quick-and-dirty black wash to bring out some of the details. Here's a group shot and another from above to show off the bases.
My observations from the initial review are largely unchanged. They are very nice figures with separate heads, though the quality of the heads are are hit-or-miss. The casting is good, with minimal flash and mold lines. For the most part, they are loaded with packs, tools, gear, etc. as befits the subject matter.
Be aware that each figure comes with two random heads, so you might not end up with the heads I used, or the heads pictured on the website. Also, some of the neck pegs are a bit skinny; a bit of putty or just some extra superglue will fix this. I've listed them with the names that Mega Minis has given them. For those looking to acquire these figures, they are available here.
Gang Member with Shotgun and Cutting Equipment
Love the character of this figure, though he's the one figure I couldn't get to photograph well, so you'll have to take my word for it. Uniquely among this batch, he does not have a separate head. Also, he doesn't have any specifically futuristic gear. His main equipment is a double-barreled shotgun and a cutting torch on his back. His aviator cap and goggles, trenchcoat and lack of sci-fi equipment would make him a good fit for a steampunk setting as well as sci-fi, post-apocalyptic, etc.
Gang Member with Grinding Tool
This figure comes with a separate grinding tool with hands attached. He's unarmed, so I'll probably add a pistol holster. It's a nice find, though, as unarmed civilian sci-fi figures are fairly uncommon. The cutting tool could easily be modified into any number of tools by cutting away the blade and substituting some other techy bit.
Gang Member in Light Armor
This is a female figure with a heavy automatic weapon. The head I chose for her is the best of the female heads available.
Gang Member in Trench Coat
This is another one of my favorites. I gave him a Pig Iron Kolony Rebel head, though in retrospect that may have made him look a bit too bad-guy-ish, and he ended up resembling the most recent movie incarnation of the Batman villain Bane. He and the two following figures seem almost tailor-made to be Necromunda gangers, scum or bounty hunters.
Gang Member with Assault Rifle
Here's a nice pose -- and is that a bolter he's carrying? I particularly like the messenger bag laying across his chest.
Gang Member with Light Machinegun
This is a typical shooting dude with an SMG.
Gang Member with Rocket Launcher
The rocket launcher is a separate piece, and as I already have various launcher-armed figures, I switched out the launcher for an assault rifle from Heresy Miniatures. I did have to reposition the left hand to be supporting the gun rather than steadying the rocket launcher. It's a nice figure, but unfortunately the original configuration with the rocket launcher isn't very balanced. Check out that huge tire on the base!
In conclusion, I'm very happy with the Salvage Crew figures. They're not state-of-the-art sculpts, but they fill a nice niche in my sci-fi collection. They would work well in most post-apocalyptic or sci-fi game setting and seem ripe for use in Necromunda. Also, at only $2.50 a piece for each 28mm figure, they are a great deal.
As a bonus, I give you Rosie, Cryotechnician. I had this Reaper Chronoscope miniature lying around for some time, so I decided to use her here. I think she's intended to be a "not" version of Kaylee from Firefly and Serenity. The figure comes with a wrench and gun options for her right hand, though I still haven't decided which to use. With the wrench option she is unarmed, and you can never have too many unarmed sci-fi figures in your collection.
Like most Chronoscope figures, she stands notably taller than other 28mm models. Using traditional sole-to-eye measurements, the Salvage Crew are a standard 28mm, while Rosie towers to a height of 32mm. Despite the height, she fits in well with the style of the Salvage crew figures, so I'm pretty happy with her. As with most Reaper miniatures, the detail is really well done, and she's a step up in overall quality from the others.
-- Karl, Chicago Skirmish Wargames club member
Inkwell Industries: Bases, Barrels and Wheels
Inkwell Industries is a one-man side project that has some good quality resin products at remarkable prices. This review will showcase their bases, barrels and tires, all of which I purchased a few months ago.
At present the only way to buy Inkwell Industries products is through the Post-Apoc Wargames forum's Traders Shack, which is where I found them.
The 25mm round bases come in 9 designs and are sold in batches of 20 for $5. In the past I've tended to view cast resin bases as a bit of an extravagance. With most bases costing nearly the price of what I try to spend for miniatures ($1 to $2) I didn't see the point. At 25 cents each, however, I couldn't resist trying them, especially when I have a slew of post-apocalyptic figures that would look good on them.
The bases look like the pictures below, though they now all come in white.
The bases all seem well cast. Some of them are a touch uneven on the bottom, but nothing you can't fix with a bit of sandpaper.. A few of them had what might be very minor flaws in the casting detail on top, but since these are all modeled after broken ground, scrap and salvage, I wouldn't have noticed if I hadn't had two of each base to compare to each other, and I doubt anyone else would notice.
Most importantly, the sides all seemed nice and smooth, with no bubbles. The heights of terrain modeled on the bases do vary a bit. Inky informs me that he originally made the bases for himself to balance out the height of the various figures he was using for his own post-apocalyptic games. Differing heights don't bother me, but it's interesting to hear this perspective
My final observation is that while a wide variety of bases are great for post-apocalyptic figures, players seeking a more uniform look might not appreciate all the variation. I would love to see the selection expanded so there were 4 to 5 different sculpts for each "theme" that appears in the mix (gears, rocky terrain, wreckage, etc).
Be sure to read through the miniatures review below to see photos of these bases black-washed and attached to miniatures.
Inkwell also has a 40mm round base cast in a metal plate pattern. It's a nice design, and while the plates aren't perfectly level (I'm not sure if this is intentional or not), they're a steal at 50 cents each and would be a nice choice for basing Space Marine Terminators. I'll probably use the one I have to base up the Ape-X figure from the Reaper Bones Kickstarter.
Hint to Inkwell...If this metal-plate design was available in 25mm or 40mm, I'd buy a batch tomorrow!
I also purchased a pack of oil barrels. They are very simple, with basic rim detailing and a valve on top. The bottoms are a bit uneven on some, but that's to be expected on barrels cast from a one-piece mold, and it's easy to fix. They are entirely adequate, and at 10 for $3 they are quite a bargain.
Lastly, I bought some resin wheels. These are purchasable individually at 15 cents each, and I got 16 of them.
While the diameter and detail of the wheels are all the same, the thickness of the wheels varies quite a bit. There seem to be 3 or so different thicknesses. For folks using these for terrain detailing, this is not a problem, but for those intending to put these on vehicles, it might be worthwhile to specifically request wheels of the same thickness.
I had no problem making a few sets of wheels out of the batch I purchased, though a few will need to be sanded down a bit. The resin is easy to cut and modify, so I have no doubt it will be easy to drill out holes to fit these onto the wheel posts of the Bburagao cars.
Overall, I'm quite pleased with the products received from Inkwell. They don't have quite the polish of some higher-priced resin products, but at a third of the cost or less they are more than adequate for my uses. I highly recommend them, and it's very likely that I will be purchasing more of the bases in the near future.
Salvage Crew Miniatures on Inkwell Bases
Last year I briefly reviewed the Salvage Crew miniatures from Mega Miniatures. They were originally produced by Alpha Forge for their Star Mogul game, and Mega Minis acquired the line last year (which includes many other great figures) and released the game as a free download on their website.
The purchase of the post-apocalyptic bases from Inkwell Industries seemed like a perfect excuse to assemble these figures and base them up. I've mounted them on the Inkwell bases and given them a quick-and-dirty black wash to bring out some of the details. Here's a group shot and another from above to show off the bases.
My observations from the initial review are largely unchanged. They are very nice figures with separate heads, though the quality of the heads are are hit-or-miss. The casting is good, with minimal flash and mold lines. For the most part, they are loaded with packs, tools, gear, etc. as befits the subject matter.
Be aware that each figure comes with two random heads, so you might not end up with the heads I used, or the heads pictured on the website. Also, some of the neck pegs are a bit skinny; a bit of putty or just some extra superglue will fix this. I've listed them with the names that Mega Minis has given them. For those looking to acquire these figures, they are available here.
Gang Member with Shotgun and Cutting Equipment
Love the character of this figure, though he's the one figure I couldn't get to photograph well, so you'll have to take my word for it. Uniquely among this batch, he does not have a separate head. Also, he doesn't have any specifically futuristic gear. His main equipment is a double-barreled shotgun and a cutting torch on his back. His aviator cap and goggles, trenchcoat and lack of sci-fi equipment would make him a good fit for a steampunk setting as well as sci-fi, post-apocalyptic, etc.
Gang Member with Grinding Tool
This figure comes with a separate grinding tool with hands attached. He's unarmed, so I'll probably add a pistol holster. It's a nice find, though, as unarmed civilian sci-fi figures are fairly uncommon. The cutting tool could easily be modified into any number of tools by cutting away the blade and substituting some other techy bit.
Gang Member in Light Armor
This is a female figure with a heavy automatic weapon. The head I chose for her is the best of the female heads available.
Gang Member in Trench Coat
This is another one of my favorites. I gave him a Pig Iron Kolony Rebel head, though in retrospect that may have made him look a bit too bad-guy-ish, and he ended up resembling the most recent movie incarnation of the Batman villain Bane. He and the two following figures seem almost tailor-made to be Necromunda gangers, scum or bounty hunters.
Gang Member with Assault Rifle
Here's a nice pose -- and is that a bolter he's carrying? I particularly like the messenger bag laying across his chest.
Gang Member with Light Machinegun
This is a typical shooting dude with an SMG.
Gang Member with Rocket Launcher
The rocket launcher is a separate piece, and as I already have various launcher-armed figures, I switched out the launcher for an assault rifle from Heresy Miniatures. I did have to reposition the left hand to be supporting the gun rather than steadying the rocket launcher. It's a nice figure, but unfortunately the original configuration with the rocket launcher isn't very balanced. Check out that huge tire on the base!
In conclusion, I'm very happy with the Salvage Crew figures. They're not state-of-the-art sculpts, but they fill a nice niche in my sci-fi collection. They would work well in most post-apocalyptic or sci-fi game setting and seem ripe for use in Necromunda. Also, at only $2.50 a piece for each 28mm figure, they are a great deal.
As a bonus, I give you Rosie, Cryotechnician. I had this Reaper Chronoscope miniature lying around for some time, so I decided to use her here. I think she's intended to be a "not" version of Kaylee from Firefly and Serenity. The figure comes with a wrench and gun options for her right hand, though I still haven't decided which to use. With the wrench option she is unarmed, and you can never have too many unarmed sci-fi figures in your collection.
Like most Chronoscope figures, she stands notably taller than other 28mm models. Using traditional sole-to-eye measurements, the Salvage Crew are a standard 28mm, while Rosie towers to a height of 32mm. Despite the height, she fits in well with the style of the Salvage crew figures, so I'm pretty happy with her. As with most Reaper miniatures, the detail is really well done, and she's a step up in overall quality from the others.
-- Karl, Chicago Skirmish Wargames club member
Sunday, July 8, 2012
Review: Bases from Proxie Models
Ken at Proxie Models is unique among one-man hobby companies since he cuts dies to create injection molds to make plastic bases -- all out of his own barn! Here's a video with more information on how Ken works. Today, I'll review a variety of bases available from Proxie Models.
The bases I ordered are below 30mm hex, 30mm round, 25mm round and 70mm bike base.
Proxie Models charges very low shipping rates, and the bases arrived quickly, with each set individualy bagged in ziplocks with card headers. Proxie Models bases have a few design features that set them apart from most other bases.
- Small raised lip on the edge that is about half the thickness of the new-style slotted bases that are quite common these days.
- Shorter height -- most of the Proxie Models bases are a millimeter or two shorter than their most common counterparts.
- Textured surface -- most Proxie Models bases have a rough surface that could substitute for ballast/flock basing.
- Price -- Proxie Models bases are as cheap, and in most cases significantly cheaper, than similarly sized bases.
First off, the 25mm round base. I picked up 32 bases for $4, about 13 cents each.
In this comparison pic, from left, we have:
- Proxie Models -- 25mm base, 2mm high, 21mm interior recess, rounded lipped sides
- Mantic -- 25mm base, 3mm high, 25mm top (plain on one side, recessed on other), 15mm interior recess. Straight sides.
- Standard slotted base -- 25mm base, 3mm high, 23mm top, sloped sides
This base had the most texture of all the bases reviewed. I had no trouble at all imagining someone gluing a plastic figure right to the base, painting and drybrushing the base and skipping sand or flock entirely. However, the lipped design gives this base the smallest actual model basing area of the three with an interior diameter of only 21mm. As for the lip vs straight vs sloped, that's purely an aesthetic choice. I will probably be using these for rebasing of Heroclix miniatures where I want a quick basing solution, but don't want to spend alot of time on each figure.
Next, the 30mm round base. I bought 24 bases for $4, about 17 cents each.
In this pic, from left, we have:
- Proxie Models -- 30mm base, 2mm high, 26mm interior recess, rounded lipped sides.
- Standard new-style slotted base -- 30mm base, 4mm high, 23mm interior recess, rounded lipped sides.
- Standard slotted base -- 25mm base, 3mm high, 23mm top, sloped sides.
These were the bases I was most interested in. I have many figures with cast-on bases that are wider than the 23mm top of a standard slotted base. Some manufacturers package their figures with a new-style stotted base, which helps make for a more balanced figure, but the actual area for basing is exactly the same as a standard slotted base.
The additional 3mm and the lip, which makes it easier to hide the cast-on base, make them ideal for my use. The pic below shows the difference. The texture on these bases is still pronounced enough that you might choose to dispense with basing materials, but it's not as rough as the 25mm proxie bases.
Next, a 30mm hex base. I got 32 for $4, about 13 cents each.
In this comparison pic, from left, we have:
- Standard slotted hex -- 25mm base, 3mm high, 23mm top
- Proxie hex -- 30mm base, 3mm high, 25mm interior
- EM4 mech base (also carried by Chessex) -- 29mm base, 3mm high, 25.5mm interior
- Iron Wind Metals solid pewter hex -- 30mm base, 5mm high, 25mm interior
These bases were purchased mostly for basing of the plastic mechs that come with the battletech starter box. Like the 30mm rounds, they are just textured enough that I can probably skip basing, though I will have to cut off the cast-on plastic bases that the mechs come attached too.
For metal mechs, I think that the EM4 bases or Iron Wind Bases (very nice but expensive) are more suitable. They have deeper recesses which are designed to conceal the cast-on bases that most mechs have. Also, the EM4 bases are the same price as the Proxie bases, so there's no cost advantage. I'm sure that other folks who like hex bases for fantasy and modern figures will find the Proxie Models a useful option.
Lastly, here's the "Sci-Fi Bike or Cav Base" from Proxie Models. I picked up 16 for $4, or 25 cents each.
The base measures 25mm by 70mm, and interior is 21mm by 65mm.
They look to be spot-on for the size of Games Workshop bike bases, which are often erroneously reported as being 50mm long. This is only correct if you don't count the rounded portions in the overall length. At a quarter of the price, they should prove quite popular. I bought these to base up a bunch of post-apocalyptic bikers I've been converting. The choppers are from Hot Wheels and are quite long, but fit on these bases quite well.
These bases are also a good size for basing up terrain like rubble piles and barriers. My one gripe is that the bases have a lot less texture than any of the other Proxie bases I've tried. As you can see in the pic with the biker, these bases might require ballast or flock of some kind.
Also, it might just be the plastic, but the texture appears to radiate from the middle -- not a very realistic look. I'm not averse to using basing materials. I'm just not sure why they decided to make the texture so subtle.
Conclusion
I'm very happy with Proxie Models bases. The bases all seemed to be good quality products that met my needs at a very affordable price. Proxie seems to be walking a line with bases that are just different enough to set themselves apart while being "standard" enough to meet the needs of wargamers. As well as a wide variety of other base shapes and sizes, Proxie also makes a 15mm sci-fi tank that Games Workshop fans will recognize, and a couple of 15mm plastic buildings (look for a future review...). Though I don't have any unmet base needs anymore, it's likely that I'll be doing business with them again in the future.
-- Karl, Chicago Skirmish Wargames club member
Tuesday, May 22, 2012
How to Base Fleet-scale Starfighters
I have been collecting miniature spaceships for over eight years now and finally
began painting them up recently. I had never really bothered with all my miniature starfighters,
but I finally decided to do something with them and I needed a way to base them up.
Because almost all of them came from England, I wanted to stretch them as far as I could. There are a number of methods for basing up fighters, and I combined a few of them to do it easily and cheaply.
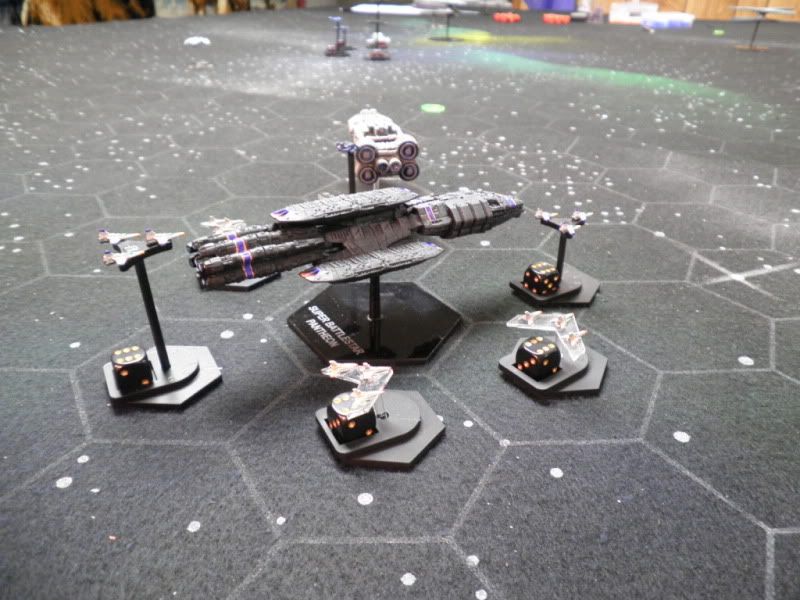
One method I had been considering involves Litko bases. They are very durable and easy to use, but expensive. First you need a Litko flying base and then you add a chevron-shaped attachment to the top. They also make a three-pronged triangle that you can stick fighters on. Both work well and I have seen them used to great effect — but they weren't really what I was looking for, and I'd need a lot of them, so I kept looking.
The fighters are based using Litko products. These are not my miniatures!
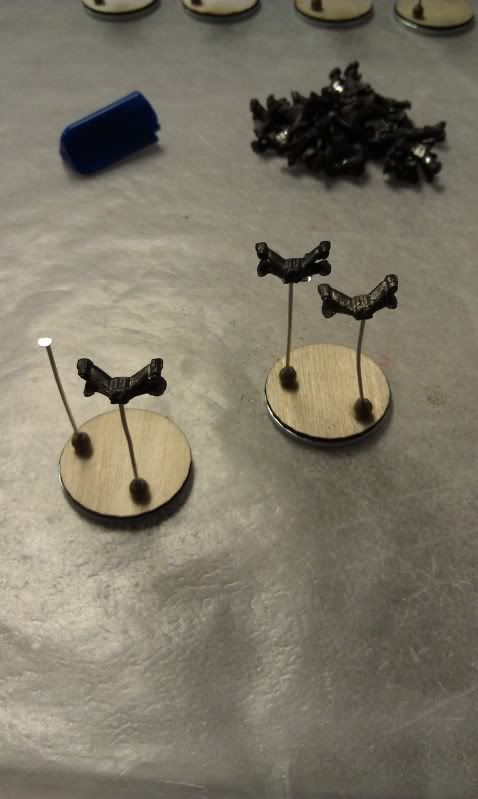
Another great option was to base them up like the creator of Star-Ranger did. He took a one-inch wood disk and glued three pins to them. Then he drilled a small hole into each fighter and mounted the fighters on the pins. I had a hard time drilling the holes, though, so I had to think outside the box. What I ended up doing was flipping around the pin and using the flattened top to attach the fighters.
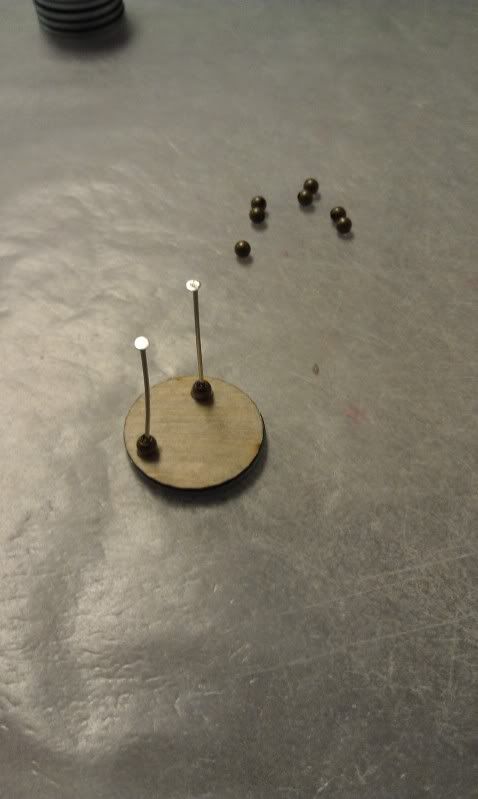
But how to get the pin on the base? To solve that problem, I found some 3.2mm brass beads from the same craft store. If I glued them to my wooden base, I could stick the pin into the bead, giving me a strong connection. It worked amazingly well.
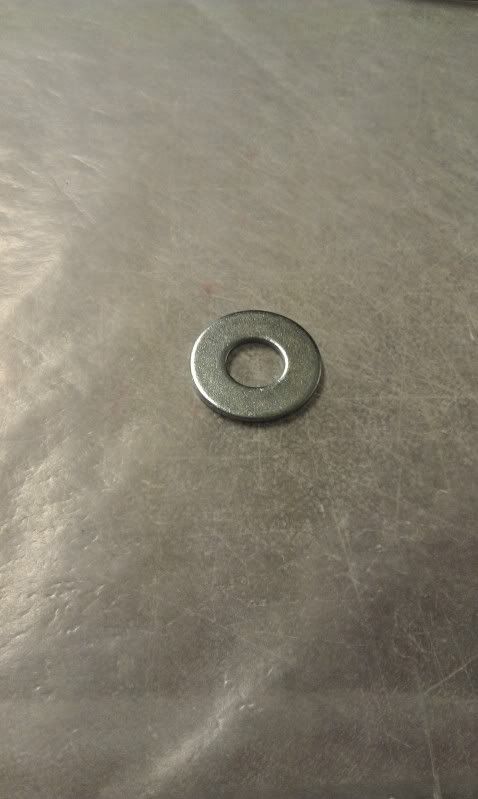
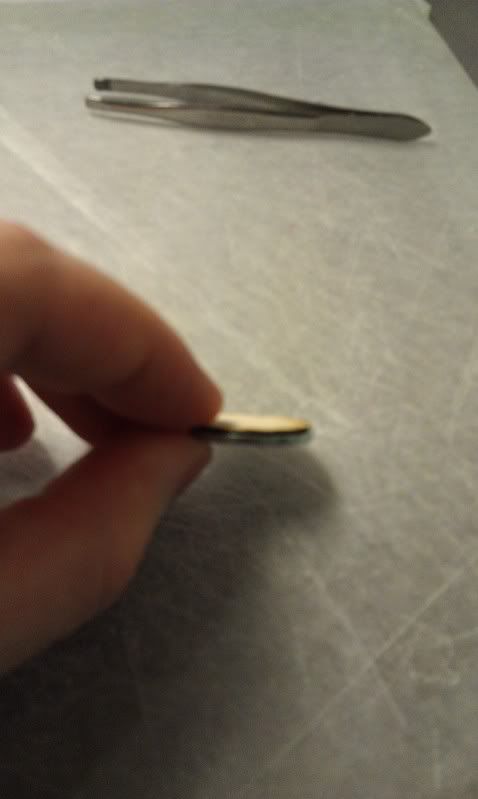
For the bottom, I first used a 7/8" steel washer from Lowe's and then discovered that Litko sold plywood disks the exact same size. I ordered a few hundred of them at 0.8mm thick and started gluing. After gluing together the washers and plywood, I had a reasonably heavy base that was magnetic.
The next step was the glue down two beads, making sure to leave plenty of space between them. Some of my fighters were quite large and I didn't want any collisions!
After letting the glue set up a bit under the bead, I added more glue and stuck the pin into the bead. It wasn't an exact fit but using a very thick gel glue, it worked.
Attaching the fighters took some more work. Some of them were small enough that they went on very easily. Some took a bit more convincing. And for a handful, I needed to glue a bead to the bottom of the fighter, cut off the flat head of the pin, and use what was left of the pin to connect the two beads.
I put two fighters on each base, which leaves room for a small dice to track how many ships are left in the squadron, and for any identifying labels I might want to use.
For shuttles and larger craft I only put on per base, mainly because Ground Zero Games stopped making their small shuttles and similar craft, so I was stuck with whatever I had on hand.
After I based up over 100 squadrons I decided to see how much it cost me per base. Using Litko's three-peg base, it would cost 63 cents per base. Using their chevron base, it would cost 73 cents per base. My method took more time but only cost 17 cents per base.
One more method works well: Studio Bergstrom sells a Versi-Base, which is a piece of foam you can stick pins into for mounting fighters. I have heard very good things about them, but each one costs 20 cents, which still makes my similar method slightly cheaper.
— Mike, Chicago Skirmish Wargames member
Because almost all of them came from England, I wanted to stretch them as far as I could. There are a number of methods for basing up fighters, and I combined a few of them to do it easily and cheaply.
One method I had been considering involves Litko bases. They are very durable and easy to use, but expensive. First you need a Litko flying base and then you add a chevron-shaped attachment to the top. They also make a three-pronged triangle that you can stick fighters on. Both work well and I have seen them used to great effect — but they weren't really what I was looking for, and I'd need a lot of them, so I kept looking.
The fighters are based using Litko products. These are not my miniatures!
Another great option was to base them up like the creator of Star-Ranger did. He took a one-inch wood disk and glued three pins to them. Then he drilled a small hole into each fighter and mounted the fighters on the pins. I had a hard time drilling the holes, though, so I had to think outside the box. What I ended up doing was flipping around the pin and using the flattened top to attach the fighters.
But how to get the pin on the base? To solve that problem, I found some 3.2mm brass beads from the same craft store. If I glued them to my wooden base, I could stick the pin into the bead, giving me a strong connection. It worked amazingly well.
For the bottom, I first used a 7/8" steel washer from Lowe's and then discovered that Litko sold plywood disks the exact same size. I ordered a few hundred of them at 0.8mm thick and started gluing. After gluing together the washers and plywood, I had a reasonably heavy base that was magnetic.
The next step was the glue down two beads, making sure to leave plenty of space between them. Some of my fighters were quite large and I didn't want any collisions!
After letting the glue set up a bit under the bead, I added more glue and stuck the pin into the bead. It wasn't an exact fit but using a very thick gel glue, it worked.
Attaching the fighters took some more work. Some of them were small enough that they went on very easily. Some took a bit more convincing. And for a handful, I needed to glue a bead to the bottom of the fighter, cut off the flat head of the pin, and use what was left of the pin to connect the two beads.
I put two fighters on each base, which leaves room for a small dice to track how many ships are left in the squadron, and for any identifying labels I might want to use.
For shuttles and larger craft I only put on per base, mainly because Ground Zero Games stopped making their small shuttles and similar craft, so I was stuck with whatever I had on hand.
After I based up over 100 squadrons I decided to see how much it cost me per base. Using Litko's three-peg base, it would cost 63 cents per base. Using their chevron base, it would cost 73 cents per base. My method took more time but only cost 17 cents per base.
One more method works well: Studio Bergstrom sells a Versi-Base, which is a piece of foam you can stick pins into for mounting fighters. I have heard very good things about them, but each one costs 20 cents, which still makes my similar method slightly cheaper.
— Mike, Chicago Skirmish Wargames member