Monday, August 4, 2014

Nuclear Renaissance Game Report and Review


Last week the post-apocalyptic wargaming bug bit the club pretty hard, so we cleared our schedules to play a game we've been interested in for quite some time: Nuclear Renaissance.

This title from Ramshackle Games is a gang-based skirmish game that's particularly well-suited to multiplayer games. That's great for us, as our club nights tend to have an irregular number of players from week to week. For last week's game, we had 5 players, so we decided to bite the bullet and run a post-apoc free-for-all game using Nuclear Renaissance.

We met at Josh's house and put together a fairly epic 4x8 foot tabletop featuring a tumbledown industrial area alongside a wooded settlement. Here's a pic of the setup:


This game marked the first outing for several bits of new terrain, including Karl's tenement high-rise and Josh's atom bomb. Here's a closer look at both halves of the battlefield.
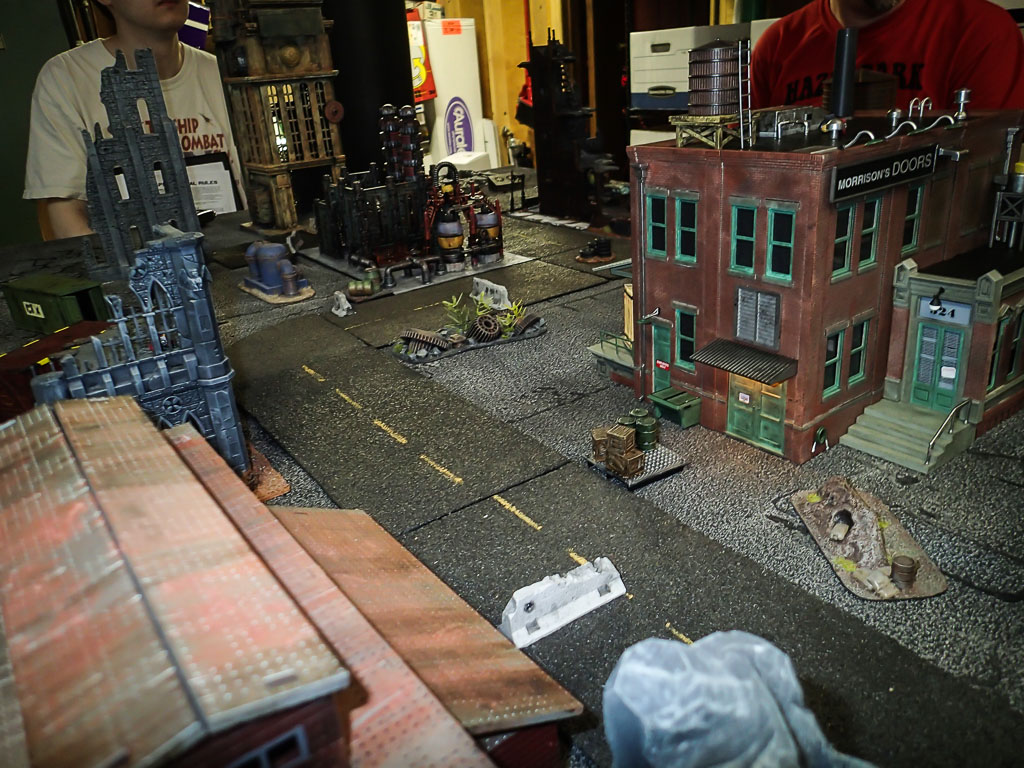


Looks like a great place to battle, right? We played a variation of the classic "Scavenger Hunt" scenario, with 10 little pieces of lost tech hidden all over the battlefield (most inside buildings or atop balconies, to encourage some mobility.

Nuke Ren is a single-figure activation game, where the players roll initiative and then take turns activating individual figures. Typical actions are move, shoot, drive, etc. Unlike games like Warhammer 40,000, vehicles don't come with a crew or pilot ... if you want your truck to move, you have to have a guy behind the wheel! Same with that sweet machinegun on top ... it won't fire unless a member of your warband is in the turret!

What this meant is that my warband (5 guys plus a buggy) was actually three guys once I got the buggy fully staffed with a driver and a gunner. Here's my team -- keep in mind that two of these guys basically weren't on the table for most of the game, since they were aboard the buggy and thus didn't need to be represented on the tabletop.


So anyway, that's something to keep in mind about Nuke Ren.

As the game progressed, each player's gang advanced toward a few of the scavenger tokens on the battlefield. Figures walk 10cm or run 20cm, and with such a large battlefield we found that our guys weren't mobilizing very quickly.


In contrast to the fairly short movement rates of infantry, vehicles proved much more mobile. This seems to be by design, probably to encourage vehicles to race around the battlefield on taxi runs.


As the vehicles moved into the center of the battlefield, we discovered the true potency of ranged firearms in the game. Such weapons are quite expensive in Nuclear Renaissance, accounting for half (or more!) of a typical figure's point value. But they're also quite powerful, and most have extremely long ranges. My assault rifle had a range of 80cm, longer than our fastest vehicle could move in a typical turn!

What this meant is that the few gangs that had assault rifles and sniper rifles were able to really rule the battlefield, despite what we thought was a pretty cluttered tabletop. Mike's troopers climbed a ruined building and took potshots from the upper-story windows...


....while my sniper scaled a warehouse and used his rifle's incredible 200cm range (why not just make it infinite?!) to rain fire down on Josh's squad.


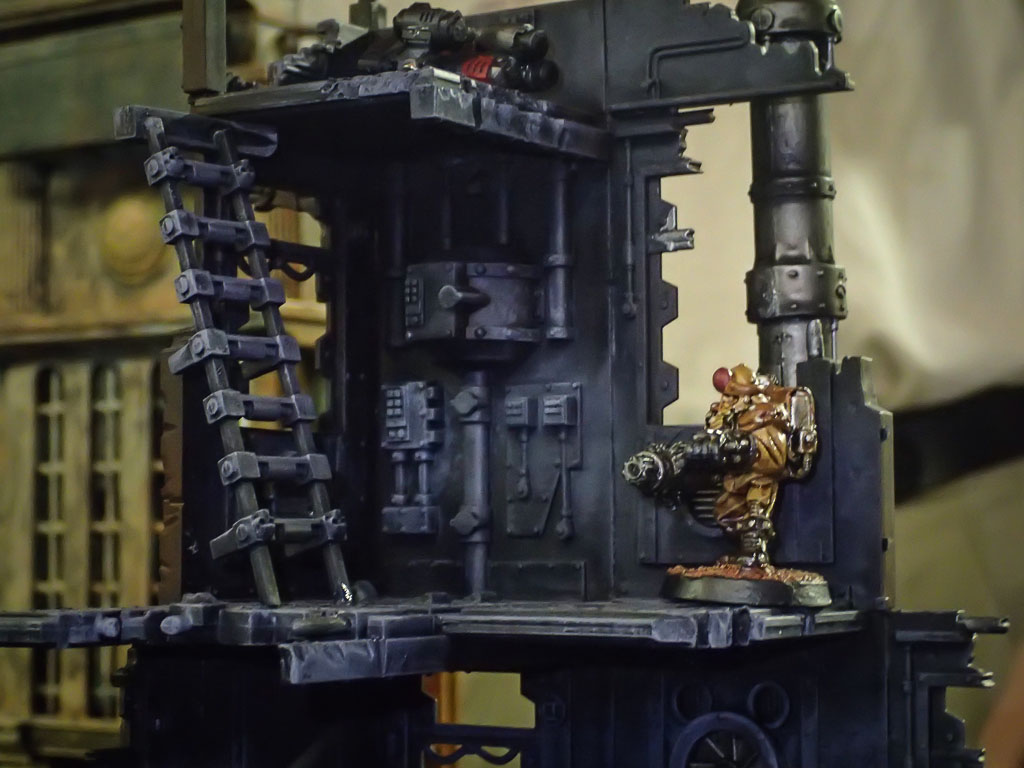
As the game progressed, little mini-battles developed around various buildings as players fought for control of the scavenger tokens. In these two pics, Karl's wastelands raiders skirmished with Mike's troopers around the base of the high-rise. Later you can see Karl's chaingunner atop a ruined building, ready to seize another piece of lost tech.


Toward the end of the game, Josh wanted to try out the vehicle ramming rules, and he picked the only other vehicle nearby as his victim -- alas, it was my buggy! The ramming rules were fairly straightforward, and Josh reduced my buggy to a heavily damaged (but still driveable) wreck.


Conclusion
We agreed that Nuke Ren was a lot of fun. Trying to play a 5-player multiplayer game while also learning a new ruleset was probably a bad idea, as we only got through 5 turns before we had to wrap up for the night.
The size of the battlefield meant that we never even got close enough to try the close combat rules, which is a bummer considering that the game seems heavily slanted in favor of close combat.

The best part of the game is probably the well-developed vehicle section. We have lots of post-apoc vehicles in our collection, so we've been really excited to try Nuke Ren and get them all on the battlefield.


The suggested point size in the rulebook is 650 points, but in practice that gets you maybe 4-6 figures plus a vehicle, so we'll almost certainly bump the gang point total up to 1000 for future games. We'll also shrink the table size down to either 4x6 feet or 4x4 feet for most games. All in all, the game is totally playable and we'll doubtless give it another run-through in the near future. Stay tuned!

-- Patrick, Chicago Skirmish Wargames club member

Saturday, August 2, 2014

Terrain: Post-Apocalyptic Scenery Bits


When we decided to take a break from our summer fantasy campaign to play some post-apocalyptic skirmishes, I knew it was time to crank out some terrain projects I have been thinking about for a long time...


This is an O-scale building by Woodland Scenics. It is a fantastic piece for gaming, with multiple levels, plenty of room for figures, and some fantastic details. Technically, this is still a project for me as I haven't done anything beside remove it from the box -- it prepainted and ready to go as is. But I am going to weather it at some point.


What's that? Electric lights?! Yep, it came with lights installed, ready for a model train setup. I wired them up to batteries and a power switch, and it is a great effect on the table. I want to add lights to some of my other pieces!


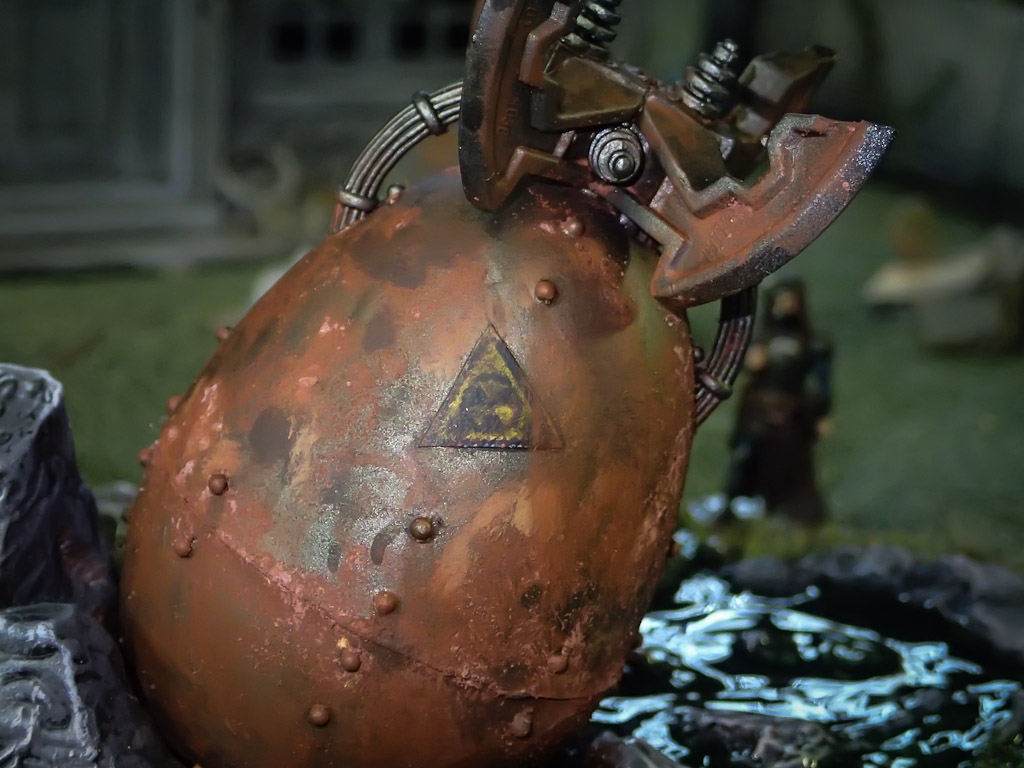
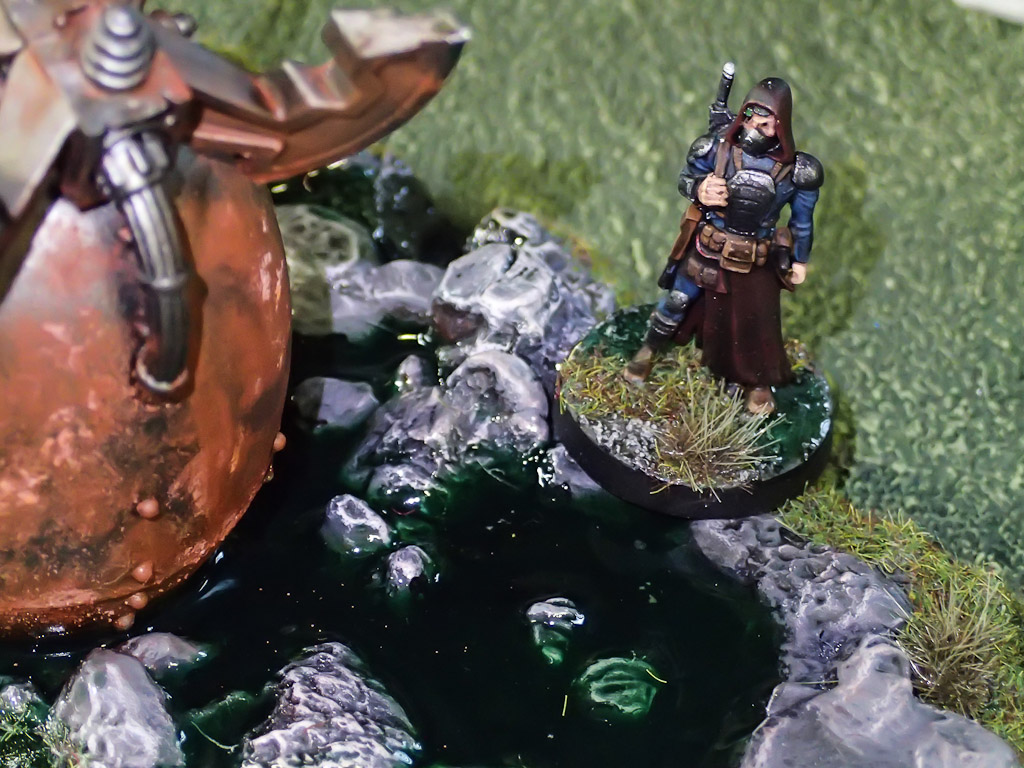
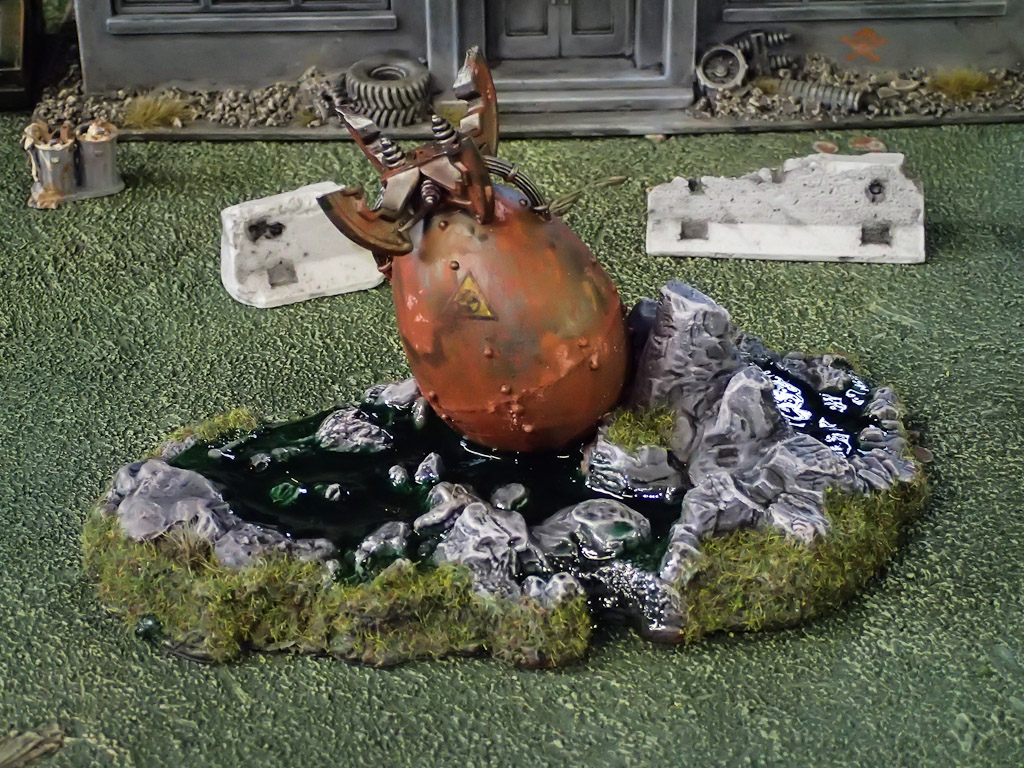
You might recognize this piece of terrain if you've ever played the game Fallout 3. Jon helped out by creating the bomb out of an easter egg and some legos. I mounted it to the base from an old Spawn action figure and painted it. After the weathering was done, I poured some unhealthy looking green water effects to complete the piece.


This piece marks the first time I've used printed details. I simply printed the symbol on regular copy paper, cut it out, and glued it to the bomb before weathering.


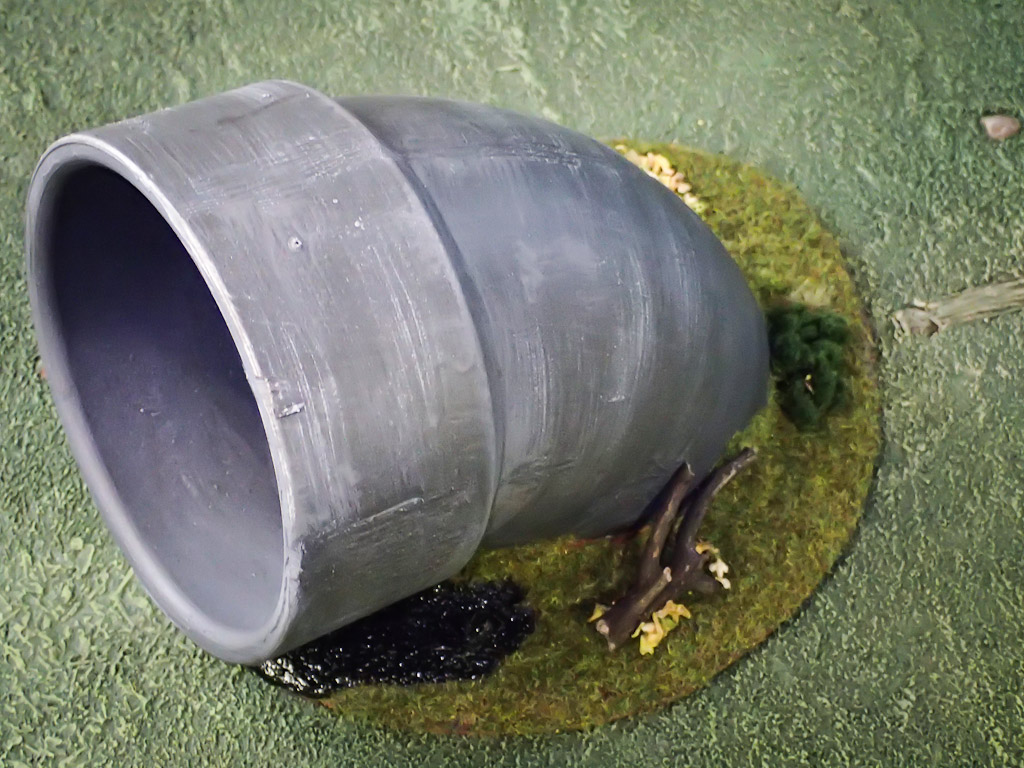
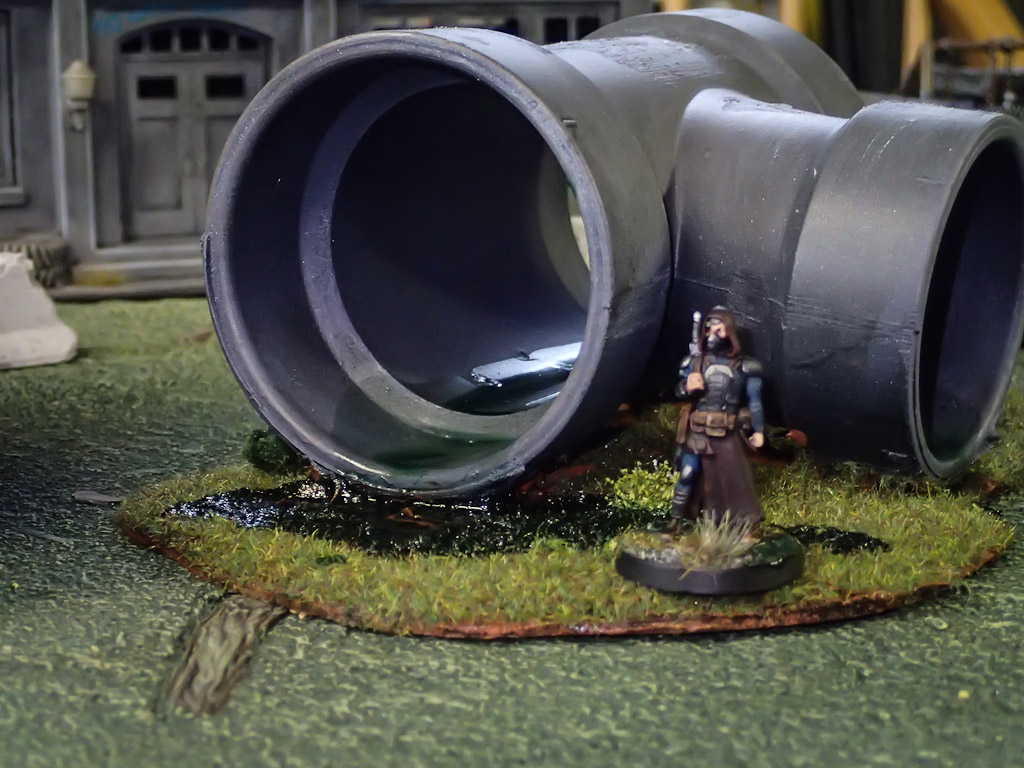
This is the first of 2 concrete pipes I made from PVC scraps. I started working on these things over a year ago, and I'm glad I finally finished them!


This first pipe is HUGE, and filled with the same greenish water as the bomb piece. Some of it is spilled out on the base as well.


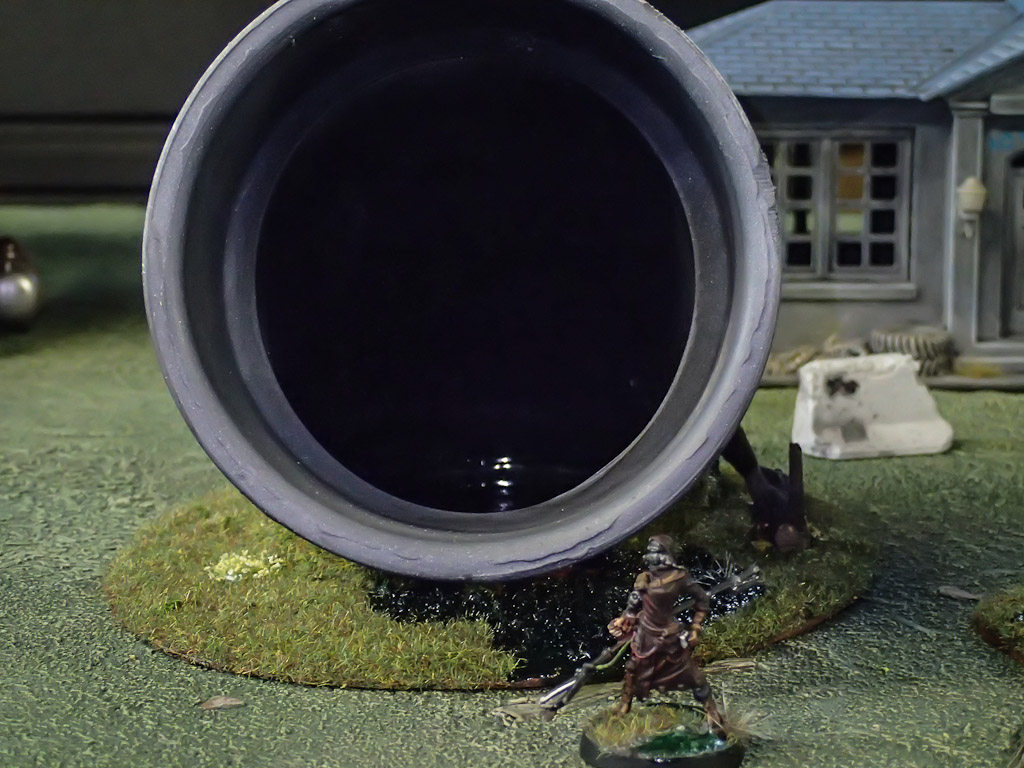
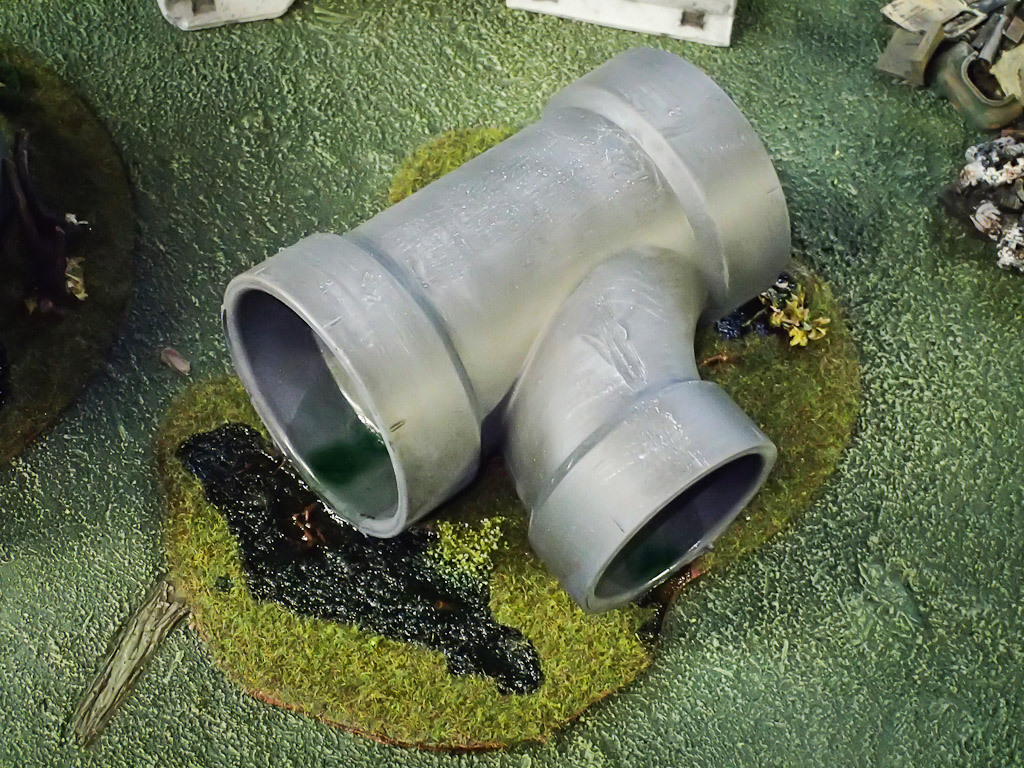
The second piece is much smaller, but it is just the right diameter for a model to move through it. (Although that water doesn't look very safe!)


The spill on the base was an accident. I tilted the pipe to make sure that the water flowed through the whole thing, but i went a little too far. I am glad, though because I think it adds to the piece.


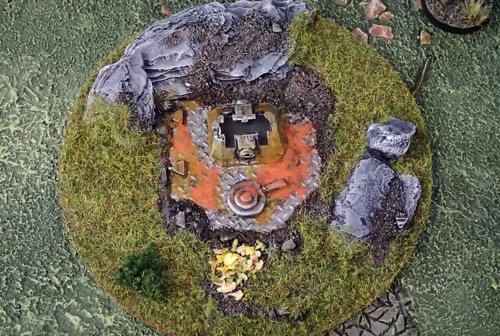
This last piece was inspired by the show LOST. It's a scratch-built hatch! Where does it lead? Nobody knows!


We got these pieces on the table for a game last week, so stay tuned for a battle report. I think they contributed to a fresh take on our standard post apocalyptic nuclear wasteland.

-- Josh, Chicago Skirmish Wargames club member
Friday, August 1, 2014

The Tainted Thegn and His Dire Men

We're about halfway through our fantasy campaign, but I've finally put pen to paper about my warband, the Tainted Thegn and His Dire Men. Read on! 

Thus sang the mangled minstrel of the coming of Fulgid Glim during the time of Quaking and of Mourning in Qaarra:


He came upon us from the bruiséd North,
Leading forth a host of brigand knav'ry
Who once were only feuding petty-kings,
born to desp'rate battle and gloried death.


But Fulgid Glim gave to them many gifts
And each their bloody praises did he sing;
and forth they came under a new accord,
'Neath the flag of the Many-eyed, Mumbling Thing.


On Glim's brow the crown of cabbages he bore
And the Dire Men called him their Tainted Thegn;
They rode on us in darkness and unease
To throw down the nacreous towers of yore
Where dwelt the darkly dreaming deities.


-- Mattias, Chicago Skirmish Wargames club member

Thursday, July 31, 2014

Tenement High-Rise from Toy Playsets


Recently I've been knocking out a number of projects that have been sitting around for a while: units for my Kings of War army, various industrial terrain pieces, a case for my fantasy miniatures, barbed wire sections, as well as a crashed helicopter for Tim and a graveyard hill for Josh.

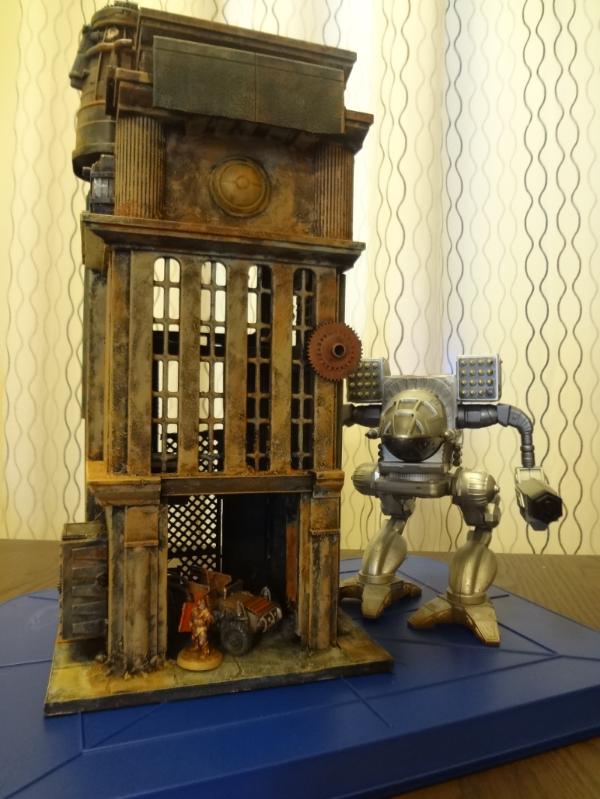
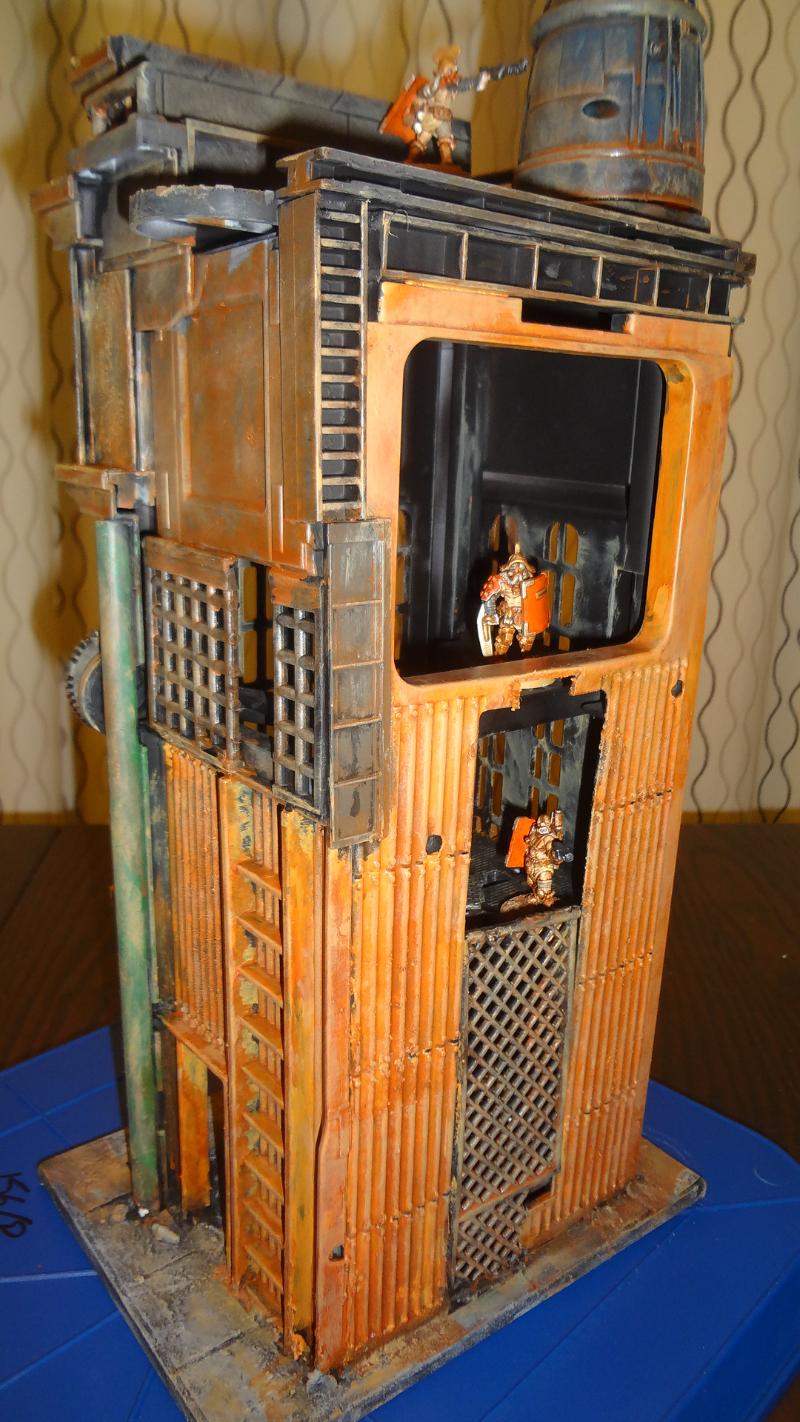
Now I've finished off the last of the in-progress stuff that was cluttering up my to-do list: the mammoth near future tenement high-rise.

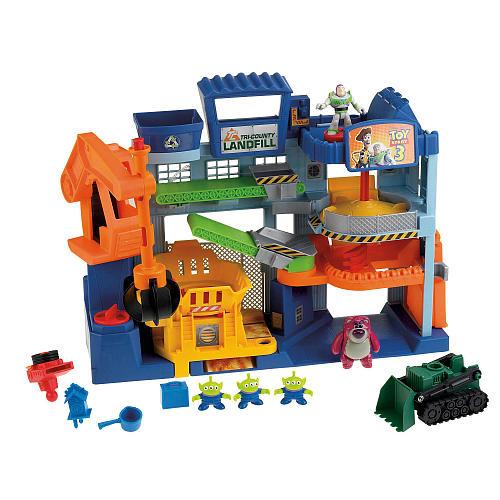
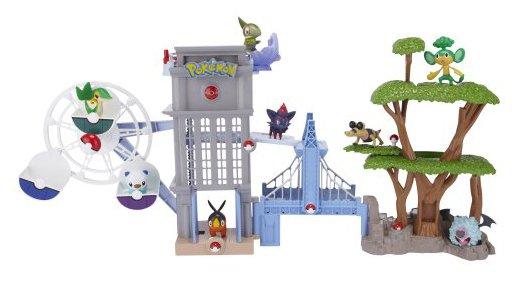
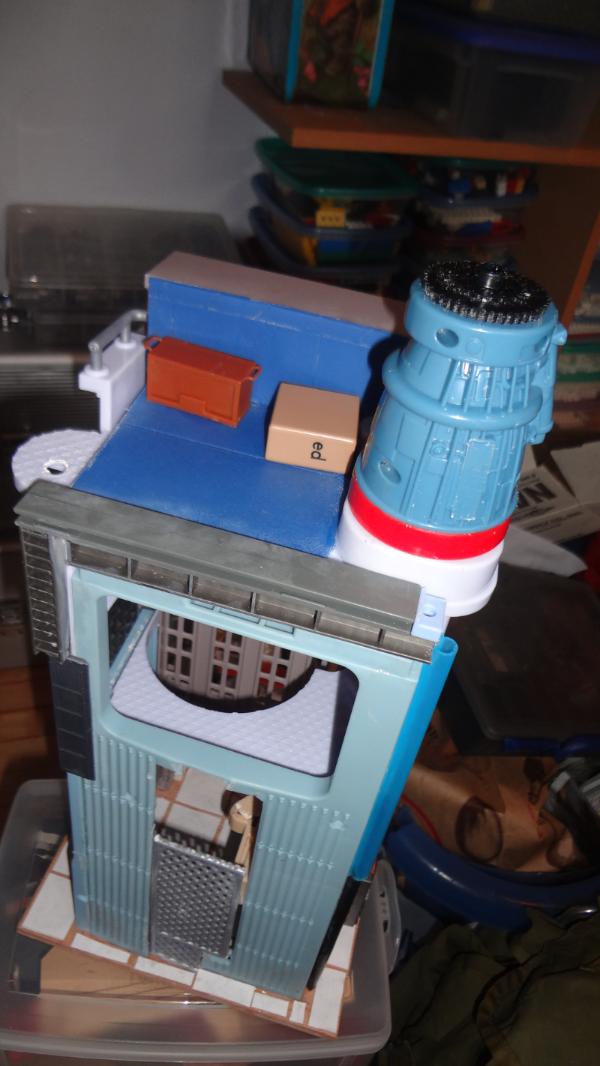
This piece began life as pieces of two toy playsets from the Pokemon and Toy Story product lines. I picked up each at resale shops for about $3 each.


I'd love to find more of these, as that bridge section would be great, and the Toy Story playset could be used almost as-is.

Construction 
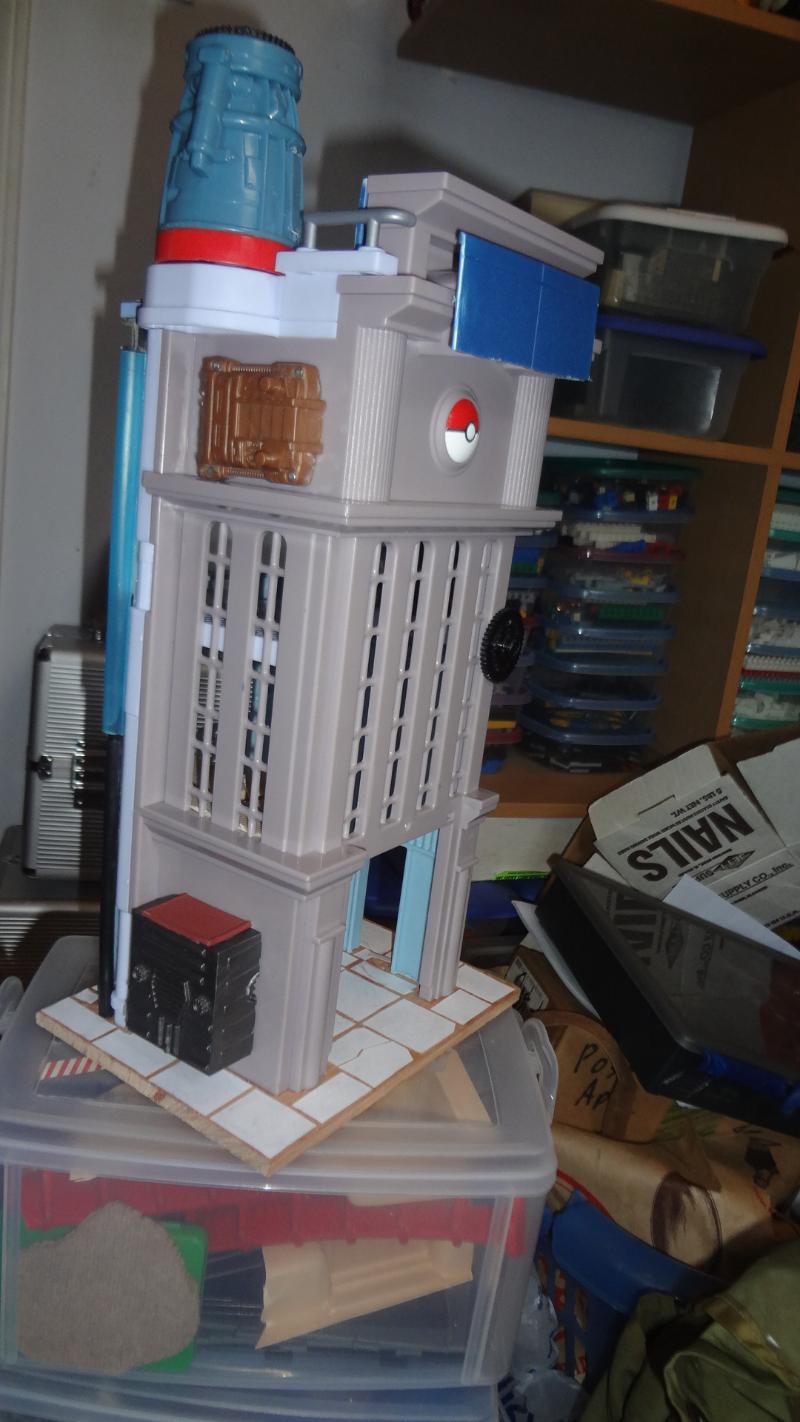
With these two inspiring pieces of plastic on my workbench, I got to work. The front and left side of the building are from the Pokemon building.


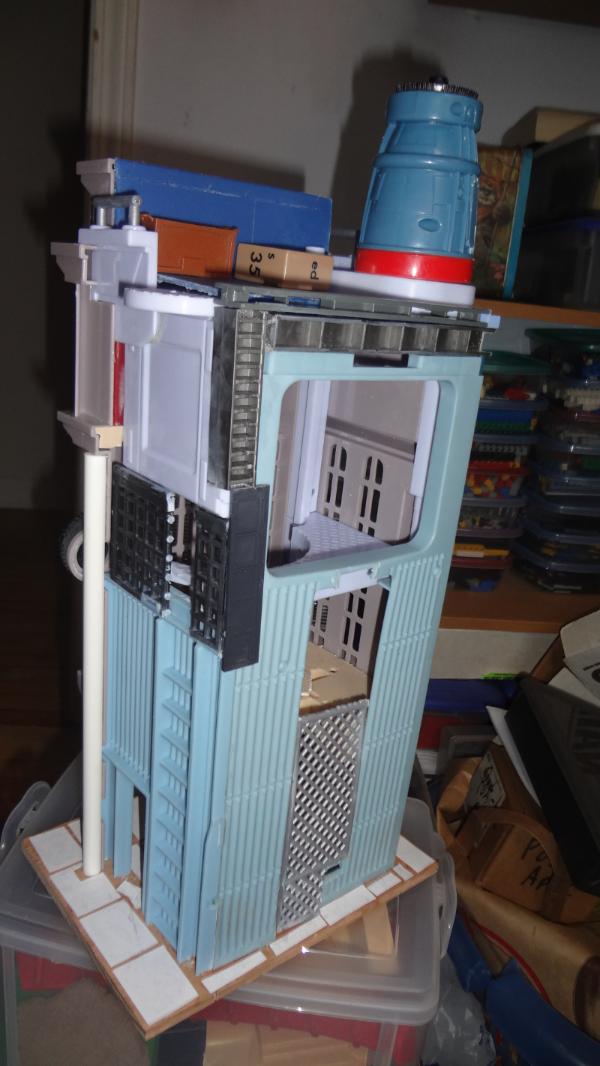
The right and rear are mostly cut-up sections of the Toy Story structure. I used superglue and plastic cement when possible, but epoxy was necessary for much of the construction due to the soft plastic of the Toy Story structure.


They are epoxyed to a wood base with cut up card for the cement flooring.


The basic building got covered with lots of other bits including toy pieces and crates, then was topped off with a Happy Meal toy chunk.


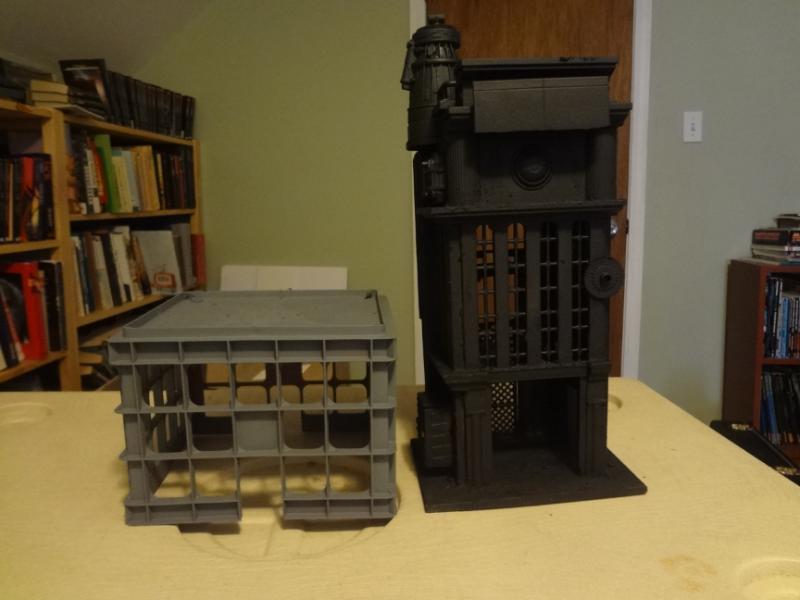
Then I rubbed the sides and ground sections with pre-mixed cement to add texture, then spray painted the whole thing black.


At this point, I realized I'd made a mistake. I had bought fireplace cement instead of premixed concrete patch for the painted surface, and the texture began to crumble off! I stuck it on the shelf in disgust, where it stayed for almost a year. Ugh!

Finishing and Finished! 
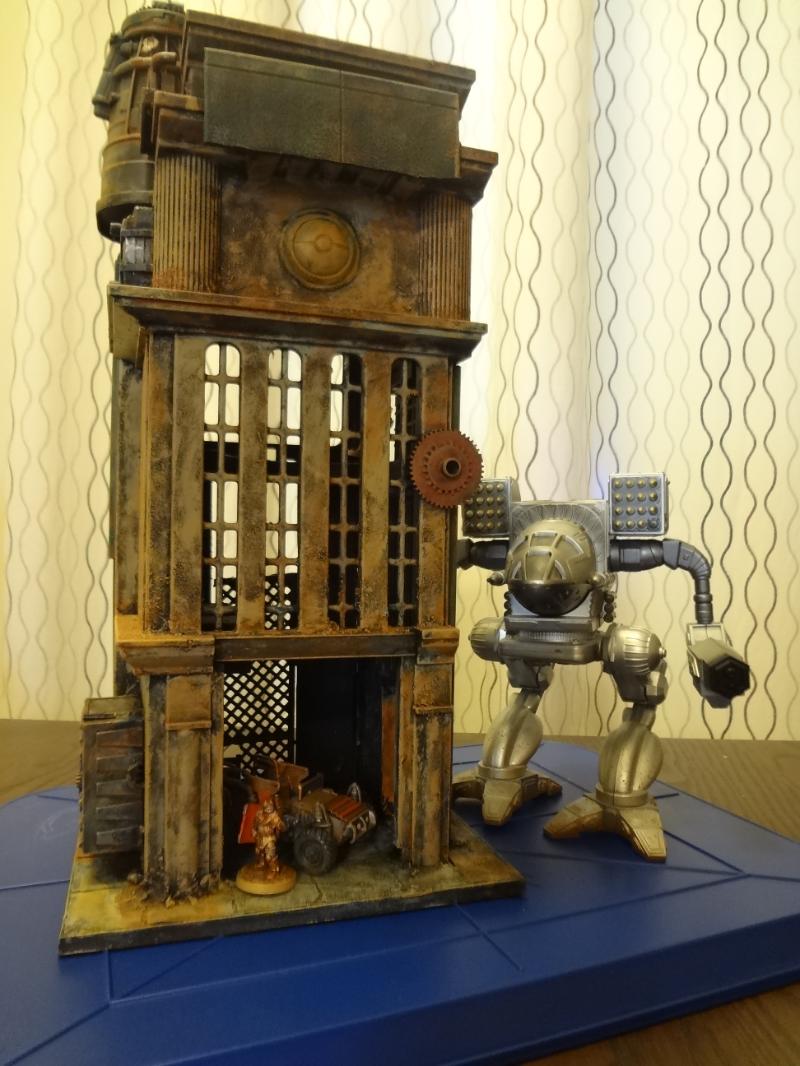
Recently, I decided to finish this one off. I took a toothbrush to the entire structure and brushed off any loose cement, then painted black gesso over the bare and rough areas to re-prime the piece and stabilize the texture that remained. Then it was simply a matter of drybrushing on the main colors, a couple of heavy brown washes and then a drybrush of tan, and I was done.

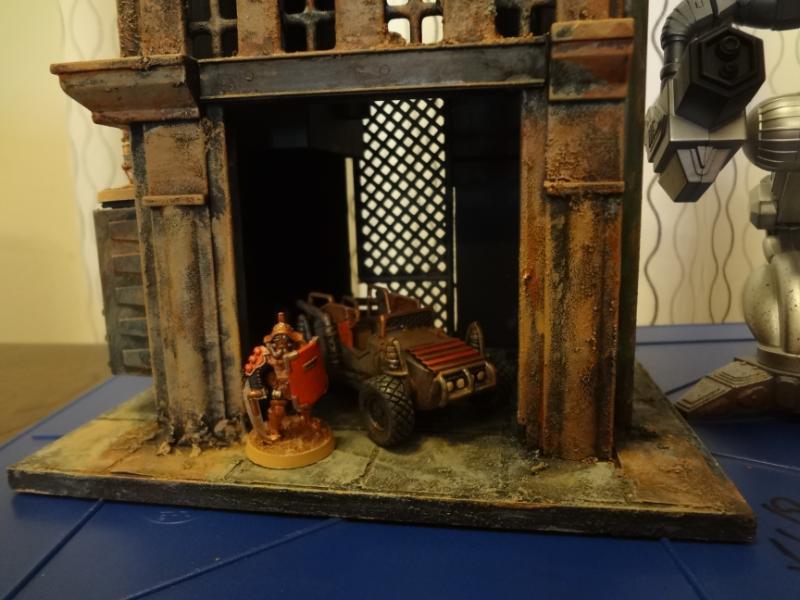
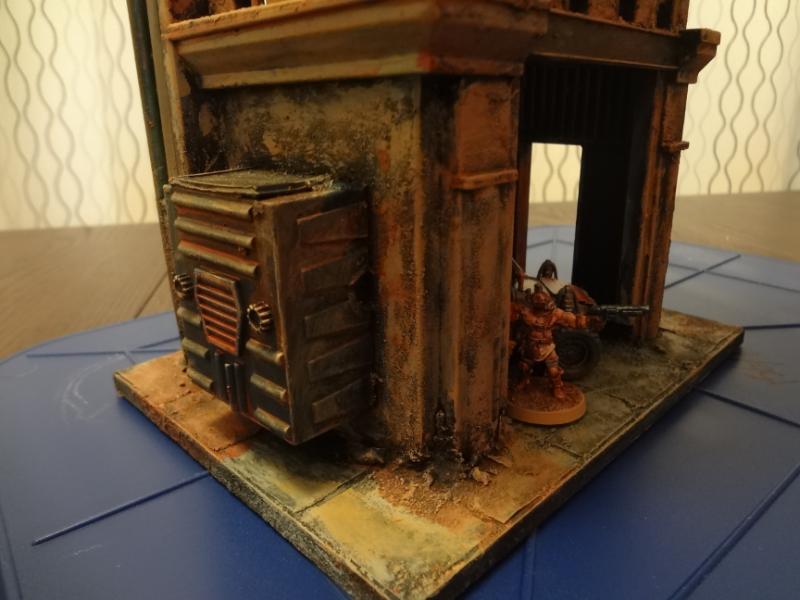
There's always more that can be done, but for run-down terrain, I prefer quick and dirty painting. Here's a pic of the finished product. The miniatures in the pictures are a Mad Cat mech (by Joyride), Urban War Gladiators and a Void Junkers buggy.

Front


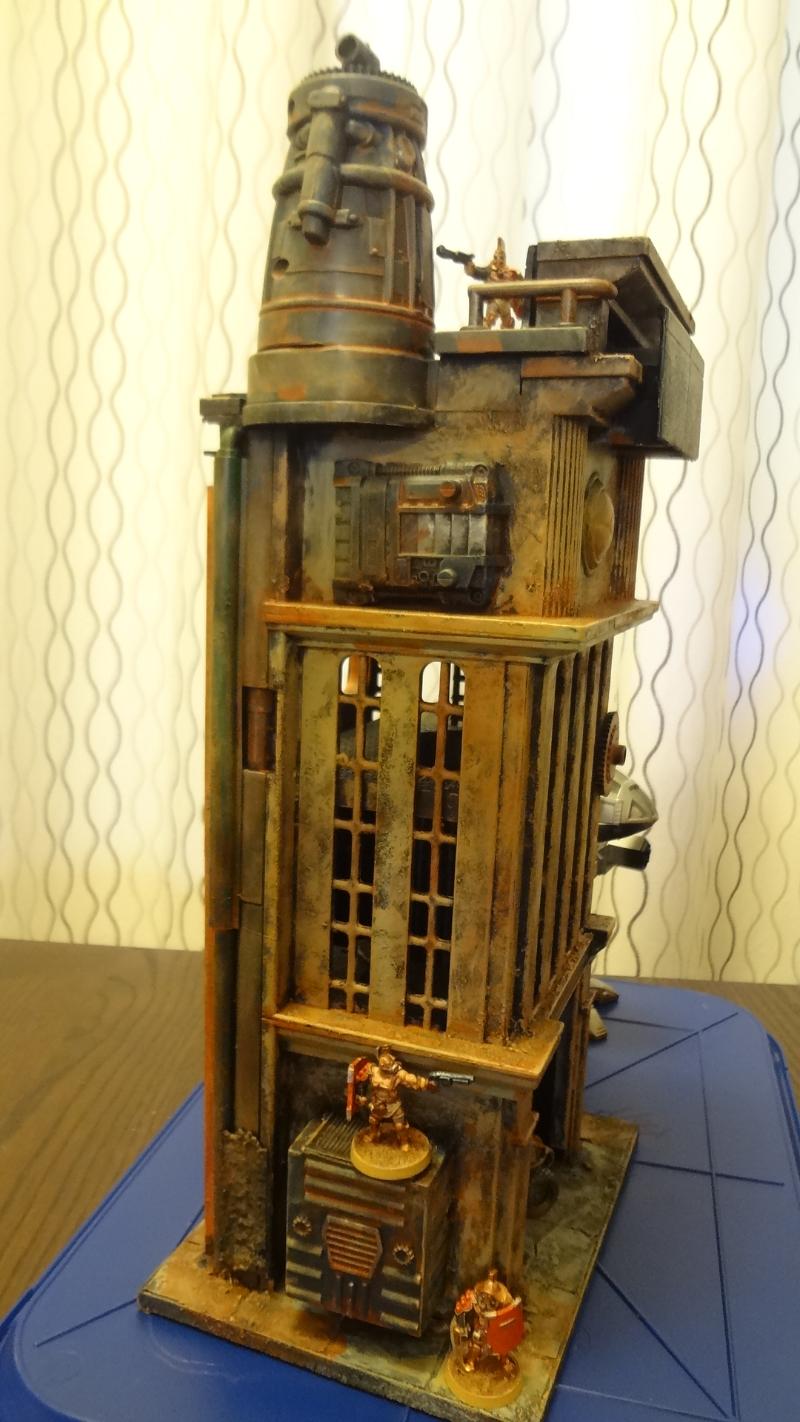
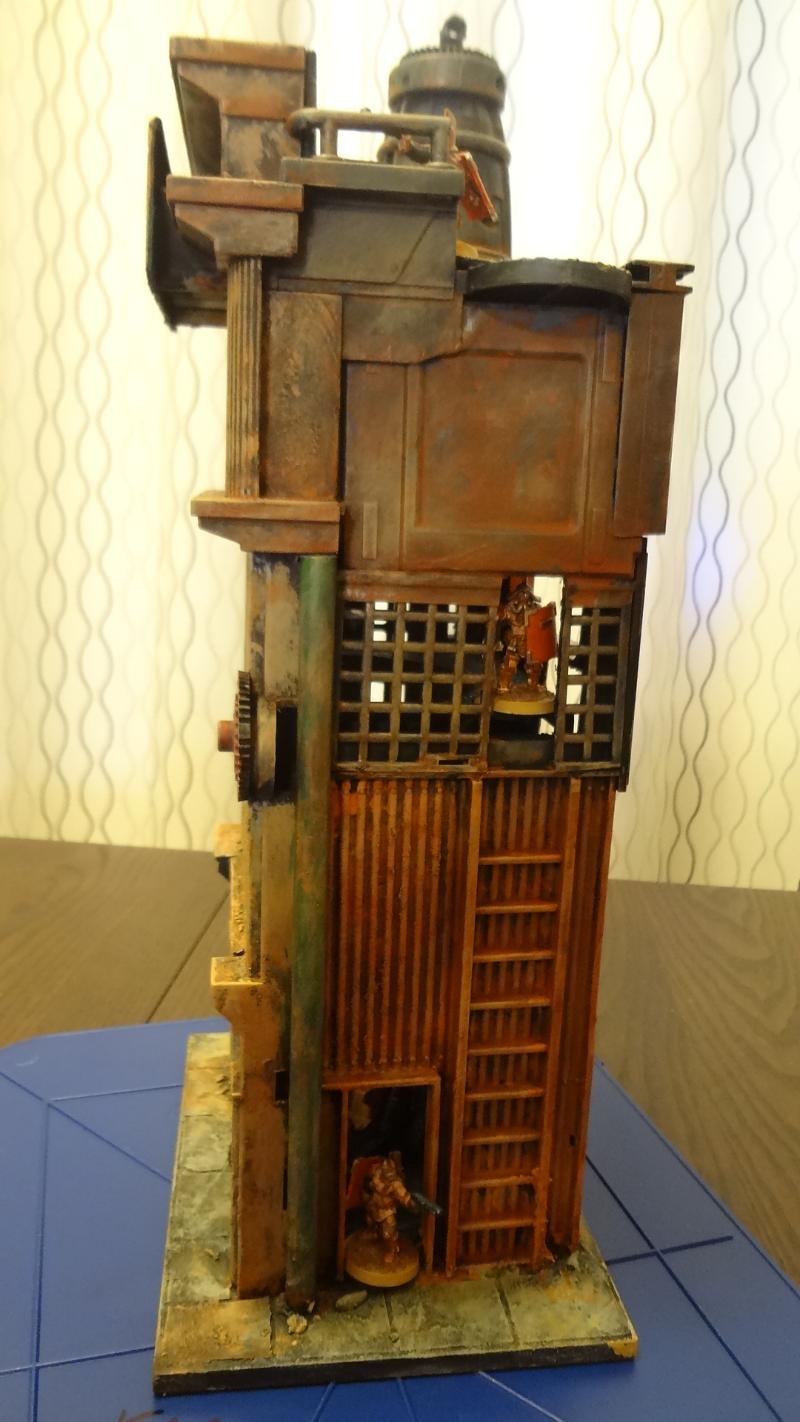
Right


Back (a bit too much flash, but it shows the two upper floors with room for miniatures)


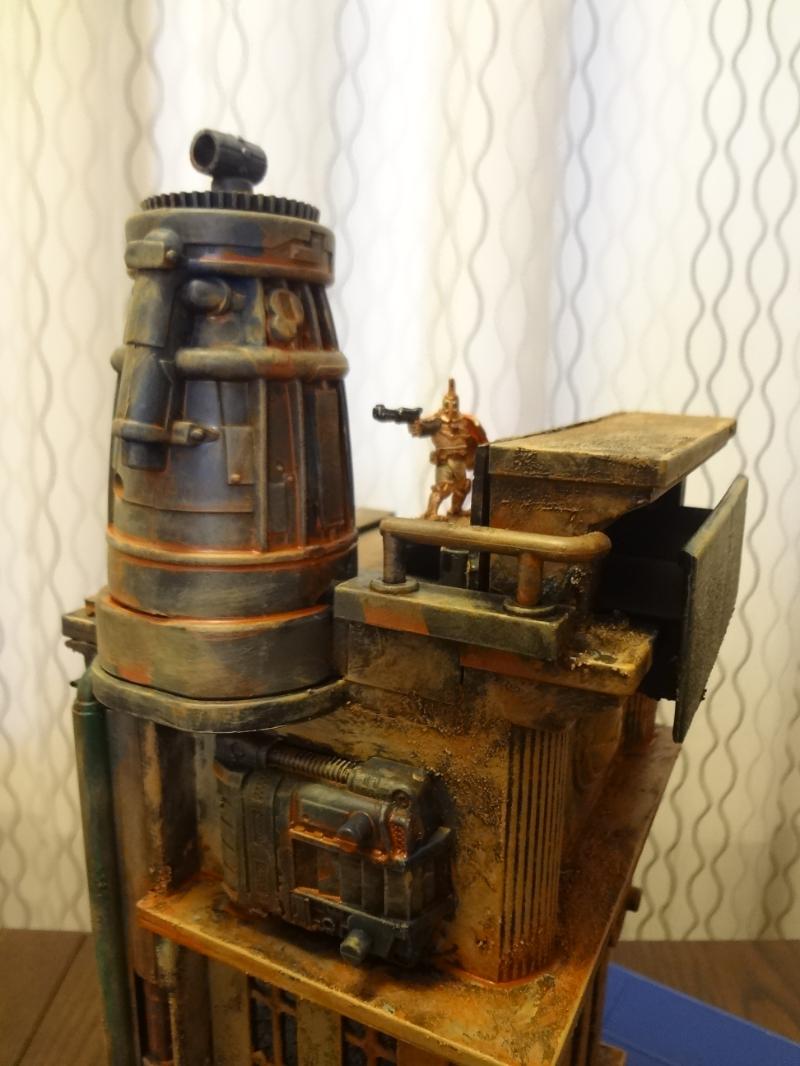
Left


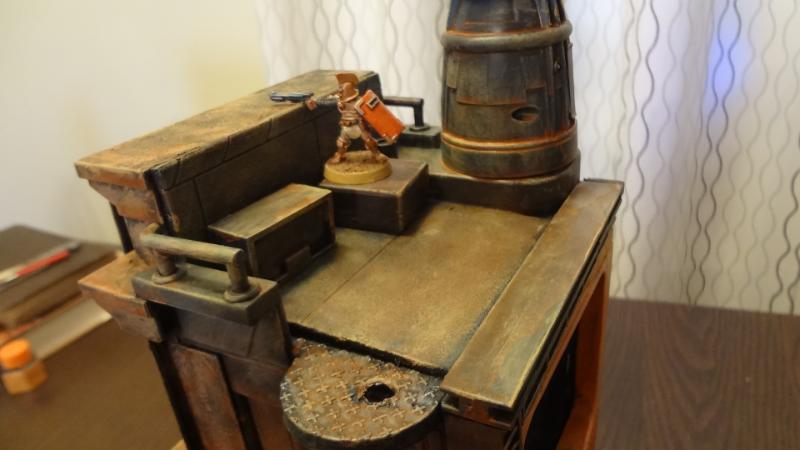
I'm particularly pleased with the roof. The crates are glued in permanently to allow minis to see over the front.


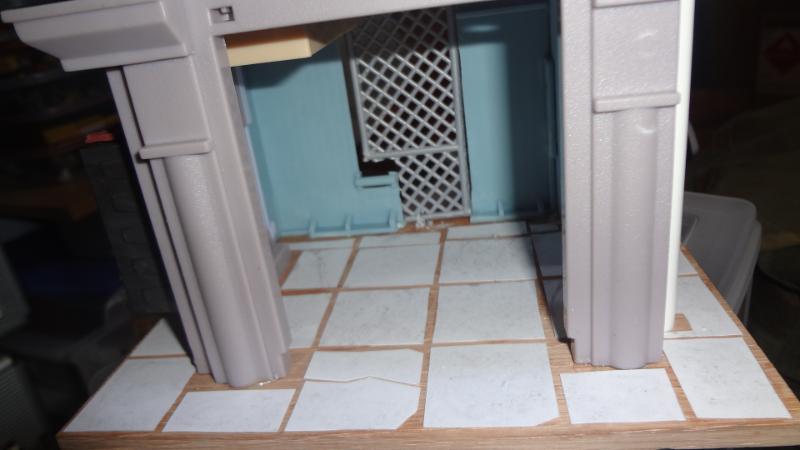
The street level view has some nice details as well.


I'm very pleased with the way this turned out. This is the largest single piece of terrain I've ever built, and it wasn't terribly difficult to construct, nor was it very time consuming compared to smaller pieces. My collection currently has a lot of small and medium-sized buildings for skirmish games. This, however, is the start of a series of urban structures that will still be well suited to skirmish games, but large enough to be useful for my 28mm Mech Attack games as well. The future is going to be BIG!

-- Karl, Chicago Skirmish Wargames club member

Tuesday, July 29, 2014

Painting the Wounded City Game Mat


Late last year I picked up not one, but two Zuzzy terrain mats: the Ruined Land mat, which I painted immediately to use for Song of Blades & Heroes, and the Wounded City mat, which has been rolled up in a corner for many months ... until now!

I painted it up last weekend in anticipation of some upcoming post-apocalyptic and sci-fi gaming. My painting method was quite a bit different this time. Instead of a solid color base coat (my typical approach for the other 4+ Zuzzy mats I've painted), I went with a different technique, inspired by this blog post.

Yes, that's right, I used a high-density foam paint roller (!) as a sort of super-drybrush to hit most of the raised bits of the mat with regular white latex house paint. This is the type of roller I used -- you don't want to use a typical fuzzy roller, as that will put way too much paint onto the mat.


My house paint was a little dried up and tacky, which was even better because even less of it stuck to the roller. Really, you don't want a lot of paint on your roller. Here's the mat after the initial dry-roll-brush.


Yep, that's straight white -- I was trusting that the final wash would dull it down considerably. The cracked pavement got straight black paint. I also painted the exposed bricks with reds, browns and dark greens.

With the first couple of rolls, it was clear that the roller was leaving marks on the mat. Thankfully, I was able to use this to my advantage and create a rough city grid using the occasional roller marks, which fit with the existing cracks and foundation details that were built into the mat itself. You can probably see the roller marks in this photo, but the final wash dulled them down considerably.

I made a wash that was mostly black paint, with a few healthy dollops of burnt umber mixed in, all watered down to a fairly thin wash consistency. Here's a look after it dried.


Everything is nice and dull, and the worst of the paint roller marks have been sort of absorbed into the overall design of the mat. I used a grey drybrush on a few spots, just to add some variety, and I highlighted the exposed bricks just a little bit, but otherwise I didn't have to do much to the mat once the wash dried. Here are a few detail shots of the cracked pavement.


And here's an action shot showing some of my existing terrain pieces alongside some newly painted figures (Kolony Militia from Pig Iron).


I have a ton of rubble and broken concrete terrain pieces (made from bits of packing foam) that will look just perfect on this mat.Using the high-density roller was fun and saved me a lot of time and effort. I probably spent 3 hours total working on this mat last weekend, and most of that was just waiting for various layers to dry. I'm really excited to get this terrain mat onto the table for a game!

-- Patrick, Chicago Skirmish Wargames club member
Monday, July 28, 2014

Robotech, Battletech and Mechwarrior Mechs for 28mm Wargaming


Thanks to a recent trade with a gentleman on DakkaDakka, I acquired a huge box of mech toys for 28mm gaming. With this acquisition of figures, my collection has gotten pretty big, so I took some time to write up a guide to Robogear, Battletech, Mechwarrior, Macross and other mecha suitabable for 28mm gaming.

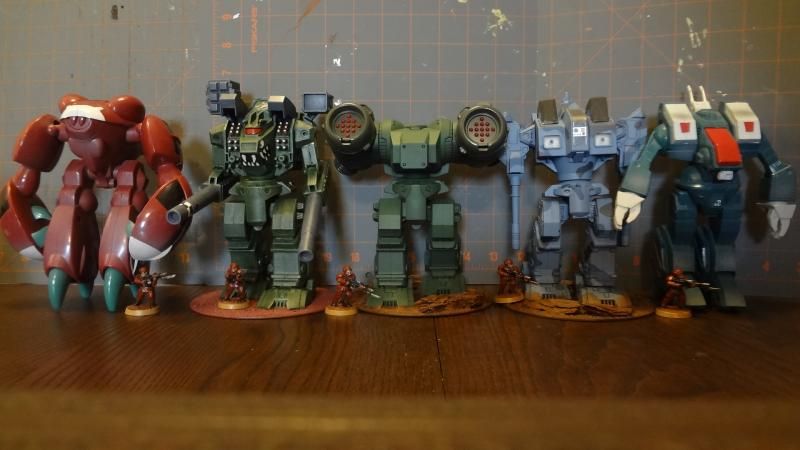
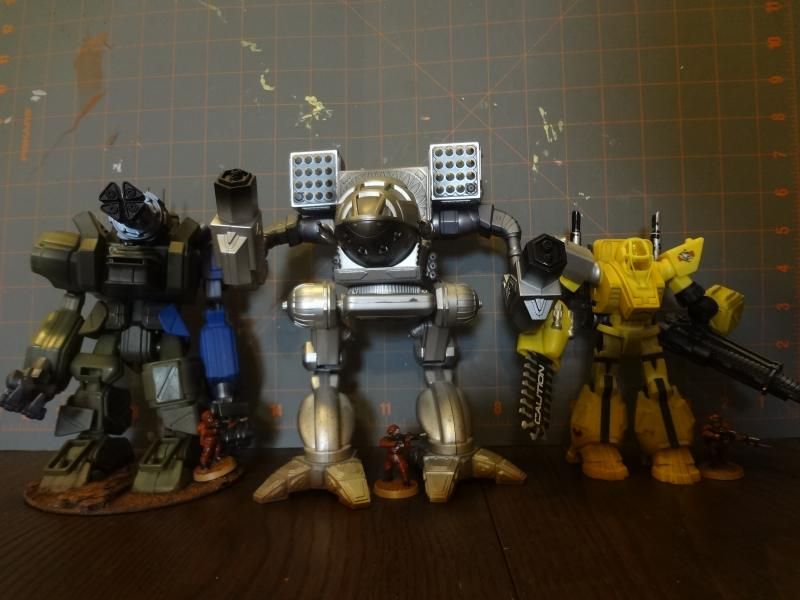
Throughout the review I'll refer to them by the name under which they were sold, with the Battletech universe name alongside in parentheses. The figures provided for scale are all Games Workshop Cadian Imperial Guardsmen with Pig Iron Kolony heads. The squares on the background are in inches, but the grid starts about three-quarters of an inch off the table. The angle of the photos will make the largest mechs appear a bit taller.

Exo-Squad/Robogear
In the 90s, after the Playmates toy company had produced the last of its original designs for the "Exo-Squad" line of toys, they reached outside the cartoon (and back a decade) and reissued a wide range of Robogear toys from the 80s. Robogear was the English language version of the Japanese cartoon "Macross." The early years of Battletech also used many Macross designs in the artwork and background. You can see the whole range of ExoSquad toys at the excellent Virtual Toy Chest. Most of these figures are still available for decent prices on Ebay.

Exosquad/Robogear Medium series
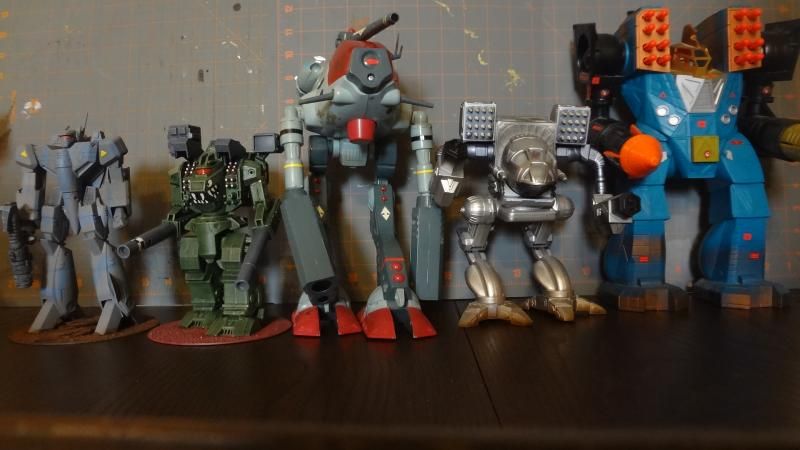
This series of 6 to 7 inch action figures are fairly simple with nice articulation, but no separate parts, or pilots. They look great on the wargames table, and are just big enough to work well with 28mm figures. The two on the outside are stock, the middle three have been repainted (and some modified). From left: Invid Scout ship, Excalibur Mk IV (Warhammer), Spartan (Longbow), Raidar X (Rifleman), Gladiator (Archer)


I acquired these three stock versions and the Mechwarrior Legionnaire (more on this later) in the big box!


Robogear large series
These larger vehicles had opening cockpits, lots of articulation and space for pilots (who, curiously, were not also reissued). They are nice toys, but VERY big. From left: Officer's Battlepod (Marauder), Tactical Battlepod, Invid Shock Trooper


Battletech 
These toys were released for the Battletech cartoon of the 90s. They were the first toys made based on non-Macross Battletech designs. Though not in scale with their action figure pilots, most (though not all) of these mechs are very close to 28mm scale. Back row, from left: Bushwacker, Axeman, Thor, Hunchback, Mauler. Front row: Toad (Elemental Battle Armor)


Mechwarrior Die Cast
Released by the Joyride company in the early 2000s to accompany the "Mechwarrior: Dark Age" collectible miniatures game, these metal and plastic models were described as 1/56 scale, but came with 1/87 scale pilots. The same models were produced both as pre-assembled action figures and self-assembled construction kits. Though not all perfectly sized for 28mm, this line contains some of the finest Battletech models yet produced. The Mad Cat in particular (disregarding the size of the pilot) is one of the best. Absent from the picture below is the Jupiter mech, which is very nice looking, but even more out of scale than the rest. These become available with some regularity on Ebay, but unfortunately they often command extremely high prices, especially the Mad Cat. From left: Legionnaire, Mad Cat, Forestry Mech (comes with an interchangeable claw arm, awesome!)


Other Model Kits 
Robogear - With minimal conversion, these remarkably affordable 28mm to 35mm Russian model kits have lot of potential for mech gaming. They're widely available on Ebay.
Macross - Coming in a bewildering array of scales and configurations, these Japanese model kits are very nicely detailed.
Gasaraki - Hard to find, but these beautifully done 1/35 scale model kits look right at home alongside 28mm Battletech and Macross designs.

From left: Robogear Werewolf (lightly modfied), 1/72 Macross Valkyrie (custom gun), Gasraki Shinden Battle Armor (weapon swap on left arm), Robogear Locust (mostly stock)


Here's another photo showing a comparison of the largest of the various lines along side each other. From left: Macross 1/72, Robogear/ExoSquad Medium 7-inch, Robogear Exosquad large series, Mechwarrior by Joyride


Conclusions 
Most of the unmodified mechs described above were recently acquired in the "big box." I've been searching for many of these (especially the Battletech toys) at a price I an afford for a very long time. Unfortunately most of them are significantly larger than the majority of the mechs I have. In my 28mm mech gaming, I'm not a stickler for mech sizes, but the majority of the Battletech and larger Robotech toys are drastically larger than the rest of my current collection of mechs (most pictured below) and would look out of place.


On the positive side, it's great to be able to finally see these toys in person. The Mechwarrior die cast figures and the additional Robogear medium kits will make excellent reinforcements. Even if I end up selling the Battletech and larger Robogear toys, perhaps they can fund the acquisition of some other rare mech models.

-- Karl, Chicago Skirmish Wargames club member