Friday, December 7, 2012

Terrain: From the Resale Shop to the Battlefield


The D-03 distillery began life as a patriotic decoration that I found at a resale shop for a couple bucks. Though the scale was wrong (it was roughly 54mm in the box), the piece had a nice shape and good surface detail. I knew it would be a great candidate for conversion


This product was meant to light up, make sound and put on a dazzling fireworks show via a mass of fiberoptics that both explode out of the back of the model. Needless to say, all that was removed.


After taking it apart (nearly everything was connected with screws, luckily) I removed the house from the base and reassembled it. I used some latex plaster to fill the holes left by all the shutters after I removed, and then I then set to detailing it.

Here's what I used for this conversion:
  • One-sided corrugated cardboard sheeting
  • Plastic toy silo from Target $1 section
  • Circular cross-stitch mesh (granny grating) 
  • Disposable plastic plate for raised grid texture and D-03 sign
  • A few model railroad kit stickers 
  • Random plastic toy bits for ladders and AC unit on roof 
  • Pegasus Chemical Plant parts for tubes and small tank
  • Some polystyrene plastic sheets and strips
I first began by creating more level surfaces to place figures. The sloped roofs on the top and rear of the building were removed and replaced with flat surfaces. I used my Dremel's cutting wheel to cut away several sections of the model.

For the front I replaced the sloped roof with a shallow incline and added a strip of styrene to help keep figures in place.


To bring the whole thing closer to 28mm scale, I took the fence pieces from the front yard, cut them down and used them to turn the porch into a raised loading dock. The remainder of the door and lower windows were covered with corrugated cardboard. A toy silo with the top removed was glued to the side of the building, and a piece of circular cross-stitch grating was glued about an inch from the top to make a concealed firing location.


A plastic dinner plate provided all the raised panels with square details as well as the D-03 sign. Other parts from the original structure also came in handy. I used the original window backings to make a flat surface on the side for attaching the silo, and the shutters make excellent vents as seen here on the roof


The AC unit is a random toy part from a resale shop bin. It's got some of the raised detail from the plastic plate added to cover up a few holes sides. I used a tiny bit cut from a GW tank accessory sprue to suggest that there might be machinery inside, though it's actually empty.


I can't recommend the Chemical Plant kit from Pegasus/Technolog highly enough. It's a gold mine of detail for adding industrial realism to your models. All the pipes on the model, as well as the small tank on the back, are from this kit.


Painting was really easy. 
  • Spraypaint the whole thing black, using black gesso to reach where I missed
  • Drybrush on main colors (orange, blue, grey, red, yellow, metalic silver, etc) 
  • Add a few stickers from a model train kit
  • A couple of heavy reddish brown washes
  • Drybrush of metalic silver on the edges of some of the siding to suggest that it is made of metal
Jobs in the wasteland are worth fighting for!


So that's it. I'm very pleased with the way this one came out. It was an extremely lucky find and I wish I had another as there's so many different ways you can convert plastic buildings, especially ones with so much good detail already included. As always, comments and questions are appreciated!

-- Karl, Chicago Skirmish Wargames club member

Thursday, December 6, 2012

Terrain: Homemade Plaster Car Wrecks


Tim continued his recent terrain assault by completing a batch of wrecked cars made from plaster poured into tinfoil molds. You might have spotted these nifty pieces in our recent Neutron York 3000 battle report!


Tim took inspiration from a pair of articles on Combat Zone Chronicles and Terragenesis. Here's what you'll need to complete the project.
  • Toy cars (Tim used 1/43 scale toys)
  • Tinfoil
  • Plaster
  • Box of sand
  • Paints
  • Washes and/or Minwax Polyshades (commonly referred to as 'dip')
 Follow these steps and you'll have a nice batch of cars for your battlefield!

1. Press tinfoil onto the cars. The mirrors cause the most problems, so be careful around them.

2. It is difficult to get the foil off and retain the shape of a car, so Tim added some creative dents here and there to make the tinfoil come off easier.

3. Put the foil in a tub of sand, so the sand supports the plaster and leaves a hollow tinfoil cup where you can pour in the liquid plaster.

4. Cast the plaster into the foil. Tim didn't use a releasing agent.

5. Remove the foil. Some sand and foil may stick to the car.


You may get a few cars that are too messed up to use as is. You can either toss them or try and carve them into a more desirable shape.

6. Glue together the individual cars to make stacks of wrecks, then base the stacked cars like you would for any other piece of scenery. Tim used wood glue.

7. Fill in the gaps between the cars with plaster, wall filler, or something like that.

8. Add sand to the bases.

9. Paint the cars. Tim decided to make them completely rusted out, so his palette included a mix of ocher, orange and rusty browns. The ground is light brown.

10. Paint bluish-gray for windows, wheel wells and other spots.

11. Paint silver for some chrome parts. Tim actually used a silver Sharpie marker for this step.

12. Drybrush. Tim used a tan color, cooled down with purple, to make the whole thing a bit less warm.

13. Brush on a coat of Minwax Polyshades Antique Walnut or Tudor. Give it at least 24 hours to dry.

14. Spray matte. You can color or base these wrecks however you might want. Tim chose to make them look very rusty and worn, but more color variety is fine also.


And here's a pic of the cars in action!


Wednesday, December 5, 2012

We'd like to thank the Academy...


In recent weeks this humble blog has been honored by not one, but two Liebster Awards, meant to call attention to blogs that haven't yet built a critical mass of readers but nonetheless produce compelling, original content all the damn time. At least, that's how I understand the award, given CSW's prolific gaming/blogging schedule and our general enthusiasm for tabletop hobby games.

A key stipulation for new award recipients, though, is to pass along the Liebster Award to a few additional blogs that really ought to be read by more people. After polling the CSW player base, we assembled this list of worthy, yet criminally under-read, blogs.
  • Warhammer For Adults -- Beginning with the tag line "Remember when Warhammer was a game and not a marketing tool?," WFA is focused on retro gaming and a bittersweet appreciation for the simpler era of the hobby. That fits really well with CSW's overall game philosophy, so we're happy to bestow a Liebster on WFA.
  • Super Galactic Dreadnought -- With a name like that, it's got to be over the top. And it is! Desert Scribe shares his love for epic spaceship gaming on Super Galactic Dreadnought. Great painted miniatures, fantastic photos. If you've ever thought about spaceship gaming, just take a stroll through his site. Your imagination will catch fire!
  • Mattblackgod's World -- Gonzo hobby gamer Mattblackgod is (mostly) focused on just one genre: post-apocalyptic sci-fi. He's an absolutely prolific modeler and painter, and most of his stuff appears in photo galleries on his site (and his old site). He also moderates the Post-Apoc Wargames forum, which is a real treasure trove of inspiration and discussion about all things post-apoc.
  • Old School Miniatures Bulletin -- Here at CSW, we love old, vintage miniatures from the early days of fantasy gaming. Those old sculpts may be a bit lumpy, but they've got loads of character. Our friends at Old School Miniatures Bulletin agree with us, and it's always a treat to see what treasures they've dredged up from back when our hobby was young.
  • Modern Appendix N -- Using Gygax's fabled Appendix N from the AD&D Dungeon Master's Guide (which sets out various books, movies and art to help inspire DMs), the author has applied that mentality to the modern era. He offers up regular posts about contemporary fiction, miniatures, comics, etc.
 Give 'em a look -- you won't be disappointed!


Monday, December 3, 2012

Terrain: From the Auction Bench to the Battlefield


At the Games Plus miniatures game auction in October, I nabbed a pair work-in-progress terrain pieces. They were on their way toward becoming a pair of urban ruins, but their owner decided to get rid of them before completion. When I picked them up -- for bargain prices -- they were basically two chopped-up resin building wall corners sitting on a piece of hardboard. No extra bits, no rubble, no gubbins, no embellishment -- and no paint. Just barebones resin walls hot-glued to the hardboard.

After some hemming and hawing about exactly how I might finish off these pieces, I just bit the bullet, pulled out my foam rubble bin, and started slinging glue around. These pictures show the finished product, which hit the battlefield in last week's In The Emperor's Name session. I've included a couple of figures for scale: a wasteland raider and a sniper lying in the rubble.


I mostly used expanded polystyrene chunks (bead foam, the kind that is made up of little balls) as well as blue foam insulation. The chunks were glued on haphazardly to create a rubble zone in the center of the terrain piece, with the walls still standing on either side. I glued everything in place, then threw in a bunch of spare bits: drinking straws for pipes, coffee stirrers for metal beams, wooden craft sticks for broken floorboards, etc. I added little bits of wire poking out of the foam chunks as concrete rebar.
 
 
After affixing all the decorative bits, I slathered the whole thing in a thick coat of blue-gray house paint. My goal was to seal the foam chunks so spray paint wouldn't melt them. The house paint created a nice unified surface, but alas I must not have done enough coats, because some of the foam chunks still melted a little bit during the spray paint stage. I was initially dismayed, but the foam didn't melt away into a puddle of goo...they just shrank a bit, and the effect was pretty cool. Crisis averted!
 

On to the painting! I sprinkled on some gravel and ballast to break up the smooth areas of the ground floor, then sprayed the whole thing black. After that I sprayed a few targeted blasts of brown, followed by a rough textured gray spray that unified the whole thing. 

Once this was dry, I used a big brush to splatter on a rough coat of brown wash, then drybrushed with a light tan to pick up the highlights. The final step was to add some patches of dead grass flock to the ruin. I guess I could have gone crazy with detailing, but I was more interested in making this piece quick and simple.
  
Here are a few more pics of this piece in last week's game. When these photos were taken, I hadn't yet completed all the steps described above, but the terrain still looks pretty cool. Pictured are Karl's Squats and Tom's Necrons.


Remember, the auction lot included two buildings. The second is currently a work in progress. It's about half the size of this piece, though, so I anticipate having it done in a week or so. Check back for more pics of the second piece!

-- Patrick, Chicago Skirmish Wargames club member

Saturday, December 1, 2012

Foamcore Buildings for Post-Apocalyptic Campaign


The club's upcoming post-apocalyptic campaign gave me a little push to finally make some simple foamcore ruins I've been thinking about for quite some time.

To start out, I made a rough sketch showing a plan and elevation of the structure. I drew out the pieces on the foam core and cut them using a metal ruler and a hobby knife.


The most difficult parts to cut are the windows. I had quite a bit of trouble with ripping up the foam part of the board cutting them. Next, I glued them together with hot glue. Each set of walls and a ceiling is a separate piece, to make the structure more modular and easier to store. I also made several sections of wall without a ceiling,


Looking at the unpainted pieces stacked together, I noticed that they have a strong brutalist look. I could have painted them in a tan cement to emphasize this, but I wanted them to look more generally modernist. So, I painted the walls in a dull gray with rusty streaks. The floors/ceilings are a mottled light green.


Leave a comment if you have any questions or thoughts about these terrain items!

-- Tim, Chicago Skirmish Wargames club member

Thursday, November 29, 2012

In The Emperor's Name: 6 Games In One Night


This week we met up to play In The Emperor's Name, the quick-play ruleset inspired by early edition Warhammer 40,000 skirmishes. We've dabbled in ITEN before, but this time we gave it a dedicated run-through (6 games on 3 different tabletop layouts) to see if we could use it for our upcoming post-apocalyptic campaign.

Since this was a 40k-inspired game, the players brought a nice array of 40k-inspired warbands, including Space Marines, Necrons, Squats, Tau, Imperial Guard and Daemonhunters. Plenty of these warbands were composed of non-Games Workshop figures, though, since we always try to put lots of different miniatures on the table as often as possible.

Here's the table, looking across all 3 tabletop layouts. We played 3 side-by-side games, then shuffled up the players and got in a second round of games, for a total of 6 games played.


The foreground is a ruined battlefield, the middle layout is a bunker complex hidden away in some rugged hills, and the final layout is an industrial warehouse sector.

The games went pretty well. ITEN is a quick and easy game to pick up, and it helped that we were familiar with the capabilities of 40k dudes (as in, a Necron warrior should be harder to kill than a Guardsman).

Here are a few shots from the games. In the pics below, Josh's newly painted Dark Angels faced off against Tom's Necrons in a fight to claim a piece of xenotech from a bombed-out battlefield. 


Ultimately Josh's Dark Angels prevailed, spiriting away the alien device before the Necrons could seize it for their own nefarious purposes.

Across the board, my Necrons were flushing a platoon of terrified Guardsmen from their bunker complex. Here we learned a perennial lesson about skirmish games -- heavy armor (or metal bodies, in the case of the Necrons) -- is a serious force multiplier. Mike's Guardsmen didn't have enough heavy weapons to effectively fight off my robots, so they inexorably squeezed the Guardsmen as the game unfolded. I only had 5 robots but they proved quite potent, especially when taking advantage of cover!


Oh! But this was a 3-person game. Another Mike, playing his Daemonhunter warband, was advancing across the board as well. He exchanged fire with my Necrons, found the match-up to be a rather bloody affair (for him), and turned his attention to the poor Guardsmen.


His warband figures are mostly Dark Elves that have been converted to hold a variety of sci-fi weapons. This young lady is a Dark Elf Beastmaster, heavily converted of course.


Across the table, Tim was running a Tau warband composed of Skinnies from the Starship Troopers game line. He also had some 28mm scale Daleks in his warband, which were quite awesome. Check out his warband below.


We also didn't end up with many pics from the warehouse sector battlefield. Here's one, showing Josh's Dark Angels defending a refinery from a two pronged assault by both of the Mikes. Yes, that's my washing machine in the background -- 'tis the blessing and the curse of playing in the basement.


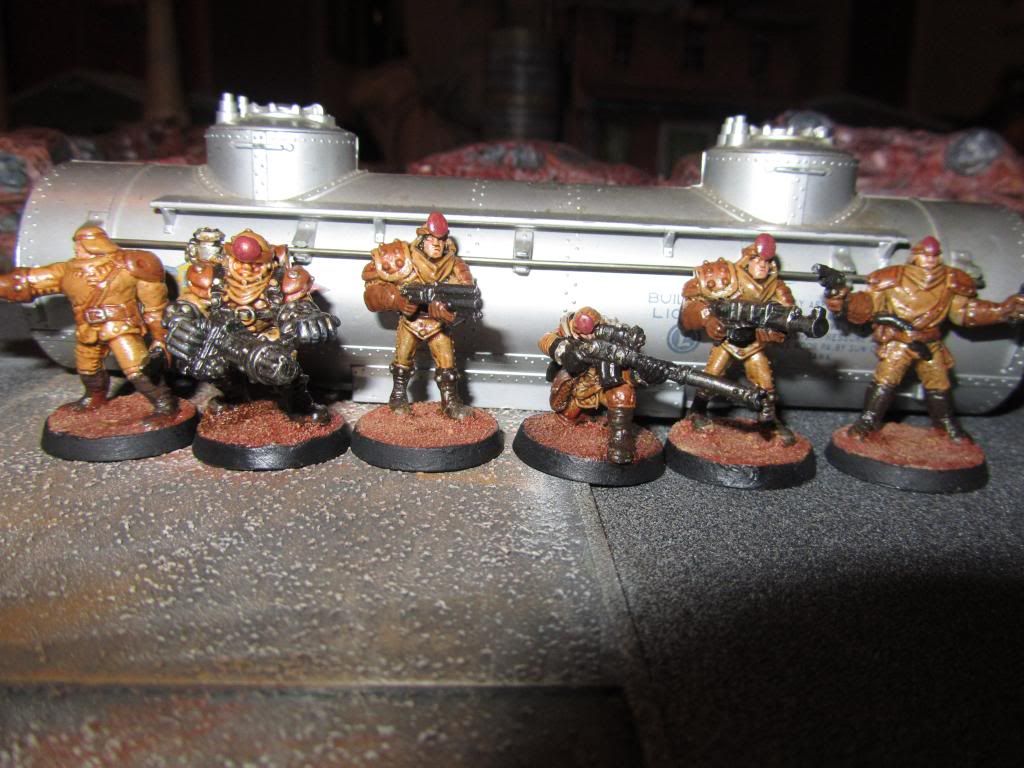
One of the last games of the night was a scenario from the ITEN rulebook called "Fort Apache," where Karl's Squats attempted to defend a ruined building from my advancing Necron warband. We went a little crazy with the pictures because his Squats (a new warband that's he's been painting up) looked so good lurking in the ruins. This is an almost-finished piece of terrain that I've been working on recently.


He managed to slaughter most of my robots before we called the game for the night. Karl had figured out how to use the "torrent of fire" rules in ITEN to his advantage, which helped make my heavily armored robots not quite so dangerous. I still ended the game with my fair share of Squat carcasses on the battlefield, though.

What followed was a lengthy discussion on ITEN as it pertained to our upcoming post-apocalyptic campaign. We spent a lot of time talking about whether or not we should limit heavy armor (like power armor for Space Marines, or metal bodies for Necrons) since it proved to be such a force on the battlefield. We also discussed the idea of creating a custom equipment list to limit the number of zany plasma guns and refractor fields in our post-apocalyptic campaign. We agreed that ITEN was a serviceable ruleset that we could build a campaign around. Hurray for that! Now let's get the campaign going!

-- Patrick, Chicago Skirmish Wargames club member, with extra photos by Josh and Karl

Friday, November 16, 2012

Play Report: Neutron York 3000 for Post-Apocalyptic Gaming

This week the club got together to playtest Neutron York 3000 as a potential ruleset for our post-apocalyptic campaign.

NY3K is a fast paced warband-size skirmish game set in a pulpy post-apocalyptic future. It has it's own fluff, factions and even a small miniatures line, but also has a unit creation mechanic that allows you to use any miniatures you wish. You can find out more about the game, rules and figures here.

A total of six games were played among the six of us. We met at my house, so I prepared three different battlefields. The first was an industrial corridor that's become a border between two gang territories. This was a great chance to use the urban terrain table that I made last month.


The second setup allowed gangs to battle for an oasis.


The third battlefield was a showdown in a border town.


Look for upcoming articles on the distillery building as see in the border town, as well as the car stacks from the urban layout.

I had prepared four gangs for players to use.

Eastern Tribe 


Rob's Raiders 


Hat Scavs 


Dead Skulls biker gang


Unfortunately I wasn't able to get pics of the other gangs, or much in-game action, as my camera was running out of juice.

 Tom brought a robot army made of Legions of Steel figures, and Jon brought a Japanese cyber-samurai robot army from various manufacturers (as usual, painted to top standard) and a group of elite soldiers made from Warzone Bauhaus troops.

Here's a couple other pics of the battles.


As for the rules themselves, we were torn. We liked the fast play and easy to understand nature of the basic game mechanics. There also is a very nicely designed advancement chart for each character, so it's ideal for campaign play. The differences between factions are subtle, but effective.

The ruleset also has plenty of scenarios and deployment methods, so it's unlikely that a campaign would get stale. Though we would be using our own setting, the NY3K setting is entertaining and written in a good tongue-in-cheek style with flavorful art throughout the book.

Some mechanics continually frustrated us. When folks began reserving actions (a necessity for survival), we found that we had to spend a lot of effort tracking reserved actions, as well as how many bonuses each figure had left. Also, we found that it was pretty common for certain weapons to hit automatically. Combine that with some weaker figures that had no defense roll, and we found that the game had more auto kills than we would have liked.

Oddly, the games felt almost too short. It's the author's intention for several games to be played in a row, but this game was considerably shorter even than Song of Blades and Heroes.

Lastly, there were a few other ambiguous areas of the rules where we would have to house rule for. In the end the club wasn't sure they wanted to invest the time in house-ruling and tweaking the rules. We may still end up using them, but next week we'll be trying out another ruleset that we've played before: In The Emperor's Name.

I would still give NY3K a cautious nod as a ruleset that wasn't to our taste, but is still worth looking at when considering post-apocalyptic gaming. It will probably require a bit of houseruling, but at $7 it's not an expensive experiment.

-- Karl, Chicago Skirmish Wargames club member