Monday, February 9, 2015

Fully Painted: Radioactive Space Mutants

After seeing Karl's Sedition Wars Vanguard troops, I decided to paint up the Strain figures to oppose them. Since I had also split Deadzone with Karl and had the Plague figures from that waiting for paint, I opted to join these two forces together with a common paint job. Both sets of figures are slimy space mutants with a love of capri pants, so they fit together naturally.


I chose a cartoony, radiation-burned, bright, and sloppy paint scheme for these figures to highlight their relatively soft details. Overall, these are good but not amazing sculpts. The Sedition Wars figures have more (but shallower) details on the bodies, but details like faces and hands on both lines tend to melt into blobs.  Like Karl, I ran into a few pieces that did not quite fit together, especially the two halves of the Strain stage 4 body.  I was able to fit them together by softening  the smaller piece in hot water and pressing it into place.

The Plague and Strain figures are both split into a series that get progressively larger and more infected.


Plague stage 3, two Strain phase 1, Plague stage 3, and Strain phase 2


Strain phase 2, Plague stage 2


Plague stage 1, Strain phase 4

I chose not to paint the Scythe Witch and Cthonian sculpts from Sedition Wars at this time, because I do not feel they fit with the rest of these figures.

-- Tim, Chicago Skirmish Wargames club member

Tuesday, February 3, 2015

February 2015 Painting Pledge

Starting this month, Chicago Skirmish Wargames is bringing back the "Monthly Painting Pledge,"  which we've tried a couple of times in the past.

To participate, any CSW member who has the time and interest provides a photo and brief description of models that he plans complete within the corresponding month. At the end of the month photos are taken and posted of completed models.

For some this provides an extra incentive to set aside some hobby time to meet this deadline. It also provides a great marker for painting progress throughout the year. So without further ado:

Karl's pledge - 3 mecha models
All three are going to be built and based on CDs as additional mechs for our 28mm scale Mech Attack game at Adepticon. If these get built fast, he has some other mech models and toys that he may tackle as well.
  • 1/72 Dougram "Ironfoot" aka Battletech Thunderbolt 
  • 1/100 Macross "Tactical Pod Glaug" aka Battletech Maurader 
  • 1/200 Macross "Destroid Monster" (going to need some conversion) 


Tim's pledge - Panther Moderns
Specifically, his intention is to complete at least half of these this month.
  • 15 Ronin from Rezolution (some will just require touching up the previous owner's very nice paint jobs and basing the models) 
  • 13 Delaque from Necromunda (because at some unspecified date, we will get in a future game of Necromunda) 
  • 8 Fusiliers from Confrontation which need some conversion work 


Mattias's pledge
  • Josh's pirate islands
  • Karl's giant
  • Tim's five ogres 
  • A small medley of fantasy figures that have been undercoated for nigh on a year 
  • 4 statues made from old busted high elves 


Jon's pledge
Three vehicles slated to be part of a Steiner force for use in a 28mm scale game of Mech Attach or Alpha Strike. Completing the mech and tank are contingent on picking up some suitable basecoat paint, otherwise additional Sedition Wars and Bronze\clay statue Samurai army models will follow instead.
  • 10 Sedition wars troops 
  • Fusco Construction Yards (FCY) Dervish Mech 
  • Antenociti's Workshop hover tank 
  • Finishing details on a customized chariot with riders converted from a Chronopia Sons of Kronos Chariot and a Malifaux "Izamu" model 


Final results of actual progress will be posted at the end of the month. Cheers!

-- Jon, Chicago Skirmish Wargames club member

Monday, January 26, 2015

Star Wars: Imperial Assault Minis with Flory Model Wash


I recently picked up Fantasy Flight's new Star Wars: Imperial Assault board game. It is full of little Star Wars mans. I usually avoid painting board game minis -- with the internal argument that they are "pieces" and not miniatures -- but these inspired me to start right away!

My goal was to get these painted up quickly. Near my house, there is a fantastic model shop called M&Models. They are an "armor" shop, and carry mostly military models. As such they have a fantastic selection of products that gamers don't often see at our local haunts. The owner recommended a new wash by Flory Models; it is designed for doing panel lines and detailing on vehicles. It is clay based, and has some really neat properties. I thought the stormtroopers would be a great way to try this out.


These are the Imperial probe droids. They each have different lens colors to differentiate them on the game board.


The Imperial Officers have different medal colors to differentiate them.


I painted the stormtroopers differently than my usual process, and I used a cool new product, so I wanted to show some in process shots.

I started with a white primer, then painted all the solid black areas with a very dark grey. I added color to shoulder pads to differentiate squads. At this point, I gave them a heavy gloss coat, and let them dry overnight.


After the gloss coat was dry, I slopped the Flory Models black wash all over the minis. It doesn't matter if it gets all over the white areas. Once this dries overnight, you can use a barely moistened cotton swab to wipe the wash off the raised areas, leaving it in the recesses and details. It wipes up cleanly with no work.

It took seconds to clean up each trooper. This is much like an oil wash, but is much easier, and safer. You have all the time you want to do the cleaning step. The wash never dries out until you seal it with a matte varnish spray.


Here are the finished stormtrooper scout gunners. After the matte varnish, I did some spot touch-ups with the white paint, painted the bases, and matte varnished them again.


After the matte coat, I went back with a 50/50 mix of satin and gloss varnish over the armor plates to give them some shine.

I was really impressed with the Flory Wash. I'm going to pick up the brown version also. One neat thing about it is that you can adjust how much will stick to surfaces just by using different varnish layers underneath. If you want a dirtier final product, you can use a matte varnish, which has more texture for the wash to adhere to.

I am really happy with these minis. They are very difficult to clean, but were really fun to paint. Expect to see more Star Wars minis as I work through the rest of the game box!

-- Josh, Chicago Skirmish Wargames club member

Friday, January 23, 2015

What We Painted in 2014

We've gotten a bit out of the habit of doing a year-in-review post, and this year was no exception. The club is pretty much chugging along as before. We have a few new faces and A LOT of new painted minis and terrain. We wanted to give some idea what we've been doing so this year we've asked CSW members to submit a list and picture of what they produced in the year 2014. Figures, terrain and even rebased prepainted minis made the cut.

The results were surprising and impressive -- have a look!

Mike


  • In the back there are three Knight Titans, one of which is a Cerastus Castigator pattern from Forge World
  • The two fliers are a Valkyrie and a Vendetta
  • In the middle we have Imperial Guard missile artillery, Hydra tank, three Leman Russ tanks, three Chimeras, and a Devil Dog lurking somewhere in the back row
  • The four superheavy tanks are a standard Baneblade, a Titan-hunting Shadowsword, an infantry-shredding Stormlord, and the Forge World plasma-equipped Stormblade 
  • A bunch of Sentinels 
  • Forge World Contemptor Dreadnought 
  • Two painting marines by the Leman Russes 
  • Imperial Guard infantry and heavy weapons teams 
  • The Necrons in the right corner
  • Chaos Marines in the left corner
  • More Imperial Guard special weapons, commanders, vox guys, standard-bearers, etc. 
  • At the very front in purple is a custom Inquisitor 

Jon 

 
  • DUST Axis Transport walker 
  • Wreck Age Stitcher (not in photo) 
  • Forgeworld Chaos Warhound Titan 
  • Reaper Bones Fire Elemental (Painted, based and lit from within by an integral LED) 
  • 5 Wargods of Aegyptus Basti models 

Mattias 


  • 2 sci-fi/post-apocalyptic vehicles 
  • 7 sci-fi characters plus a giant lobotomized machine-gun-wielding ape 
  • 11 fantasy infantry 
  • 8 fantasy cavalry 
  • 2 monstrous creatures 
  • 13-man human Blood Bowl team, including an ogre and turn/score counters 
  • Also painted this year but not pictured was the Belle of Doom 28mm scale BattleTech Warhammer mech and 6 chaos knights

Tim 


  • Descent board game figures on the left
  • Neo-Soviets (a mix of reapainted AT-43, Warmachine, 1/100 Gundam kits, and other things) on the right 
  • Uncharted Seas ships in the foreground
  • Reaper Bones and assorted other minis in the rear

Steve 

  • Iraqi National Guard from Elheim 
  • Matchbox conversions with figures from Stan Johanson. 
  • Insurgents and other converted matchbox items (not pictured)

Josh 


  • 50 rebased Mechwarrior clix 
  • 6 Wreck-Age Reclaimers 
  • 1 Tau Broadside 
  • 1 squad Tau Fire Warriors 
  • 1 squad Tau Pathfinders 
  • 1 squad Kroot (rebased) 
  • 6 Tau Stealth suits 
  • 4 Tau Crisis Suits 
  • 2 Tau character models 
  • 12 or so Tau drones 
  • Hordes Circle Oroboros Shifting Stones 
  • Hordes Circle Oroboros Sentry Stone and Mannekins 
  • Hordes Circle Oroboros Cassius the Oath Keeper and Wurmwood, Tree of Fate 
  • Mierce Miniatures were-bear in both bear and human form 
  • Mechs for Karl 
  • Converted O-scale factory building 
  • Bomb in puddle terrain piece 
  • Large pipe terrain pieces 
  • Hatch terrain piece 
  • Stone ruin terrain piece 
  • Large graveyard terrain piece 
  • 8 Wreck-Age Stakers 
  • Tons of Deadzone terrain 
  • Various bits of post-apocalyptic scatter terrain 
  • 2 post apocalyptic vehicles 
  • 15 Dark Angels terminators 
  • 9 Dark Angels bikers 
  • 3 Dark Angels character models (some of the Dark Angels and terrain wouldn't fit in the picture)
  • 1 secret mini for gift exchange 

Karl 

  • Back row
    • Building "Under Construction" 
    • Tenement High-Rise 
    • Cathedral 
    • Elevated Train Station 
  • Second to last row 
    • Gravel/Coal Tower 
    • 14 Barb Wire Fence Sections 
    • 2 Leman Russ tanks 
    • Utility Building 
    • Power Station 
  • Second row
    • 3 Rebased Trebuchets 
    • 32 pieces of sci-fi/modern scatter terrain 
    • Small sci-fi bridge 
    • Subway entrance
  • Front row 
    • 10 Pavises 
    • 18 Van Saar Necromunda gangers
    • 9 Chicago Police 
    • 3 Shadowrun 
    • Tanker Truck 
    • Rebased 6 foot soldiers and 2 mounted knights 
    • 6 Khador Warjacks 
  • Not Pictured: Post-Apoc Tuk-Tuk, Bug-Headed Giant, Mayan Statue, Necromunda Scummer 

Conspicuously absent from this lineup is the collected output of Pat, our esteemed blog editor, who at the moment has his hands full preparing for a new baby! We'll get him in the lineup next year, no matter how paltry his production rate is.

So there you have it! It was a very productive year for the club, and from what I've seen so far, 2015 will be no different! We're all looking forward to another year of great gaming and painting. Be looking out for an upcoming post where we bring back the painting pledge for February.

-- Karl, Chicago Skirmish Wargames club member

Wednesday, January 21, 2015

CSW Annual Gift Exchange


Last December we organized a Secret Santa painted miniature gift exchange, and the exchange itself took place earlier this month. Six members participated -- including Karl, whose joy was palpable upon opening his gift, as you can see in the photo above. Read on to see what he received!

The rules were simple:
  1. Draw a name out of a hat. 
  2. Paint a miniature for that person. 
  3. Do your best to make the figure choice something meaningful to the recipient. 
  4. Keep it a secret until exchange time! 
Let's take a look at the fantastic minis that came out of this exercise.


There is one thing that Pat loves more than dwarves, and that is dwarves riding animals. I created this figure using a Wreck-Age capybara, a Reaper dwarf, and some Reaper musical instruments. I thought it would be fun to have a bard riding to battle on the back of a giant rodent. He is based to match Pat's other dwarves.


Jon painted this Confrontation werewolf for me. He customized it with a pair of pistols and a rifle. The guns were hand-made from carved wood and wristwatch parts, and they are just incredible. I can't wait to get this guy on the table!


Karl painted this custom-converted mutant for Mattias. The new bits include a head swap and tentacles. Mattias's fantasy miniatures have a unique aesthetic, and I particularly like how Karl used his painting methods to emulate Mattias' style.


Tim built this Chaos Daemon Prince for Jon's Thousand Sons army. He used a fantastic paint that changes color from purple to blue depending on the light. The legs are from a GW chaos daemon, and the wings are repurposed from a Dropship Commander Scourge vehicle.


Pat painted this Games Workshop Adeptus Custodes figure from the Rogue Trader era for Karl, who has always wanted one of these minis for his collection. Pat tried to emulate the zany punk rock style of early, pre-codex Games Workshop sci-fi with his color palette choice.


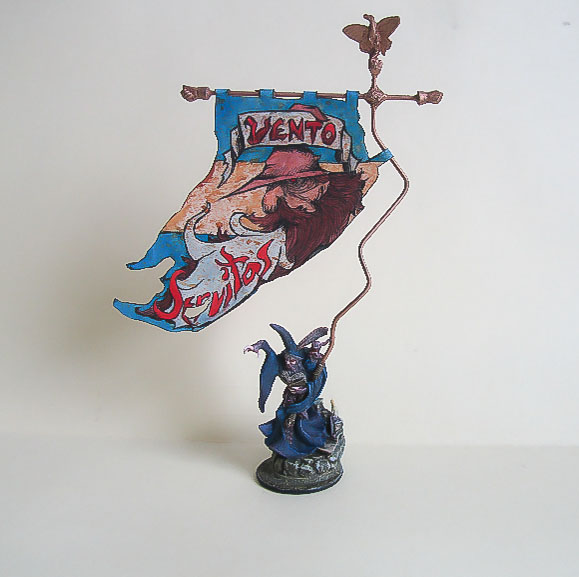
Mattias painted this standard bearer for Tim -- including the handcrafted and hand-lettered banner! It references the "Call Wind" spell from The Dresden Files. Tim intends to use this with his air spirit fairy army for Kings of War.

Overall, I was really impressed with everyone's dedication to this event. Each person went all out to customize the mini to the recipient. I think it shows how well we all know each other! Given the success of this year's gift exchange, you can be sure we'll do it all again in 2015.

-- Josh, Chicago Skirmish Wargames club member

Tuesday, January 20, 2015

Fully Painted: Dust Tactics Warzone Tenements

I've completed the seven buildings made from modified Dust Tactics Warzone Tenement kits that I showcased in a previous post. I tried a number of different painting ideas with these, so be sure to let me know what you think in the comments section below.
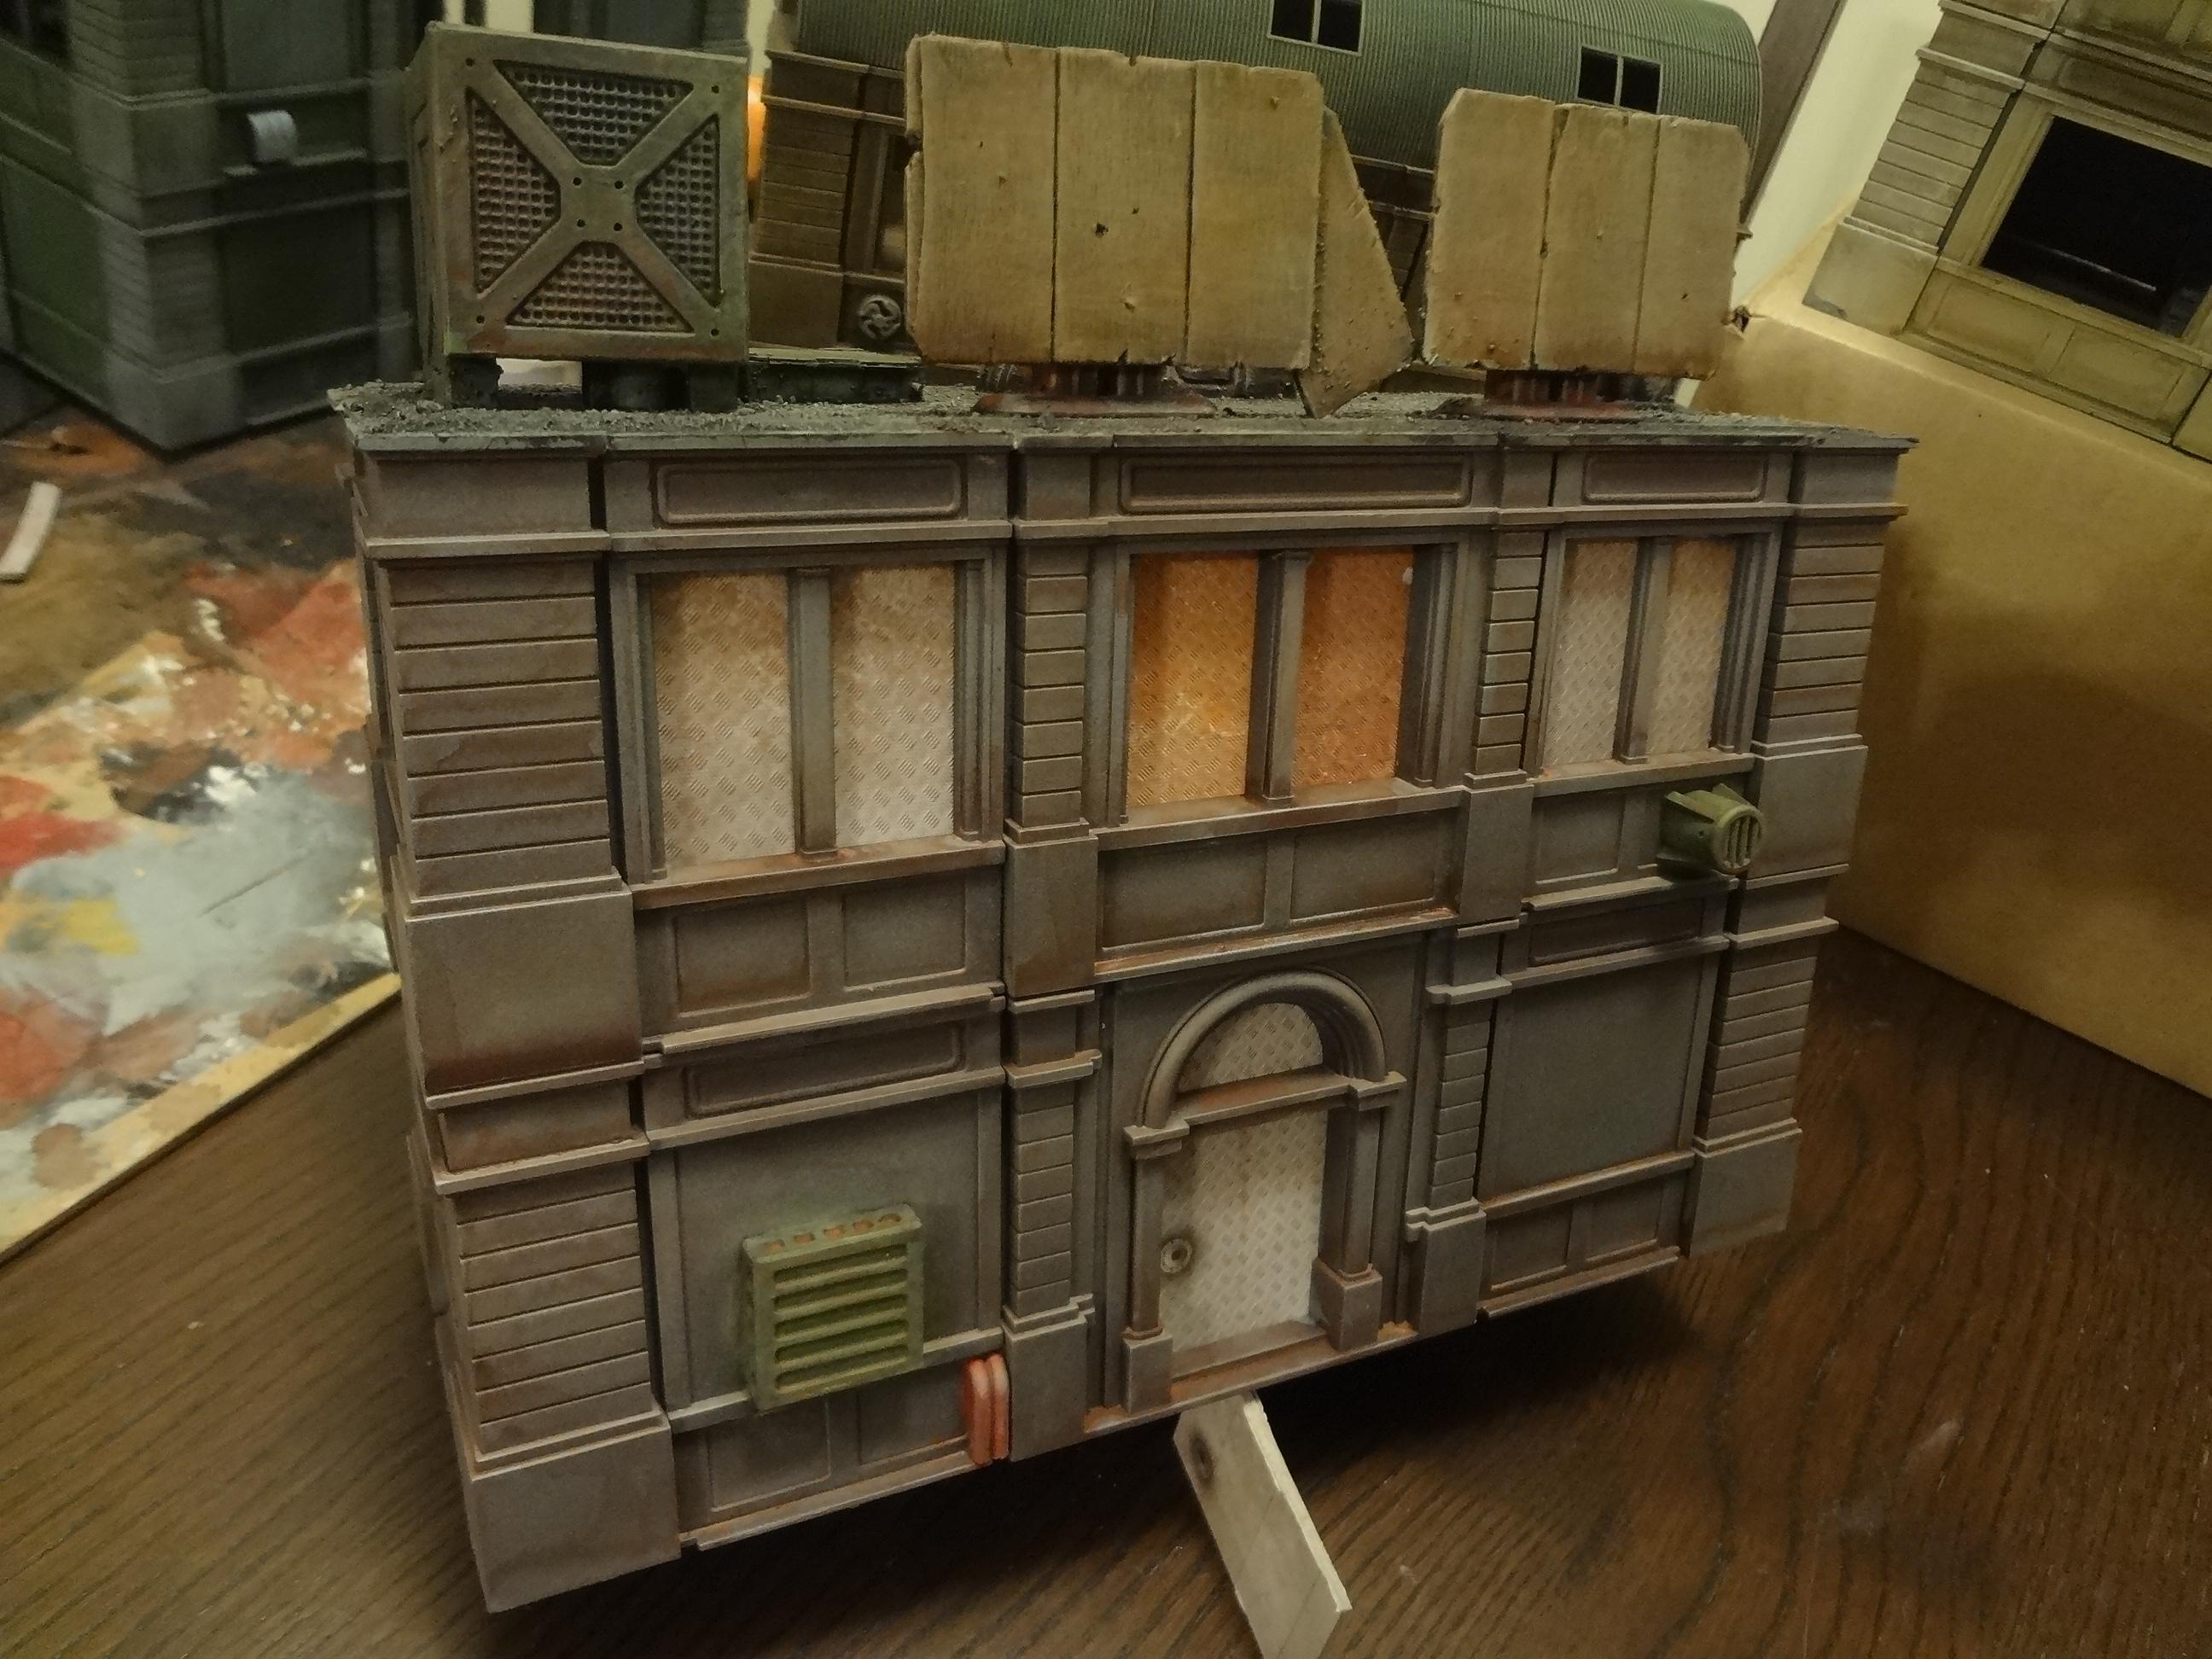
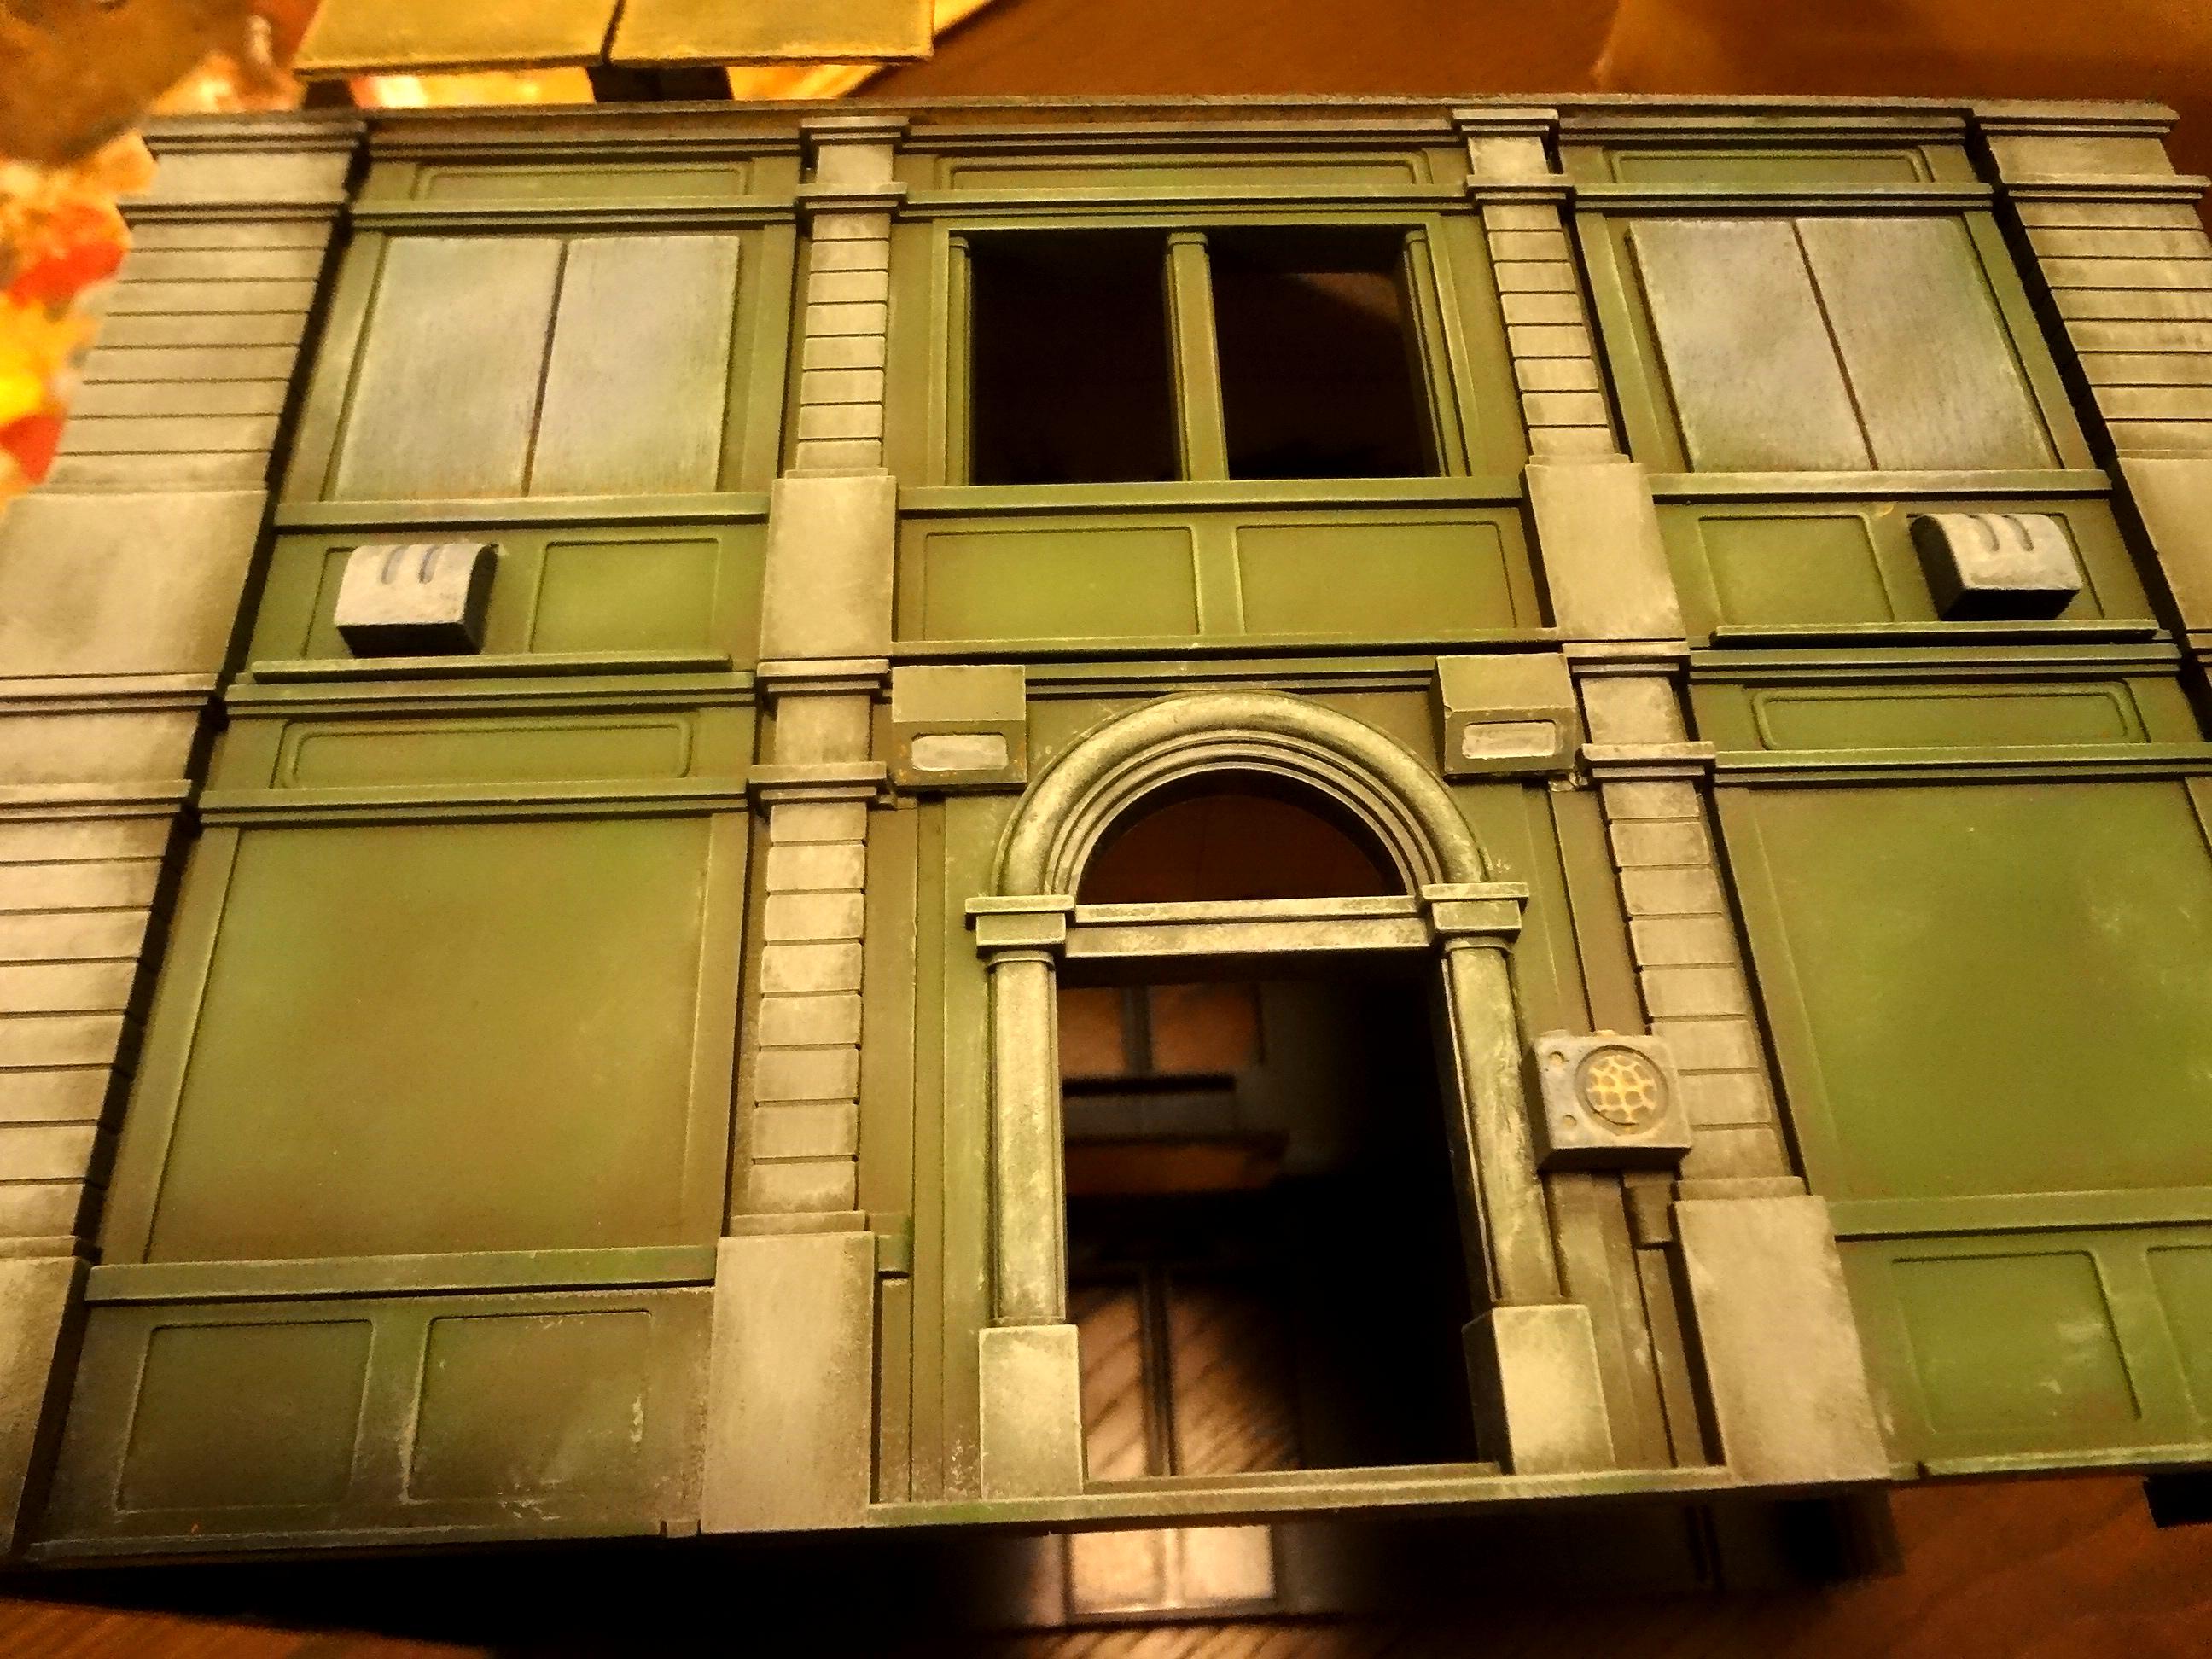
Building 1 - Boarded-Up Building
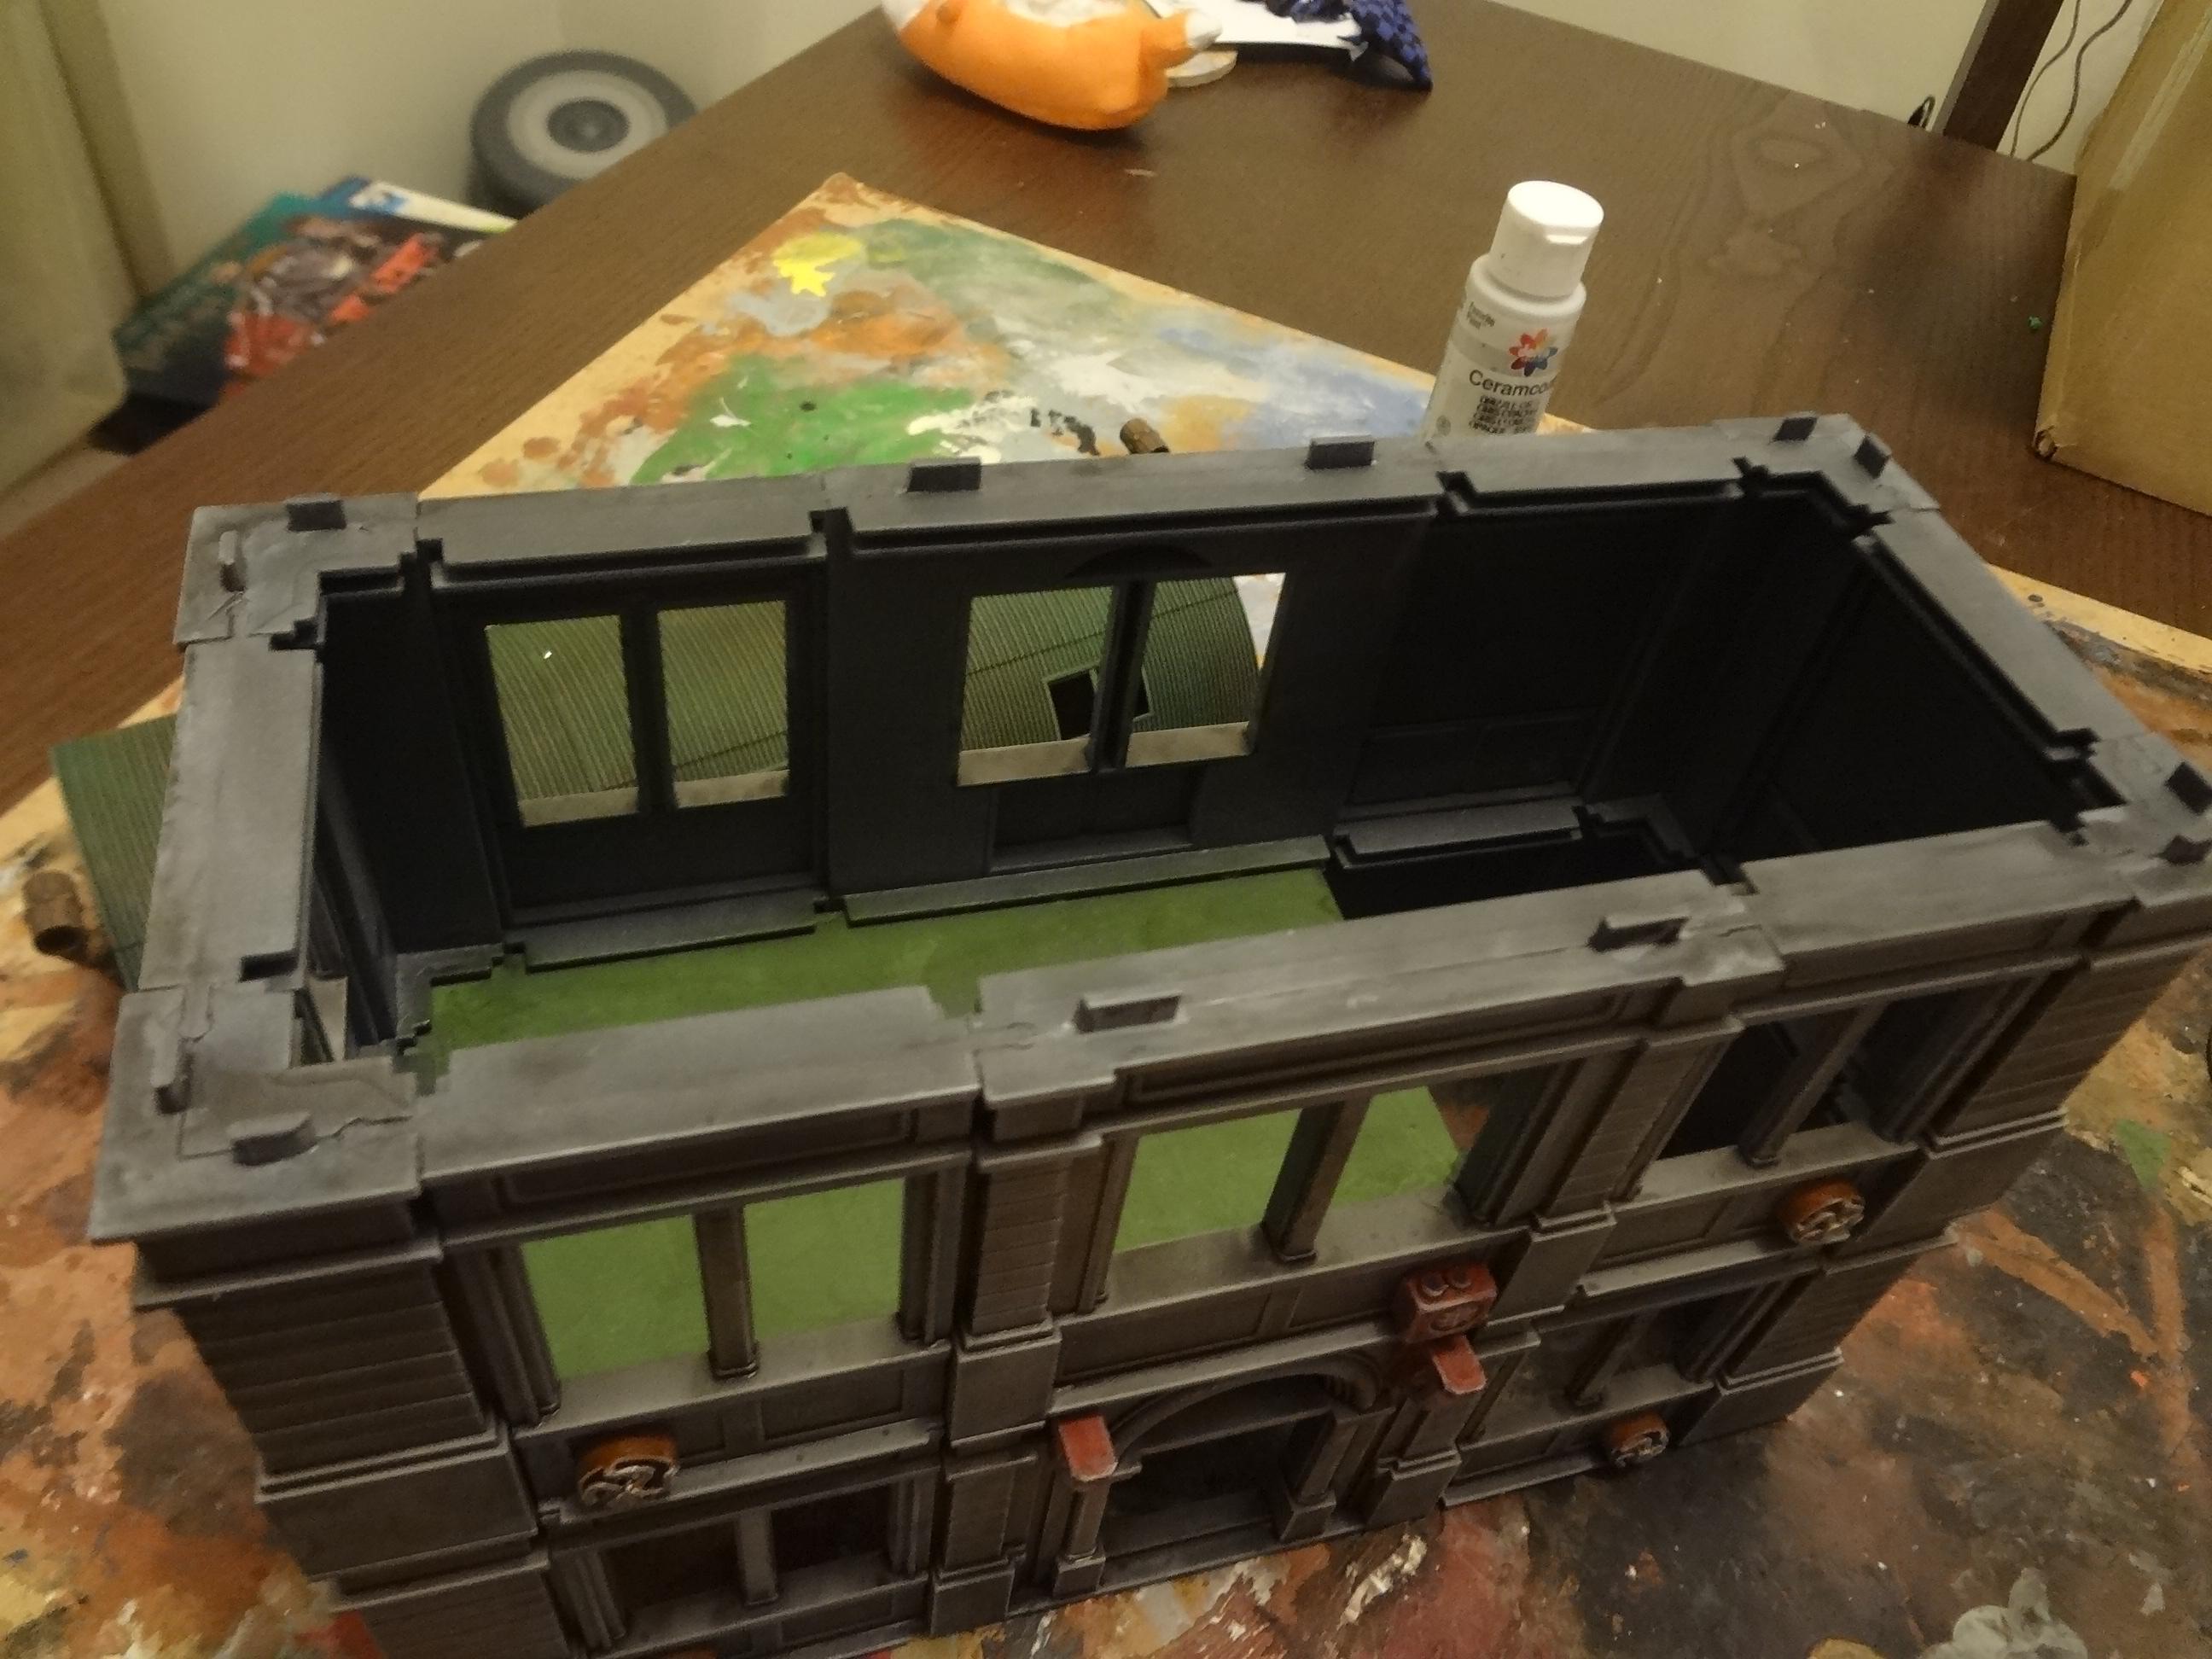
I built this one with no interior access. The printed card flooring pieces that are included in each kit were used to cover the windows and doors.

The recessed rear entrance was made by cutting apart the interior brick corner pieces.

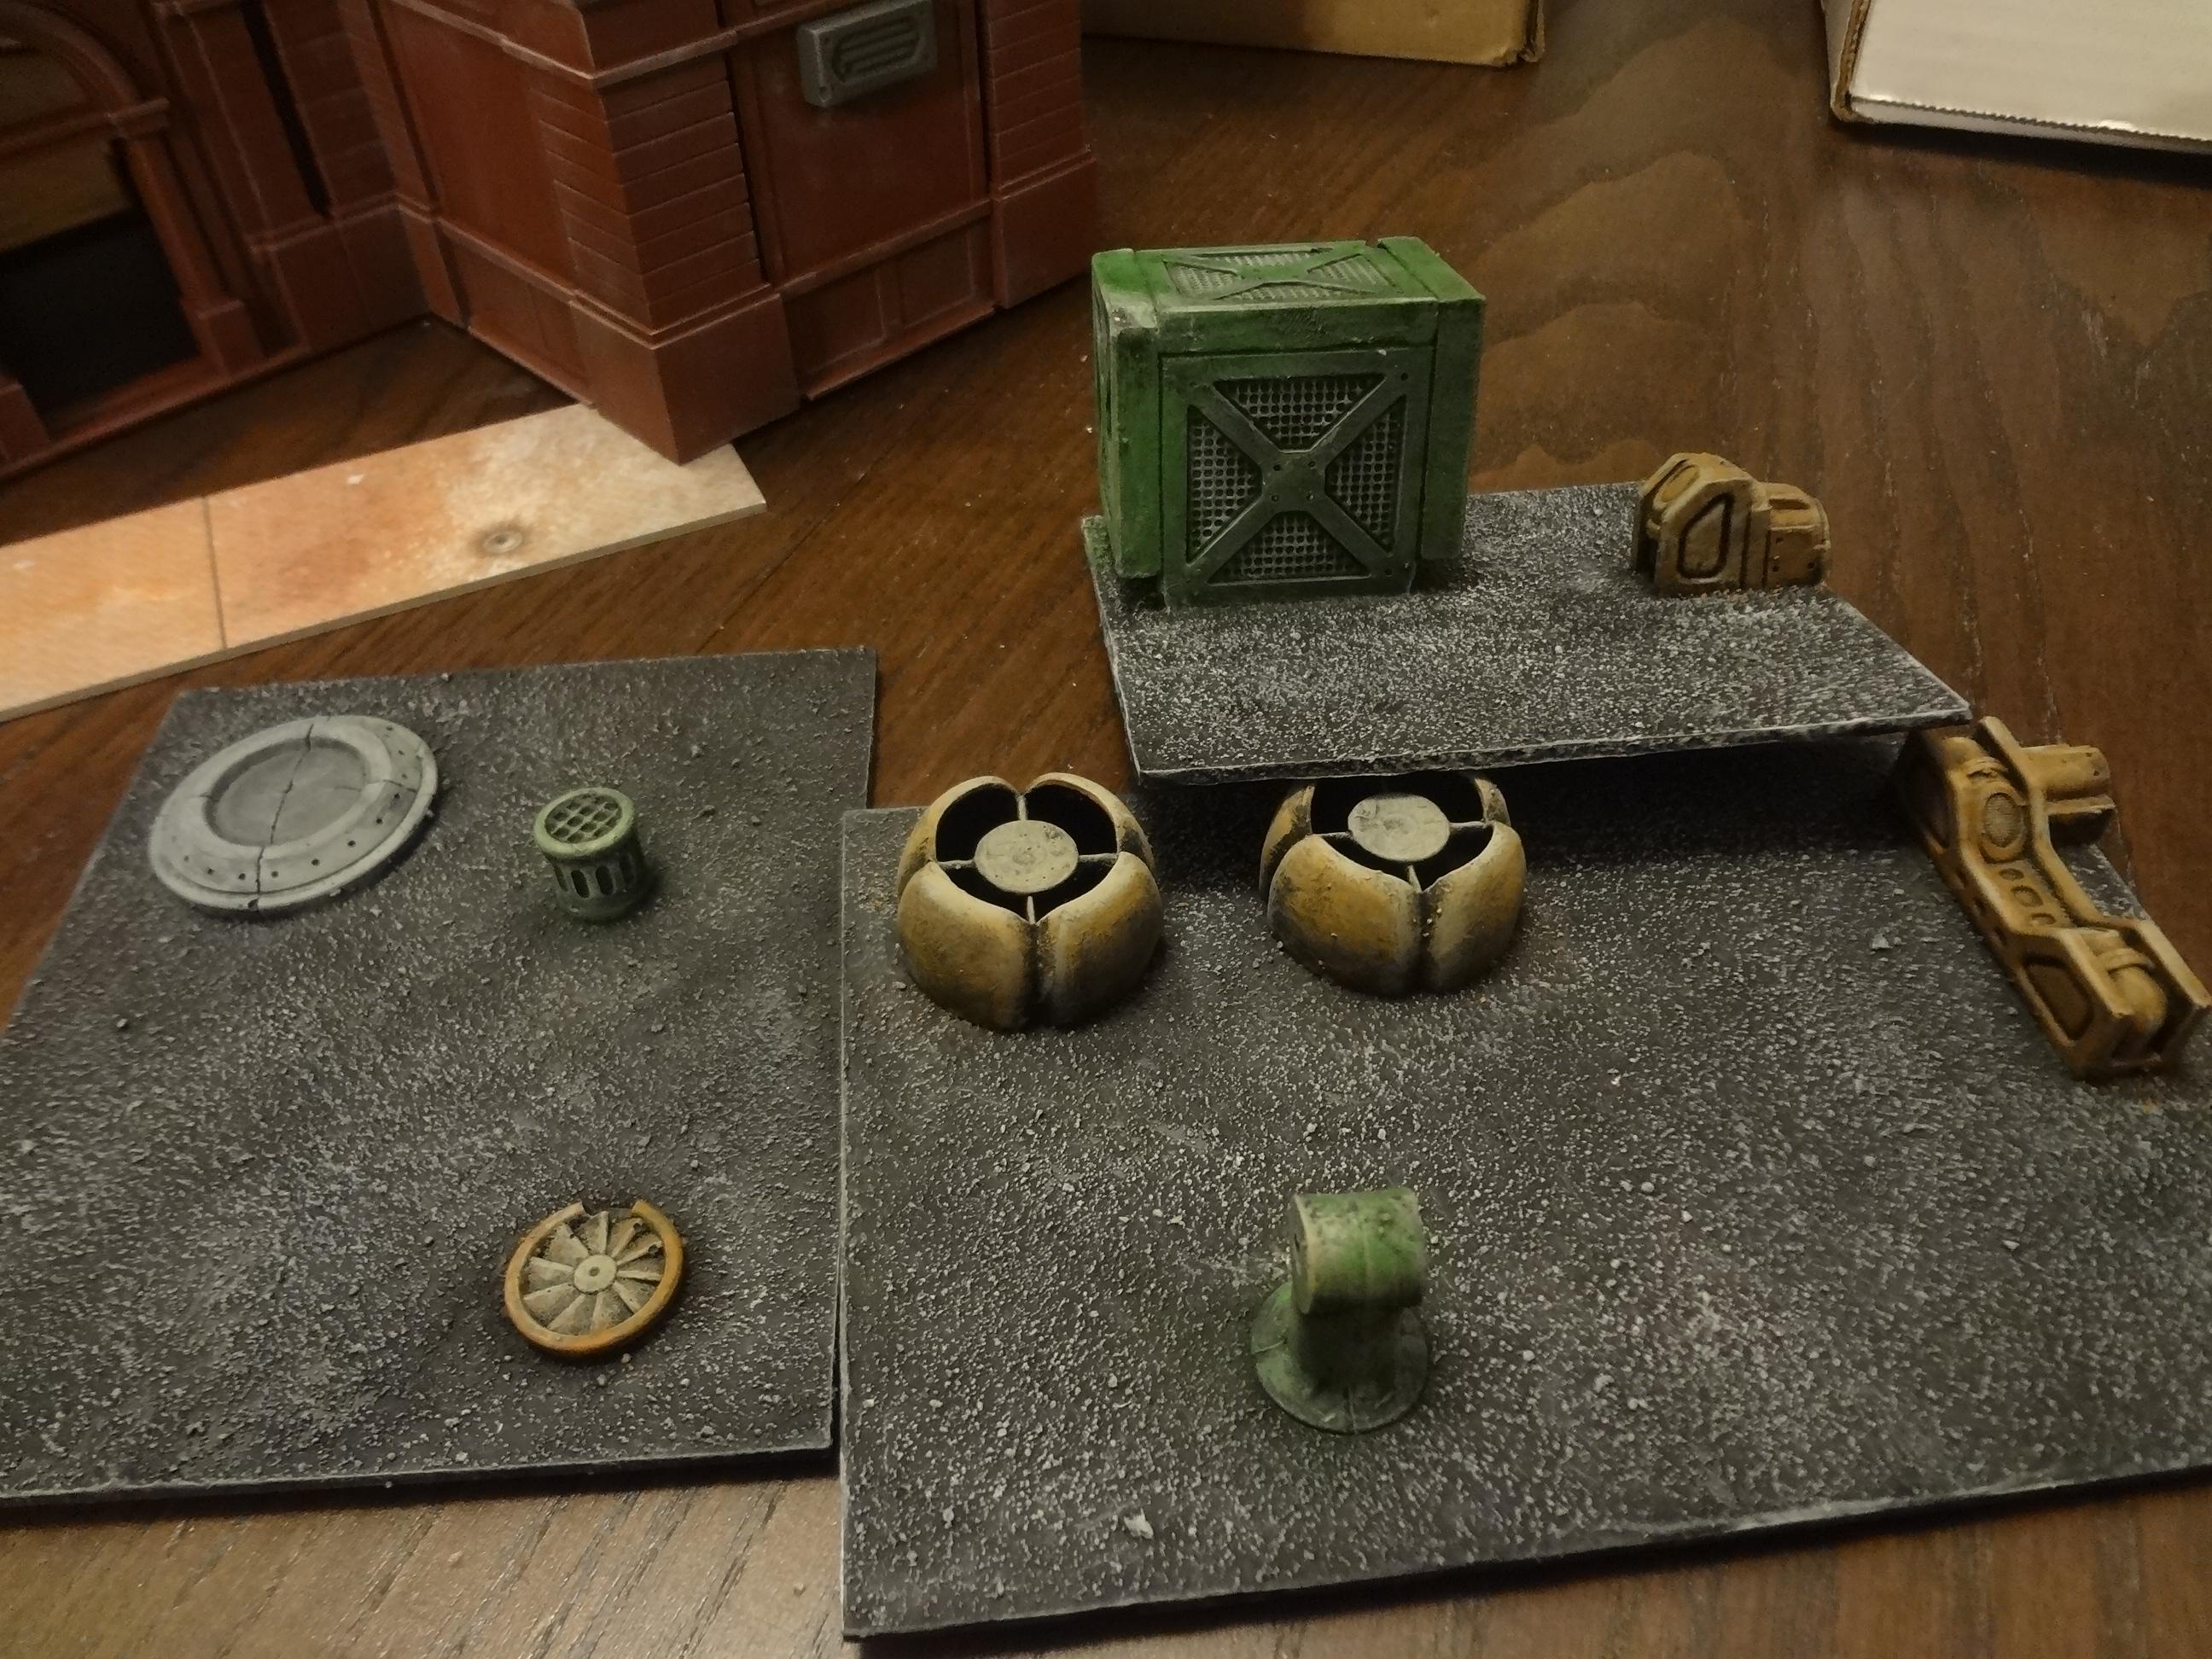
I added various greebles and used my typical gravel-and-tar-style roofing texture. The a/c unit is built from Hirst Arts blocks.


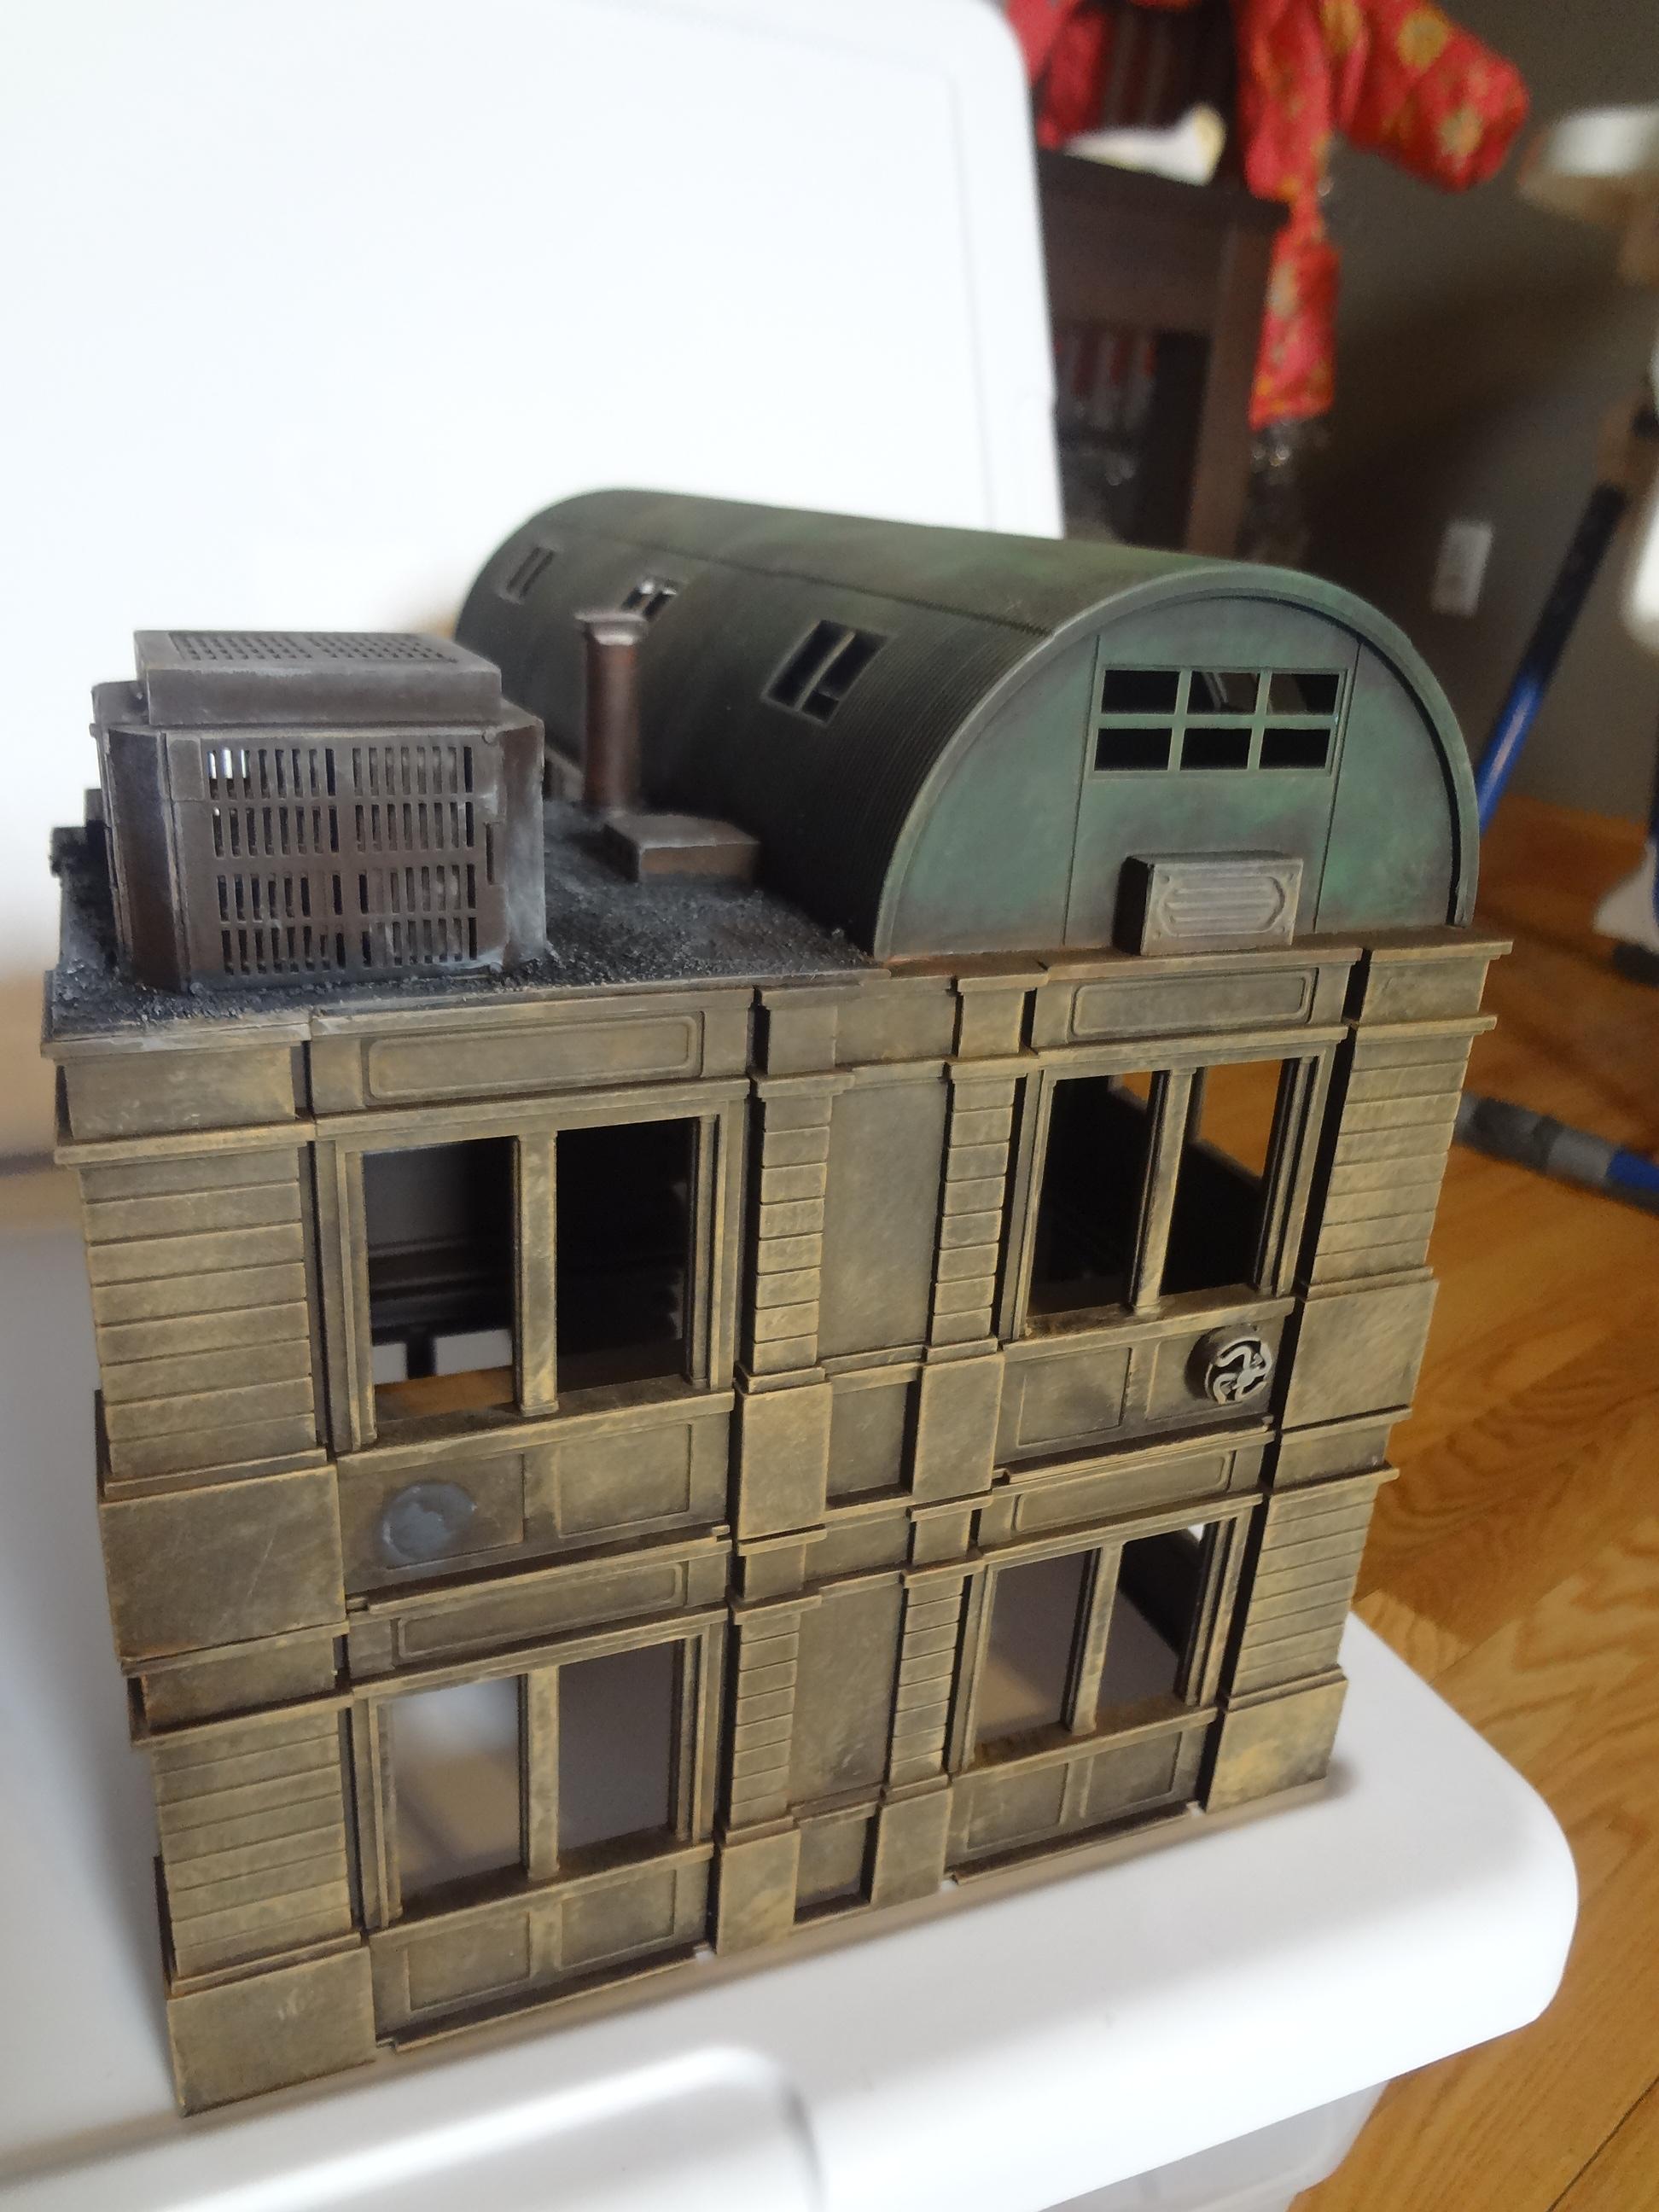
Building 2 - Small Apartment Block
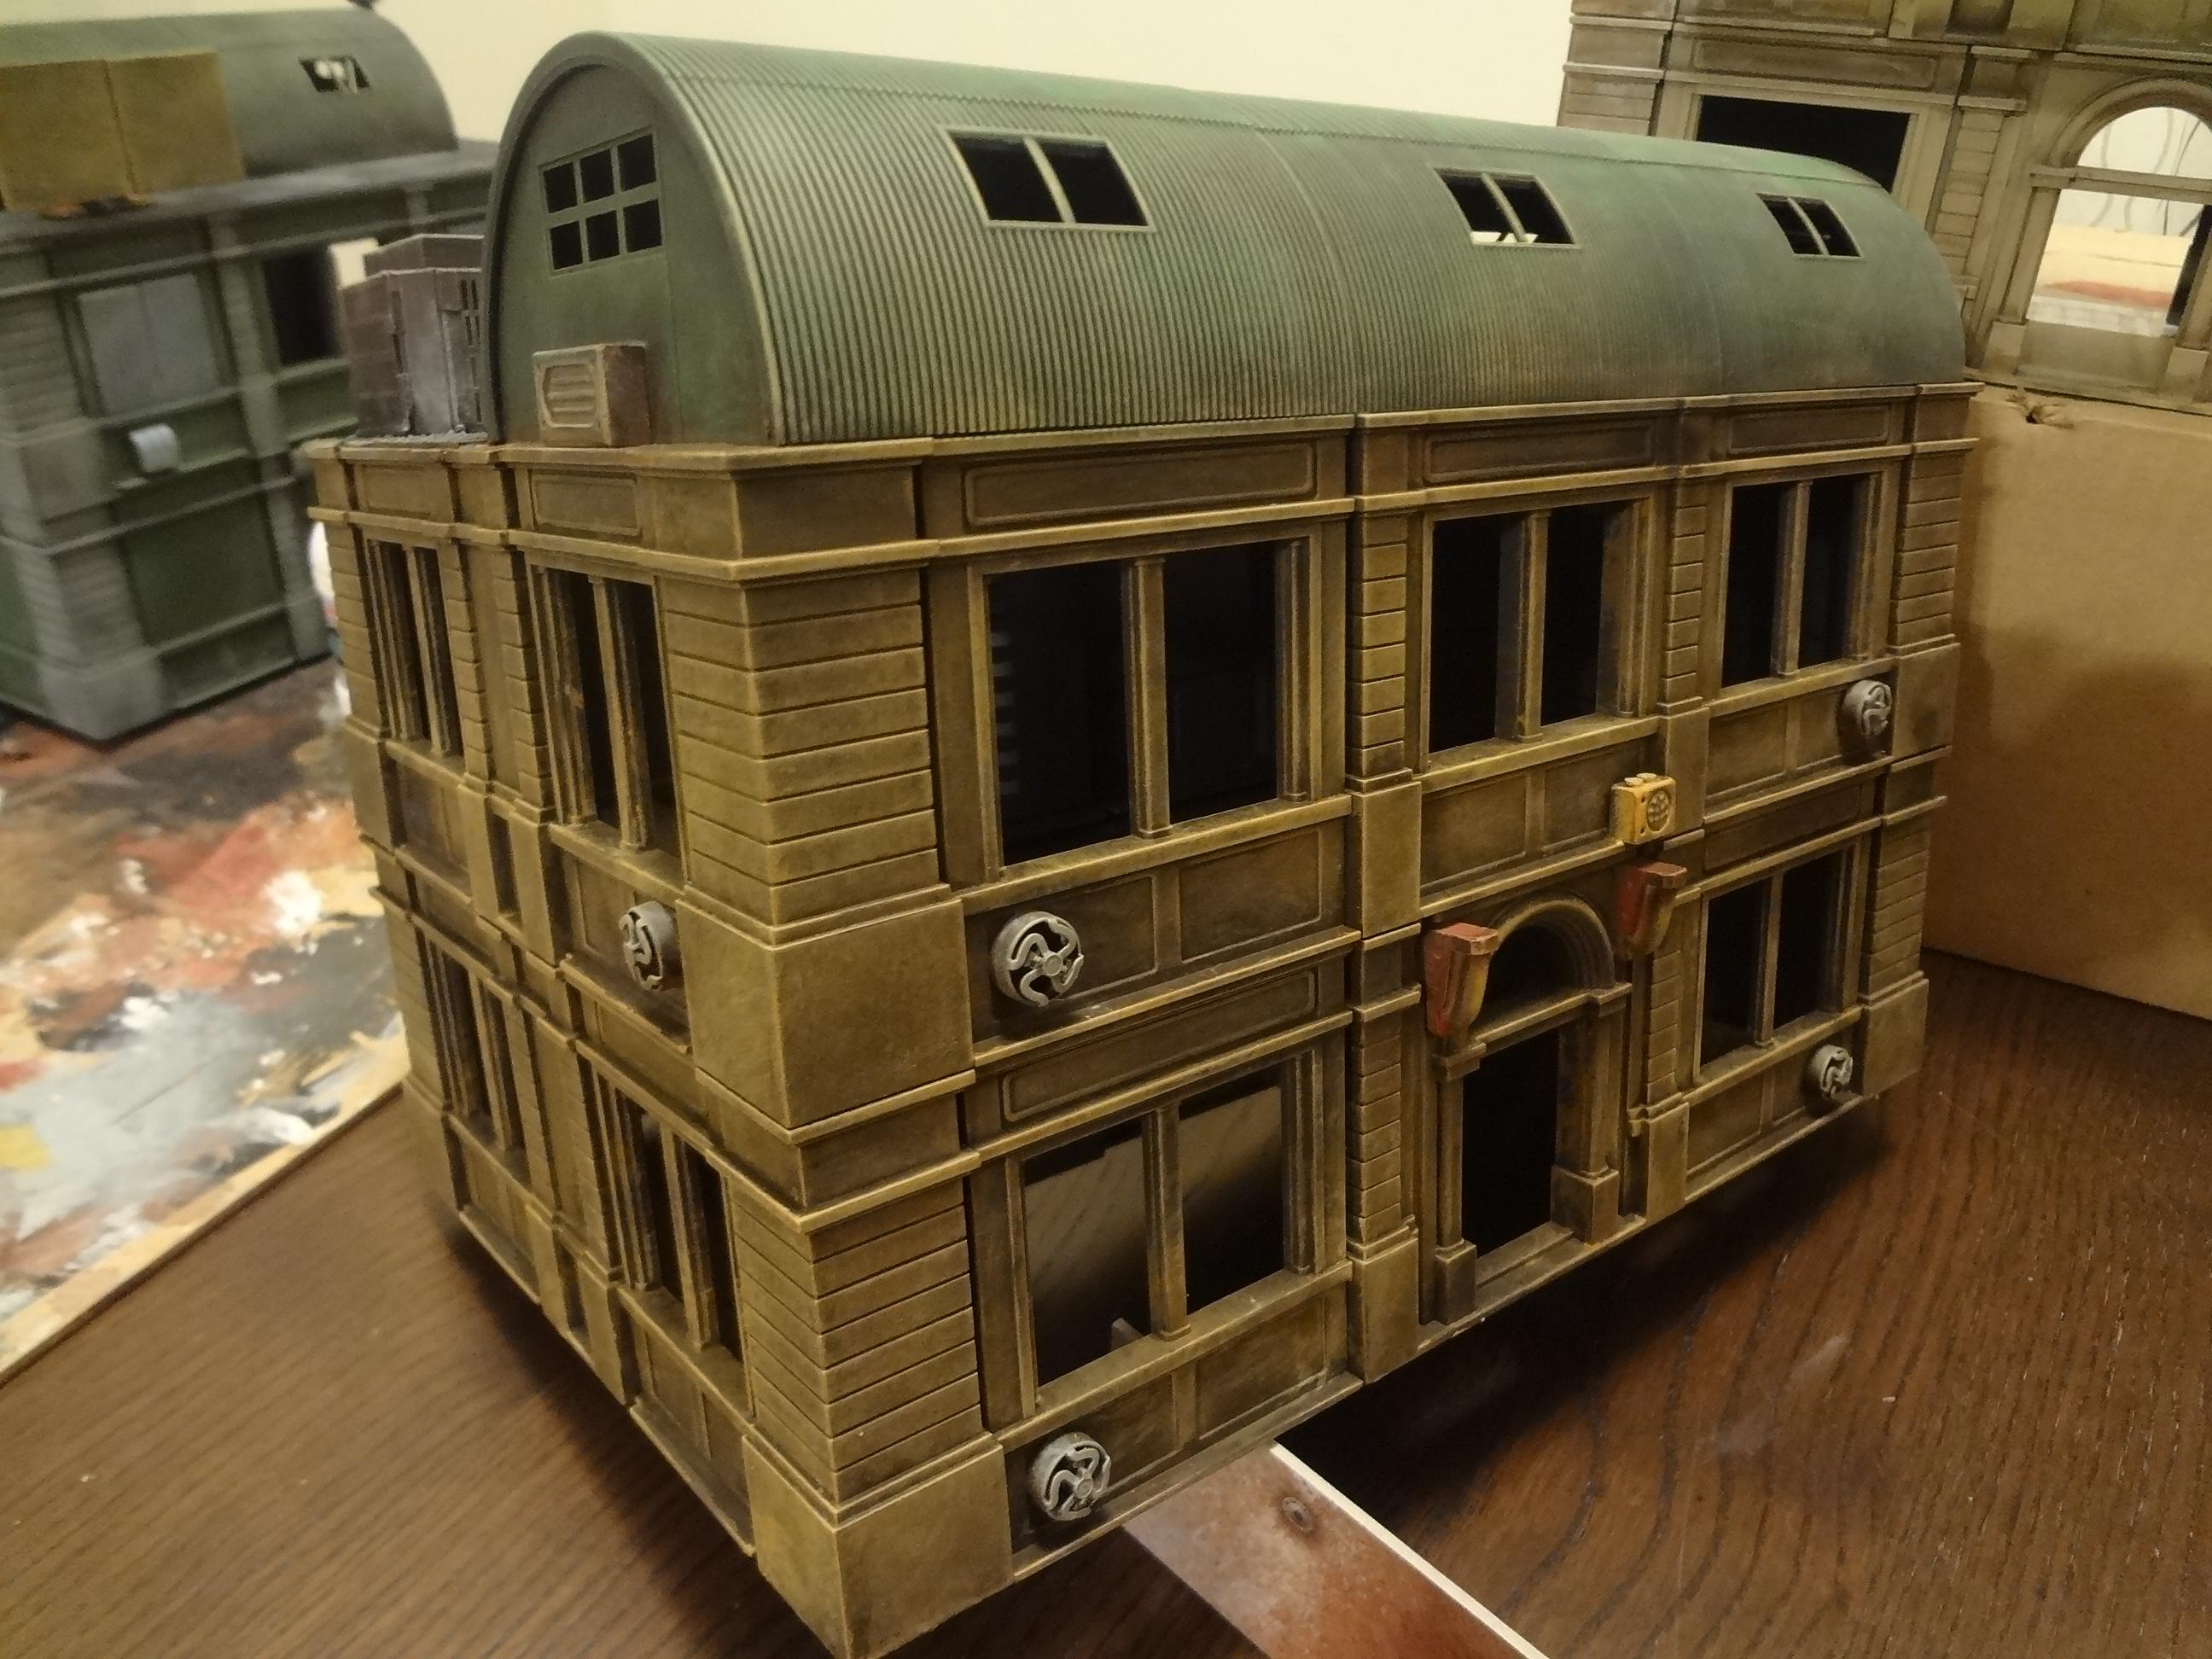
Here's a similiar building. On this one, however, I experimented with brush-dipping the building using Minwax Polyshades Tudor. It's the only one painted this way, and the results are fine, but this method increased the drying time, which is annoying, and the difference isn't enough to replace my usual washes.


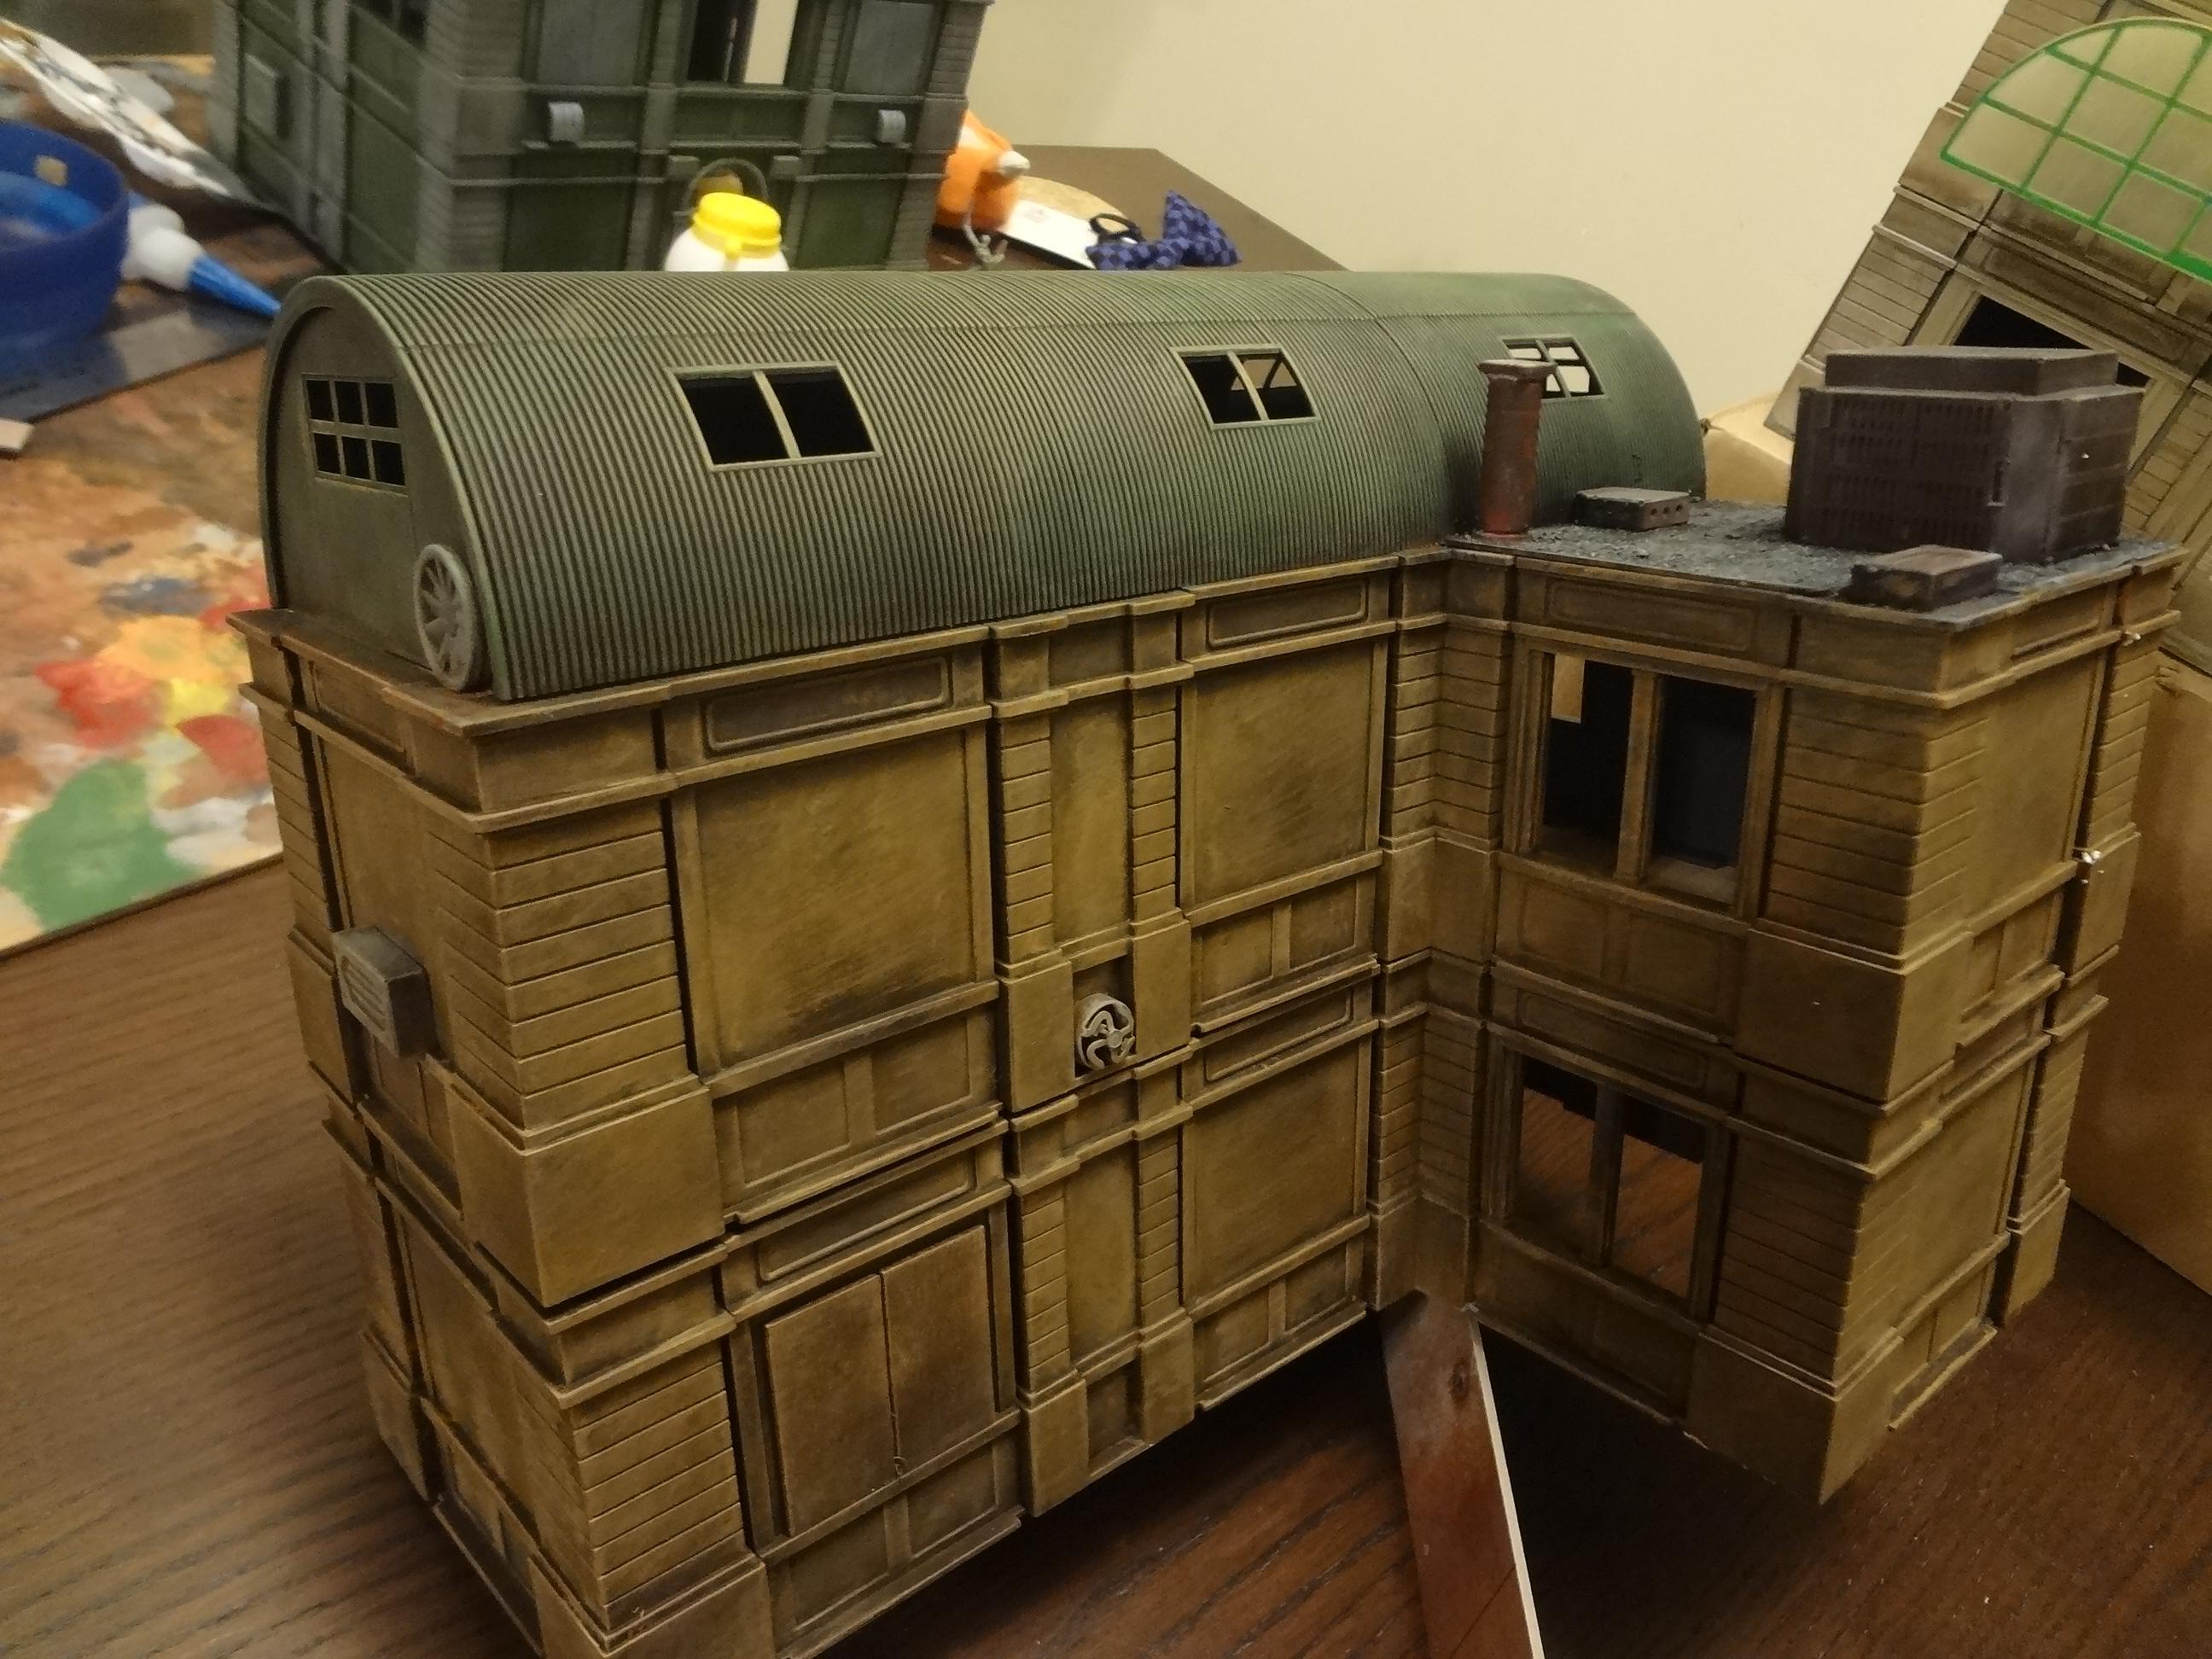
The roof is made from Dust Tactics Quonset Huts and removes for interior access.


Here's the rear view.


Building 3 - Medium Apartment Block 
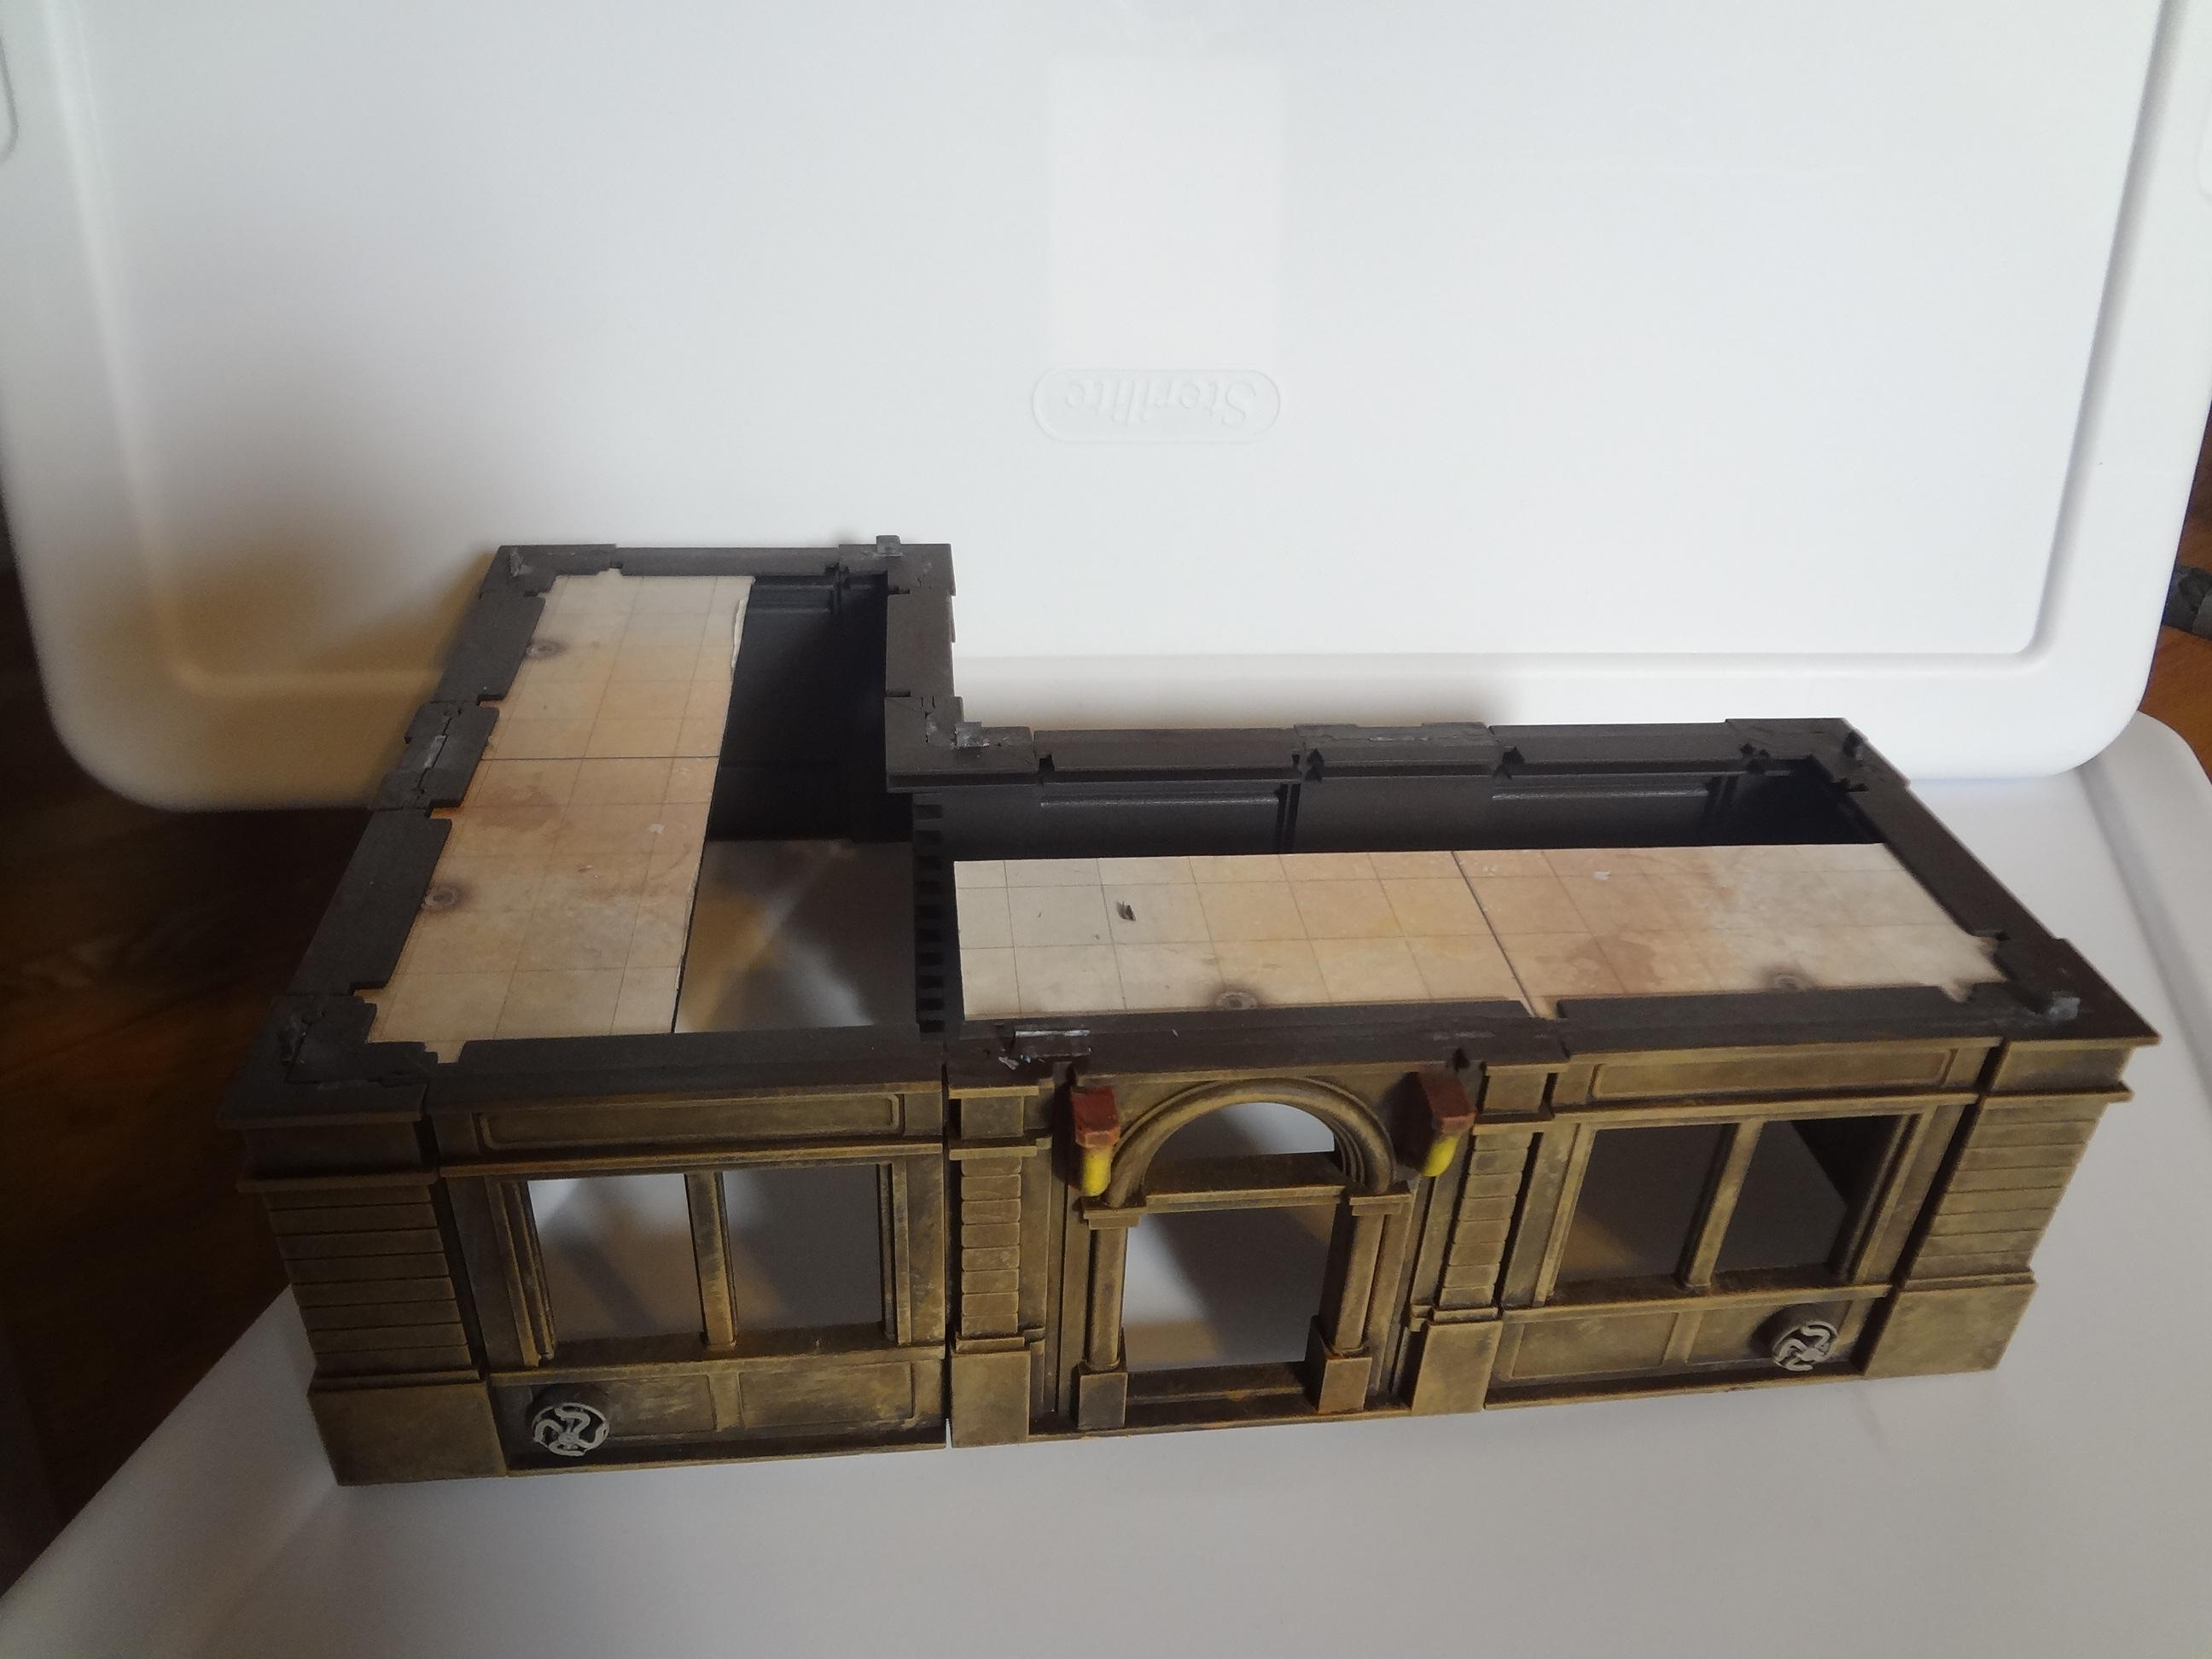
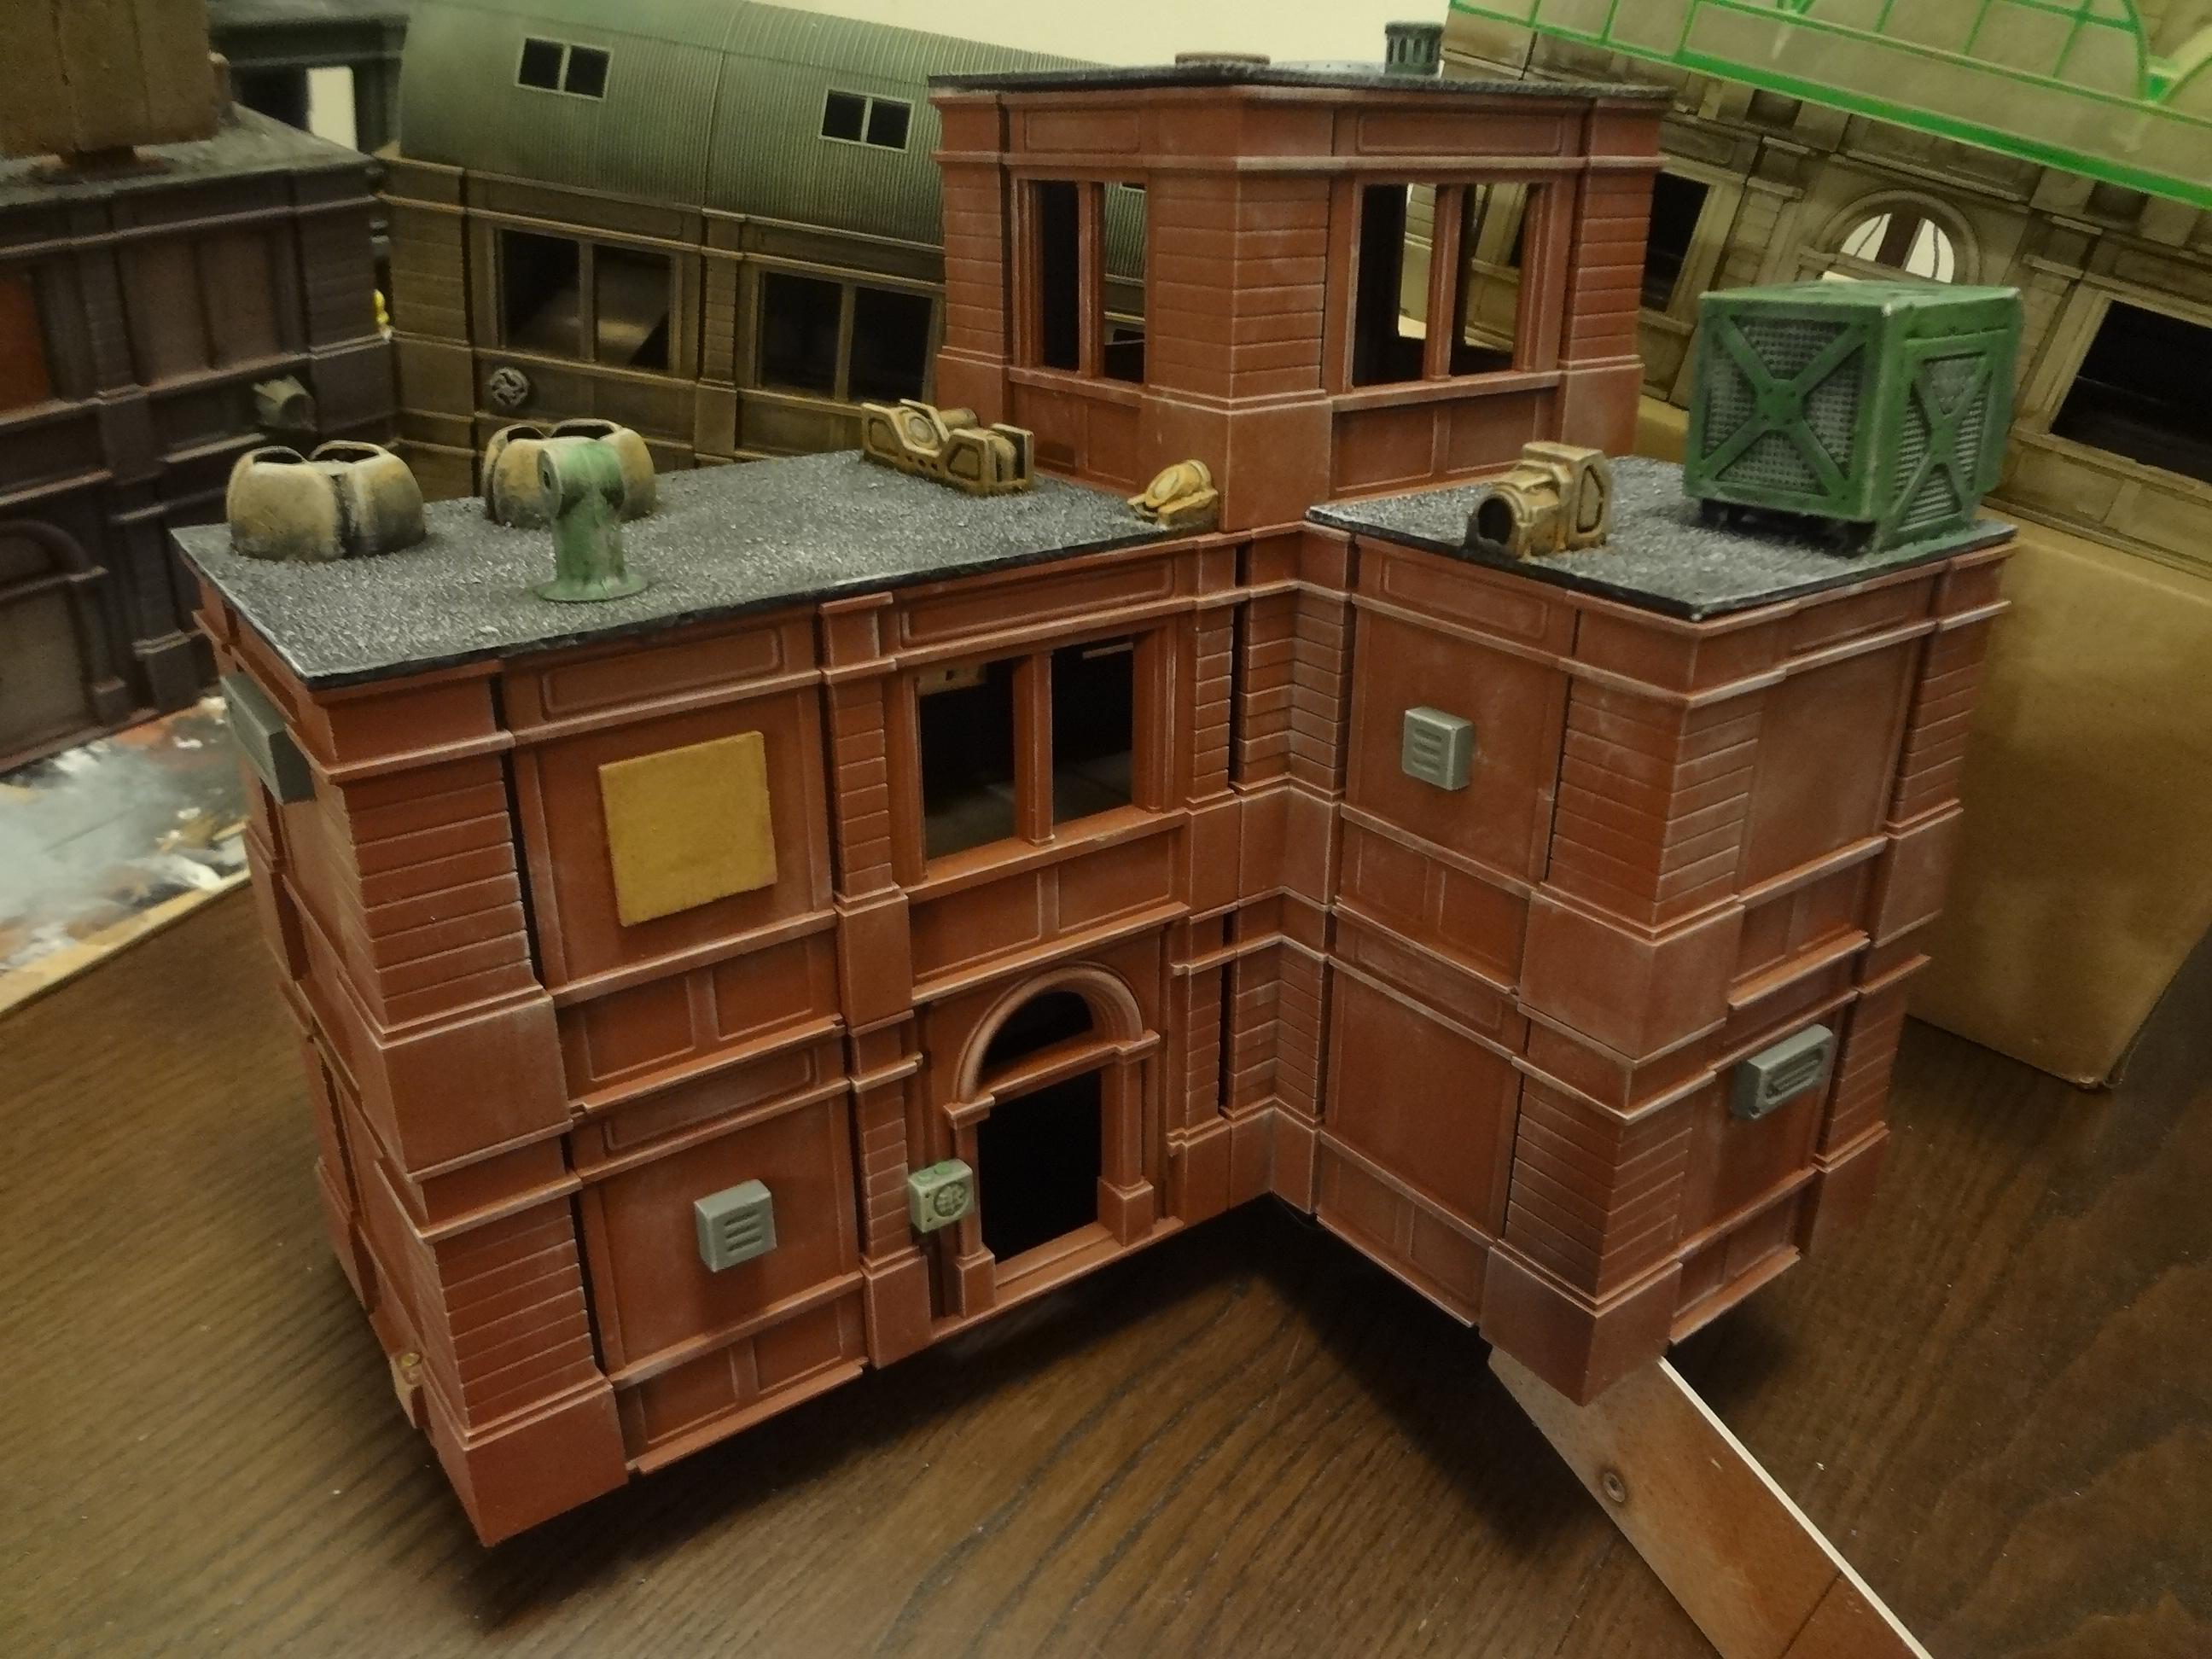
L-shaped buildings are a great way to increase the amount and direction of cover that a building offers.


This a/c unit is built from five medical specimen cases.


By removing most attachment tabs, I made the second floor removable for access. It works OK but sticks sometimes, so I probably should have just made the roof removable.


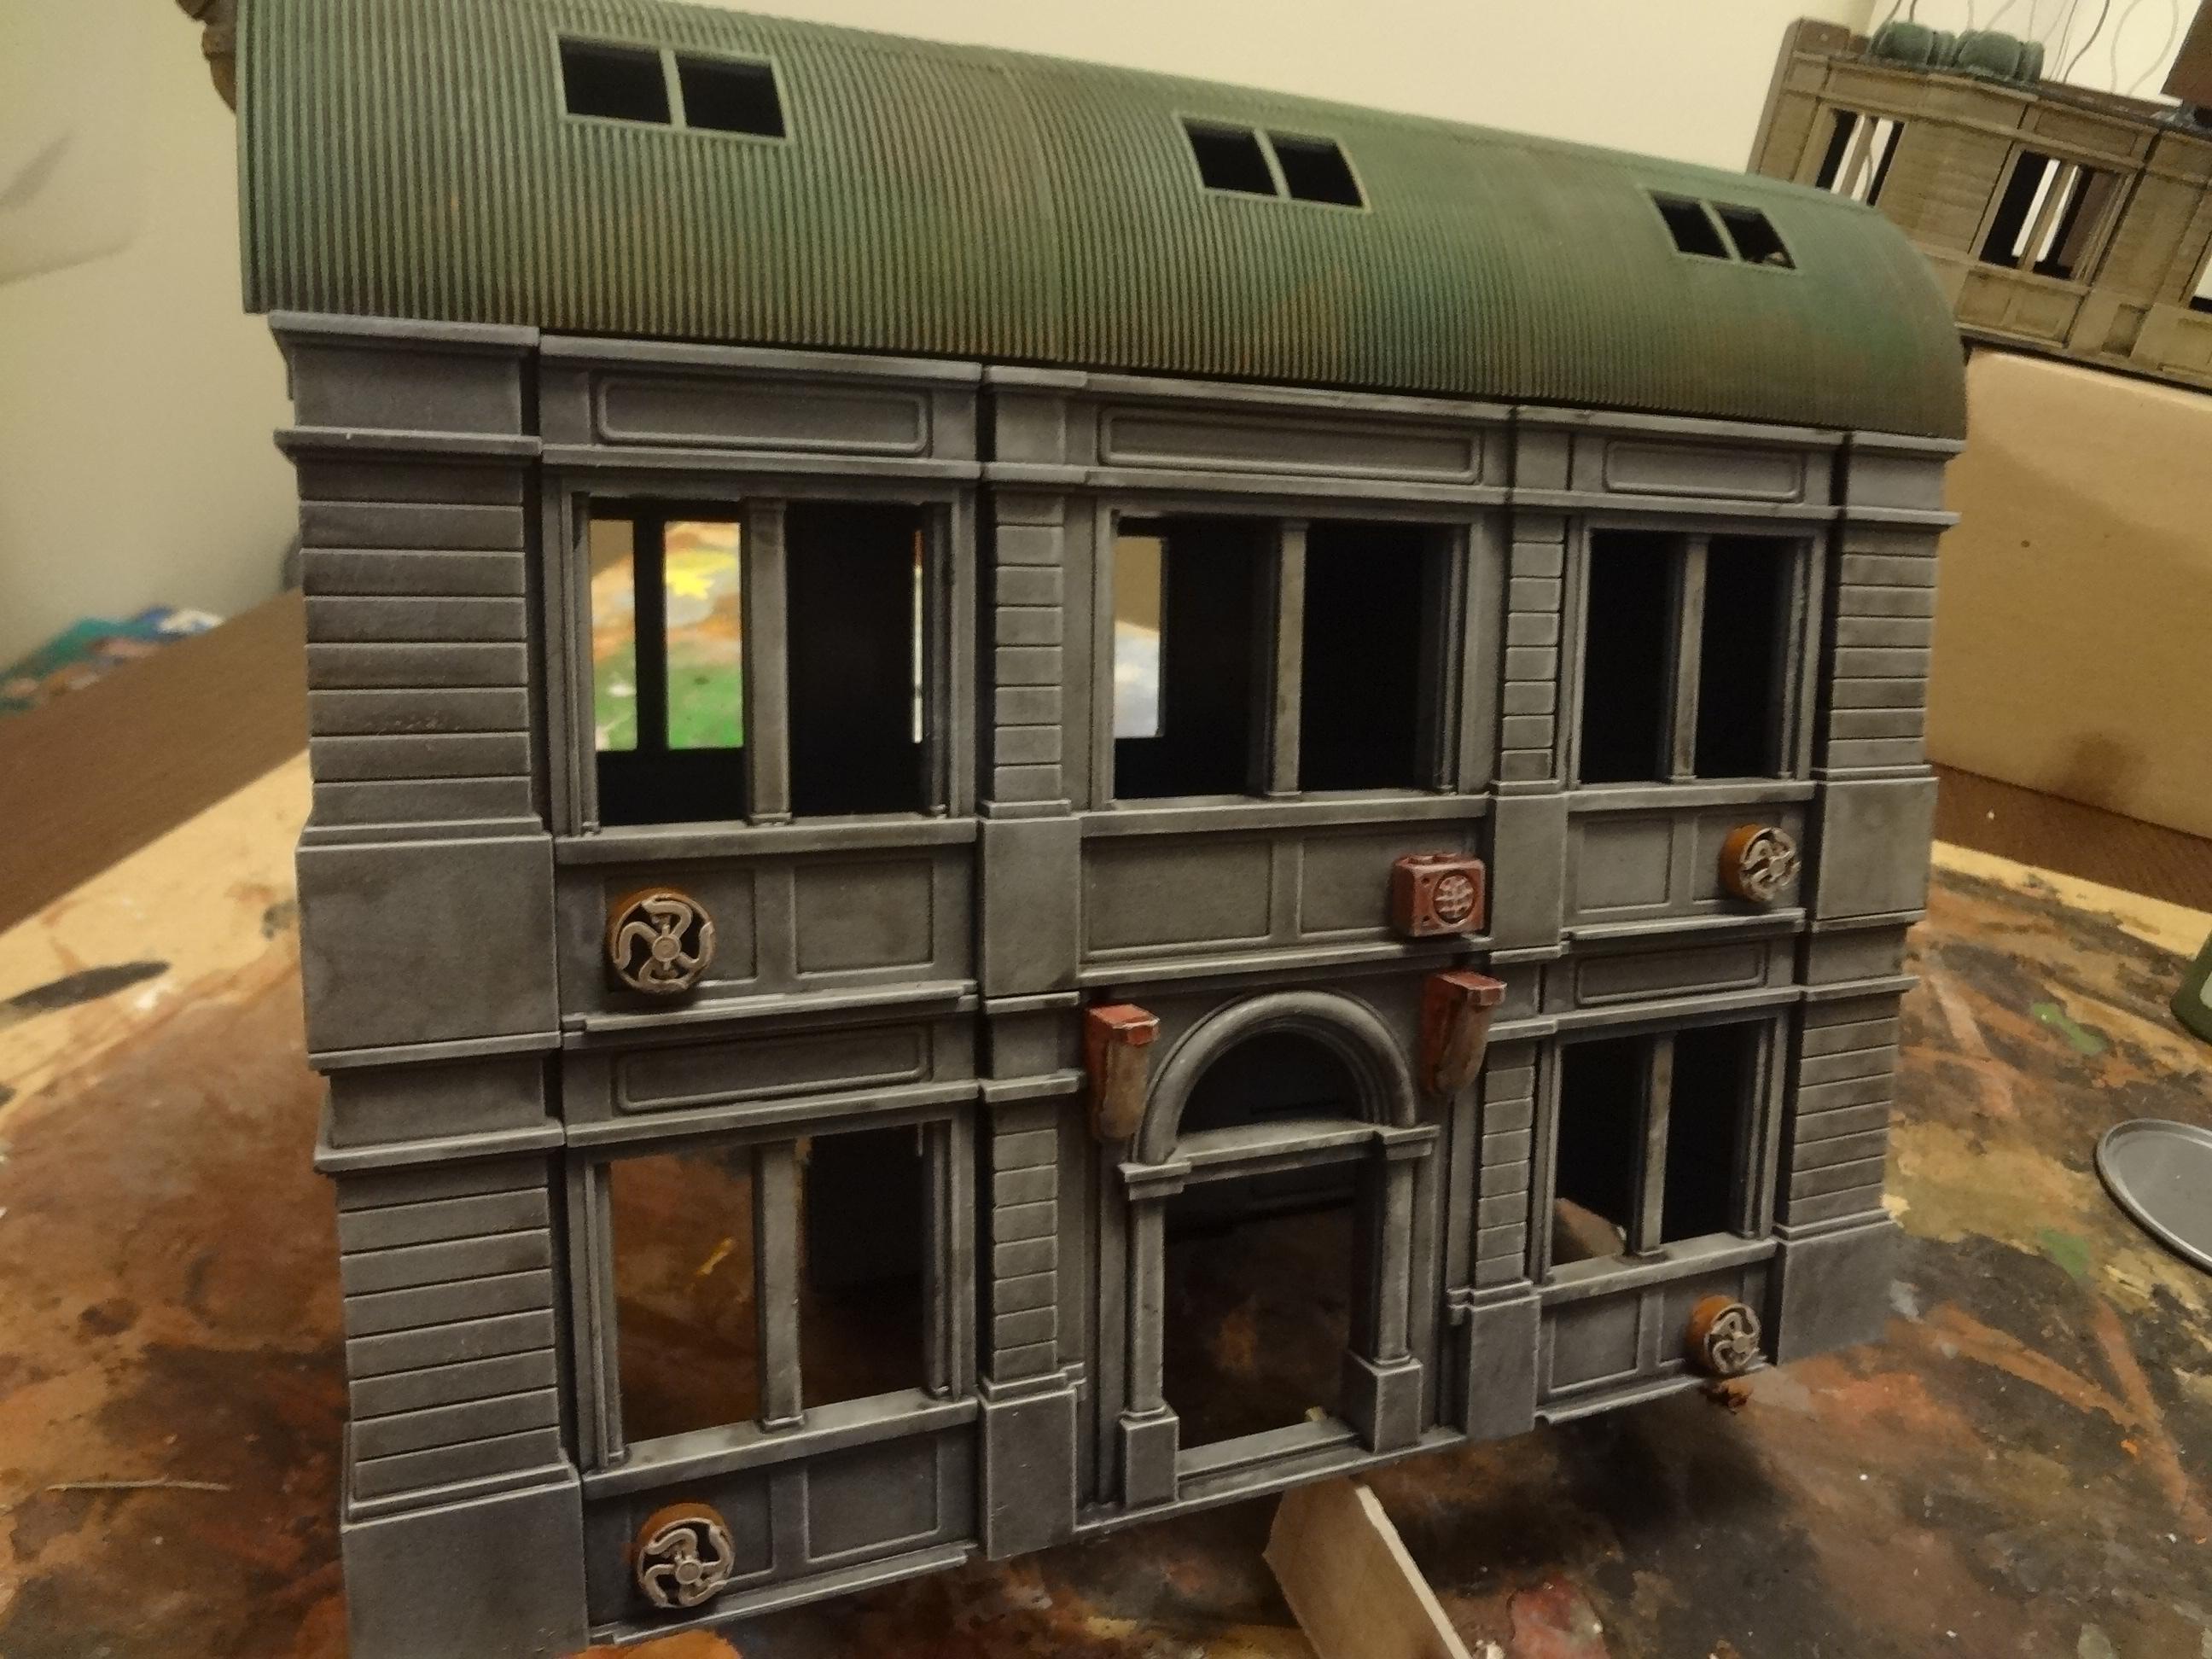
Building 4 - Repair Shop


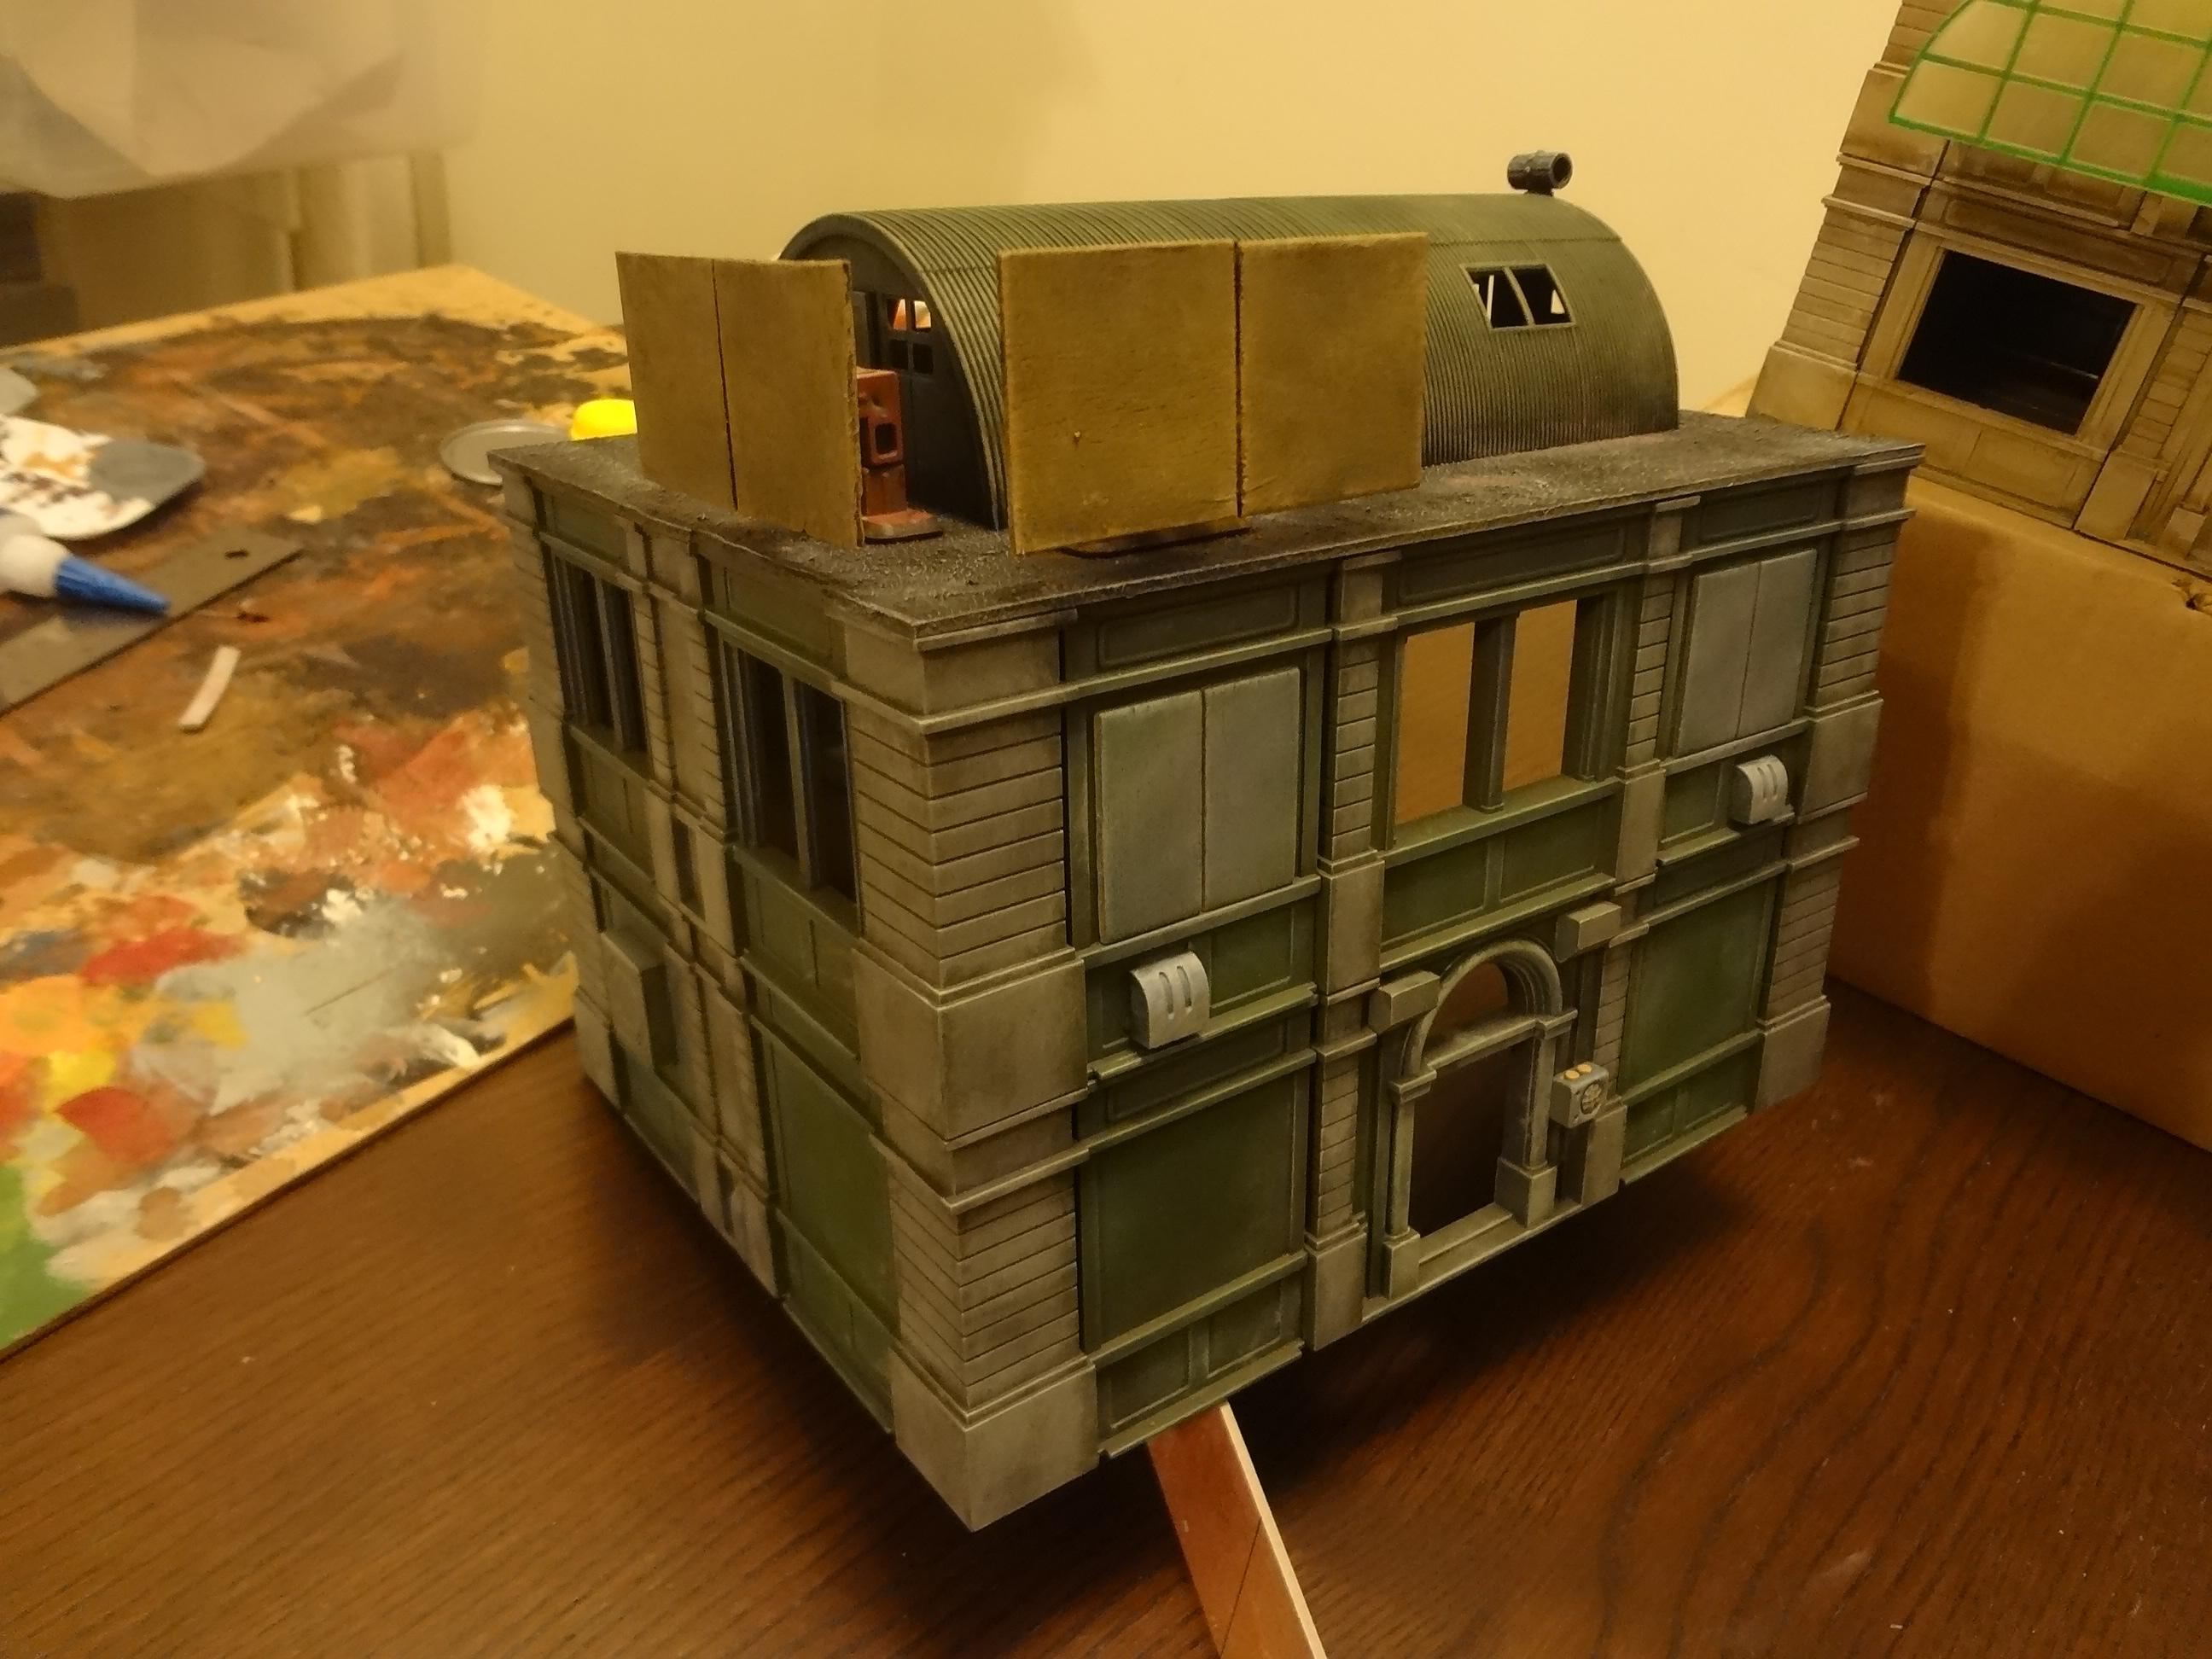
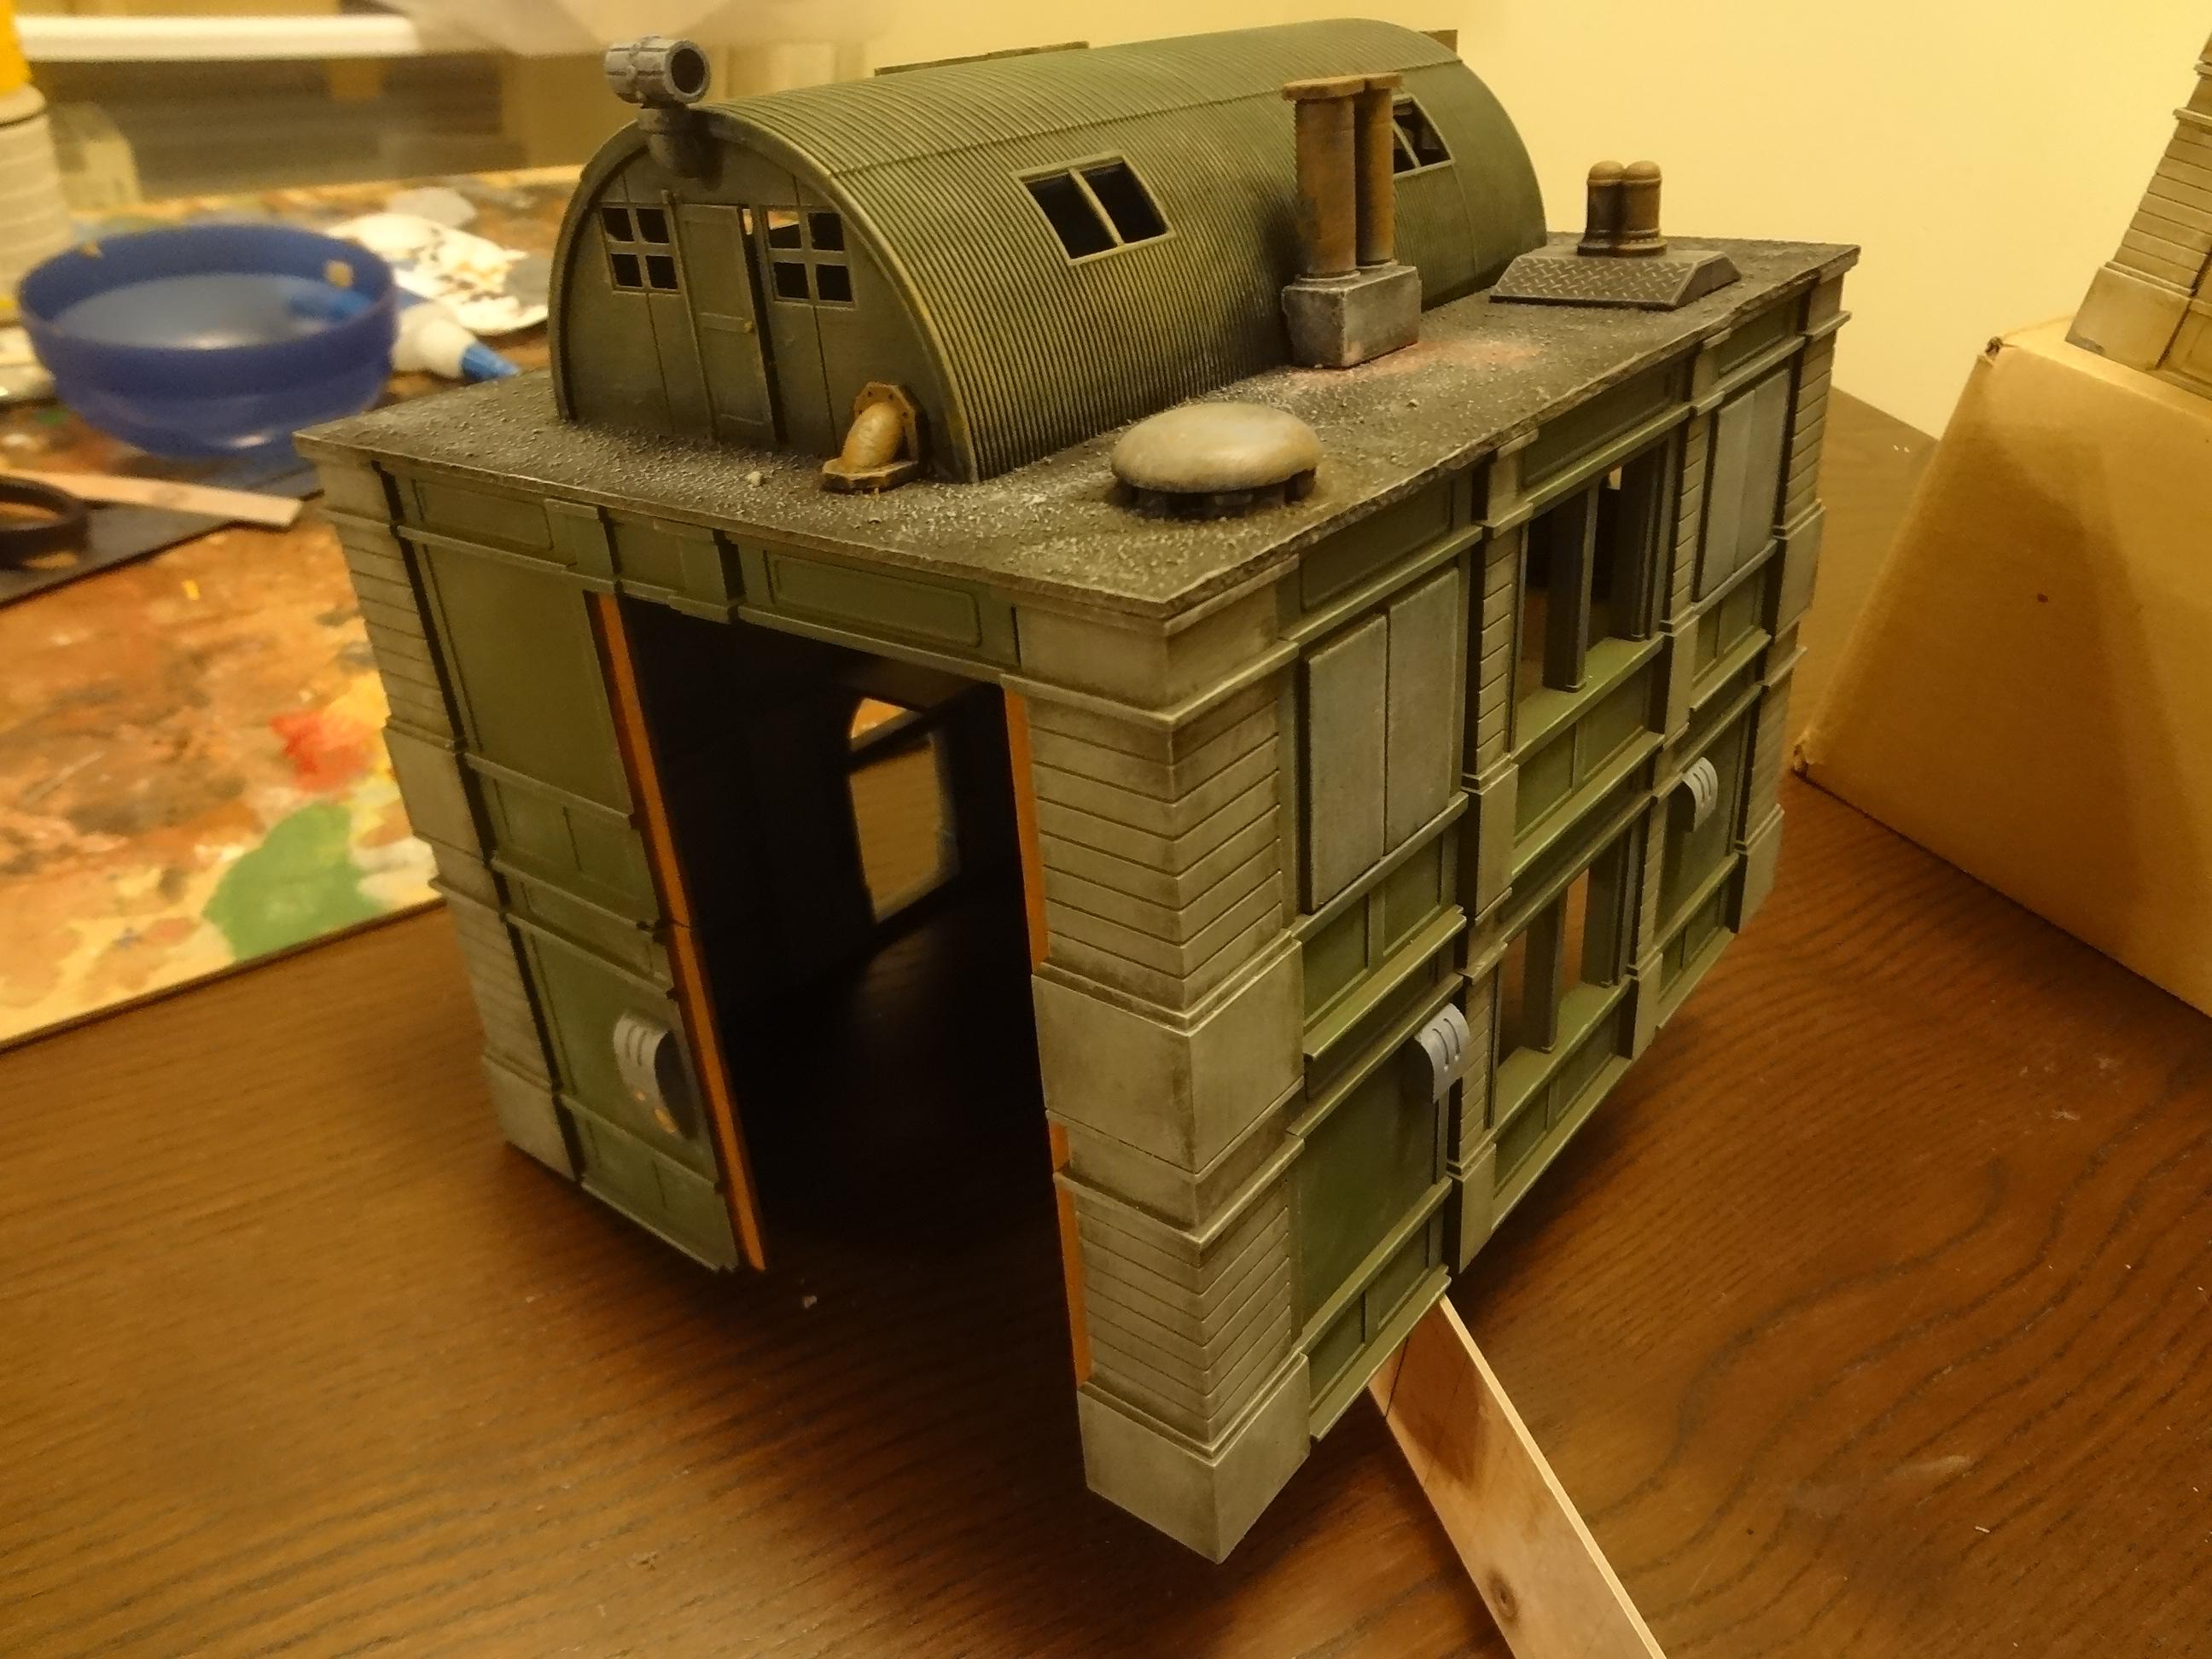
This represents my only attempt at a two-tone building, and I kind of wish I'd painted more like this. It has a piece of self-adhesive vinyl composite tile (VCT) glued to the top. The signs, Quonset hut, bits and gravel on the roof were simply pressed onto the sticky side of the tile with no additional glue needed.

VCT is really easy to score and break, though I recommend sanding the slick top side if you're going to glue or paint it.


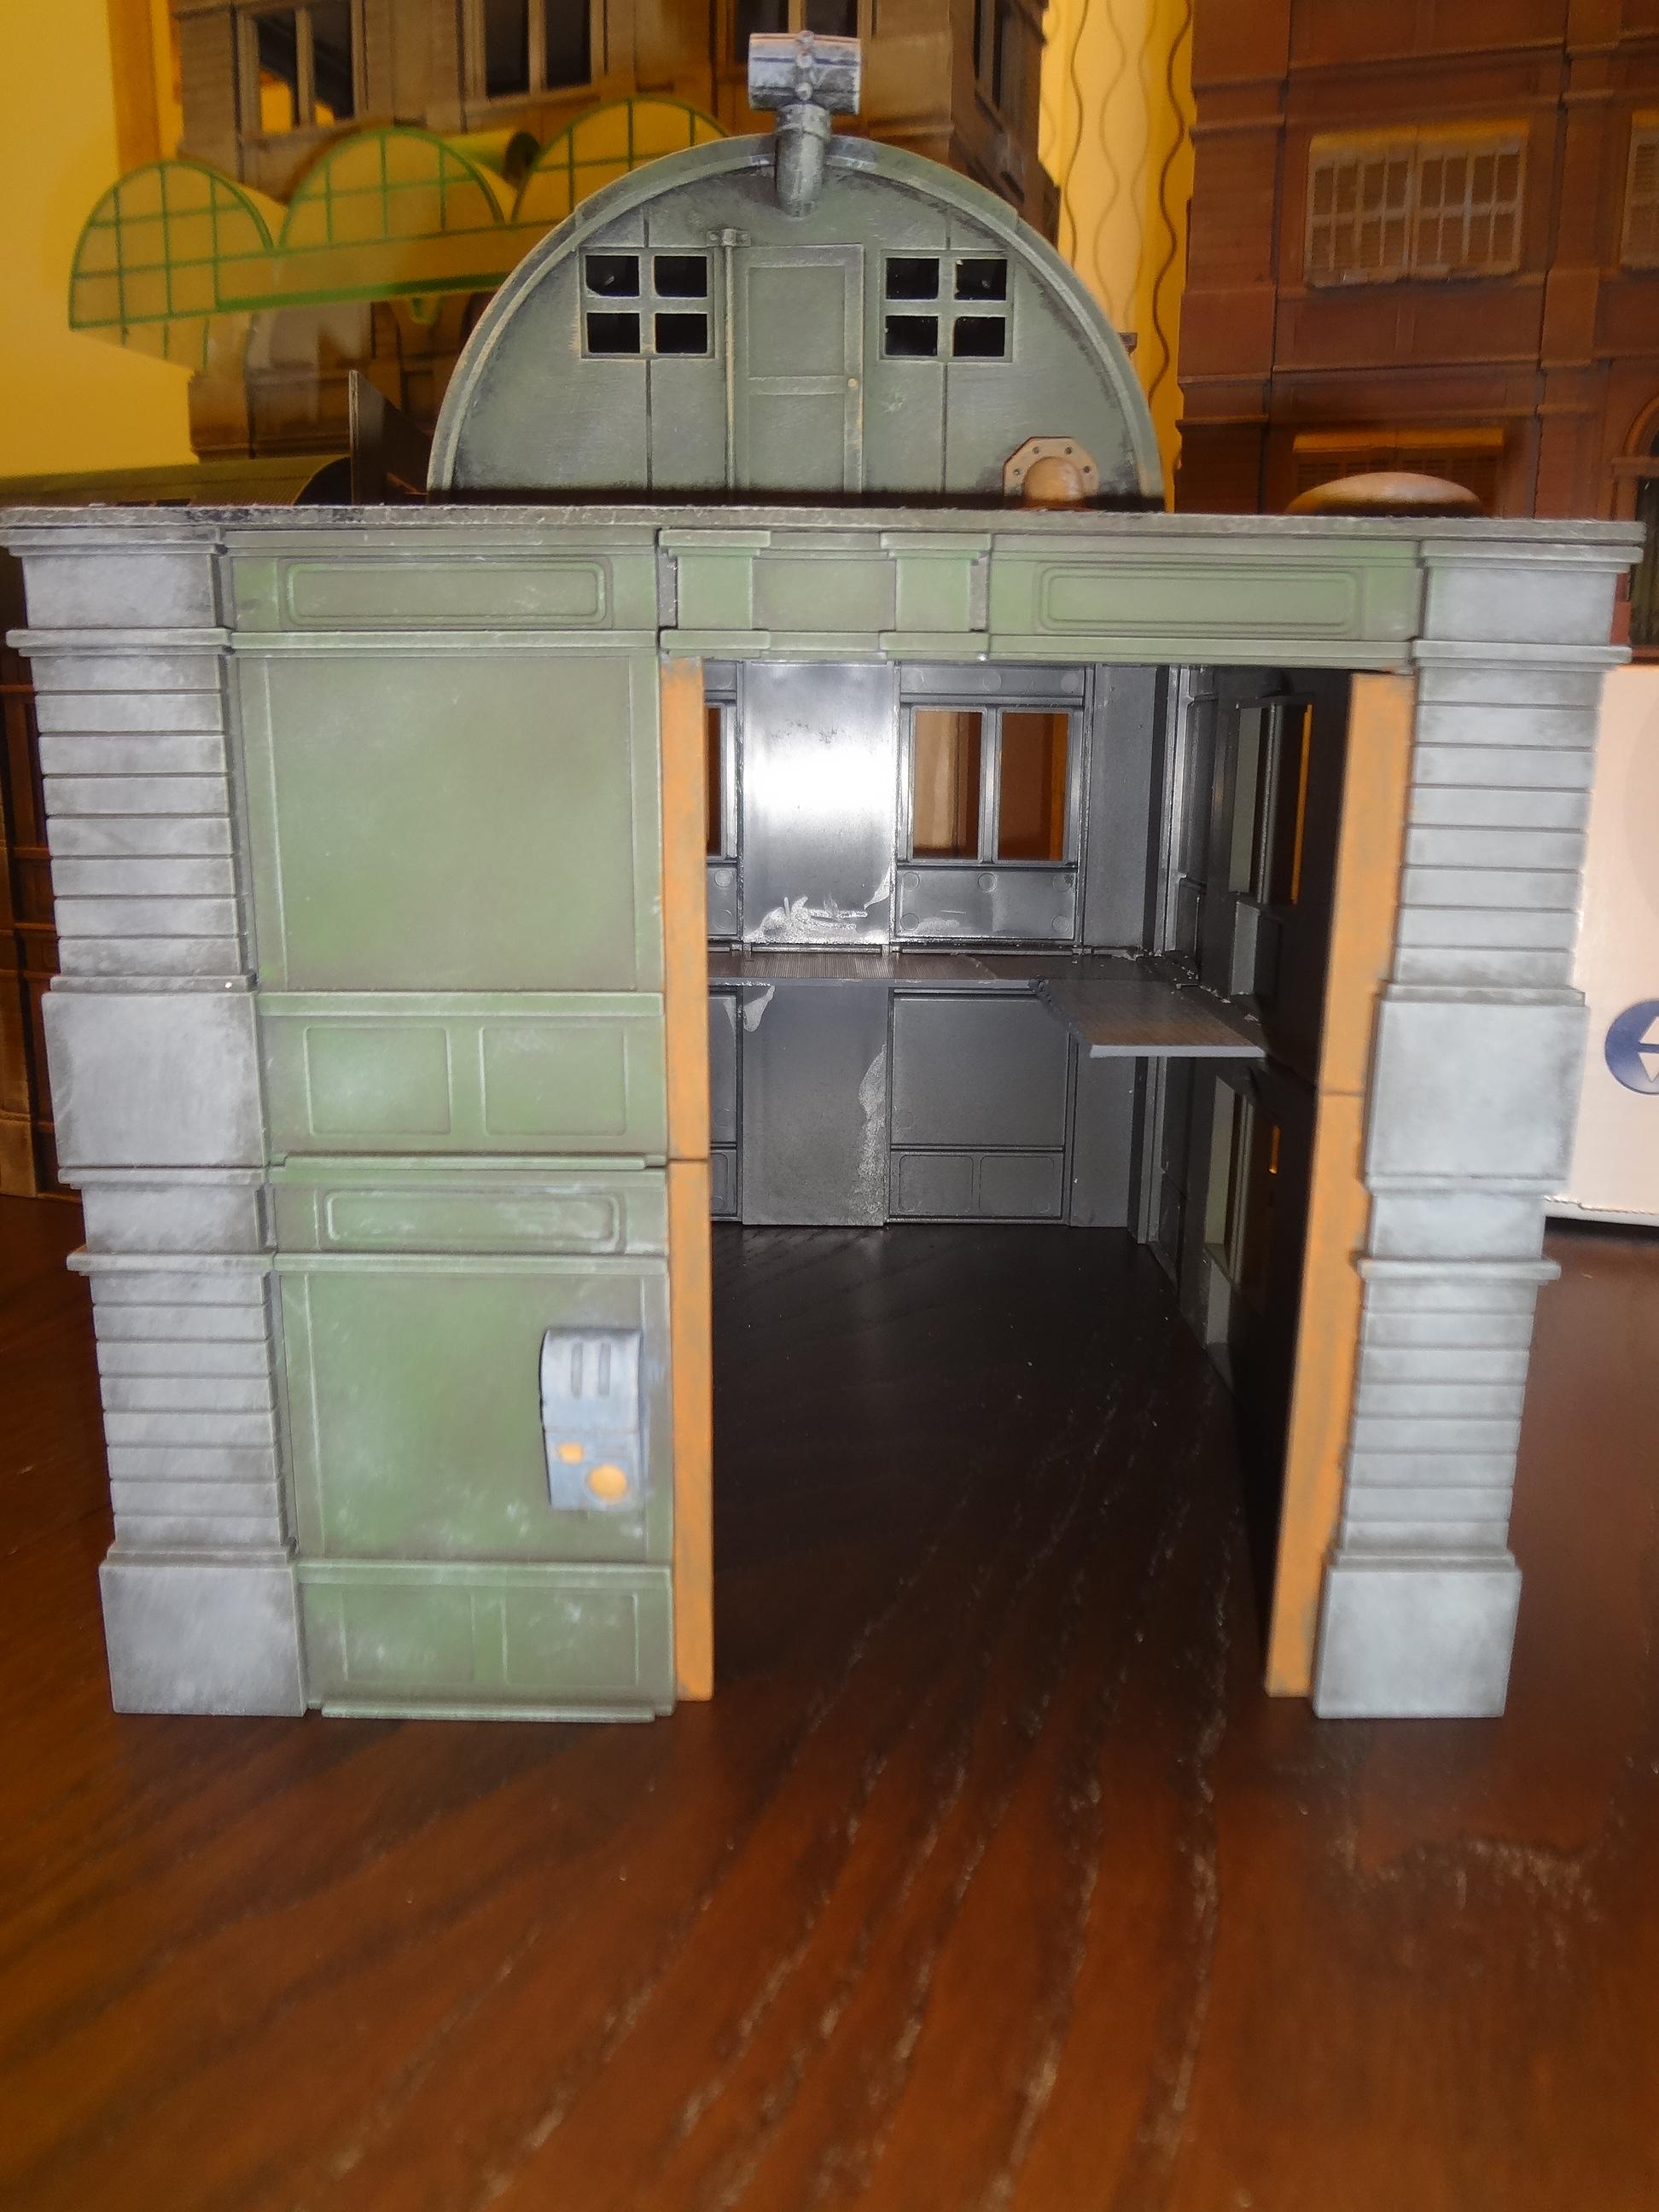
The large rear opening allows for interior access without a removable roof and is big enough to accommodate many vehicles and mechs. The retracted doors are just pieces of cardboard stuck into the side grooves of the wall pieces.

Note the header over the doorway. This is made from the top parts of wall sections, which were relatively easy to cut away. I think it looks much better than simply leaving an empty space.


Here's a look at a few more interesting Hirst Arts bits. I've no idea what they were intended to be, but they make great vents, lights and intercoms.


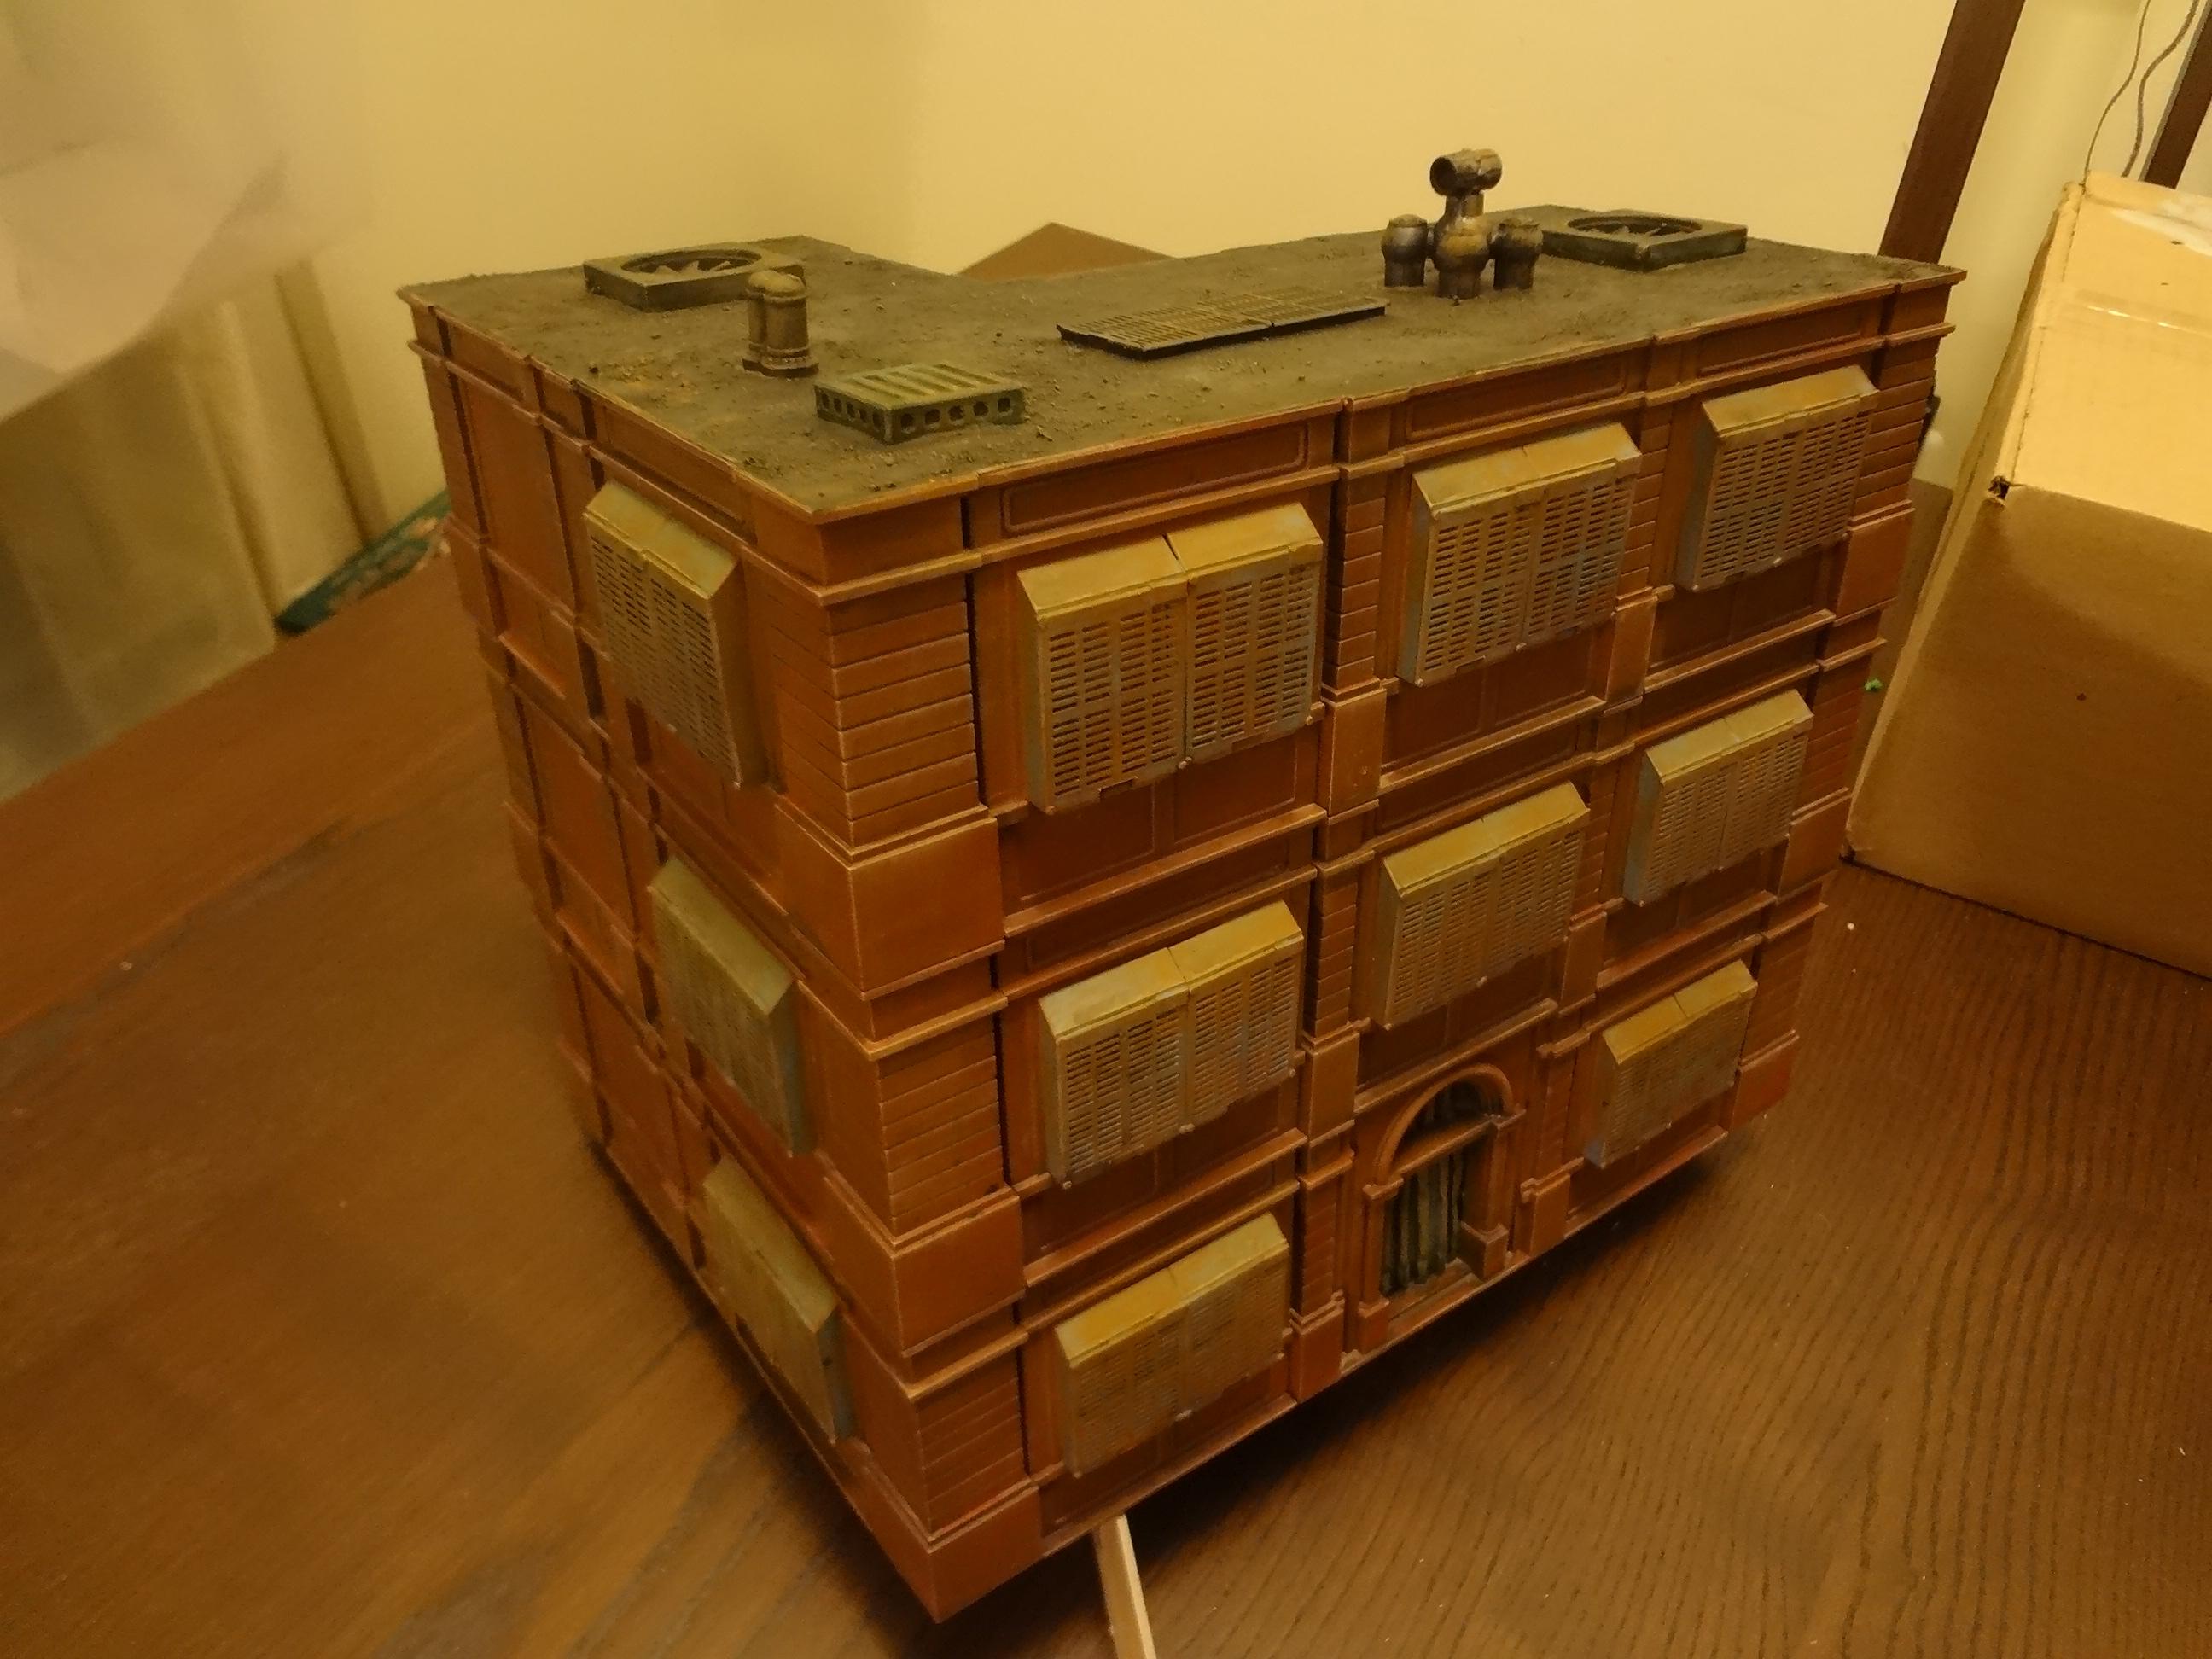
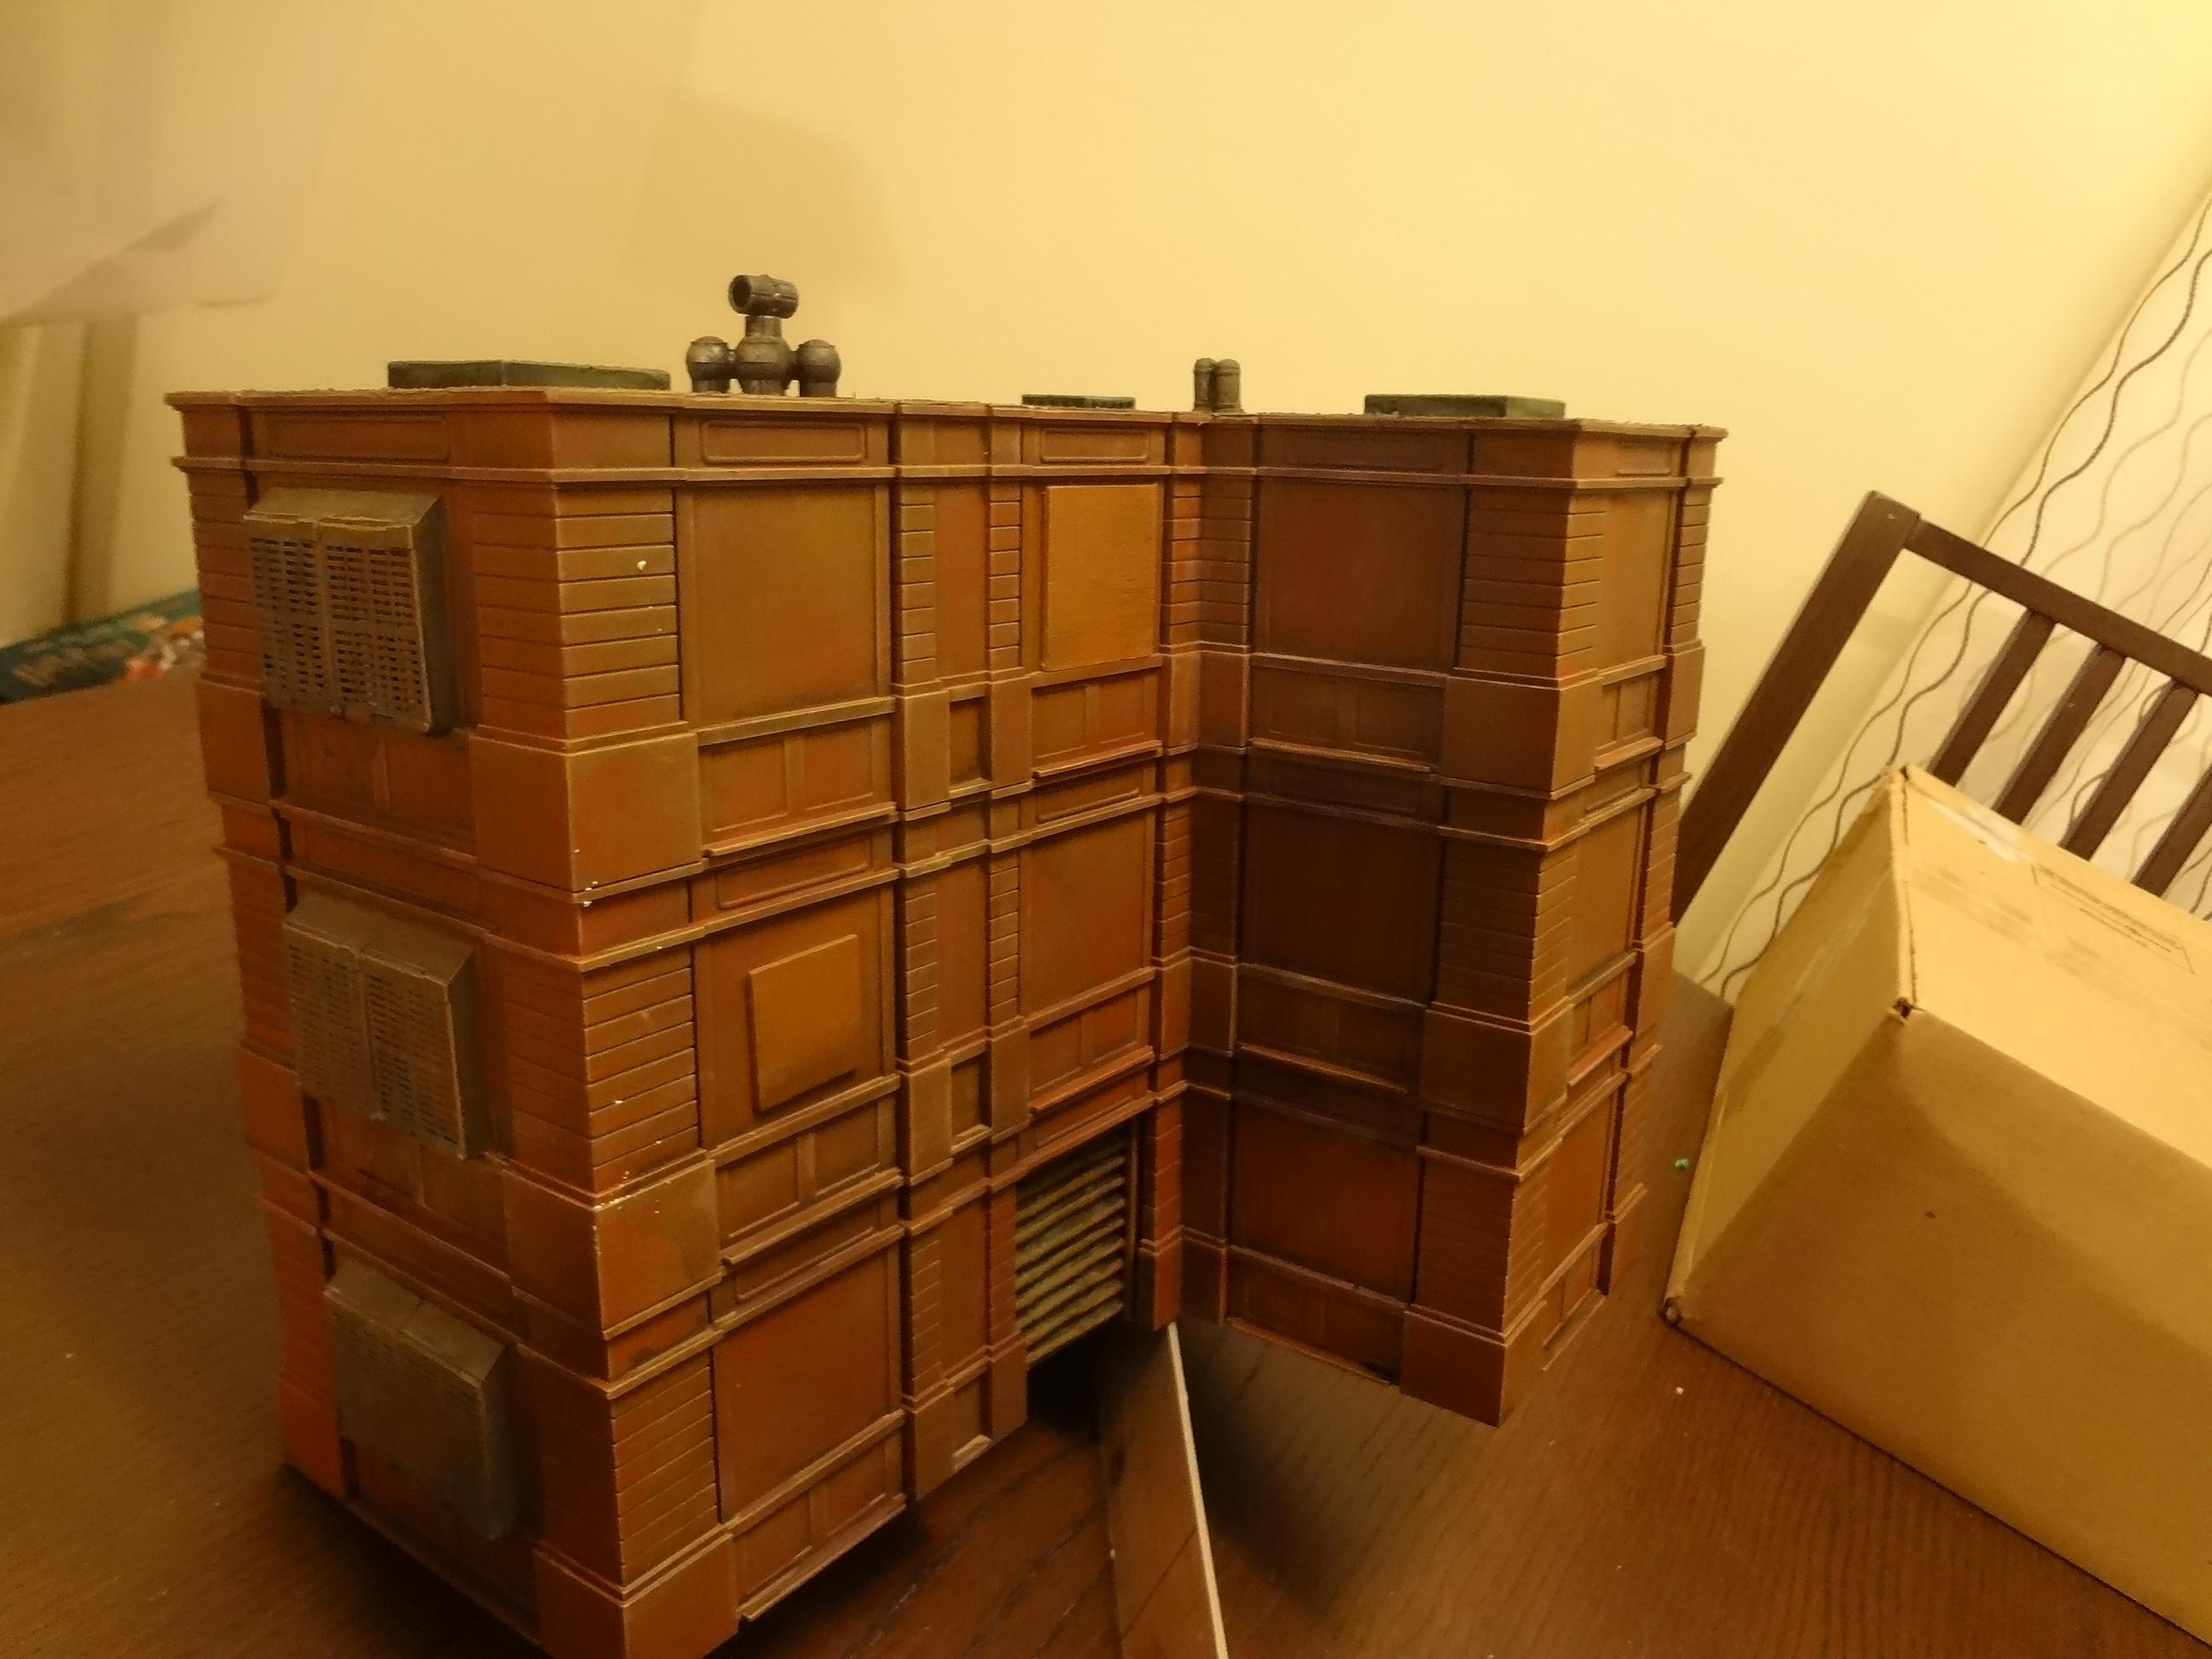
Building 5 - Large Boarded-Up Warehouse

This is the only other building made with no interior access. I've covered all windows with medical specimen cases. I think these bits look equally good as sci-fi window grates or as the metal screens used to secure vacant buildings throughout Chicago.


Another header over the rear garage entrance was made by cutting apart a wall section.


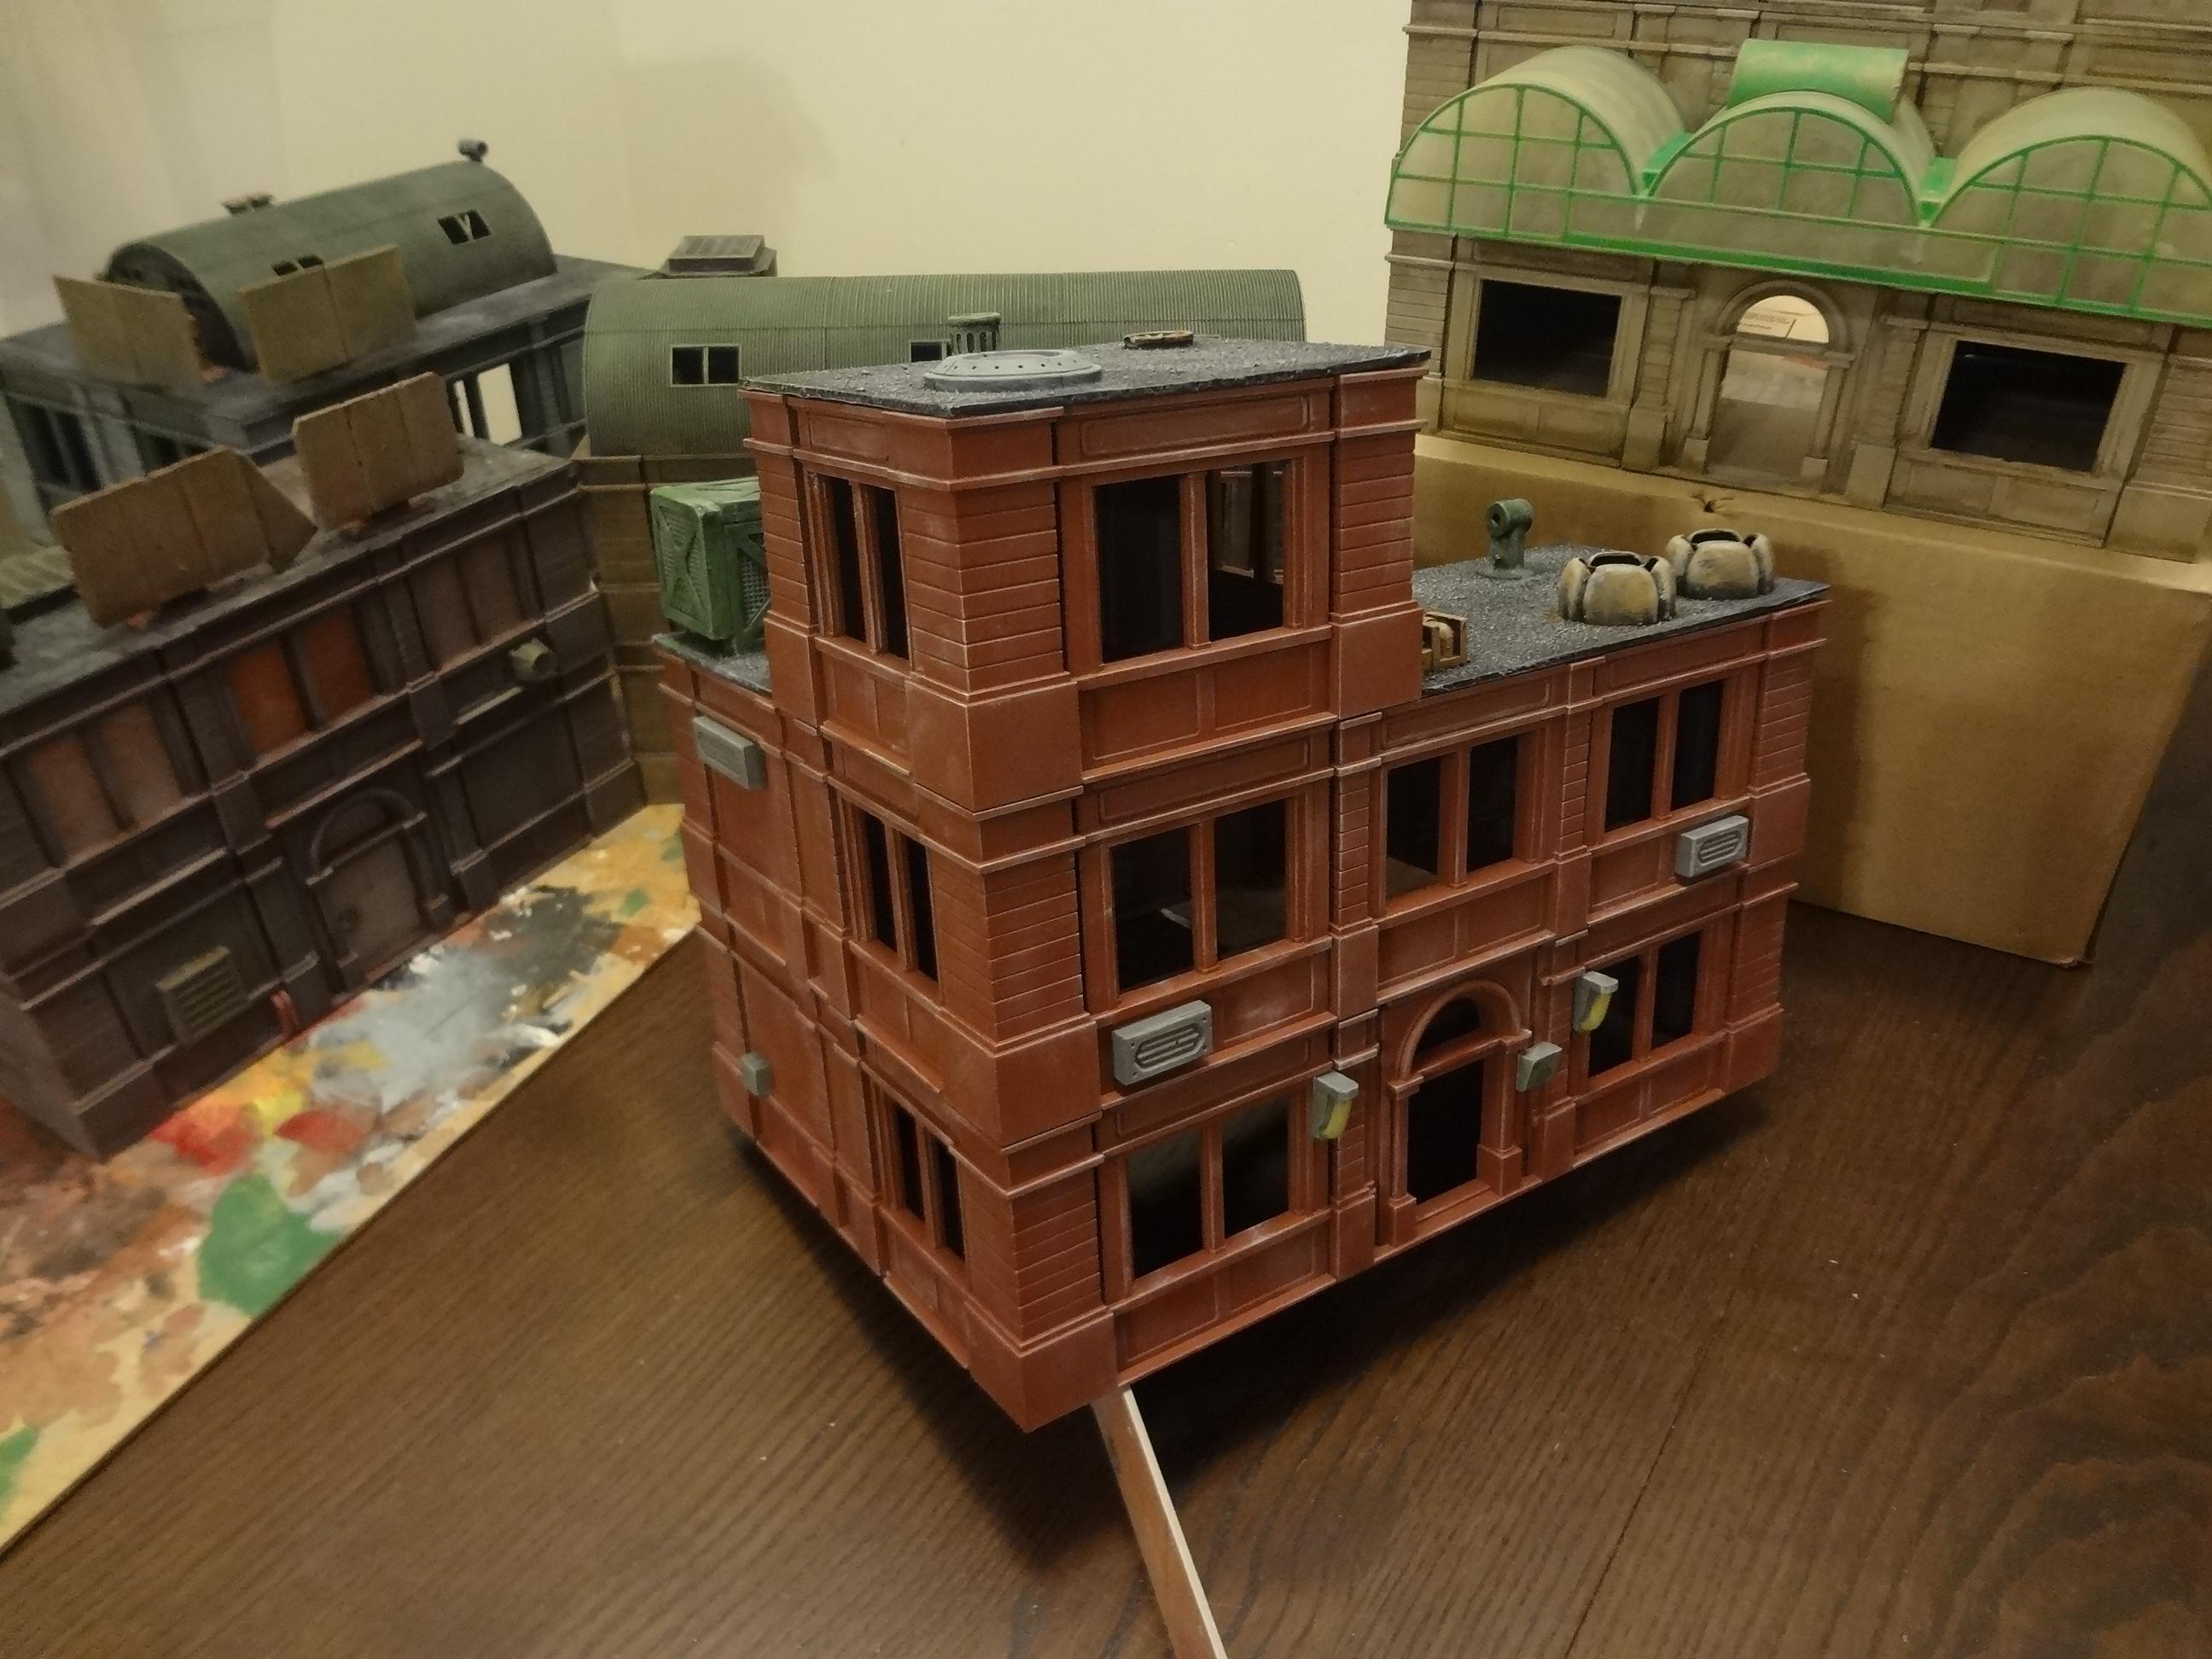
Building 6 - Large Apartment Block


Here's another standard building, though I rather like the tower corner.


This one has the VCT roofs, and this time they are removable.


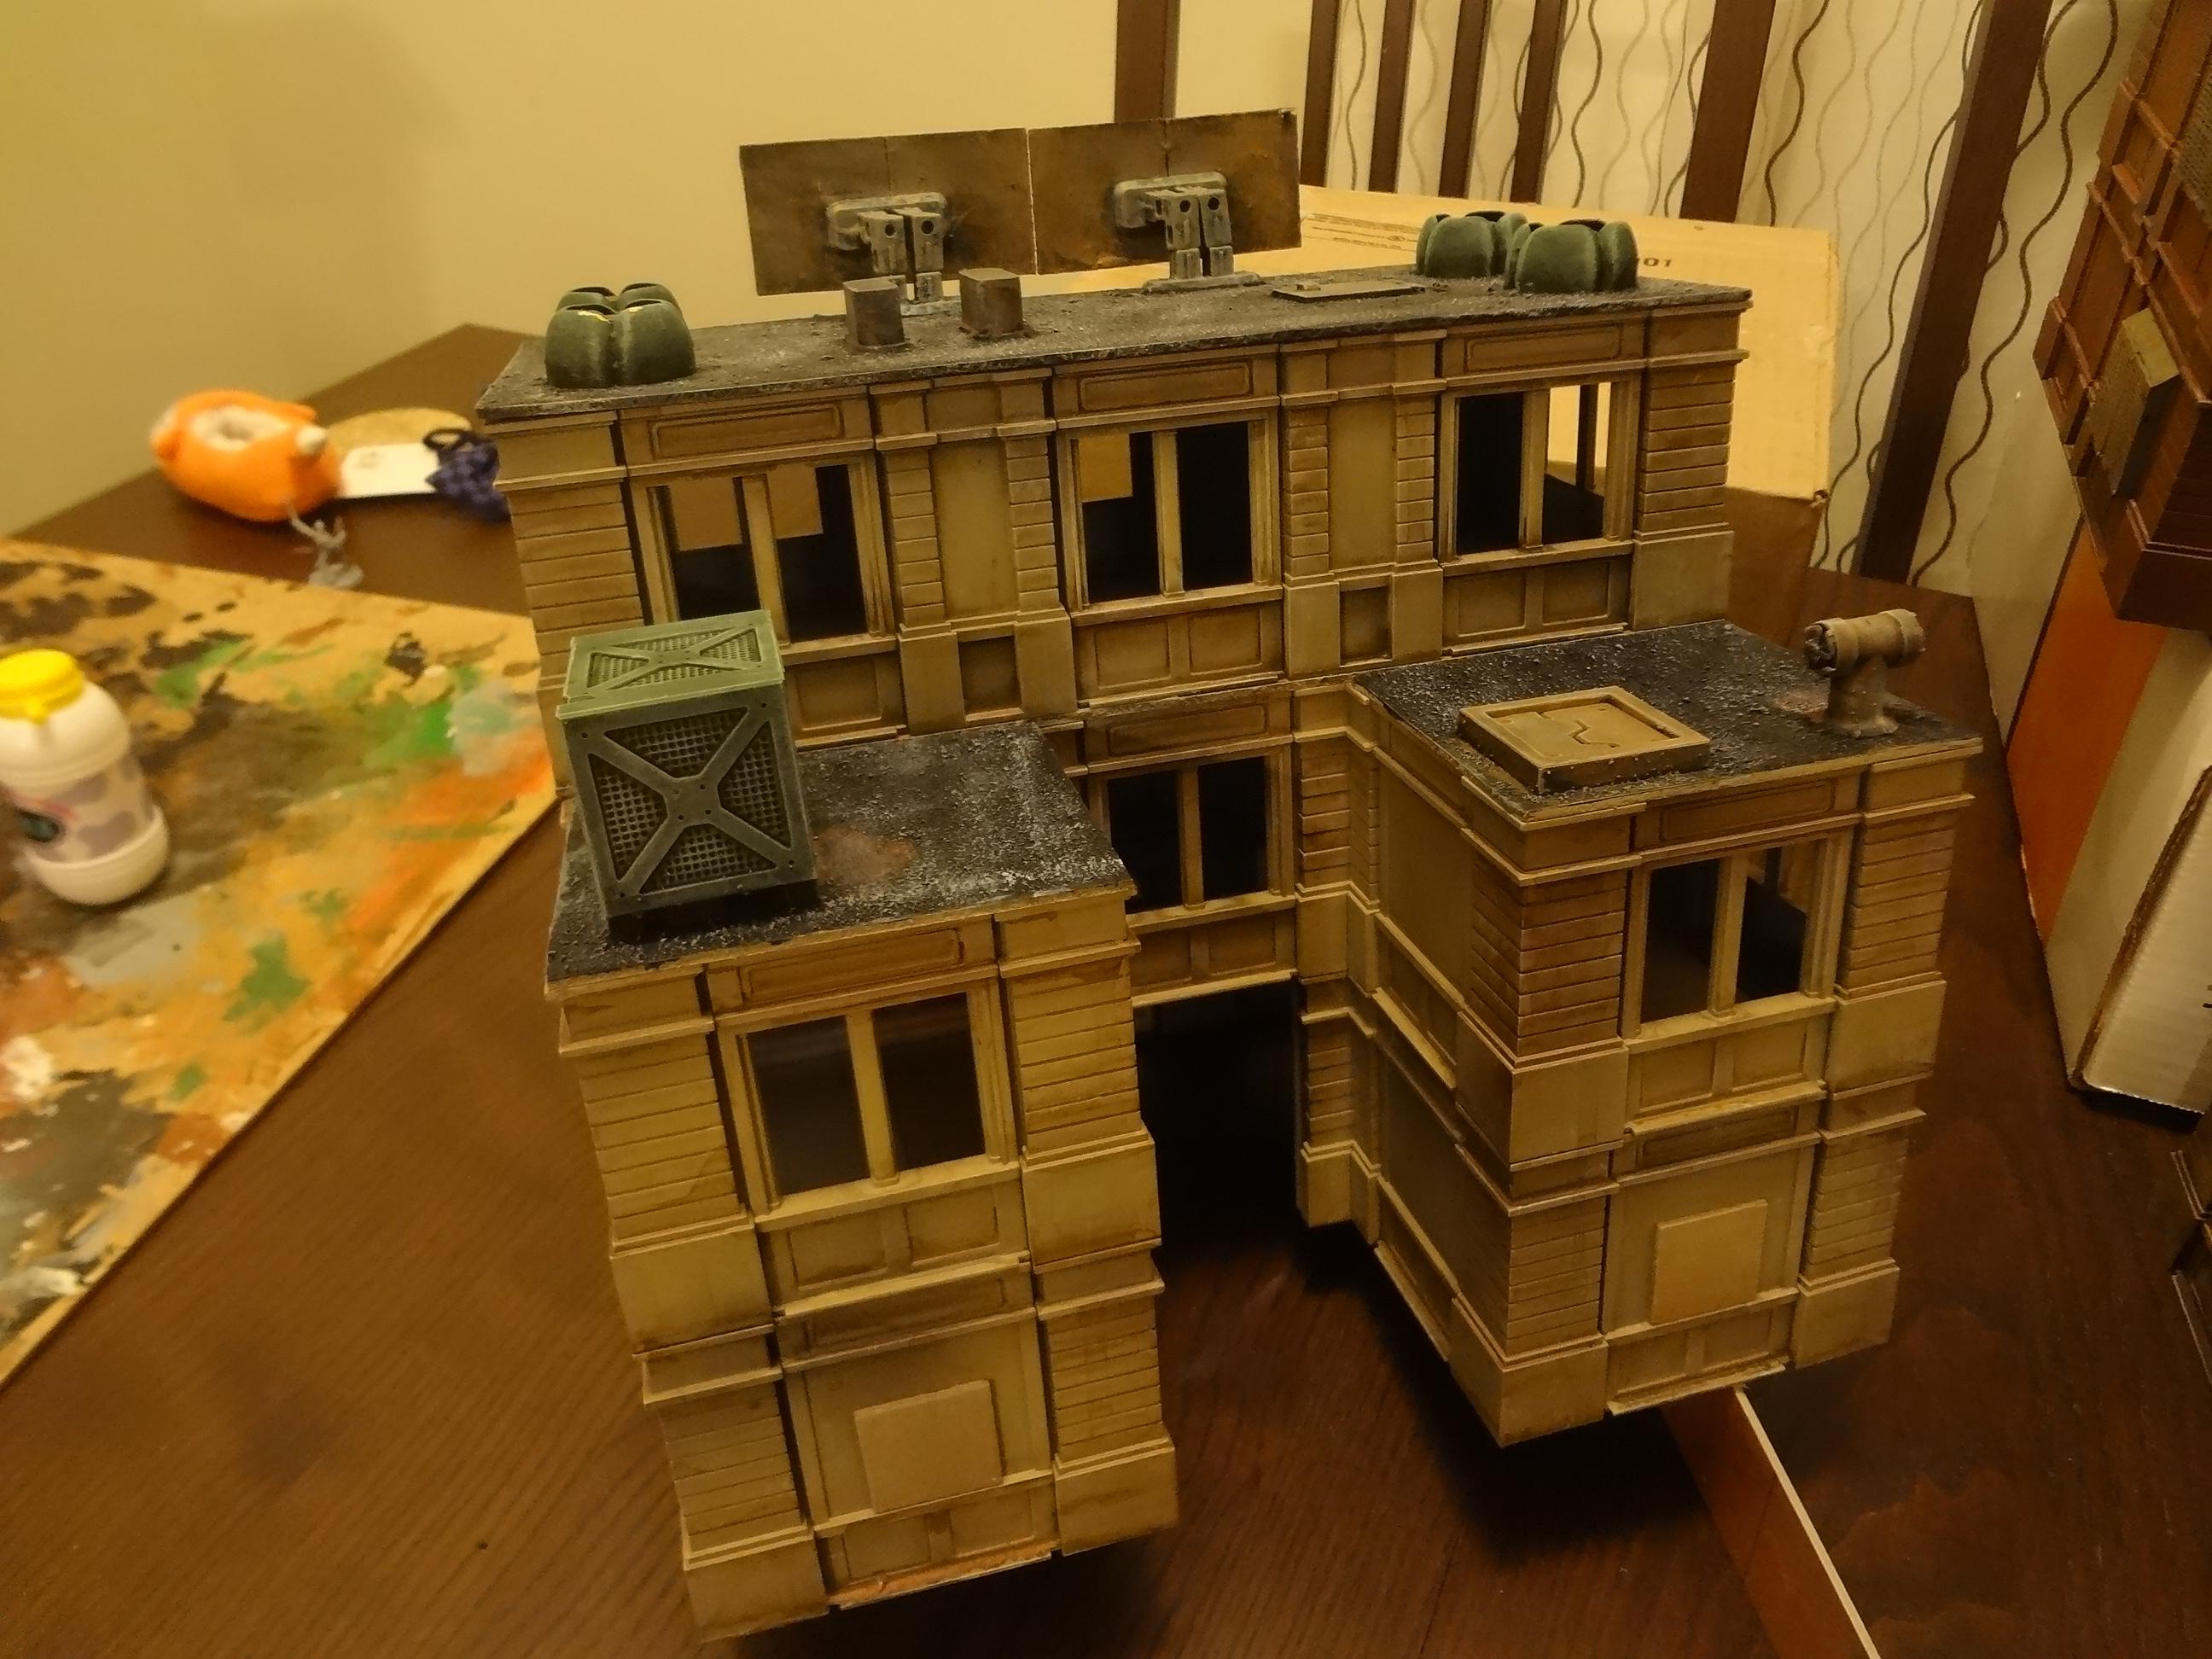
Building 7 - The Grand Hotel 


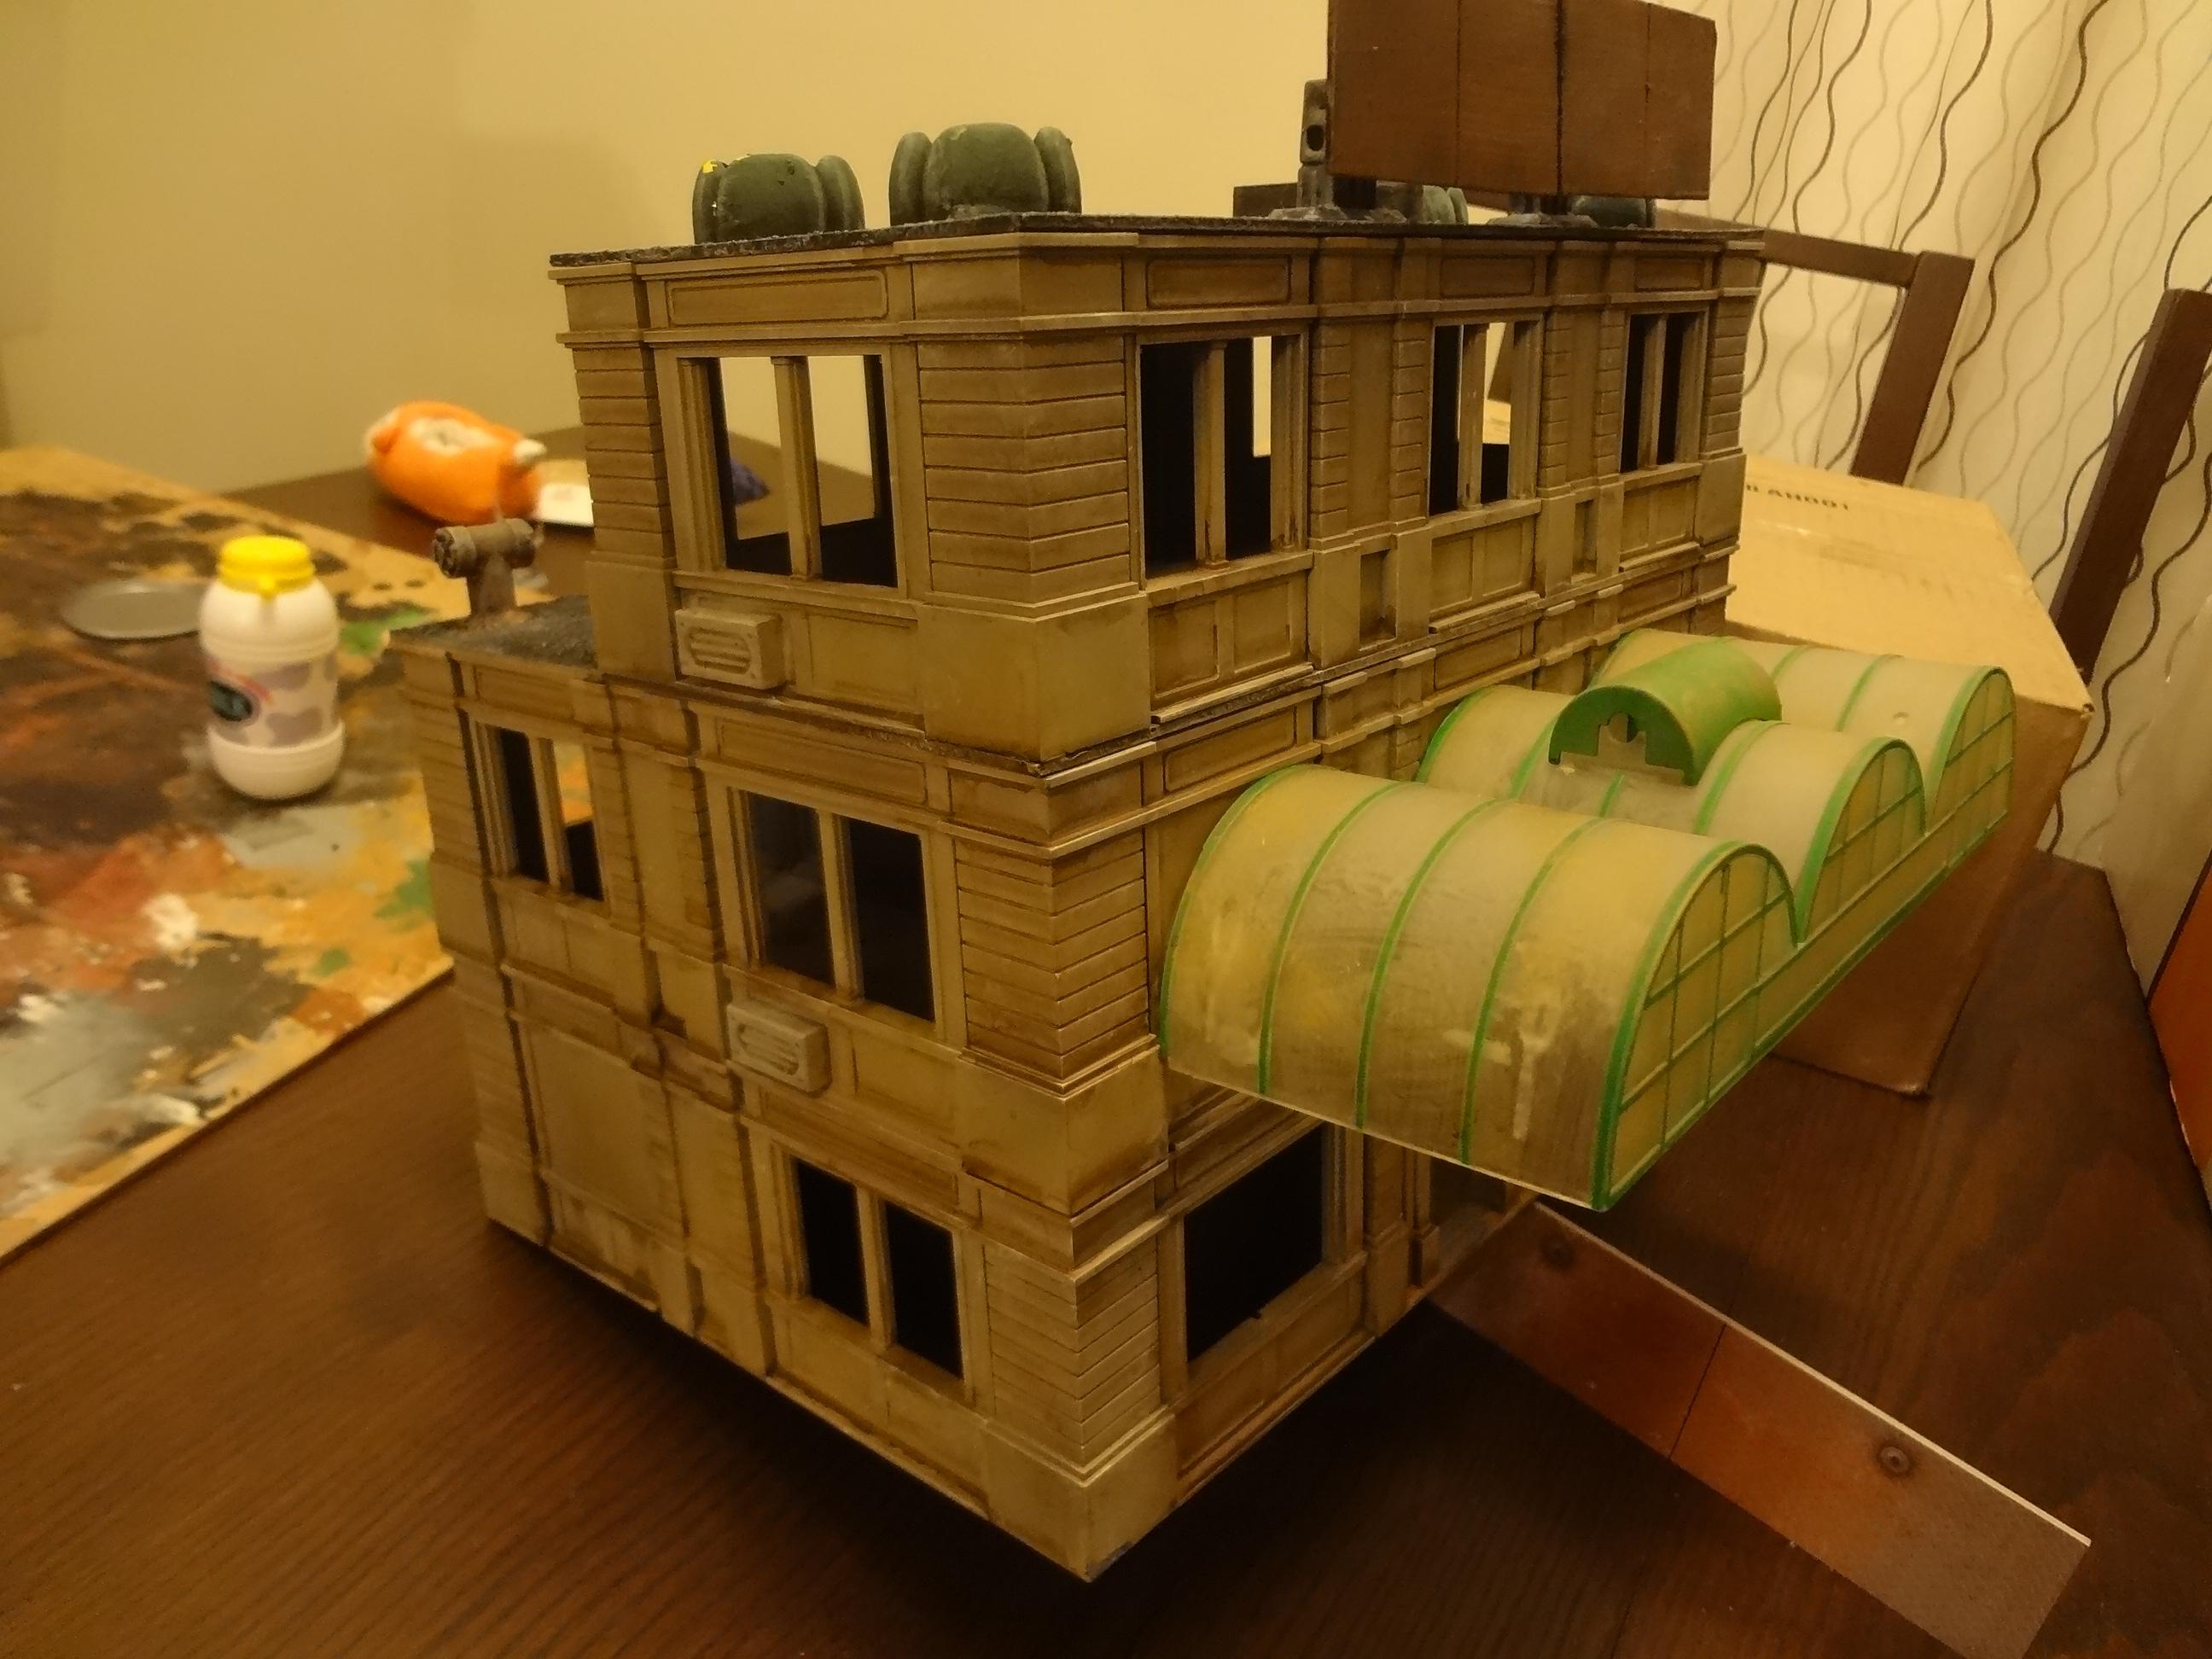
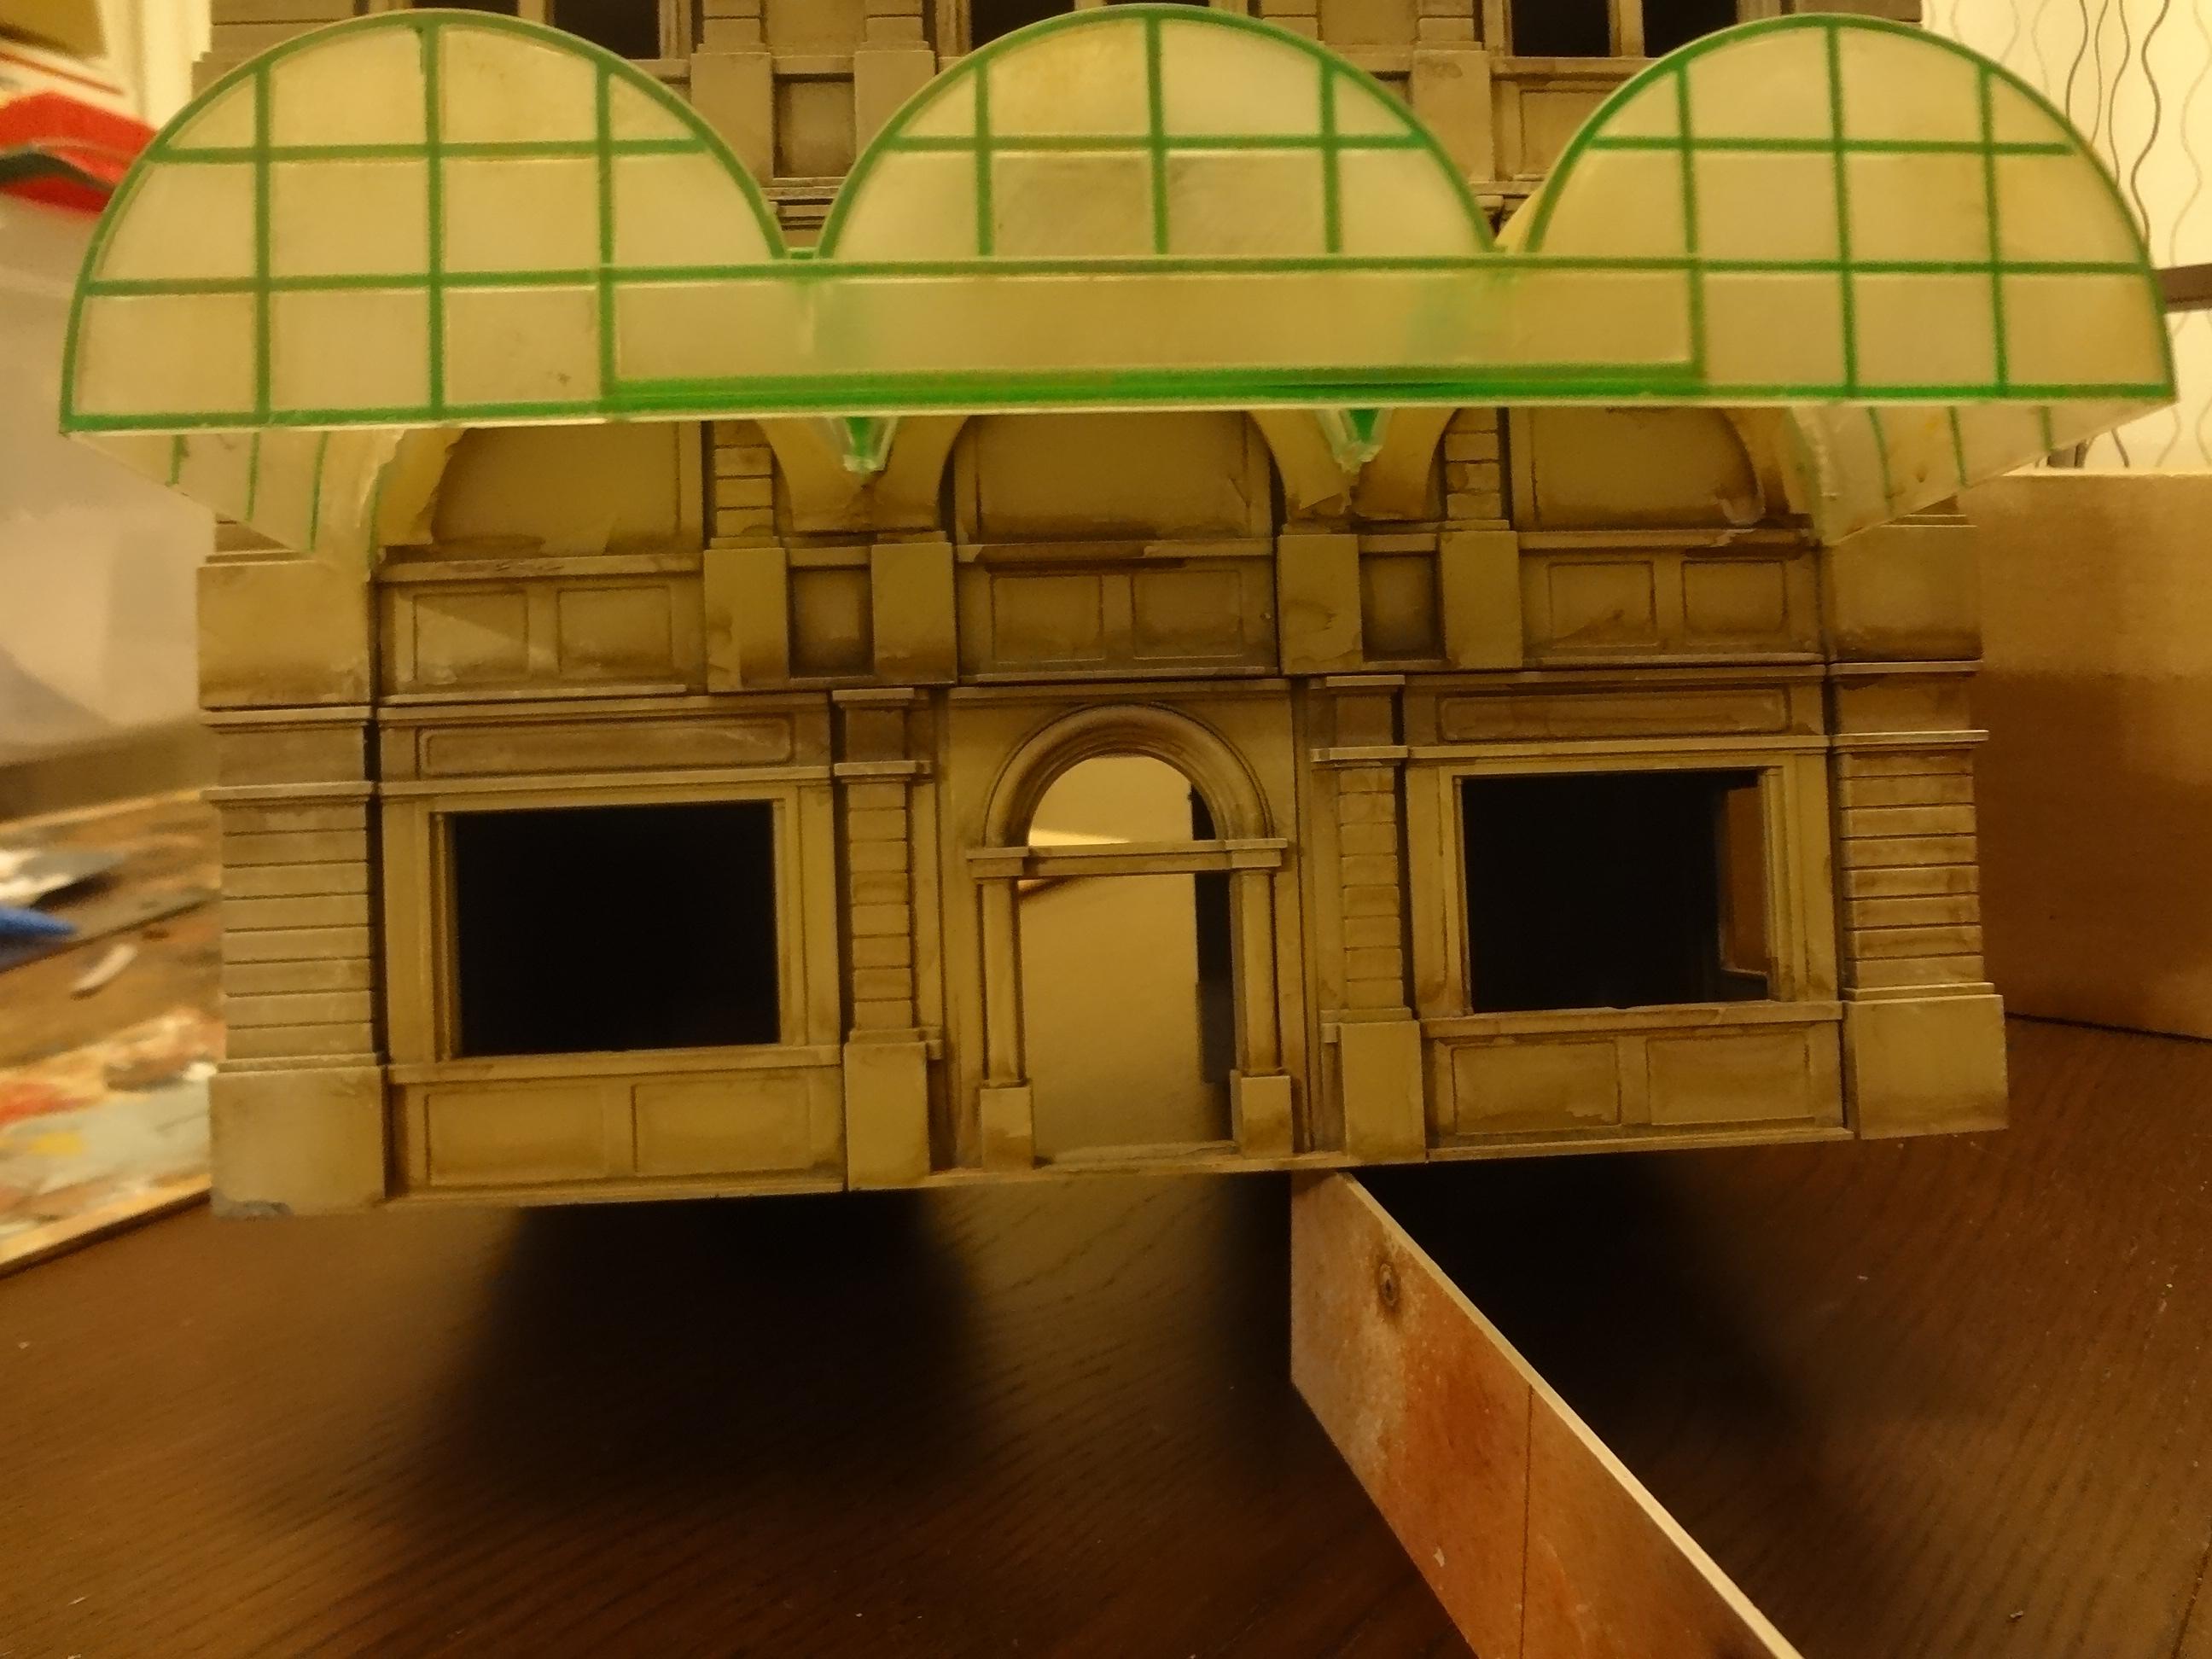
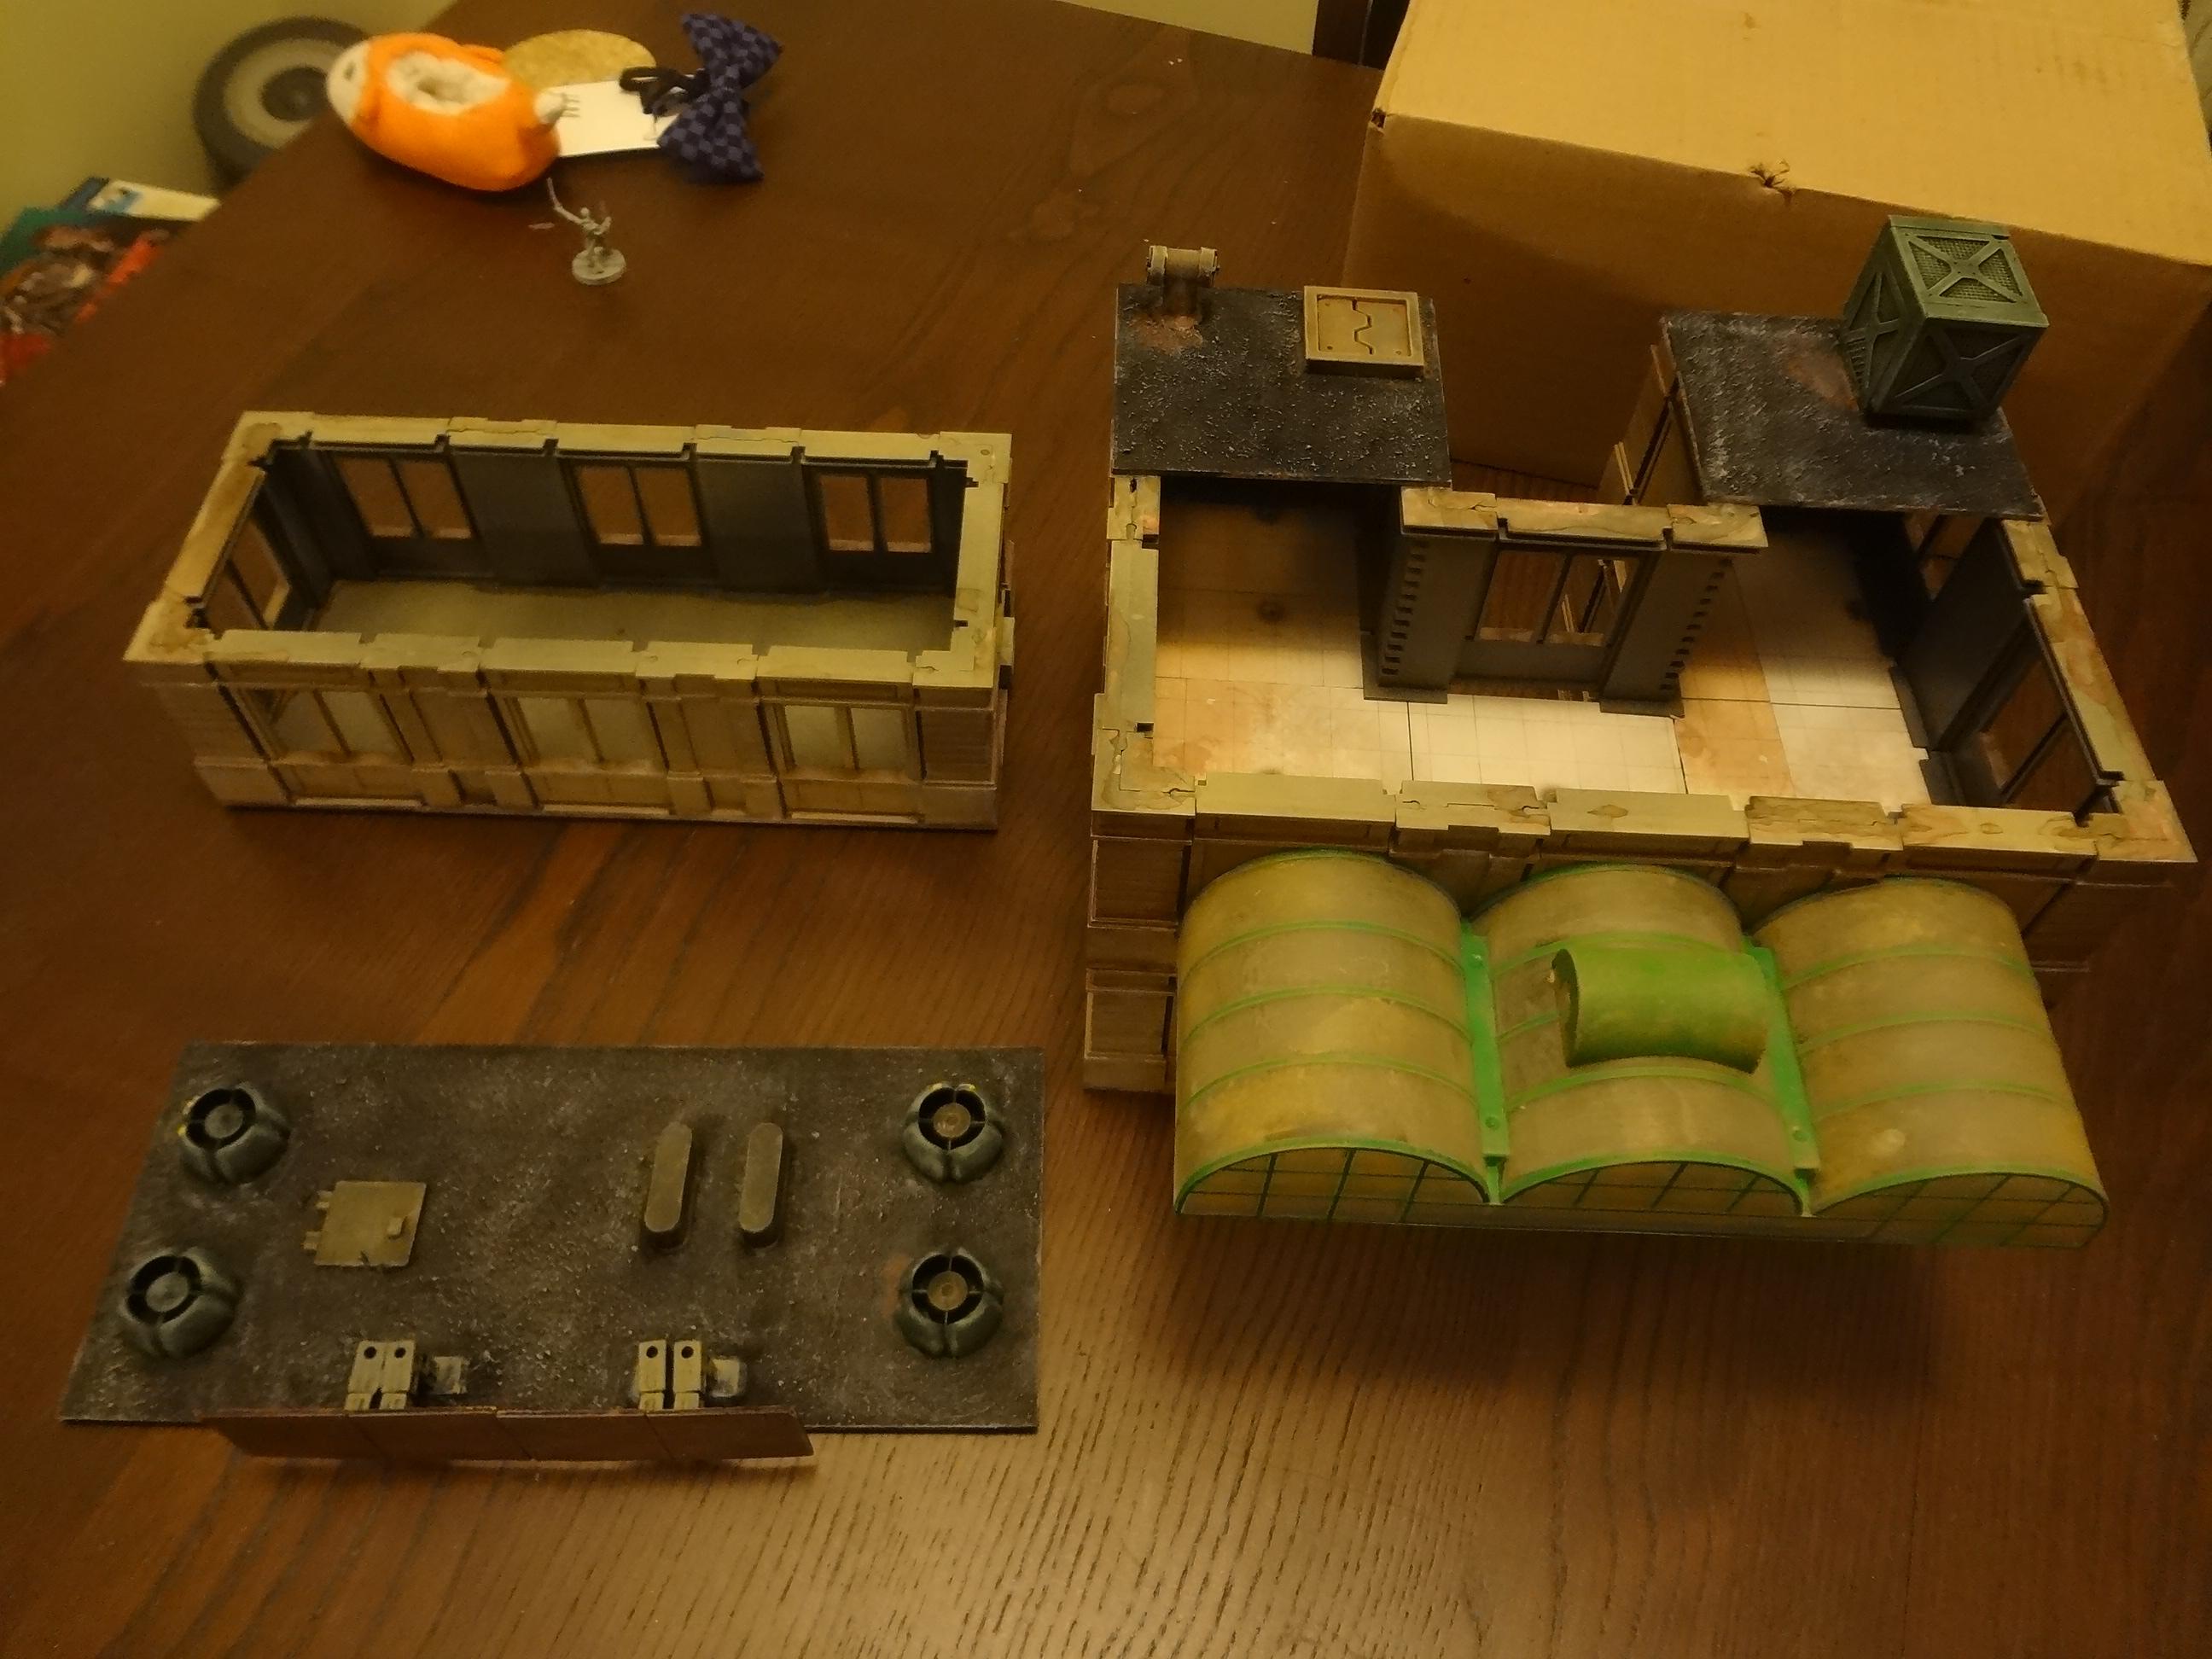
I'm particularly proud of how this one came out. The awning came from a Thomas and Friends Knapford Station toy playset I found at Goodwill, though lots of matte varnish and drybrushing was needed to muck it up. I kept the stock green framing rather than risk screwing it up with a repaint.


The u-shape in the back makes a great place for concealment.


More fun with VCTs! This building has a removable top floor and roofs.


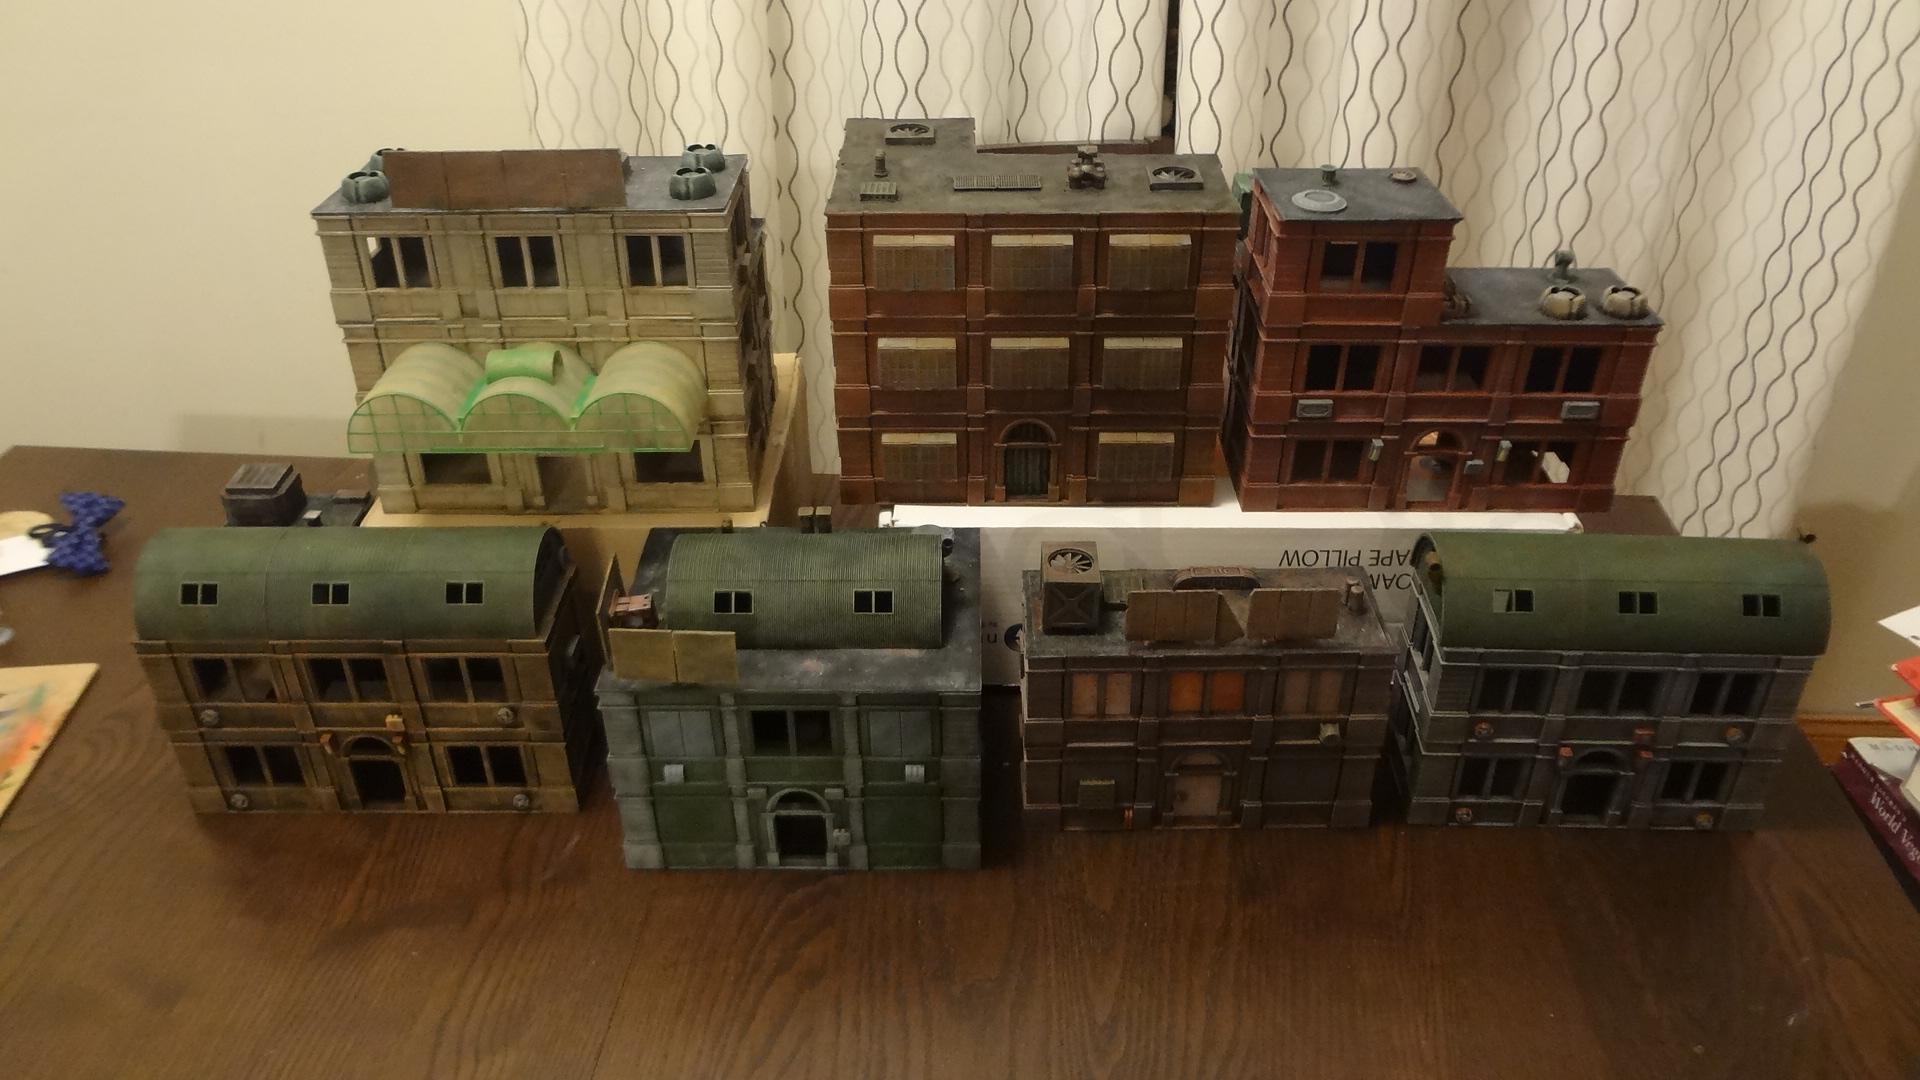
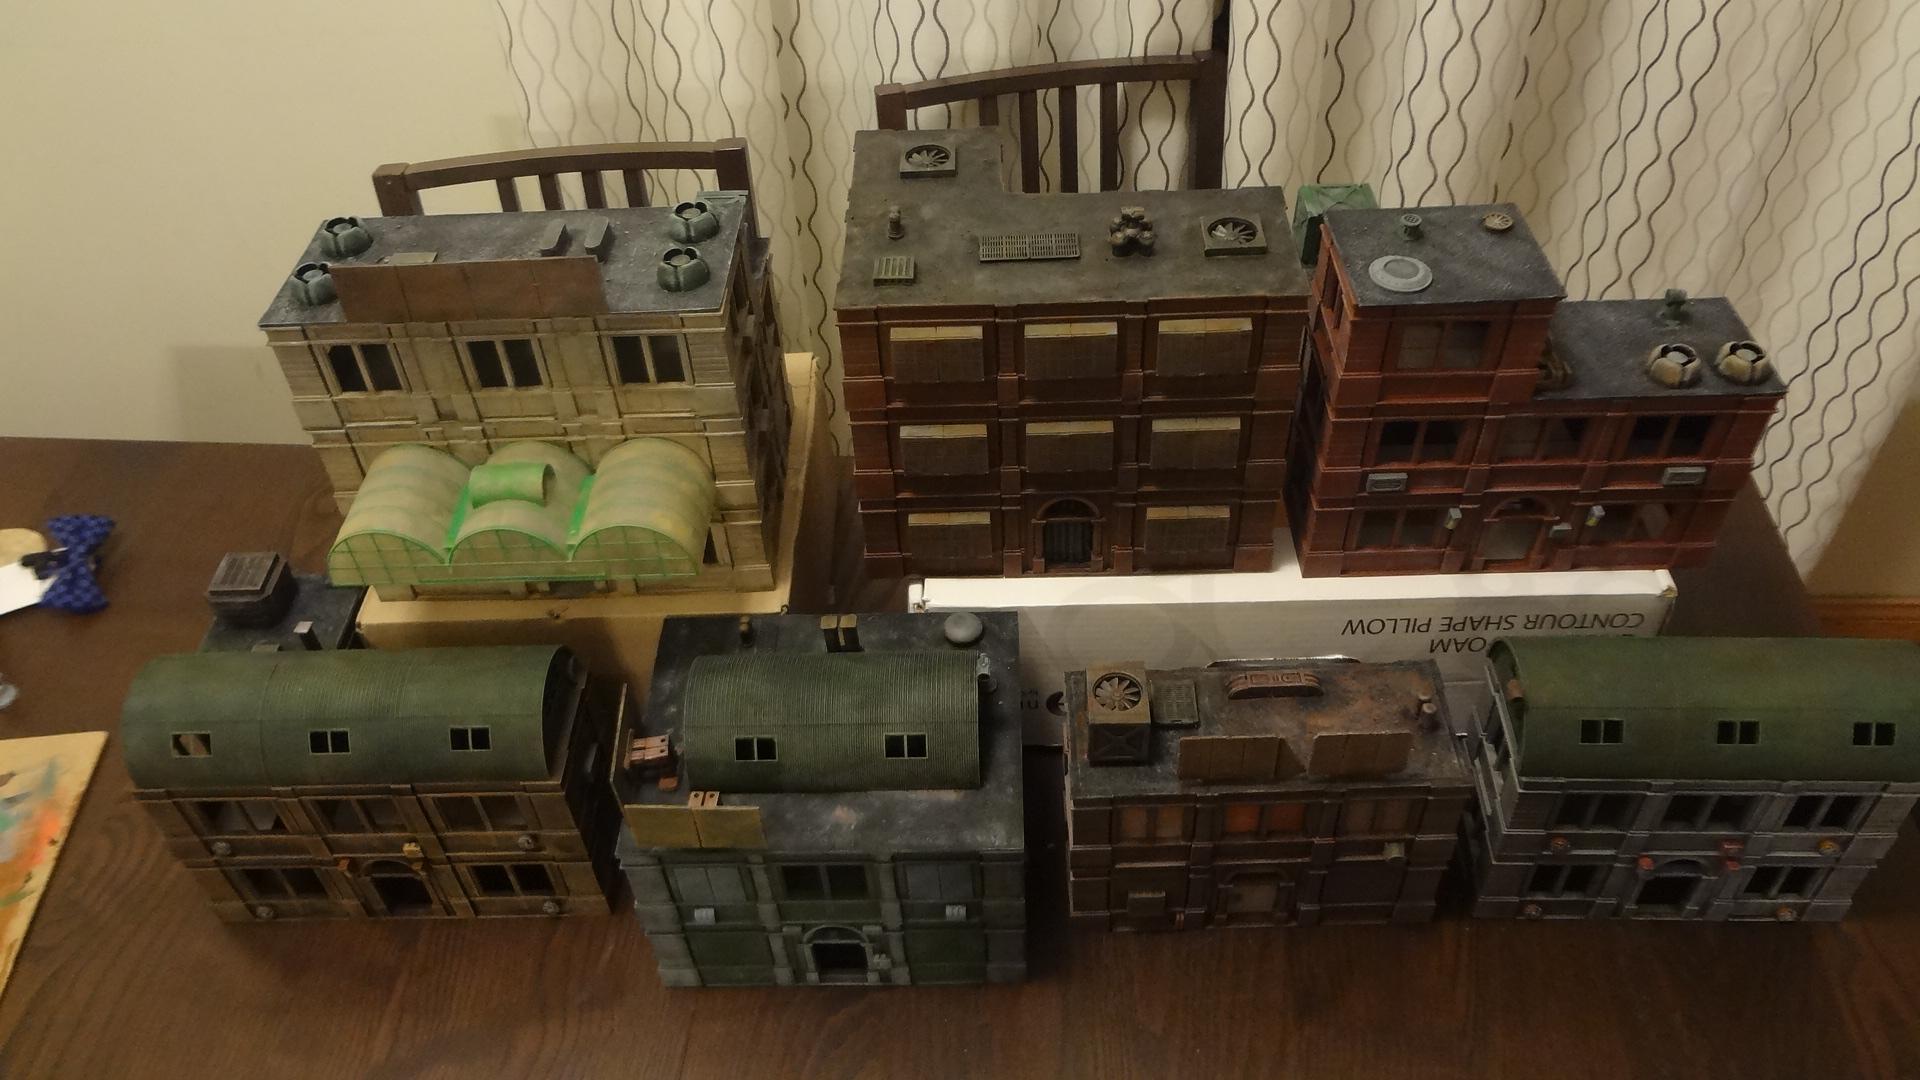
All together now!


All of these were basecoated with various colored spray paints, mostly Krylon camo sprays along with gray and ruddy brown colored primers.

After that, all but one were drybrushed with a lighter shade, washed with dark brown, and most got a final dusty tan drybrush. The dark grey color of the plastic is an excellent base for this paint scheme, and it speeds up the painting process immensely.

The interior floors are mostly the cardboard floor sections included in the kits, though some have VCT pieces or plastic card floors.

I think the final buildings could have been improved with some signage and graffiti, but it was a higher priority to keep them genre and era neutral.


All in all, this is a very pleasing set of buildings. They should have no problem fitting into modern day, near future, cyberpunk or even sci-fi settings. I'm sure they'll see use in many games!

The main impetus for this project was that, for the first time, CSW will be hosting a game at Adepticon! We plan to run a game of Mech Attack on a glorious 28mm scale urban battlefield. It will be similar to our past games at Little Wars (which we also plan to attend) but this time the table will be expanded to 8x8 feet and will have lots of new terrain and a new gaming surface. Adepticon is known for having really good looking games and excellent terrain and I want our showing to be just as impressive.

If you're in town for Adepticon in March, look us up!

-- Karl, Chicago Skirmish Wargames club member