Saturday, October 20, 2012

Still More Post-Apocalyptic Terrain

I've cleared a couple more terrain projects off my shelf relating to our forthcoming post-apocalyptic campaign. In a question posted on my previous article, a commenter asked which ruleset we were thinking of using. The answer is, we're not sure yet. It might be Blasters & Bulkheads, but it might also be Neutron York 3000, or Wastelands, or even something like Nuclear Renaissance. We're holding auditions this month and next to see which ruleset clicks for us.

On to the terrain! Up first we have a huge sewer pipe popping out of some shattered concrete. Is it a point of entry to a vast underground tunnel network? Or an exhaust vent for a ramshackle industrial plant? Only the scenario knows...

The idea for this terrain piece was shamelessly borrowed (ripped off?) from Mattblackgod, post-apoc modeler extraordinaire and moderator of the Post-Apoc Wargames Forum, an excellent source for inspiration. To wit: He made a piece of terrain that was a pipe coming out of the ground, and I was like "I can do that!" So I did. I had a length of unused PVC pipe in my basement, so I cut it at an angle, glued it to a CD base, added some foam blocks and filled in the rest with sand, gravel and green flock.


This next item is an urban ruin. It's just a few blocks of blasted concrete, really ... can't even call it a collapsed building. This my first time creating a piece like this, and I tried to create several little areas for figures to find cover. I think it turned out well (needs more little wires for concrete rebar), so I'll probably make a few more like this. It was quick and easy to put together, though it took a while to paint.


And finally we have this little barricade I put together using some spare bits. The main piece is a resin fortification, and I added some barrels, metal walls and a couple sandbags. A quick and dirty paintjob finished this up in no time flat. I've got 5 more little fortification pieces left, so I can make several more of these. It's a bit shiny because I dipped the finished product and it needs a matte spray to take the gleam off.


Here's another urban ruin along the same lines as the one I featured above. It's a bit bigger, with a ledge and more places to hide. I also added a few more detail bits, like the metal grating and the fallout poster.


The figures are Kolony Ferals from Pig Iron Productions -- some of my very favorite post-apocalyptic/sci-fi miniatures. I've got about 30 of 'em painted up, and they always draw comments when they hit the battlefield. Here's a closeup of two guys in this new terrain piece.


And here's a little piece of industrial wreckage. It's made out of the gearbox from inside a wind-up toy car, and the green piece is a bit from a Mechwarrior clix figure. The other debris is just twisted wire and a small snippet of plastic grating. Oh, and the figure is another Kolony Feral dude.


More to come!


-- Patrick, Chicago Skirmish Wargames club member

Friday, October 19, 2012

Making an Urban Wargaming Table

At the recent Games Plus miniatures auction I was fortunate enough to put the winning bid on this sizable bit of work.


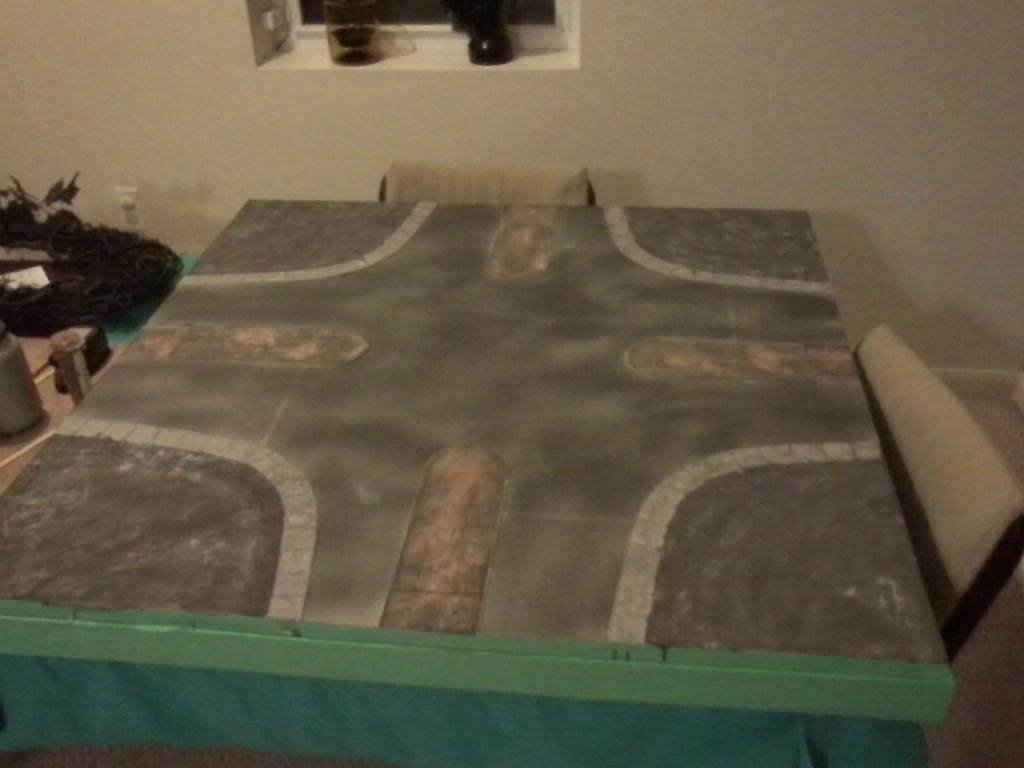
It's a scale model of an elevated roadway intersection made by model the Illinois Department Of Transporation (IDOT), and it measures about 3.5 feet square. I won it before realizing that I didn't have room for it in my car! Luckily Pat was able to drive it home for me.

It appears to be approximately HO scale (20mm in size) and it's constructed entirely of plastic and plexiglass with a rather impressive internal support system.

I decided to turn it into an urban wasteland board -- and, of course, I've blogged the whole process, from start to finish. My main goal was simply a game board that had enough texture and color to be interesting, but nothing that would inhibit the placement of terrain. We've amassed quite a collection of individually based scenic items (as opposed to the modular terrain tiles that other players enjoy), so I had to leave room to place these features all over the board.

Though it's a bit unique to start a project like this using a professionally produced architectural model, the how-to detailed below can be applied to any urban wargaming board. I've included a few notes as to where the process would be a bit different if starting from scratch.

Supplies needed 
  • Light gray house paint 
  • Dark gray house paint 
  • Paint texture ( I like "Sheetrock Sand Finish Paint Additive") 
  • A few Mason jars for paint mixing 
  • Craft paints in brown, tan and ivory 
  • Black wash (in this case made from water, black paint, and a touch of dish soap)
  • Masking tape 
  • Rustoleum Aged Iron textured spray paint
  • Thin plastic card 
  • Scissors 
  • One-inch or 1.25-inch square paper punch (optional, but extremely useful
  • Tack2y glue (a thick but inexpensive PVA that you can find at your local craft store
  • Extra fine point permanent marker. 
  • Clear matte spray varnish

I got the board home and discovered that after taking out 10 screws, the bridge section was removable. I took off the bridge section and set it aside for a future project (watch for an upcoming blog post). That left me with this.

At this point I was able to examine the handiwork of the board's creators, who had even added nicely defined curbs and a slightly lowered street elevation! I masked off the edges of the board and inspected the street. It was already painted light grey and had traffic markings on it.


If building your own board, mask off the street areas and paint them with light gray house paint, then paint on any markings. I didn't want to entirely cover up the the nice street markings, so I got the can of Rustoleum Aged Iron textured spray and took a light pass over the road surfaces. Be careful, as this product comes out of the can really fast.


I put it on a bit heavier than I would have liked, but you can still see the road markings. And as you can see, it adds a nice, uneven texture and color in one step.

Now for the sidewalks. You can cut out squares yourself if you have access to a square hole punch, but they're expensive at $12 to $20 each. I borrowed this Paper Shapers 1-1/4 Inch Nesting Punch from my wife's scrap-booking supplies and punched out about 70 squares of thin card.


To get the most squares out of each sheet of card, turn the bottom of the punch towards you, otherwise it's very hard to see where the cut is happening and you end up wasting a lot of paper.


My sidewalks were mostly curved, so I after laying them out I had to cut angles in the sides so they would all fit together. No real reason to measure though, just eye it and cut.


I glued them down with a 2:1 mixture of Tacky Glue (thick PVA from the craft store) and water that I painted right onto the board. The edges of the card sections will curve up when you glue them. Simply let the glue sit a couple of minutes and go back and push the edges down a few times. A pair of popsicle sticks is great for pushing the edges down without getting your fingers stuck to the card sections. Make sure to leave cracks between all the sections and feel free to have a lot of broken sidewalk sections -- this is an urban battlefield, after all!

When the sidewalks were dry, I gave them a coat of light gray flat house paint (don't get satin or eggshell). Sidenote: I recommend house paint for large sections of terrain. It's is sturdy, available in any color and most hardware superstores have a brand that is available for less than $10 a gallon! Just so you know: even though in-store displays show color tabs for specific brands and grades of paint, any color can be mixed in any brand/grade of paint. I went to Menards and picked my colors of paint from the Philadelphia Grand Distinction ($24 per gallon) display, but had them mixed into the $8.99 a gallon Lucite brand. If you have a favorite shade of model paint, just bring in a swatch on a piece of white paper and they'll match it for you.

Now it's time to cover all the remaining areas of ground with a coat of textured dark gray paint. Making textured paint is a cinch. You can go old school and mix in sand, but I recommend the "Sheetrock Sand Finish Paint Additive".


It's a nice ground pumice that stays mixed better than sand and only costs $1.50 a pint (16 ounces in volume, but marked 8 ounces in weight). I mix batches of this in the glass jars that pasta sauce comes in, which are nicely marked in 2 ounce increments.


For a nice rough texture, I use 4 ounces of additive and 16 ounces of paint. Note that after adding the additive, the level of the paint will not raise much as pumice is extremely porous and sucks up the paint.

When you've got your textured paint ready, apply it to all areas of ground.


If you want a more worn and battered look, you can paint some textured paint areas overlapping the sidewalk. I didn't do much of this, but it's up to you. While the textured paint is drying, take your extra fine tip permanent maker and trace the breaks and cracks between the sidewalk sections. Then give the sidewalks a nice liberal black wash.

Then it's time to dry brush. I used only light gray housepaint for the main four corners, as they were areas that would have been built-up with buildings and such.


For the medians, I figured they would have at one time been landscaped, so to represent the scorched soil I painted on a few large brown blotches, then drybrushed on tan, followed by ivory.


Then I did just a bit more light grey drybrushing, touching up areas of the curbs that had been accidentally over-painted and a few spots of street that came out a bit darker than I wanted.


The final step was simply a quick coat of matte clear spray varnish (I used Rustoleum) for a bit of protection. Then I hauled it into the sunlight for a picture of the finished product.


Here's what the board looks like with minis some 28mm Hazmat figs from Lead Bones (sold by Recreational Conflict) and a couple of 1:43 scale cars from Road Signature by Yat Ming.


Sidenote: I really like these cars. They scale well with 28mm figures, though at $6 they're about twice as much as cheaper models I've used in my conversions. They are well-detailed and have much nicer wheels than cheaper models. I found them at Menards this week. I recommend getting there quick if you like them, as they tend to go fast.


I'm pretty happy with the results here. It's a nice-looking board without much to inhibit the placement of terrain. It should serve well for sci-fi and post-apocalyptic games. It was quick to make, and though the board doesn't have a lot of color, the differing textures between the areas of dirt, street and sidewalk provide suitable contrast. The median sections add just the right amount of color variation. In retrospect I might have instead have gone with a very dark brown texture paint rather than dark gray, but I was influenced by the relentlessly gray boards of Warhammer 40k Cityfight, so that's what I did.

Lastly, though the sidewalks are pretty clearly 28mm, it's even possible that this board could be used for smaller scales such as the 10mm sci-fi games that we occasionally play. As always, please leave a comment if you have any questions!

-- Karl, Chicago Skirmish Wargames club member

Tuesday, October 16, 2012

Gearing Up for a Post-Apocalyptic Campaign

We're planning to run a post-apocalyptic wargame campaign this fall, so I thought this would be a good opportunity to clear out my terrain backlog. I've had a few unpainted resin pieces kicking around for the better part of a year, it's was time to get 'em painted up.

First we have a small ruin made from a cut-up plastic tray, like the kind you might use for pencils on your desk. It was painted and based on a CD to make a small, serviceable terrain piece.


Next up is a Kryomek laser defense turret that I picked up at an auction for a few bucks. It's a multi-part resin and metal kit, and as you can see it looks pretty cool on the table. It's based on a CD and I deliberately avoided giving it the traditional dirty post-apocalyptic paintjob. I wanted it to serve double duty in our sci-fi games if needed. (The turret rotates separately atop the base.)


Lastly we have this junk pile. It's a single piece of resin that I painted, dipped and based on an oblong piece of fiberboard. It will be a great piece of grimy wreckage for our tabletop.


On the workbench right now (and hopefully appearing in a future blog post) are some dirt barricades, an industrial drain pipe and a medium-sized urban ruin. Keep an eye out for 'em soon!

-- Patrick, Chicago Skirmish Wargames club member

Monday, October 15, 2012

Build Your Own 1:1 Scale Laser Pistol


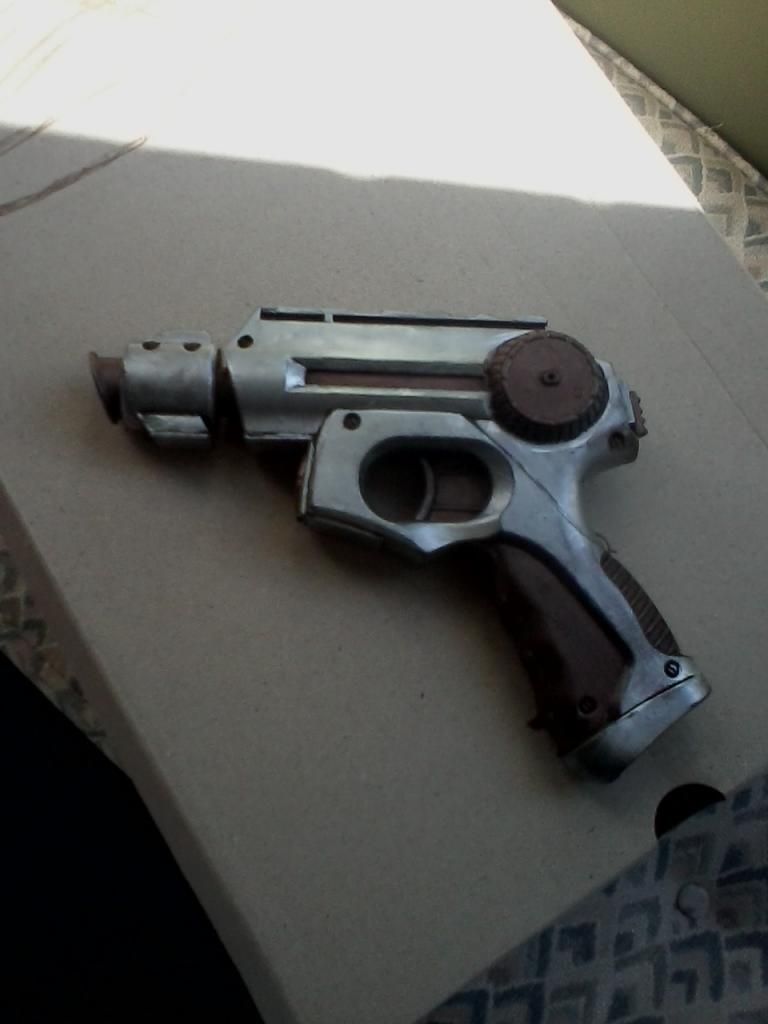
A recent posting on The Miniatures Page showed some interesting ways folks had repainted or modified Nerf guns to look steampunk. While looking at them, I realized that some had quite a nice sci-fi look. Though I don't presently engage in any cosplay, I thought it would be fun to try my hand at making one myself. Who doesn't want their own laspistol?

Supplies needed
  • Nerf Nitefinder pistol 
  • Sheet polystyrene or other plastic card for covering over the cutaway sections 
  • Two round pieces for covering the nerf emblems. I recommend the inside pieces of Heroclix bases 
  • Plastic bits for adding detail and covering up the rear plunger opening 

Tools needed
  • Dremel or other motor tool with cutting and sanding bits 
  • Superglue or plastic glue if using all plastic 
  • Hot glue gun and PVA glue 
  • Black spray paint 
  • Rub 'N Buff 
  • Small Phillips screwdriver 
  • Sandpaper


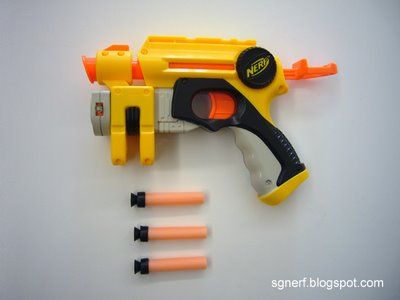
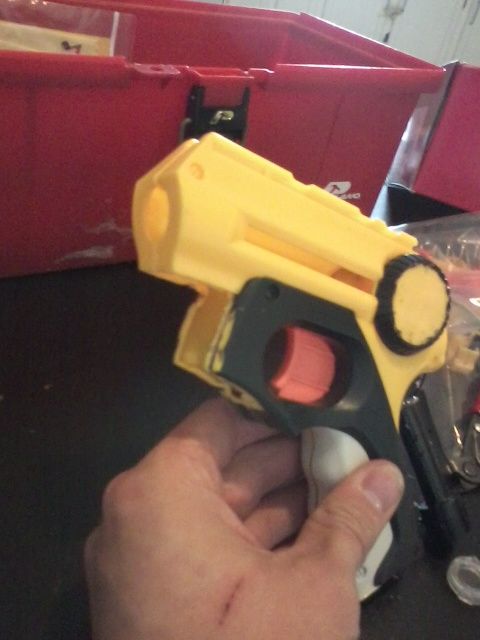
I started with the Nerf Nitefinder as seen above. This is one of the cheapest of the Nerf guns and can be had for less than $10 at most toy stores. Though I don't play much anymore, I'm a longtime fan of the Warhammer 40,000 universe, and this pistol looked like it could have a 40k look with some modifications.

My goals were as follows:
  1. Remove the laser targeter and ammo holder under the barrel. 
  2. Move the laser targeter into the main barrel and retain its functionality. 
  3. Achieve a look similar to a Warhammer 40k autopistol or laspistol. 
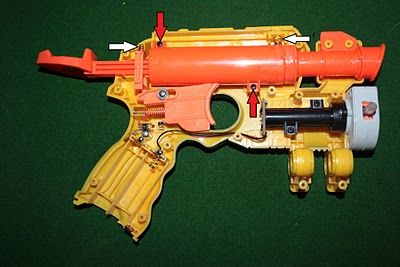
Here's what I saw when I opened up the toy gun.


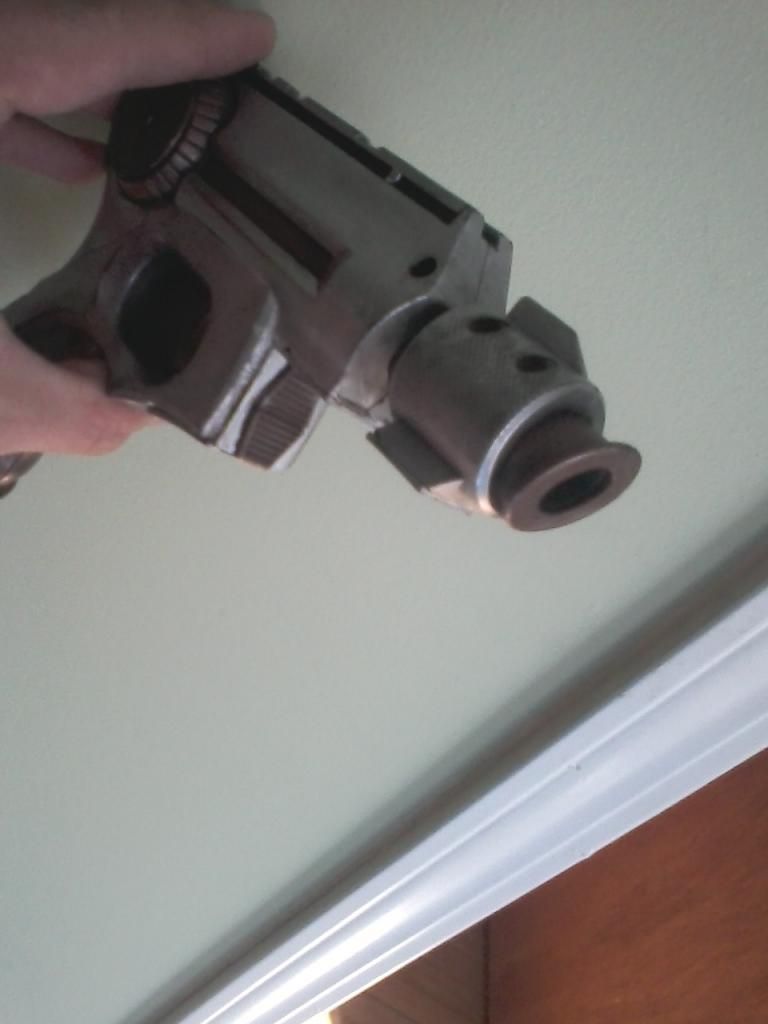
The plunger, spring and rear of the barrel would be removed (save the black o-ring gasket), and the black targeting mechanism would be moved into the barrel. A Dremel or drill is necessary to clear the air vent and other plastic bits from inside the barrel so that you can see all the way though it. The positioning of the targeter is as below, except that it will be inside the orange barrel.

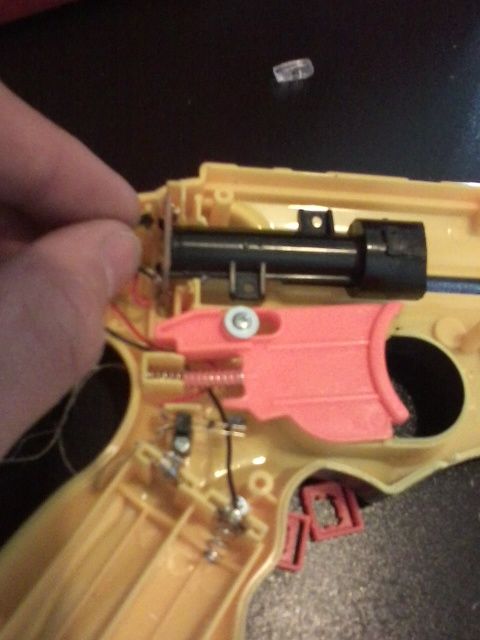
If you are careful, you don't have to do any soldering as the targeter is wired to the trigger mechanism and can be simply moved.


A bit of plastic has to be cut away to make room for the circuit board of the targeter. The body of the targeter has 4 screw connection points. Remove the two on the right and left (located near the opening) and keep the top and bottom. Put the black gasket around the end of the targeter and it and the top and bottom screw points will keep the targeter firmly in place in the center of the barrel.

The lens for the targeter can be glued to the front of the targeter. Remove it from the grey plastic casing and cut away the rods on the side of the lens until it looks like this:


Do not use plastic or superglue as they can fog up the lens. I used a bit of PVA glue to get the position just right, followed by a hot glue gun. At this point, test the targeter to make sure that it is shooting as close to straight as possible. If it's way off, simply peel off the hot glue and try again. The end result will never shoot completely straight, but if you get this step right, it will at least be close.

However, first the body had to be modified. I removed every bit of the targeter casing with a Dremel, and the end result looked like this:


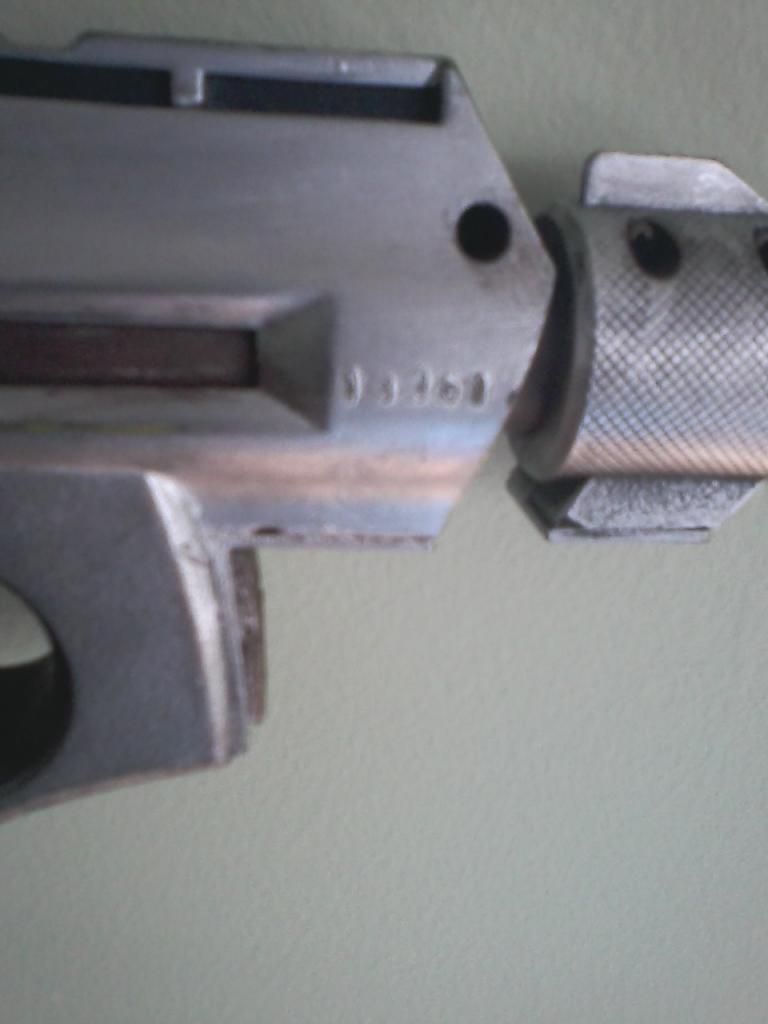
At this time I also sanded away all writing and emblems on the sides of the barrel and under the butt of the pistol. I found find sandpaper to be better for removing writing and warning printing as it gives a bit smoother surface with less effort. I did leave in place the serial number on the right side of the barrel as it looks very much like the serial number on real firearms.

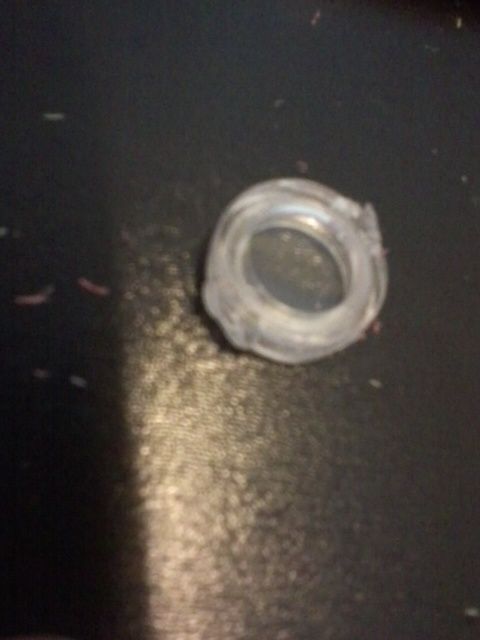
The inside parts of Heroclix bases were glued over the round areas where nerf emblems were. You can use other round details to cover them up, but the Heroclix bases were the perfect size and were very cheap. I then reassembled the interior and set to covering up the cut-away sections.

Note that once you start the next step you will not be able to open up body of the gun again, though the battery compartment in the handle will still be accessible. I used pieces of sheet magnet (plasticard would work great also) to cover up the parts I had cut off. I simply glued them in place, but I highly recommend using a bit of plastic putty to smooth the edges into the body of the gun.

Plastic detail bits were glued in front of the trigger (small vents) and over the hole where the plunger was located (bits of megablocks to look like a switch).

Then the entire model got a coat of black spray paint. I used cheap $1 hardware store paint, but I probably should have used Krylon Camo Black as it is designed to bond strongly to plastic.

Here are the magnet pieces hiding the cutaways.


When all was dry, it was time to color this thing.

The only two finishes I used were Rub 'N Buff metallic finish in the Sliver Leaf and Spanish Copper colors. Rub 'N' Buff comes in a squeeze tube and is ideally applied with a finger with a circular motion. I used a brush for some of the harder to reach areas, especially barrel areas.

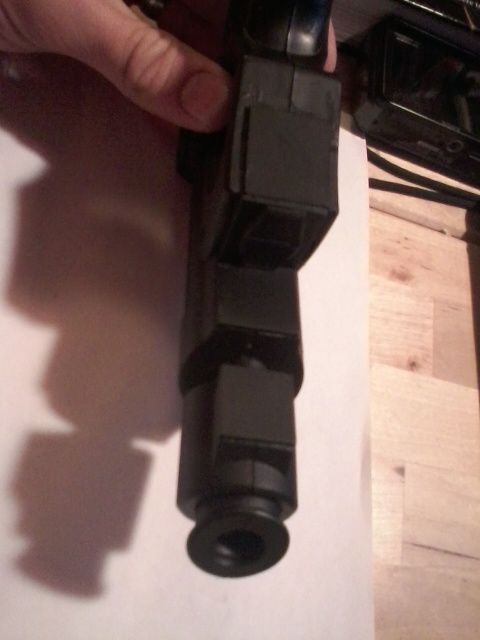
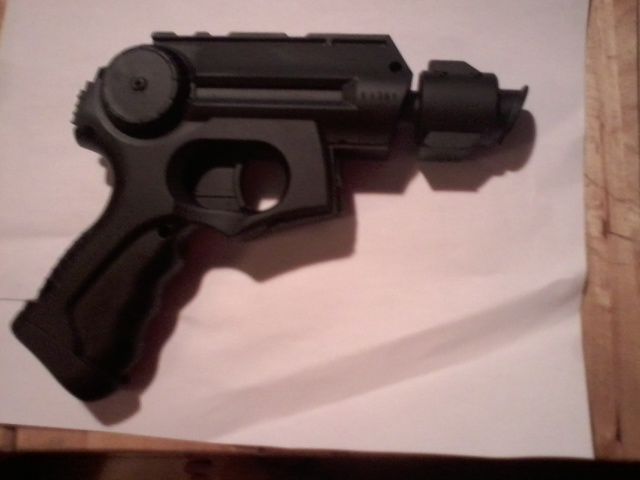
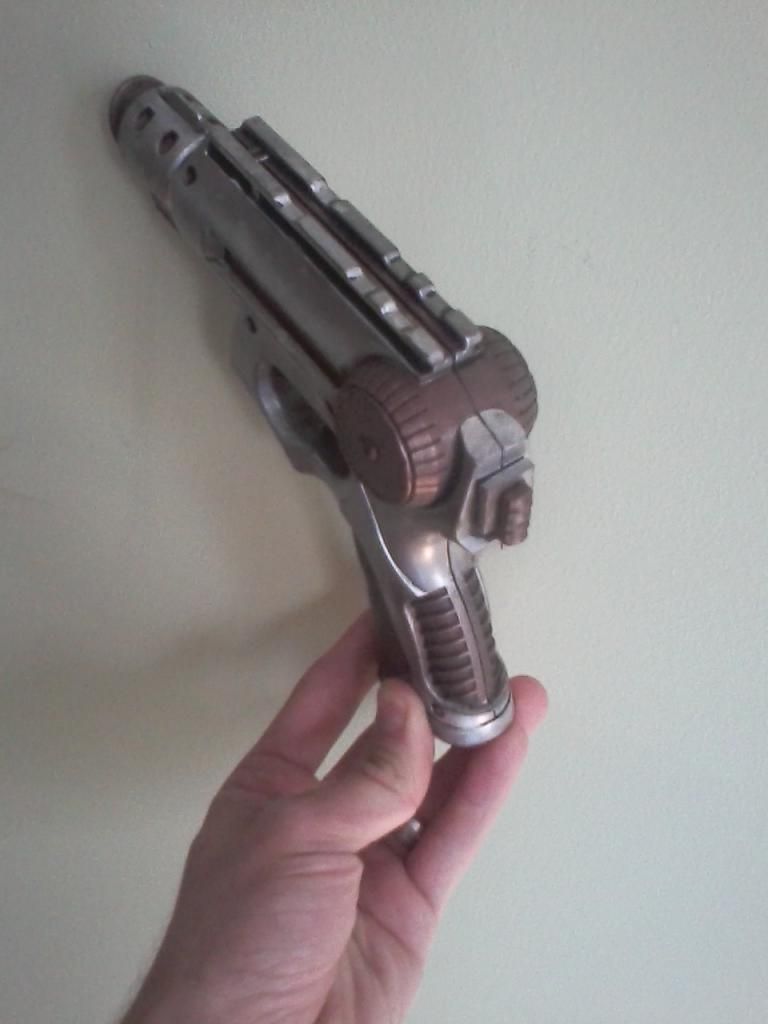
After application, the surface is buffed with a soft cloth to bring out the metallic shine. If it doesn't look good to you after one application you can always apply another. I went for a fairly shiny look, but some folks apply it irregularly for a more worn appearance. Here are the final results.


Intensity adjustment cylinder and fire selector switch


Serial number and the somewhat rough join between magnetic sheet and gun body


Vent bits glued on near trigger


In the end I'm quite happy with the results. It's a good-looking gun that with an appearance somewhere between a Warhammer 40k lasgun and autogun. The laser targeter function actually works (though it shoots a degree or two southeast), and the metallic finish is convincing.

If I were going to do the project again, I'd smooth out the joins where I covered the cutaways with plastic putty, and I'd paint using Krylon Camo Black instead of cheap hardware store spray paint.

It's holding up well now, but if used as a prop I don't know how the primer will hold up. If the Rub 'N Buff rubs off and reveals a bit of black, it looks like grit and wear. But if the color rubs off and reveals yellow plastic, that just looks just bad.

I'd also use a bit of masking taping to apply the Rub 'N Buff, and I'd put the color on the barrel before final assembly. Have a question about this tutorial? Leave a comment and I'll respond!

-- Karl, Chicago Skirmish Wargames club member

Tuesday, October 9, 2012

Naval Thunder report: Raid on Rabaul


I ran a game recently at Nav-Con, a long-running convention dedicated solely to naval wargaming. This year I once again used my trusty naval combat ruleset: "Naval Thunder: Battleship Row" by Steel Dreadnought Games.

It's a fairly simple system with a limited amount of bookkeeping and doesn't take all day to play out. For the scenario, I took a real event and modified it slightly. The basic premise was an attempt by the American Pacific Fleet to raid the newly captured Japanese port of Rabaul, which became their most important possession in the Southeast Pacific region.

At this point in the war, the port was poorly fortified. Because of that, Allied command sent Task Force 11, centered on the old carrier USS Lexington, to bomb the base and any warships anchored there. Historically, the Japanese spotted the Americans using a flying boat, and then the Americans saw the flying boat. The Japanese launched an ineffective air raid against the task force, and the American ships fled for safer waters.

In my scenario, the Japanese spotted the Americans while remaining undetected and instead sprang a clever trap. Attacking at three different points, the Japanese ships have caught the Americans napping, despite the fact that they are individually less powerful.

The main Japanese force consisted of their four oldest cruisers, Aoba, Kinugasa, Furutaka and Kako in Cruiser Division 6. Two light cruisers, Kuma and Tama, attacked from the opposite side. Steaming in with Aoba's group was the real-life Destroyer Squadron 6, composed of six old destroyers and led by the light cruiser Yubari.

On the American side, the carrier USS Lexington was at the center. She was the oldest US fleet carrier to fight in the war and still had her eight-inch guns available, which proved to be quite powerful in this scenario.

In close protection were three heavy cruisers, USS Indianapolis, USS Minneapolis, and USS San Francisco. Along with them were eight destroyers, most of which were of the WWI era. A small force had pulled ahead of the main group containing one heavy cruiser, USS Pensacola, and two destroyers.


For this game there was effectively only one objective. The Japanese had to sink the Lexington while the Americans would sacrifice every other ship to save her.

To make the Americans' lives even harder, the Japanese crews were experienced, which made it easier for them to hit things, while the Americans were stripped of their powerful radar-directed fire control. Also, USS Lexington was effectively a floating bomb, and any time she was hit in the first two turns there was a decent chance a fire would start.

On Turn 1 the Americans turned around while sending Indianapolis with two destroyers to assist Pensacola's group in sinking Kuma and Tama. They succeeded the following turn with heavy losses but basically removed themselves from the game as a result.

Japanese CruDiv 6 turned to cut off the Americans in a line abreast formation, while DesRon 6 began assembling itself into battle formation. USS Lexington hit Kima with her eight-inch guns, making her captain grin wildly at the thought of his carrier engaging in a gunfight.

The cruisers exchanged fire, started a few fires, and Kinugasa blew the old US destroyer USS Litchfield apart with surprisingly accurate fire. USS Pensacola began to flood, and ineffective damage control teams made the problem worse.


Turn 2 proved to be quite bloody for both sides. USS Lexington and her escorts continued running despite the Japanese ships in front of them. CruDiv 6 turned to starboard to clear all their guns for action while DesRon 6 just kept racing forward. Lexington was hit several times, sparking a fire which would last the rest of the game. USS San Francisco took an engine hit but caused a magazine explosion on Aoba which blew the Japanese cruiser apart. Furutaka burst into flames thanks to accurate fire from USS Minneapolis but remained afloat and fighting. USS Lexington continued her destructive streak by sinking Yubari.

On the other side of the board, Kuma was sunk by USS Indianapolis but managed to sink USS Porter and USS Pensacola with torpedoes. Tama hit USS Winslow with gunfire but didn't sink the plucky destroyer and then fled the board with a mangled hull and raging fires that were barely extinguished.

With both Japanese light cruisers gone, USS Indianapolis and the surviving destroyers tried to catch up to USS Lexington but didn't make it by the end of the game.


Turn 3 proved to be the decisive turn for the Japanese. DesDiv 6 split in half, with three destroyers quickly turning their broadside to USS Lexington, while the other three crossed the T of the beleaguered carrier. Continuing her hot streak, Lexington sunk Furutaka with accurate gunfire. Kako hit USS Minneapolis and started a flood. Minneapolis hit back and started a fire. Then USS San Francisco raked Kako with five-inch shells and sent her to the bottom, while the destroyer USS Zane blasted Mochizuki apart.

But it was too late! Three torpedoes slammed into USS Lexington and shattered the proud ship, taking her from 113 hull points to 41 and then quickly to 37 from flooding damage. Fortunately, the other three Japanese destroyers all missed.


On turn 4 Kinugasa launched her carefully husbanded torpedo salvo on USS Lexington, hoping desperately to sink the tough ship. But the salvo missed completely while her gunfire was slightly more successful. Kinugasa was finished off by San Francisco and almost all of the remaining Japanese destroyers joined her beneath the waves.


It looked bleak for the Japanese, but inept damage control teams finished the work of the Imperial Japanese Navy, and USS Lexington capsized.

The ripples from this battle will surely echo through the history of the Pacific War. Without Lexington, the US fleet would never have opposed the Port Moresby invasion and they might not have sent USS Enterprise and USS Hornet off the launch the Doolittle Raid. In addition, the loss of CruDiv 6 would create problems for the Japanese. Those four heavy cruisers were vitally important to the Guadalcanal operation. Needless to say, history shifted drastically from this what-if battle.

-- Mike, Chicago Skirmish Wargames club member